
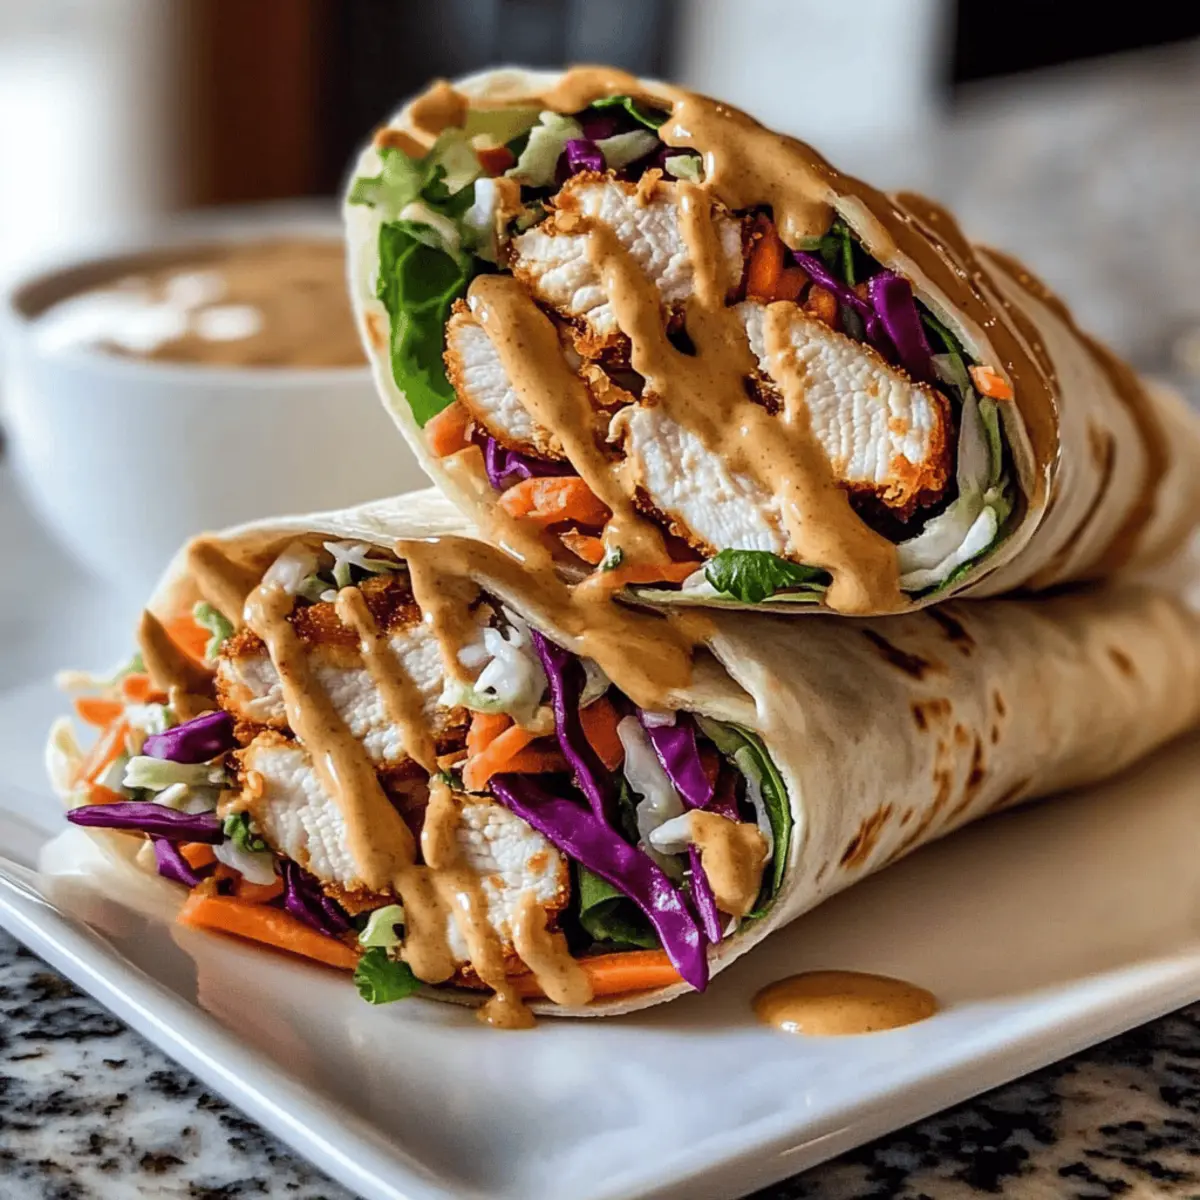
The smell of sizzling chicken mixed with a hint of garlic and ginger fills my kitchen, instantly transporting me to the vibrant street markets of Thailand. I can hardly contain my excitement as I prepare to share my Quick & Easy Thai Peanut Chicken Wraps—a recipe that celebrates bold flavors while fitting seamlessly into our busy lives. These wraps come together in just 15 minutes, making them the perfect solution for anyone seeking a quick meal without sacrificing taste or nutrition. Plus, they’re incredibly customizable—whether you’re accommodating dietary preferences or just getting creative with the fresh veggies in your fridge, there’s a version for everyone. What unique twist will you add to make these wraps your own?
What Makes These Wraps a Must-Try?
Quick Preparation: With just 15 minutes needed, you’ll love how fast and easy it is to whip these up for lunch or dinner.
Versatile Options: Easily adapt the recipe to cater to your preferences—swap in firm tofu for a vegetarian option or use lettuce leaves for a low-carb style.
Flavor Explosion: The combination of creamy peanut sauce, savory chicken, and crisp veggies creates a delightful burst of flavors with every bite.
Nutritional Powerhouse: Packed with lean protein, healthy fats, and fresh ingredients, these wraps keep you satisfied without compromising your health goals.
Crowd-Pleaser: Perfect for family dinners or meal prep, these wraps will impress everyone—try pairing them with a light cucumber salad for an extra refreshing touch!
Thai Peanut Chicken Wraps Ingredients
For the Peanut Sauce
• Peanut Butter – Provides creaminess and rich flavor; substitute with sunflower seed butter or tahini for a peanut-free version.
• Low-sodium Soy Sauce – Adds umami depth; using regular soy sauce will increase sodium content.
• Brown Sugar or Honey – Sweetness balances flavors; coconut sugar is a great lower glycemic option.
• Rice Wine Vinegar – Introduces acidity; apple cider vinegar can be an alternative choice.
• Minced Garlic – Enhances flavor profile; freshly minced garlic is preferred for better taste.
• Minced Ginger – Adds warmth and spice; ground ginger may slightly alter the flavor.
• Sriracha Sauce – Provides heat; adjust the quantity to your taste or omit for a milder sauce.
For the Wrap Filling
• Cooked Chicken Breast – Main protein source that keeps the dish hearty; rotisserie chicken is a convenient substitute.
• Coleslaw Mix – Offers crunch and nutrients; fresh shredded cabbage can work instead.
• Grated Carrot – Optional for sweetness and color; can be omitted if you prefer.
• Chopped Cilantro – Adds freshness; substitute with parsley if you’re not a cilantro fan.
• Roasted, Salted Peanuts – Provides texture and nutty flavor; can be omitted for nut-free diets.
• Tortillas – Holds the filling together; try using lettuce leaves for a low-carb option.
With these Thai Peanut Chicken Wraps ingredients, you’ll be all set to create a delicious meal that’s ready in no time! Enjoy customizing to fit your tastes and dietary needs.
Step‑by‑Step Instructions for Thai Peanut Chicken Wraps
Step 1: Make the Peanut Sauce
In a small bowl, whisk together 1/4 cup of peanut butter, 2 tablespoons of low-sodium soy sauce, and 1 tablespoon of brown sugar. Add 1 tablespoon of rice wine vinegar, 1 minced garlic clove, and 1 teaspoon of minced ginger. Mix until smooth, and if you prefer a thinner consistency, incorporate water a little at a time until you reach your desired texture. Set aside the flavorful sauce.
Step 2: Prepare the Filling
In a large mixing bowl, combine 2 cups of cooked and shredded chicken breast, 2 cups of coleslaw mix, 1 grated carrot, and 1/4 cup of chopped cilantro. Drizzle your prepared peanut sauce over the mixture and toss everything together gently until the ingredients are well combined and evenly coated with that creamy texture of Thai Peanut Chicken Wraps.
Step 3: Warm the Tortillas
Take 4 tortillas and place them on a microwave-safe plate. Heat them in the microwave for about 30 seconds, or until they are soft and pliable. This warming process makes incorporating the filling easier and helps prevent tearing, ensuring your delicious Thai Peanut Chicken Wraps are beautifully assembled.
Step 4: Assemble the Wraps
Lay each heated tortilla flat on a clean surface. Divide the filling mixture evenly across the center of each tortilla, ensuring not to overfill. Fold the sides inwards, then roll the tortilla tightly from the bottom up to encompass the filling. This step will help hold all the delightful flavors in place.
Step 5: Serve and Enjoy
After wrapping, slice each wrap in half diagonally for visual appeal. Serve immediately to enjoy the freshness and crunch of the vegetables alongside the creamy peanut sauce. These Thai Peanut Chicken Wraps are perfect for a quick meal, offering a satisfying bite for your lunch or dinner.
Tips for the Best Thai Peanut Chicken Wraps
-
Warm Tortillas: Ensure your tortillas are warmed before filling. This keeps them pliable and prevents tearing, making your Thai Peanut Chicken Wraps easy to assemble.
-
Don’t Overfill: Avoid filling the wraps too much to prevent spills. A little filling goes a long way—fold in the sides before rolling tightly.
-
Customize Your Sauce: Adjust the peanut sauce to your taste. Add more sriracha for heat or use honey instead of brown sugar for a different sweetness in your Thai Peanut Chicken Wraps.
-
Fresh Ingredients: Use crisp, fresh vegetables for the filling. They’ll add crunch and flavor depth to your wraps, making each bite more enjoyable.
-
Store Wisely: If you’re meal prepping, store the filling and tortillas separately to maintain freshness. Assembled wraps can be kept for up to two days in the fridge.
-
Try Substitutes: Feel free to swap ingredients based on your preferences. Rotisserie chicken or tofu makes a great protein base, and fresh herbs add an aromatic touch.
Make Ahead Options
These Thai Peanut Chicken Wraps are a fantastic choice for meal prep! You can prepare the filling and the peanut sauce up to 3 days in advance; simply store them in separate airtight containers in the refrigerator to keep them fresh and tasty. To maintain quality, be sure to refrigerate the filling immediately after combining the chicken, coleslaw mix, and sauce—this prevents the veggies from wilting. When you’re ready to enjoy your wraps, just warm the tortillas for about 30 seconds in the microwave, then assemble the wraps with your prepped filling. Enjoy the same vibrant flavors and textures, saving you precious time on busy weeknights!
Thai Peanut Chicken Wraps Variations & Substitutions
Feel free to get creative with these wraps and tailor them to your tastes or dietary needs!
- Vegetarian: Replace chicken with cubed firm tofu or chickpeas for a hearty, plant-based option. The creamy peanut sauce will complement the tofu perfectly, giving you that rich flavor without the meat.
- Nut-Free: Use sunflower seed butter instead of peanut butter for a delicious nut-free meal. This swap still delivers that creamy texture while being safe for those with nut allergies.
- Low-Carb: Swap tortillas for large lettuce leaves for a fresh, low-carb wrap. It’s a crunchy twist that allows the vibrant filling to shine.
- Extra Crunch: Add toppings like sliced bell peppers or cucumber for added texture and freshness. Their crispness will enhance the overall bite and enrich your eating experience.
- Sweet Twist: Substitute brown sugar with coconut sugar for a lower glycemic index version. This will still provide sweetness while offering a unique flavor depth.
- Spicy Kick: Increase the heat by adding sliced jalapeños to the filling or more sriracha to the sauce. This is perfect for those who crave a little extra spice!
- Fresh Herbs: Swap cilantro for fresh mint or basil if you’re looking for a different flavor profile. Both herbs add a delightful freshness that complements the other ingredients.
- Meal Prep: Consider making a batch of the filling and sauce to store in the fridge for easy assembly throughout the week, much like meal prep Grilled Chicken Sweet bowls that can be customized daily.
Whatever variations you choose, these wraps are sure to bring a smile to your face and flavor to your table!
Storage Tips for Thai Peanut Chicken Wraps
Fridge: Store leftover assembled wraps in an airtight container for up to 2 days to maintain freshness and flavor.
Filling: If you’ve made the filling in advance, it can be stored separately in the refrigerator for up to 3 days. Just remember to keep tortillas and filling apart to prevent sogginess.
Freezer: While not recommended for fully assembled wraps, you can freeze the filling for up to 2 months. Thaw it in the fridge overnight before reheating.
Reheating: To reheat, warm the filling on the stove or microwave. For the wraps, gently warm in a skillet to maintain the tortillas’ texture.
What to Serve with Thai Peanut Chicken Wraps
Elevate your meal with delightful sides that perfectly complement the vibrant flavors of these wraps.
-
Crispy Cucumber Salad: This refreshing salad balances the richness of the peanut sauce, offering a satisfying crunch with every bite. Lightly dress cucumbers with rice vinegar and a sprinkle of sesame seeds for a bright side.
-
Fresh Spring Rolls: Pair the wraps with fresh spring rolls filled with shrimp or veggies. Their delicate texture and fresh herbs echo the bright flavors in the wraps, creating a delightful dining experience.
-
Mango Salsa: Sweet, tangy mango salsa adds a fruity kick that contrasts beautifully with the savory chicken. The juiciness complements the wraps, enhancing each bite with a burst of tropical goodness.
-
Asian Slaw: A tangy slaw featuring cabbage, carrots, and cilantro brings additional crunch and flavor. Toss it with a light sesame dressing to tie the flavors of the meal together seamlessly.
-
Quinoa or Brown Rice: Serve the wraps with a side of fluffy quinoa or brown rice to add a wholesome grain element. This will make the meal satisfying and filling while enhancing nutritional value.
-
Light Coconut Soup: A flavorful coconut soup can be an excellent way to start your meal. Its creamy texture and aromatic spices will set a warm tone and complement the wraps wonderfully.
Thai Peanut Chicken Wraps Recipe FAQs
What type of chicken should I use for the wraps?
I recommend using cooked chicken breast, as it’s lean and pairs perfectly with the flavorful sauce. For convenience, rotisserie chicken works excellently! You can also use cubed firm tofu for a vegetarian version.
How should I store leftovers of the wraps?
Store your leftover assembled Thai Peanut Chicken Wraps in an airtight container for up to 2 days. To keep the wraps fresh and prevent sogginess, if possible, store the filling and tortillas separately.
Can I make the filling ahead of time?
Absolutely! You can prepare the filling up to 3 days in advance. Just store it in an airtight container in the refrigerator. When you’re ready to eat, warm it up and assemble the wraps with fresh tortillas.
How can I freeze the filling?
To freeze the filling, place it in an airtight container or freezer bag, ensuring you remove as much air as possible. It can be stored in the freezer for up to 2 months. When ready to use, thaw it in the refrigerator overnight before reheating it on the stove or in the microwave.
What can I substitute for peanuts if allergies are a concern?
If you need a nut-free option, simply omit the roasted, salted peanuts from the wrap. You can also replace them with seeds, such as sunflower seeds, to add some crunch without the allergens.
Do the wraps need to be eaten immediately?
While they’re best enjoyed fresh, you can assemble the Thai Peanut Chicken Wraps a couple of hours before serving and keep them in an airtight container in the fridge. For optimal taste and texture, I recommend eating them within 2 days.
Delicious Thai Peanut Chicken Wraps Ready in 15 Minutes
Ingredients
Equipment
Method
- In a small bowl, whisk together the peanut butter, soy sauce, brown sugar, rice wine vinegar, minced garlic, and minced ginger until smooth. Set aside the sauce.
- In a large mixing bowl, combine the cooked chicken, coleslaw mix, grated carrot, and chopped cilantro. Drizzle the peanut sauce over and toss together until evenly coated.
- Warm the tortillas in the microwave for about 30 seconds or until soft and pliable.
- Lay each tortilla flat, divide the filling among them, and fold the sides inward before rolling tightly from the bottom up.
- Slice each wrap in half diagonally and serve immediately.
Leave a Reply