
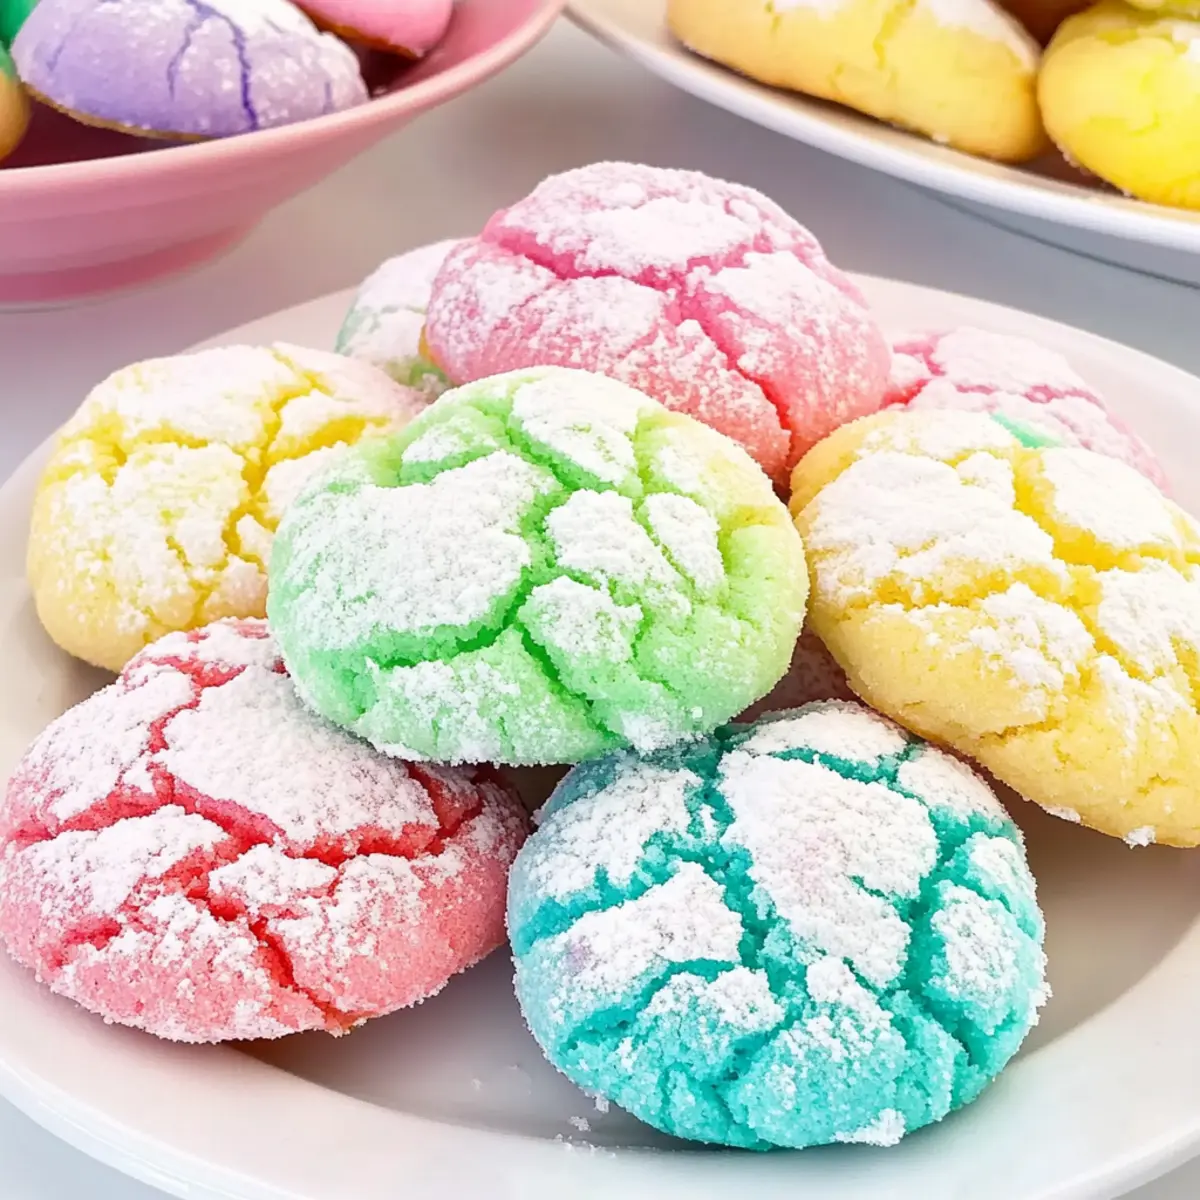
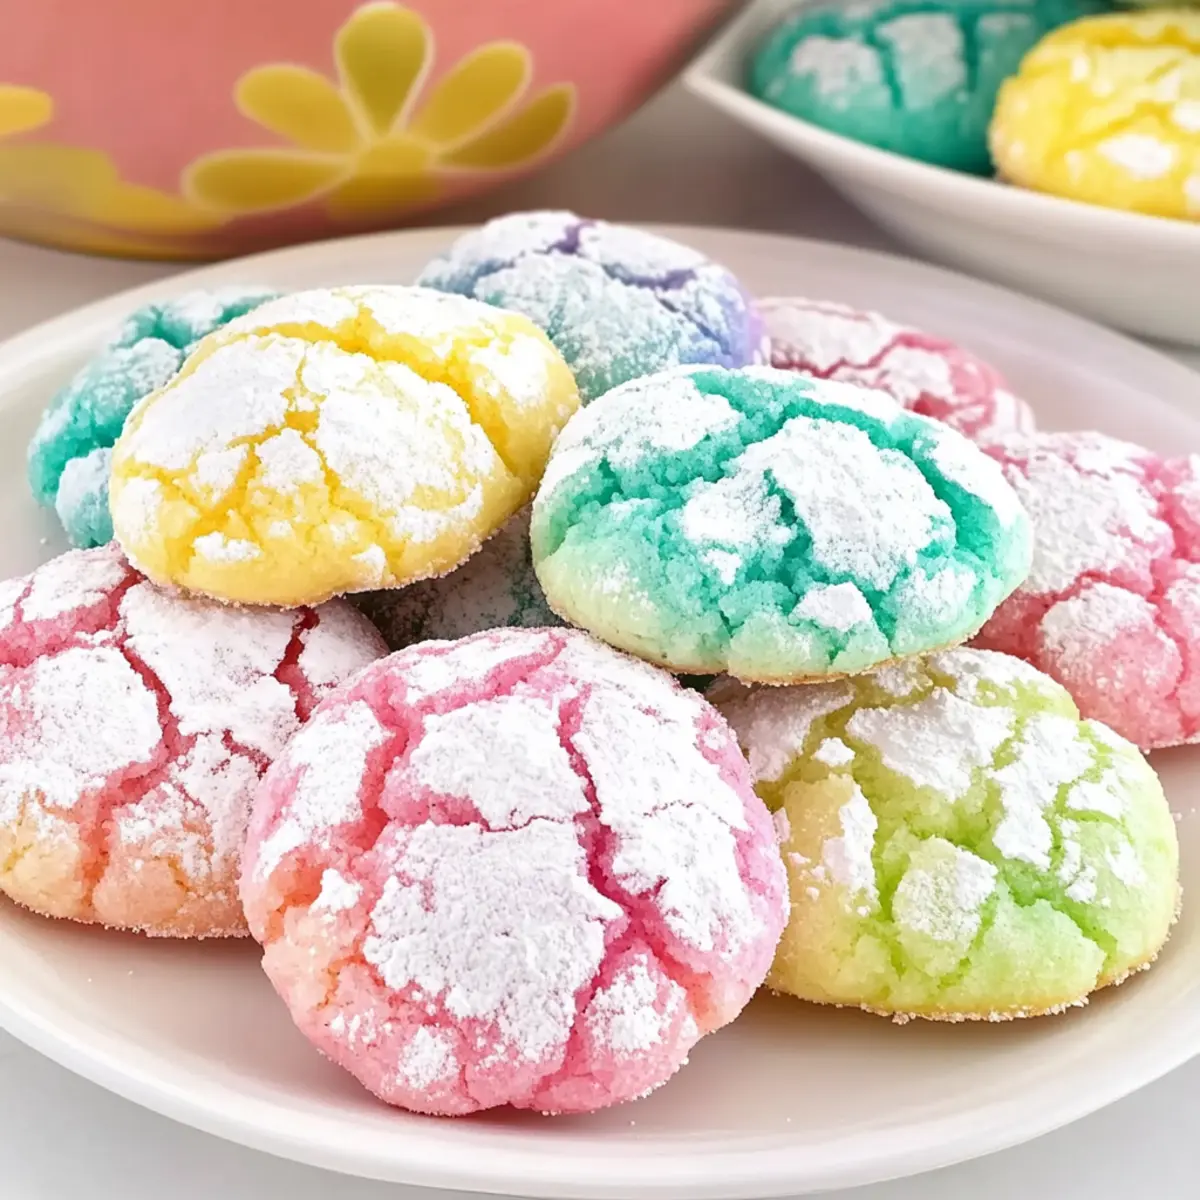
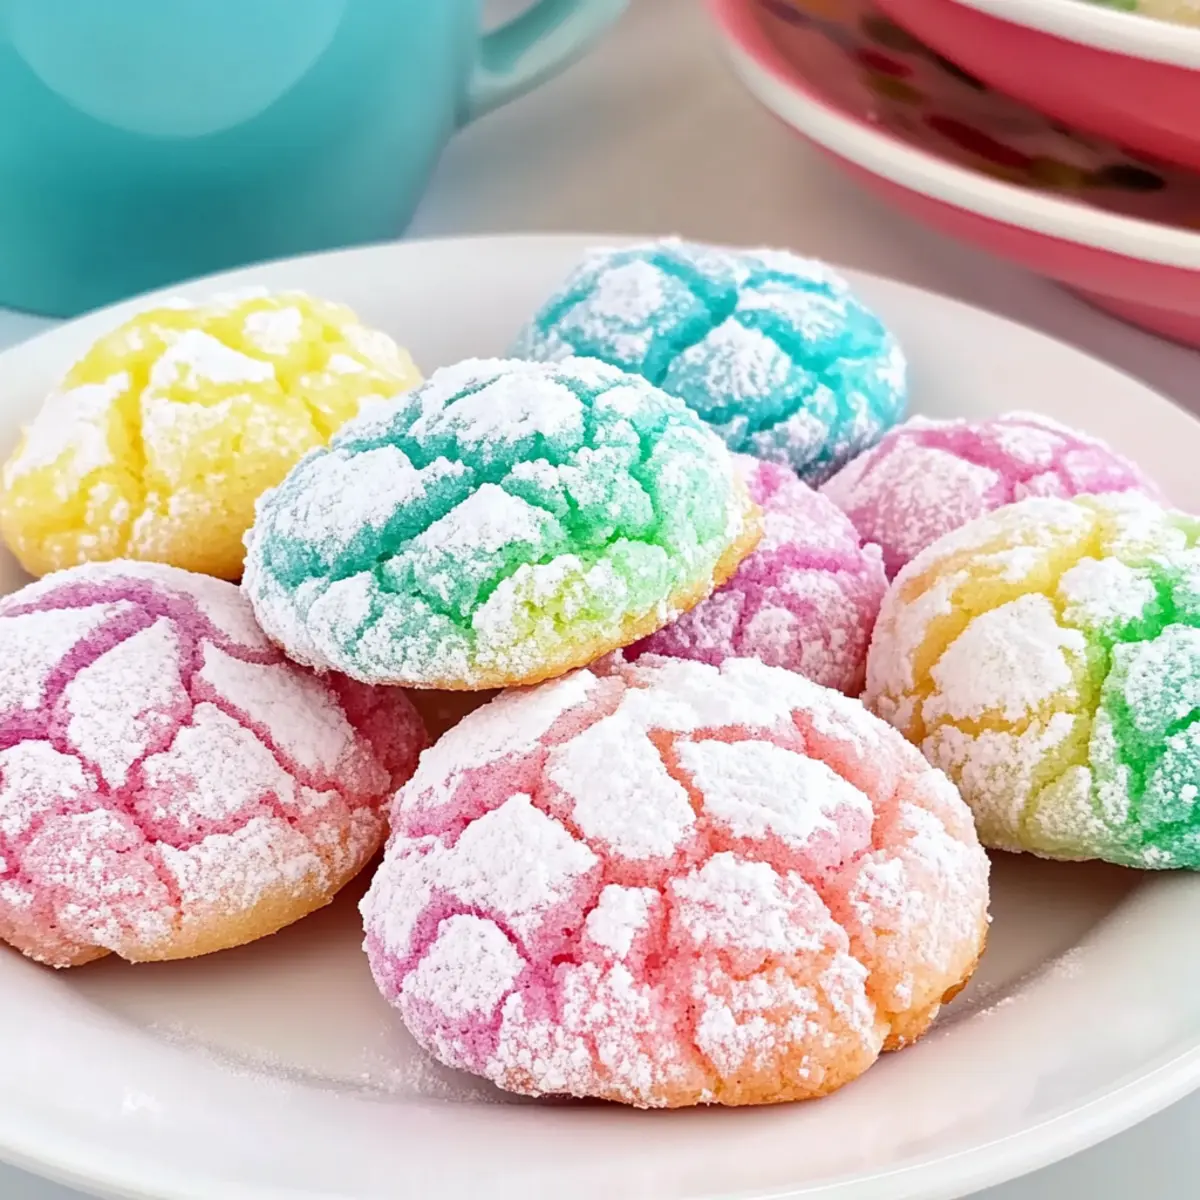
As I sifted through my pantry, I stumbled upon a rainbow of gel food coloring that sparked an idea—Springtime Crinkle Cookies! These vibrant, soft, and chewy treats embody the spirit of the season, bringing joy to any gathering with their delightful burst of color and flavor. This simple recipe is perfect for bakers of all skill levels, letting you indulge without the fuss. Not only are they a crowd-pleaser, but these cookies can easily be customized to suit your taste. Whether you’re celebrating with friends or needing a moment of sweetness in your day, these crinkle cookies deliver both nostalgia and creativity in every bite. Curious about how to create these festive delights? Let’s dive in!

Why Are Springtime Crinkle Cookies Special?
Vibrant Colors: These cookies are a feast for the eyes, bringing cheerful hues to your table. They’re perfect for spring gatherings, from birthday parties to holiday celebrations.
Easy to Make: Even beginners can whip these up! The straightforward process means you won’t be spending all day in the kitchen—just mix, chill, and bake!
Soft and Chewy: Expect a delightful texture that’s chewy in the center with a perfectly crinkled top, making each bite a delicious experience.
Endless Customization: Get creative! Swap the almond extract for citrus zest or add chocolate chips for an extra treat.
Family Favorite: Perfect for sharing, these cookies are sure to be a hit with kids and adults alike, making them a must-try recipe this season! For more delightful cookie ideas, check out my Cider Cheesecake Cookies or Candy Corn Cookies.
Springtime Crinkle Cookies Ingredients
For the Cookie Dough
- All-Purpose Flour – Provides structure; make sure it’s well-measured for the best texture.
- Baking Powder – Serves as a leavening agent; use fresh for the perfect rise.
- Salt – Balances sweetness and enhances flavor.
- Unsalted Butter (softened) – Adds richness; use margarine if you’re in a pinch but it’ll alter the taste.
- Granulated Sugar – Sweetens and contributes to texture for the cookies.
- Large Eggs – Essential for binding and moisture; a key player in achieving that chewy center.
- Vanilla Extract – Infuses depth of flavor; opt for high-quality for the best results.
- Almond Extract (optional) – Adds a delightful nuttiness; swap it out if you prefer!
For Rolling
- Powdered Sugar – Gives a sweet, snowy finish that enhances texture and appearance.
For Color
- Gel Food Coloring – Brings vibrant life to your cookies; feel free to mix colors for a fun twist.
These Springtime Crinkle Cookies are not just a feast for the taste buds but also a bright addition to every spring celebration!
Step‑by‑Step Instructions for Springtime Crinkle Cookies
Step 1: Prepare the Dough
In a large mixing bowl, whisk together 2 cups of all-purpose flour, 2 teaspoons of baking powder, and ½ teaspoon of salt. In a separate bowl, cream ½ cup of softened unsalted butter and 1 cup of granulated sugar together until the mixture is light and fluffy—about 3-4 minutes. Next, beat in 2 large eggs, followed by 1 teaspoon of vanilla extract and ½ teaspoon of almond extract, ensuring everything is thoroughly combined before gradually mixing in the dry ingredients until just combined.
Step 2: Add Color
If you wish to create vibrant Springtime Crinkle Cookies, divide the dough into equal portions based on how many colors you’d like to use. Add a few drops of gel food coloring to each portion, kneading it gently with your hands until the color is evenly distributed. Be sure to check the hues and adjust as needed—adding more if you desire deeper colors—making these cookies visually stunning and fun!
Step 3: Chill the Dough
Once colored, cover the dough with plastic wrap and chill it in the refrigerator for about 30 minutes. This step is crucial as it allows the dough to firm up, preventing excessive spreading during baking. As the dough chills, the flavors meld beautifully, enhancing the taste, while the texture becomes perfect for rolling.
Step 4: Shape Cookies
After chilling, preheat your oven to 350°F (175°C). Prepare a baking sheet by lining it with parchment paper to ensure easy removal. Roll the chilled dough into small balls, approximately 1-inch in diameter. Next, generously coat each ball in powdered sugar to create the signature crinkly appearance; it will provide that delightful, snowy finish.
Step 5: Bake
Arrange the powdered sugar-coated cookie balls on the prepared baking sheet, leaving space between each to allow for spreading. Bake them in the preheated oven for 10-12 minutes. You’ll know they’re ready when the tops look crinkled and the edges are set while the centers remain soft. Remove the cookies from the oven and let them cool for about 5 minutes on the sheet before transferring them to a wire rack to cool completely.
Expert Tips for Springtime Crinkle Cookies
Chill the Dough: Chilling is non-negotiable! This crucial step firms up the dough, creating that beautiful crinkle pattern when baked.
Use Fresh Ingredients: Ensure your baking powder is fresh; stale powder can lead to cookies that don’t rise well.
Measuring Matters: Accurately measure your flour; too much can lead to dense cookies instead of the desired soft and chewy texture.
High-Quality Extracts: Opt for high-quality vanilla and almond extracts; they significantly enhance the flavor of your Springtime Crinkle Cookies.
Storage Secrets: Keep your cookies in an airtight container to maintain freshness, or freeze them for longer storage.
Customize Colors: Don’t hesitate to experiment with different gel food coloring combinations for a truly unique and festive appearance!
Make Ahead Options
These Springtime Crinkle Cookies are perfect for busy home cooks looking to save time during those hectic weeks! You can prepare the cookie dough up to 24 hours in advance; simply follow the first three steps—mixing, coloring, and chilling the dough—then cover it tightly in plastic wrap before refrigerating. If you need to prep even further ahead, the dough can be frozen for up to 3 months. When you’re ready to bake, just thaw the dough in the refrigerator overnight. Roll the chilled dough into balls and coat in powdered sugar before baking for 10-12 minutes. This way, you’ll enjoy delicious, freshly baked Springtime Crinkle Cookies with minimal last-minute effort!
Variations & Substitutions for Springtime Crinkle Cookies
Feel free to let your creativity shine and make these delicious cookies uniquely yours!
-
Citrus Twist: Substitute almond extract with orange or lemon zest for a refreshing citrus flavor that brightens up each bite. This simple change adds a lovely zing to the sweetness.
-
Nutty Additions: Stir in semi-sweet chocolate chips or chopped nuts like walnuts or pecans for a delightful crunch that contrasts beautifully with the soft cookie texture. Each bite will offer a wonderful mixture of flavors.
-
Gluten-Free Option: Use a gluten-free all-purpose flour blend to make these cookies suitable for those with gluten sensitivities. Just ensure that your baking powder is also gluten-free to maintain the cookie’s fluffy texture.
-
Dairy-Free Delight: Swap the butter for a dairy-free alternative like coconut oil or vegan butter. This keeps the rich flavor while making the cookies suitable for dairy-free diets.
-
Spice it Up: Add a pinch of cinnamon or nutmeg to the dough for a warm, spice-infused flavor that complements the sweetness beautifully. It’s a lovely twist that adds depth and warmth to these bright cookies.
-
Color Variations: Experiment with various gel food coloring combinations, like mixing blue and yellow for a green hue or creating a tie-dye effect by briefly kneading two different colors together. The results will be visually stunning and perfect for any celebration!
-
Mini Crinkle Cookies: For bite-sized treats, roll smaller balls of dough for cookies that are perfect for sharing, snacking, or adorning dessert platters. They bake just as beautifully in a miniature version!
-
Holiday Themes: Switch up the colors to match your favorite holiday! Red and green for Christmas, pastel colors for Easter, or orange and black for Halloween—your imagination is the limit!
These Springtime Crinkle Cookies are all about joy, so don’t hesitate to try one of these variations or even come up with your own! And, if you’re looking for more uniquely delectable cookies, check out my delightful Cider Cheesecake Cookies for a different twist or my Brown Butter Cookies that add a rich depth of flavor!
How to Store and Freeze Springtime Crinkle Cookies
- Room Temperature: Keep your cookies stored in an airtight container at room temperature for up to 1 week. This helps maintain their soft and chewy texture.
- Fridge: If you live in a warm climate, refrigerate the cookies for better longevity; they can last up to 2 weeks when properly stored.
- Freezer: For longer storage, freeze the cookies in a single layer on a baking sheet, then transfer them to a zip-top bag. They can be frozen for up to 3 months.
- Reheating: To enjoy them warm, simply pop frozen cookies in the microwave for 10-15 seconds or in the oven at 350°F (175°C) for a few minutes, restoring their original deliciousness!
What to Serve with Springtime Crinkle Cookies
These colorful, soft delights evoke a sense of celebration, and pairing them with the right accompaniments can elevate your dessert experience.
-
Vanilla Ice Cream: The creamy, sweet vanilla contrasts beautifully with the chewy texture, creating a delightful balance.
-
Fresh Berries: Juicy strawberries or blueberries add a fresh, tart flavor that brightens each bite, perfect for a springtime treat.
-
Mint Tea: A fragrant cup of mint tea serves as a refreshing complement, enhancing the cookies’ sweetness while cleansing the palate.
-
Chocolate Sauce: Drizzle over the cookies for an indulgent twist. The richness of chocolate pairs seamlessly with the cookie’s soft, chewy center.
-
Lemonade: A zesty lemonade provides a refreshing, citrusy punch that cuts through the sweetness, making it a perfect match for the cookies.
-
Fruit Salad: A medley of seasonal fruits adds a refreshing and colorful touch to any table setting, balancing the sweetness of the cookies with natural juiciness.
Feel free to mix and match! Each pairing offers an enticing new way to enjoy your Springtime Crinkle Cookies, making every bite a delightful celebration.
Springtime Crinkle Cookies Recipe FAQs
How can I select the best ingredients for my Springtime Crinkle Cookies?
Absolutely! When choosing your ingredients, opt for good quality unsalted butter, as it enriches the flavor. Ensure your baking powder is fresh—stale baking powder won’t give you the rise you need, leading to flat cookies. For flour, make sure it’s properly measured using the spoon and level method; too much flour can result in tough cookies.
How should I store my Springtime Crinkle Cookies?
To keep your cookies fresh, store them in an airtight container at room temperature for up to one week. If you live in a warmer area, refrigerate them to extend their shelf life—this can last up to two weeks! Remember to let them cool completely before storing, so they don’t become soggy.
Can I freeze Springtime Crinkle Cookies? How do I do that?
Yes! Freezing is a great option. After baking and cooling your cookies, place them in a single layer on a baking sheet and freeze until solid. Then, transfer the cookies to a zip-top freezer bag, removing excess air, and label with the date. They can be frozen for up to three months! To enjoy, reheat in the microwave for about 10-15 seconds or warm them up in the oven at 350°F (175°C) for a few minutes.
What if my cookie dough is too sticky or dry?
No problem at all! If your dough is sticky, try chilling it for a bit longer; this will firm it up and make it easier to roll into balls. If your dough seems dry, it may be due to too much flour—add a touch of softened butter or a teaspoon of water to help bind it. Make adjustments gradually until you achieve the right consistency.
Are Springtime Crinkle Cookies suitable for people with allergies?
These cookies contain eggs and dairy, so they may not be suitable for those with egg or dairy allergies. If you’d like to make them allergy-friendly, you can substitute eggs with flaxseed meal (1 tablespoon ground flaxseed mixed with 2.5 tablespoons water per egg) and use dairy-free butter or margarine. Always check the labels on food coloring and extracts for potential allergens.
How can I customize the flavors of my Springtime Crinkle Cookies?
The more the merrier! You can easily tailor these cookies by substituting the almond extract with citrus zests like orange or lemon for a refreshing twist. Feel free to fold in some chocolate chips or nuts for an extra layer of texture and taste. If you’re feeling adventurous, mix together different gel food coloring for a colorful surprise!
Springtime Crinkle Cookies - Soft, Colorful Chewy Delights
Ingredients
Equipment
Method
- In a large mixing bowl, whisk together the flour, baking powder, and salt.
- In a separate bowl, cream the softened butter and granulated sugar together until the mixture is light and fluffy, about 3-4 minutes.
- Beat in the eggs, followed by the vanilla and almond extracts.
- Gradually mix in the dry ingredients until just combined.
- Divide the dough into equal portions based on the number of colors you'd like to use. Add gel food coloring to each portion and knead until color is evenly distributed.
- Cover the dough with plastic wrap and chill in the refrigerator for about 30 minutes.
- Preheat your oven to 350°F (175°C) and prepare a baking sheet by lining it with parchment paper.
- Roll the chilled dough into 1-inch balls and coat each ball in powdered sugar.
- Arrange the cookie balls on the prepared baking sheet and bake for 10-12 minutes.
- Let them cool for about 5 minutes on the sheet before transferring to a wire rack to cool completely.
Leave a Reply