
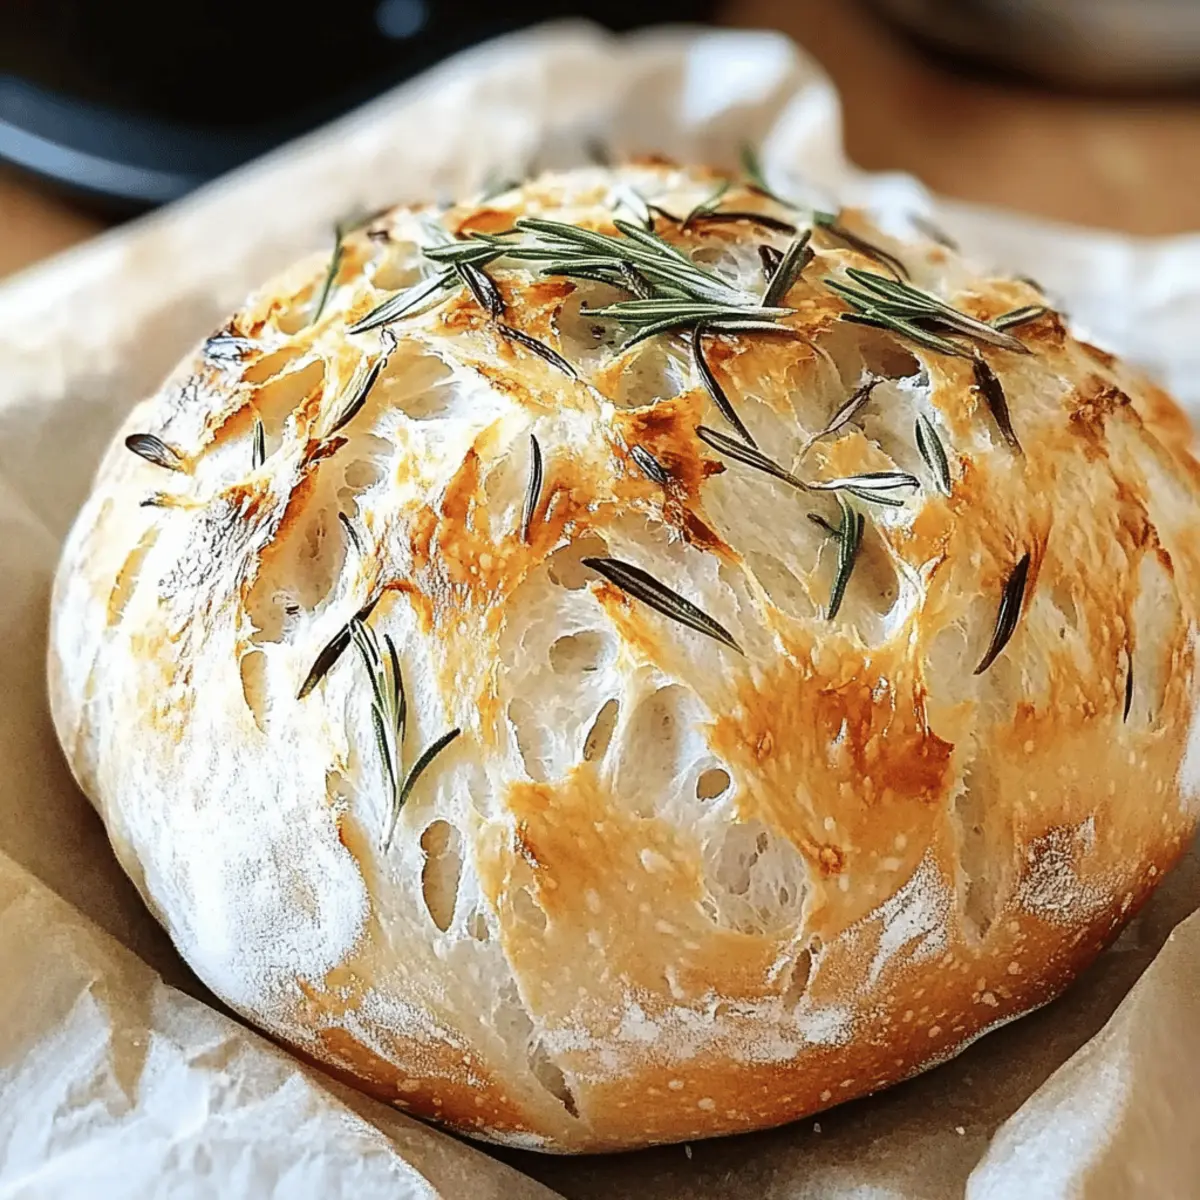
As I pulled the golden brown loaf from the oven, the intoxicating aroma of rosemary and roasted garlic filled my kitchen, instantly transporting me to a rustic Italian bakery. This no-knead Rosemary & Roasted Garlic Artisan Bread effortlessly transforms ordinary meals into extraordinary experiences, making it the perfect companion for stews or simply enjoyed warm with a pat of butter. What I love most about this recipe is its simplicity—crafted over two days, it yields a deliciously chewy texture with a delectably crusty exterior without the fuss of traditional kneading. No matter your cooking level, you can impress your family and friends with this savory loaf that begs to be shared. Are you ready to elevate your baking game and fill your home with the irresistible scent of fresh bread? Let’s get started!
Why is this bread a must-try?
Irresistible aroma: The moment you start roasting garlic and mixing in fresh rosemary, your kitchen fills with a heavenly scent that will have everyone asking what’s cooking.
No-knead convenience: With just a few simple steps over two days, you can create a bakery-quality loaf without breaking a sweat.
Chewy texture, crunchy crust: The unique no-knead method yields a delightfully chewy interior and a satisfying crust that will keep you coming back for more.
Versatile pairing: This artisan bread is perfect alongside a comforting soup or served warm with a drizzle of olive oil—a true crowd-pleaser!
Health benefits: With garlic and rosemary packed in, not only are you savoring incredible flavors, but you’re also indulging in ingredients known for their health-boosting properties. So, are you ready to surprise your loved ones with your new baking skills? Give this savory Rosemary & Roasted Garlic Artisan Bread a try!
Rosemary & Roasted Garlic Artisan Bread Ingredients
For the Bread
- Roasted Garlic – Adds savory depth to the bread; substitute with raw garlic for a sharper flavor if desired.
- Water (1½ cups) – Activates yeast and hydrates the flour; use room temperature water (near 70°F/21°C) for optimal yeast activity.
- Active Dry Yeast (1 teaspoon) – Ferments the dough, aiding in rise and texture; ensure it’s fresh for best results.
- Bread or All-Purpose Flour (3 cups, plus more for dusting) – Provides structure to the bread; use bread flour for a chewier texture.
- Dried Oregano (½ teaspoon) – Adds herbal flavor; for a fresh taste, substitute with fresh oregano if available.
- Kosher or Fine Sea Salt (1 teaspoon) – Enhances flavor and controls yeast fermentation.
- Finely Chopped Rosemary (2 teaspoons, plus more for topping) – Brings aromatic notes to the bread; use fresh rosemary for the strongest flavor.
- Smashed Roasted Garlic (1 whole head) – Intensifies the garlic flavor throughout the bread.
- Extra-Virgin Olive Oil (1 tablespoon) – Adds moisture and enhances flavor; substitute with melted butter if desired.
This Rosemary & Roasted Garlic Artisan Bread is set to become a favorite at your table!
Step‑by‑Step Instructions for Rosemary & Roasted Garlic Artisan Bread
Step 1: Prepare Roasted Garlic
Begin by preheating your oven to 400°F (204°C). Wrap a whole head of garlic in aluminum foil and place it directly on the oven rack. Roast for about 30-35 minutes, until the cloves feel soft and fragrant. Once done, remove from the oven and allow to cool slightly before squeezing out the roasted garlic pulp for use in your dough.
Step 2: Mix Dough
In a large mixing bowl, combine 1½ cups of room temperature water and 1 teaspoon of active dry yeast. Let it sit for about 5 minutes until the yeast bubbles. Then, add 3 cups of bread flour, ½ teaspoon of dried oregano, 2 teaspoons of finely chopped rosemary, the smashed roasted garlic, and 1 tablespoon of extra-virgin olive oil. Stir everything together until just combined and no dry flour remains.
Step 3: First Rise
Cover the bowl with plastic wrap or a clean kitchen towel, and let the dough rise at room temperature for approximately 12-18 hours. The dough should double in size and have a slightly dome shape when ready. Look for a bubbly surface indicating the yeast has done its work, creating a delightful flavor for your Rosemary & Roasted Garlic Artisan Bread.
Step 4: Shape and Second Rise
After the first rise, generously flour a clean surface and gently turn out the dough without deflating it too much. Using floured hands, shape the dough into a round loaf by folding the edges towards the center. Cover the loaf with a towel and let it rest for another 1-2 hours, allowing it to puff up again and develop a rich texture.
Step 5: Preheat Oven
While the dough undergoes its second rise, preheat your oven to 450°F (232°C). Place a Dutch oven or a heavy cast-iron pot (with its lid) inside to heat up for about 30 minutes. This step is crucial as it helps achieve the perfect crust for your Rosemary & Roasted Garlic Artisan Bread.
Step 6: Bake
Carefully remove the hot pot from the oven (remember, it’s extremely hot!). Gently transfer the risen dough into the pot, making sure to maintain its shape. Cover with the lid and bake for 30 minutes. Afterward, uncover the pot and bake for an additional 15-20 minutes until the bread turns a beautiful golden brown and the crust is crisp.
Step 7: Cool
Once baked, remove the pot from the oven and take out the bread carefully. Transfer the loaf to a wire rack and let it cool for at least 30 minutes before slicing. This cooling period allows the interior crumb to set, ensuring that your Rosemary & Roasted Garlic Artisan Bread is perfectly tender and easy to slice.
Make Ahead Options
These no-knead Rosemary & Roasted Garlic Artisan Bread loaves are perfect for meal prep enthusiasts! You can mix the dough and allow it to rise for up to 24 hours at room temperature, enhancing the flavors while you handle your busy schedule. For even more convenience, after the first rise, shape the dough and refrigerate it for up to 3 days—this not only saves time but also deepens the taste. When ready to bake, let the dough come to room temperature for about 30 minutes before following the final baking steps. This way, you’ll enjoy a fresh, crusty loaf just as delicious as if you’d baked it right away, making mealtime effortless!
How to Store and Freeze Rosemary & Roasted Garlic Artisan Bread
Room Temperature: Keep the bread in a paper bag at room temperature for up to 3 days to maintain its crust and chewy texture. Avoid plastic bags, as they can make the crust soggy.
Fridge: Do not store this bread in the fridge, as it can dry out the loaf quickly, diminishing its delightful flavor and texture.
Freezer: For longer storage, wrap the cooled loaf tightly in plastic wrap and then in foil. It can be frozen for up to 3 months. When ready to enjoy, thaw overnight in the fridge.
Reheating: To revive the crusty exterior after freezing, preheat your oven to 350°F (175°C) and warm the bread for about 10-15 minutes before slicing. This will bring back that freshly baked goodness to your Rosemary & Roasted Garlic Artisan Bread!
Rosemary & Roasted Garlic Artisan Bread Variations
Feel free to get creative with this recipe—your kitchen is your canvas!
-
Thyme Twist: Swap rosemary for fresh thyme to bring a different herbal note to your bread. You’ll love the subtle earthy flavor that complements the garlic beautifully!
-
Cheesy Delight: Fold in grated Parmesan or cheddar cheese for a savory bread variation. The melted cheese will create little flavor pockets throughout your loaf, making each bite irresistible.
-
Mediterranean Flair: Add sun-dried tomatoes and Kalamata olives into the dough for a Mediterranean-inspired twist. This lively combination will transport you to a sun-drenched terrace with every slice.
-
Spicy Kick: Mix in crushed red pepper flakes to give your bread a delightful heat. This variation is perfect for those who enjoy a little spice in their life!
-
Nutty Surprise: Incorporate toasted walnuts or pine nuts into the dough for an added crunch. The texture they bring makes for a delightful experience alongside that chewy interior.
-
Garlic Lovers: Don’t hold back—add an extra head of roasted garlic! The intensified garlic flavor ensures every bite bursts with mouthwatering goodness.
-
Onion Touch: Introduce caramelized onions into your dough for a sweet and savory harmony. They add depth and richness that perfectly complements the garlic and rosemary.
-
Vegan Option: Replace the dairy ingredients with plant-based alternatives. Use olive oil instead of butter and omit any cheese for a completely vegan-friendly loaf.
Get inspired, and don’t hesitate to explore these variations. You might just discover a new family favorite, or enjoy alongside a delicious Creamy Roasted Beet Salad for a delightful meal.
Expert Tips for Rosemary & Roasted Garlic Artisan Bread
- Fresh Yeast Matters: Always check the freshness of your active dry yeast; expired yeast can lead to a dense loaf that lacks the delightful rise central to this recipe.
- Room Temperature Water: Use water that’s around 70°F (21°C) to ensure optimal yeast activation—a common mistake is using water that’s too hot or too cold, which can inhibit fermentation.
- Allow for Resting Time: Don’t rush the rising process! Giving your dough ample time to rise will develop the flavor and texture that makes this Rosemary & Roasted Garlic Artisan Bread truly artisan.
- Scoring the Dough: For a beautiful crust, score the top of your loaf just before baking. This helps control how the bread expands and adds an artisanal touch.
- Cool Before Slicing: Ensure you let the bread cool for at least 30 minutes before slicing. This allows the inside to set properly, preventing the bread from becoming gummy.
What to Serve with No-Knead Rosemary & Roasted Garlic Artisan Bread
Delight in creating a well-rounded meal that complements the savory richness of this artisan bread.
- Roasted Tomato Soup: Its tangy sweetness pairs perfectly, enhancing the bread’s garlic and rosemary flavors for a hearty bite.
- Creamy Spinach Salad: The refreshing crunch of fresh spinach, combined with creamy dressing, balances the bread’s warm, chewy texture beautifully.
- Savory Herb Butter: Spread this on warm slices of bread for an extra layer of flavor that elevates every bite into a gourmet experience.
- Winter Vegetable Stew: A wholesome stew of root vegetables adds earthiness that harmonizes with the robust flavors of the bread.
- Cheese Platter: Robust cheeses like aged cheddar or creamy goat cheese create a delightful contrast, perfect for nibbling while enjoying this artisan loaf.
- Grilled Chicken Skewers: These add protein with their smoky flavor, making a fulfilling combination alongside the aromatic bread for a complete meal.
- Red Wine: A glass of full-bodied red wine will bring richness, marrying beautifully with the savory notes of the bread and any hearty sides.
- Chocolate Chip Cookies: Finish with a sweet note! These classic treats provide a perfect contrast to the savory bread, satisfying your sweet tooth after a meal.
Rosemary & Roasted Garlic Artisan Bread Recipe FAQs
How do I select the best garlic for roasting?
Absolutely! When choosing garlic for roasting, look for heads that are firm and plump without any dark spots or soft blemishes. The outer skins should be dry and papery. Avoid any heads that feel lightweight or have green sprouts, as these can indicate that the garlic is old or not fresh.
What’s the best way to store leftover Rosemary & Roasted Garlic Artisan Bread?
Very! To store your bread, place it in a paper bag at room temperature for up to 3 days. This helps maintain the crust’s crunchiness. Avoid storing it in plastic, as this will make the crust soggy. If you have leftover slices, consider placing parchment paper between them to help keep the texture.
Can I freeze the Rosemary & Roasted Garlic Artisan Bread?
Absolutely! To freeze your loaf, let it cool completely after baking. Wrap the bread tightly in plastic wrap, followed by aluminum foil to prevent freezer burn. It can be frozen for up to 3 months. When you’re ready to enjoy it, simply thaw it in the refrigerator overnight, and reheat as needed for that fresh-baked taste!
What if my dough doesn’t rise properly?
No worries! If your dough isn’t rising, it might be due to inactive yeast. Always check your yeast’s expiration date before using. For optimal yeast activation, make sure your water is around 70°F (21°C) and let it sit for about 5 minutes after mixing with yeast. If the mixture isn’t bubbly after this time, the yeast has likely expired. Consider starting anew with fresh yeast!
Are there any dietary considerations I should keep in mind for this recipe?
Of course! This Rosemary & Roasted Garlic Artisan Bread is vegetarian and can easily fit into a vegan diet if using olive oil. However, if you or your guests have allergies, be mindful of the flour used—always opt for gluten-free flour for gluten sensitivities, understanding that the texture may vary. Always check ingredients labels to eliminate any risk for allergies!
Savory Rosemary & Roasted Garlic Artisan Bread to Savor
Ingredients
Equipment
Method
- Preheat your oven to 400°F (204°C). Wrap a whole head of garlic in aluminum foil and roast for 30-35 minutes until soft. Cool slightly and squeeze out the roasted garlic pulp.
- In a large mixing bowl, combine 1½ cups of water and 1 teaspoon of active dry yeast. Let sit for 5 minutes until bubbly. Add 3 cups of flour, ½ teaspoon of oregano, 2 teaspoons of rosemary, smashed garlic, and 1 tablespoon of olive oil. Stir until combined.
- Cover the bowl and let the dough rise at room temperature for 12-18 hours until doubled in size with a bubbly surface.
- Flour a surface, gently turn out the dough, and shape into a round loaf. Cover and let rest for 1-2 hours.
- Preheat oven to 450°F (232°C) with a Dutch oven or cast-iron pot inside for about 30 minutes.
- Transfer the risen dough into the hot pot, cover, and bake for 30 minutes. Uncover and bake for an additional 15-20 minutes until golden brown.
- Remove the pot and bread, transfer to a wire rack, and cool for at least 30 minutes before slicing.
Leave a Reply