
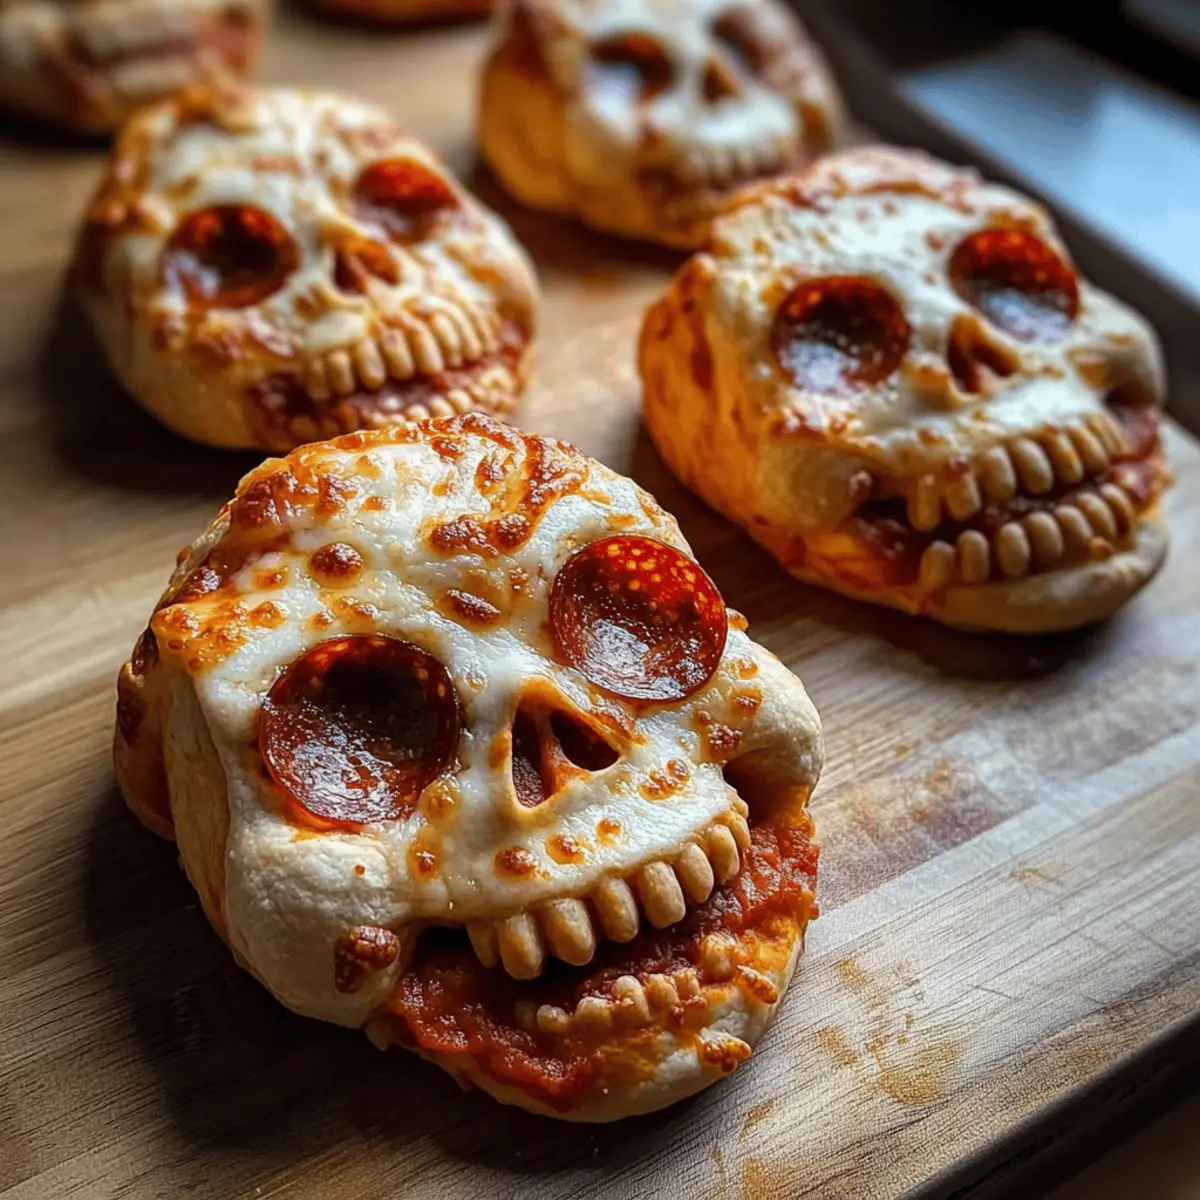
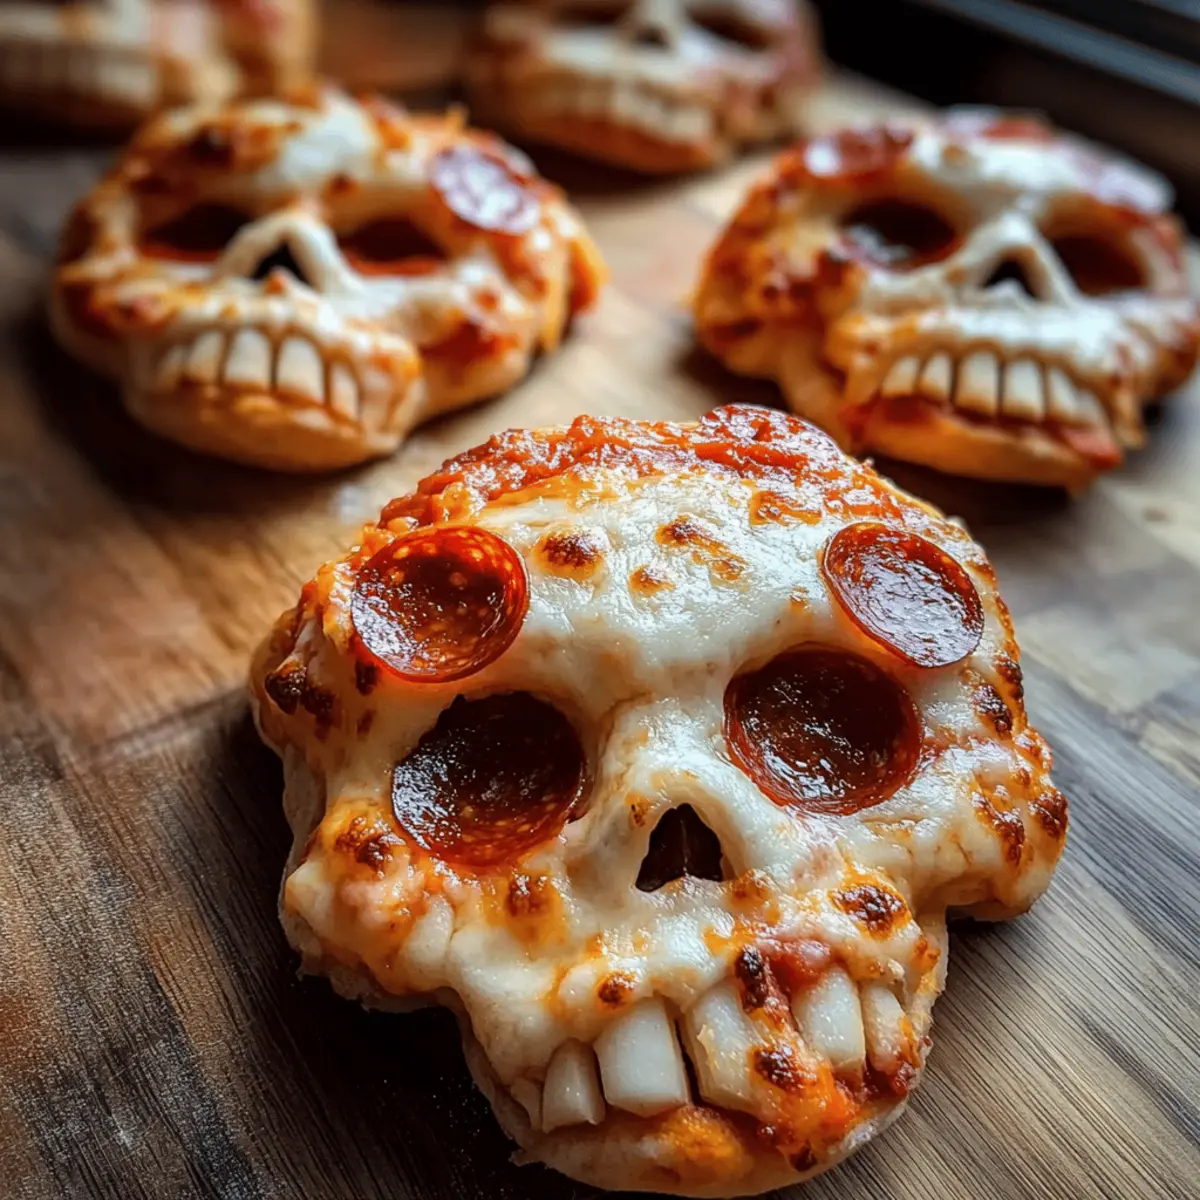
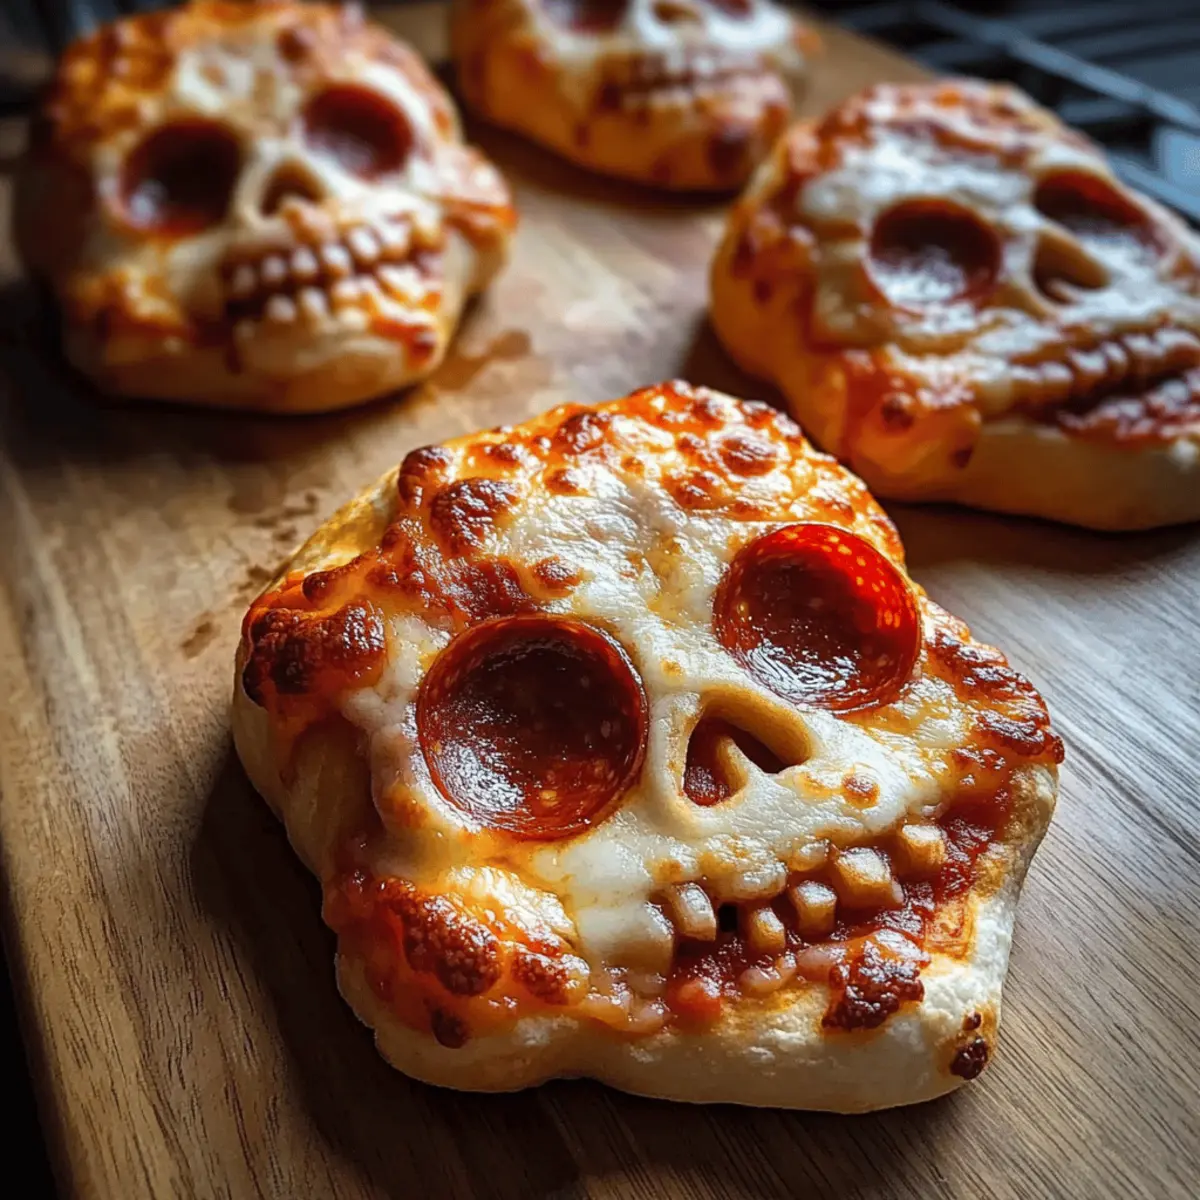
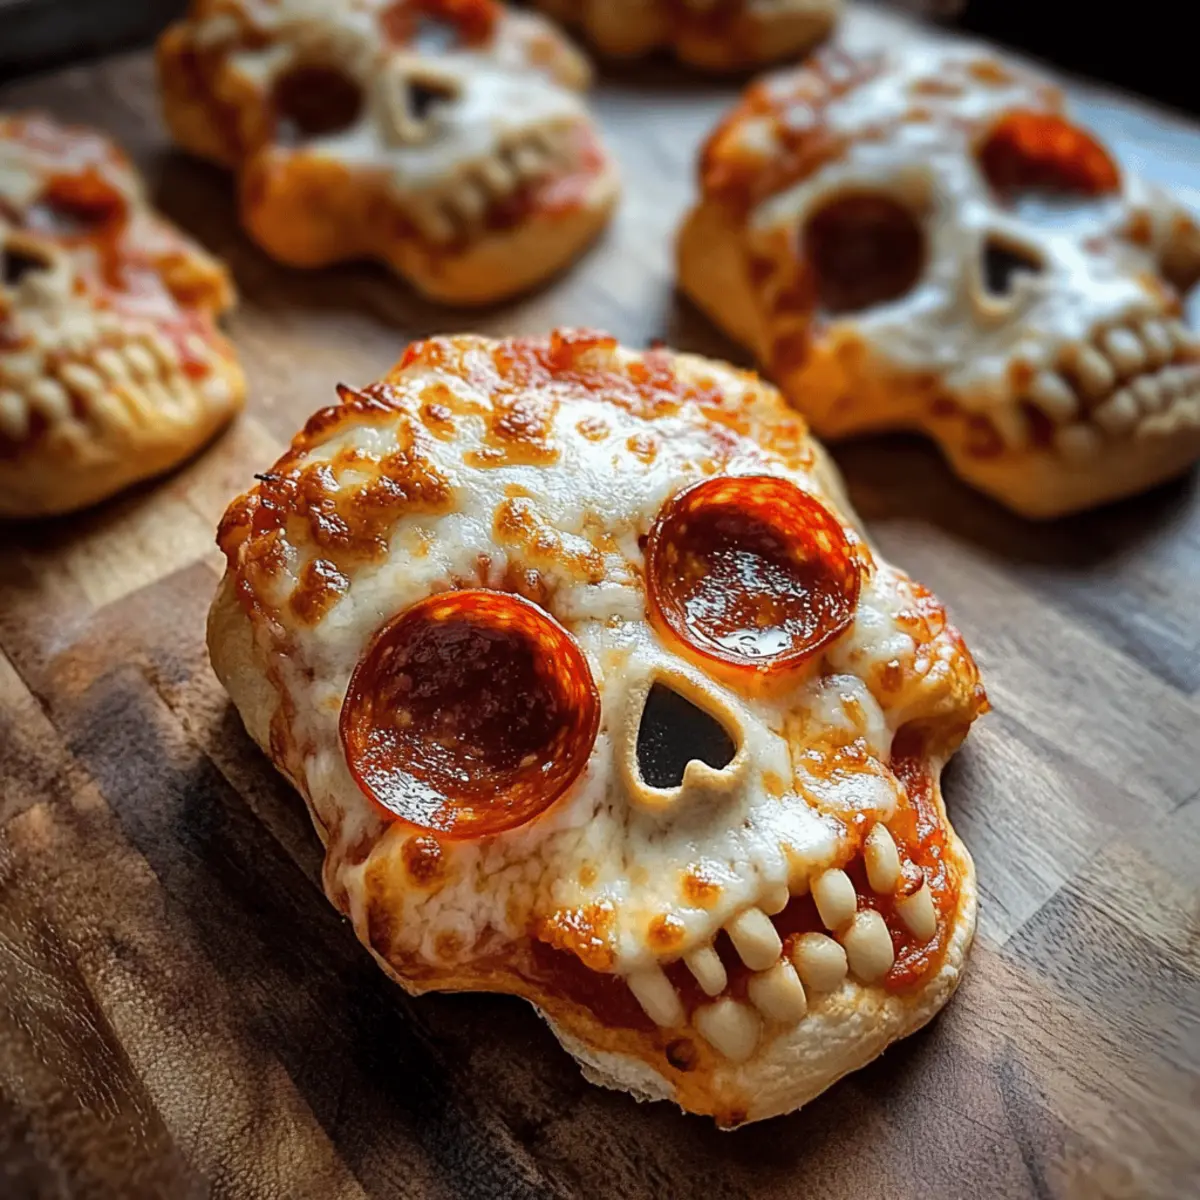
As I rummaged through the pantry, the spirit of Halloween whispered delightful ideas, and then it hit me—Pizza Skulls! These spook-tacular treats bring creativity and fun to my kitchen while transforming traditional pizza into a playful, kid-friendly appetizer. With just a few simple ingredients, the customization possibilities are endless; whether loaded with gooey cheese or packed with your favorite toppings, they’re a crowd-pleasing hit at any Halloween gathering. Not only are these Pizza Skulls easy to whip up, but they also make for an entertaining cooking experience that the whole family can enjoy. Ready to create a batch that will inspire smiles and satisfy taste buds? Let’s dive into the whimsical world of Pizza Skulls and make this Halloween feast unforgettable!
Why Are Pizza Skulls So Fun?
Irresistible appeal: Pizza Skulls combine the classic flavors we adore in a quirky, Halloween-themed way, making them a hit at any gathering.
Endless customization: Whether you prefer pepperoni, veggies, or a sweet twist, these treats allow for delicious variations to suit every palate.
Kids Love Them: Their silly skull shapes bring a sense of excitement to dinner, encouraging kids to help in the kitchen and enjoy homemade food.
Quick to Make: With simple ingredients and easy steps, you’ll have these spooky delights ready in no time—perfect for busy Halloween evenings!
Perfect party hit: Pizza Skulls are fantastic for sharing and sure to be the centerpiece of your Halloween spread. Pair them with marinara dipping sauce for an extra flavor kick!
Pizza Skulls Ingredients
For the Dough
- Flour – Provides structure for the dough; substitute with gluten-free flour for a gluten-free version.
- Water – Activates the yeast and hydrates the dough; use warm water for better yeast activation.
- Olive oil – Adds moisture and richness to the dough; can be replaced with melted butter for a different flavor.
- Sugar – Helps activate the yeast; you can use honey or agave syrup as a natural alternative.
- Salt – Balances flavors and strengthens gluten; don’t skip it for the best taste.
For the Filling
- Pizza sauce – Adds flavor and moisture; substitute with marinara or your favorite tomato sauce for variety.
- Mozzarella cheese – Melts beautifully for a gooey filling; opt for vegan cheese if preferred.
- Pepperoni slices – Gives a classic pizza taste; try turkey pepperoni or omit for a vegetarian option.
- Black olives – For decoration and added flavor; substitute with any small vegetable or topping you like.
Optional Toppings
- Sliced bell peppers – Adds a sweet crunch for a colorful twist; great for a veggie option.
- Mushrooms – Brings an earthiness that pairs well with cheese; sauté them for extra flavor.
- Spinach – A healthy addition that packs a nutrition punch; use fresh or frozen, just ensure it’s dry.
For the Garnish
- Parsley – Freshens up the appearance and adds a pop of color; chopped for a sprinkle just before serving.
- Smoked paprika – Adds a hint of smokiness; sprinkle lightly for an extra flavor dimension.
Step‑by‑Step Instructions for Pizza Skulls
Step 1: Activate the Yeast
In a medium bowl, combine 1 cup of warm water (about 110°F), 1 tablespoon of sugar, and 2 teaspoons of active dry yeast. Let this mixture sit for 5 minutes until it becomes bubbly and frothy, signaling that your yeast is alive and ready to work its magic. This is a crucial step in making your Pizza Skulls perfectly rise and airy.
Step 2: Prepare the Dough
In a larger mixing bowl, combine 3 cups of flour and 1 teaspoon of salt. Create a well in the center and drizzle in 2 tablespoons of olive oil, followed by the activated yeast mixture. Gradually stir all the ingredients together until a shaggy dough forms, ensuring everything is well incorporated for your delightful Pizza Skulls.
Step 3: Knead the Dough
Transfer the dough onto a lightly floured surface. Knead the dough for about 8-10 minutes, applying firm pressure with your palms until it becomes smooth and elastic. You’ll know it’s ready when it springs back lightly when you poke it. This step builds the structure needed for the perfect Pizza Skulls.
Step 4: Let It Rise
Place the kneaded dough in an oiled bowl, turning it to coat. Cover the bowl with a clean kitchen towel and allow it to rise in a warm area for 30 minutes, or until doubled in size. The dough will be puffed and soft—just the way we want it for our spooky creations!
Step 5: Shape the Skulls
After the dough has risen, roll it out on a floured surface to about 1/4-inch thickness. Use a skull-shaped cookie cutter to cut out as many skulls as possible. Gather and reroll any leftover dough to maximize your creations, ensuring each Pizza Skull has its unique and fun shape.
Step 6: Assemble the Skulls
On half of the skull shapes, place a spoonful of pizza sauce, a generous sprinkle of mozzarella cheese, and your preferred toppings such as pepperoni or olives. Carefully seal each filled skull with another skull shape pressed on top, using a fork to crimp the edges securely to prevent any delicious fillings from leaking out during baking.
Step 7: Bake to Perfection
Preheat your oven to 375°F (190°C) and line a baking sheet with parchment paper. Place your assembled Pizza Skulls on the sheet and bake for 20-25 minutes until golden brown and the cheese is beautifully bubbling. Keep an eye on them towards the end to achieve that perfect flaky crust!
Step 8: Add the Finishing Touches
Once baked, remove the Pizza Skulls from the oven and let them cool slightly. You can garnish with a sprinkle of chopped parsley or a dash of smoked paprika for extra flair. The result is an array of spooky, tempting bites that are sure to be a hit at your Halloween gathering!
Make Ahead Options
These Pizza Skulls are perfect for meal prep lovers! You can prepare the dough and assemble the skulls up to 24 hours in advance. Simply complete the steps of mixing and kneading the dough, then let it rise as directed. Once shaped, cover the assembled skulls tightly with plastic wrap and refrigerate. For optimal freshness, avoid adding toppings that could make the dough soggy; instead, keep the fillings simple. When you’re ready to bake, simply preheat your oven and pop them in for about 20-25 minutes until golden brown and deliciously bubbly. This way, you’ll have delightful Pizza Skulls ready in no time for your Halloween celebration!
Expert Tips for Pizza Skulls
- Yeast Activation: Ensure your water is warm but not hot. Too much heat can kill the yeast, preventing a proper rise.
- Avoid Overfilling: Don’t stuff the Pizza Skulls too full. Leaving some space ensures they won’t burst in the oven, keeping the cheesy goodness inside.
- Crimp with Care: Use a fork to crimp the edges securely. This prevents leaks and creates an adorable decorative touch.
- Dough Handling: If using store-bought dough, be gentle while cutting out shapes. It can be more fragile, so handle it with kid gloves to maintain form.
- Experiment with Fillings: Feel free to get creative! Use your favorite pizza toppings and adapt the fillings to cater to different dietary preferences.
What to Serve with Pizza Skulls?
Ready to take your Halloween gathering to the next level? These spooky bites are perfect for pairing with a variety of delightful side dishes and drinks.
- Light Side Salad: A fresh salad with mixed greens and a tangy vinaigrette balances the richness of the Pizza Skulls.
- Roasted Veggies: Sweet, caramelized vegetables add color and nutrition, making each bite even more satisfying.
- Marinara Dipping Sauce: A small bowl of warm marinara is ideal for dunking, enhancing the classic pizza flavors of your spooky treats.
- Garlic Breadsticks: Crunchy, buttery breadsticks offer a complementary texture and subtle garlic flavor that everyone loves.
For a fun twist, serve with Apple Cider: This sweet and spiced drink will carry the autumn spirit deliciously into your meal.
- Pumpkin Spice Dessert: Finish off your gathering with a seasonal sweet like pumpkin pie or cookies for a festive touch that rounds out the experience.
Each of these pairings creates a delightful, inviting spread that celebrates the joy of cooking and sharing with loved ones this Halloween!
Pizza Skulls: Creative Twists Ahead!
Let your imagination roam free as you explore these delightful variations to make your Pizza Skulls uniquely yours!
-
Dairy-Free: Substitute mozzarella with vegan cheese for a deliciously creamy filling that’s also dairy-free.
Give your kids a chance to enjoy the same gooey texture without any animal products! -
Gluten-Free: Use a gluten-free flour blend to create a tasty, crumbly crust that everyone will love.
It makes these spooky snacks accessible for those with gluten sensitivities, ensuring no one misses out. -
Veggie-Packed: Load up on colorful veggies like bell peppers, zucchini, or spinach for a nutritious twist.
Not only will this add a pop of color, but it also enhances the flavors, making them irresistibly vibrant. -
Spicy Kick: Add jalapeños or crushed red pepper flakes to give your Pizza Skulls a fiery punch.
Perfect for those who love a little heat with their treats, these spicy bites will surely awaken taste buds! -
Sweet Surprise: For a dessert version, fill the skulls with chocolate chips and marshmallows instead of savory items.
Who said Halloween treats can’t be sweet? Embrace the fun with this unexpected delight! -
Meat Lovers: Mix in bacon or sausage alongside the pepperoni for a hearty, meaty filling.
This twist will satisfy the hungriest of party-goers and bring a gourmet touch to your spooky ensemble. -
Herb Infusion: Incorporate dried herbs like oregano or basil into your dough for extra flavor.
This subtle change makes each bite fragrant and herbaceous, elevating your Pizza Skulls with an Italian flair. -
Additional Dipping Sauces: Serve alongside more dipping options like ranch or garlic aioli for added variety.
Pairing these delicious dips transforms your Pizza Skulls into a full flavor experience that everyone will enjoy!
Let these variations inspire you to mix it up! And don’t forget, a delicious marinara dipping sauce always makes a perfect pairing for your creations. Happy cooking!
How to Store and Freeze Pizza Skulls
Fridge: Store leftover Pizza Skulls in an airtight container in the fridge for up to 3 days to keep them fresh and flavorful.
Freezer: Uncooked assembled skulls can be frozen on a baking sheet until solid, then transferred to a freezer-safe bag for up to 3 months.
Reheating: To reheat, place chilled or frozen Pizza Skulls on a baking sheet and bake at 375°F (190°C) for 10-15 minutes until warm and crispy.
Room Temperature: If consumed within a few hours, Pizza Skulls can safely sit out at room temperature for a Halloween party, but don’t leave them out for more than 2 hours.
Pizza Skulls: Spooky Halloween Treats Recipe FAQs
What is the best way to select ripe ingredients for Pizza Skulls?
Absolutely! When selecting your ingredients, opt for fresh vegetables and high-quality cheese for the filling. Look for firm, bright-colored bell peppers and mushrooms without dark spots or soft patches. For the olives, choose plump ones without any blemishes for the best flavor. Fresh pizza sauce or marinara should be aromatic and free of added preservatives whenever possible.
How should I store leftover Pizza Skulls and for how long?
Leftover Pizza Skulls can be stored in an airtight container in the fridge for up to 3 days. To maintain their delightful texture, make sure they cool completely before sealing them in. If you’re planning on enjoying them later, consider freezing them!
Can I freeze assembled Pizza Skulls, and if so, how?
Yes! Freezing Pizza Skulls is a fantastic way to plan ahead. First, assemble the skulls as per your recipe instructions but don’t bake them. Place the assembled skulls on a baking sheet lined with parchment paper and freeze them until solid (about 1-2 hours). Once frozen, transfer them to a freezer-safe bag or container, where they can last for up to 3 months. When ready to bake, they can go directly from the freezer to the oven; just add a few extra minutes to the baking time!
What are some common issues I might encounter while making Pizza Skulls?
One common issue is the dough not rising. This can happen if your water was too hot, which can kill the yeast, or if your yeast is expired. Make sure the water is warm, around 110°F (43°C), and check the expiration date on your yeast. Another issue could be overflowing fillings; avoid overstuffing the skulls to ensure they seal properly and don’t leak during baking. If your dough is too sticky while kneading, sprinkle in a little extra flour to make it manageable.
Are there any dietary considerations I should keep in mind when making Pizza Skulls?
Very much so! If cooking for individuals with dietary restrictions, consider alternatives. For gluten-free options, substitute the flour with a gluten-free blend. Use vegan cheese if needed and opt for vegetable toppings to make it a pescatarian or vegetarian treat. Always check labels for allergens, especially with prepackaged ingredients like pizza sauce or dough, as they may contain dairy, gluten, or other common allergens. It’s best to communicate and know your guests’ preferences and allergies for a delightful gathering!
Halloween Pizza Skulls Deliciously Spooky Surprise Bites
Ingredients
Equipment
Method
- In a medium bowl, combine 1 cup of warm water, 1 tablespoon of sugar, and 2 teaspoons of active dry yeast. Let sit for 5 minutes until bubbly.
- In a larger mixing bowl, combine 3 cups of flour and 1 teaspoon of salt. Make a well and add 2 tablespoons of olive oil and the yeast mixture. Stir until a shaggy dough forms.
- Transfer dough to a floured surface. Knead for 8-10 minutes until smooth and elastic.
- Place the kneaded dough in an oiled bowl, cover, and let it rise in a warm area for 30 minutes.
- Roll the risen dough out to about 1/4-inch thickness and cut out skull shapes with a cookie cutter.
- On half of the skull shapes, place pizza sauce, mozzarella cheese, and toppings. Press another skull shape on top and crimp the edges with a fork.
- Preheat your oven to 375°F and bake the assembled Pizza Skulls for 20-25 minutes until golden.
- Let cool slightly then garnish with parsley or smoked paprika before serving.
Leave a Reply