
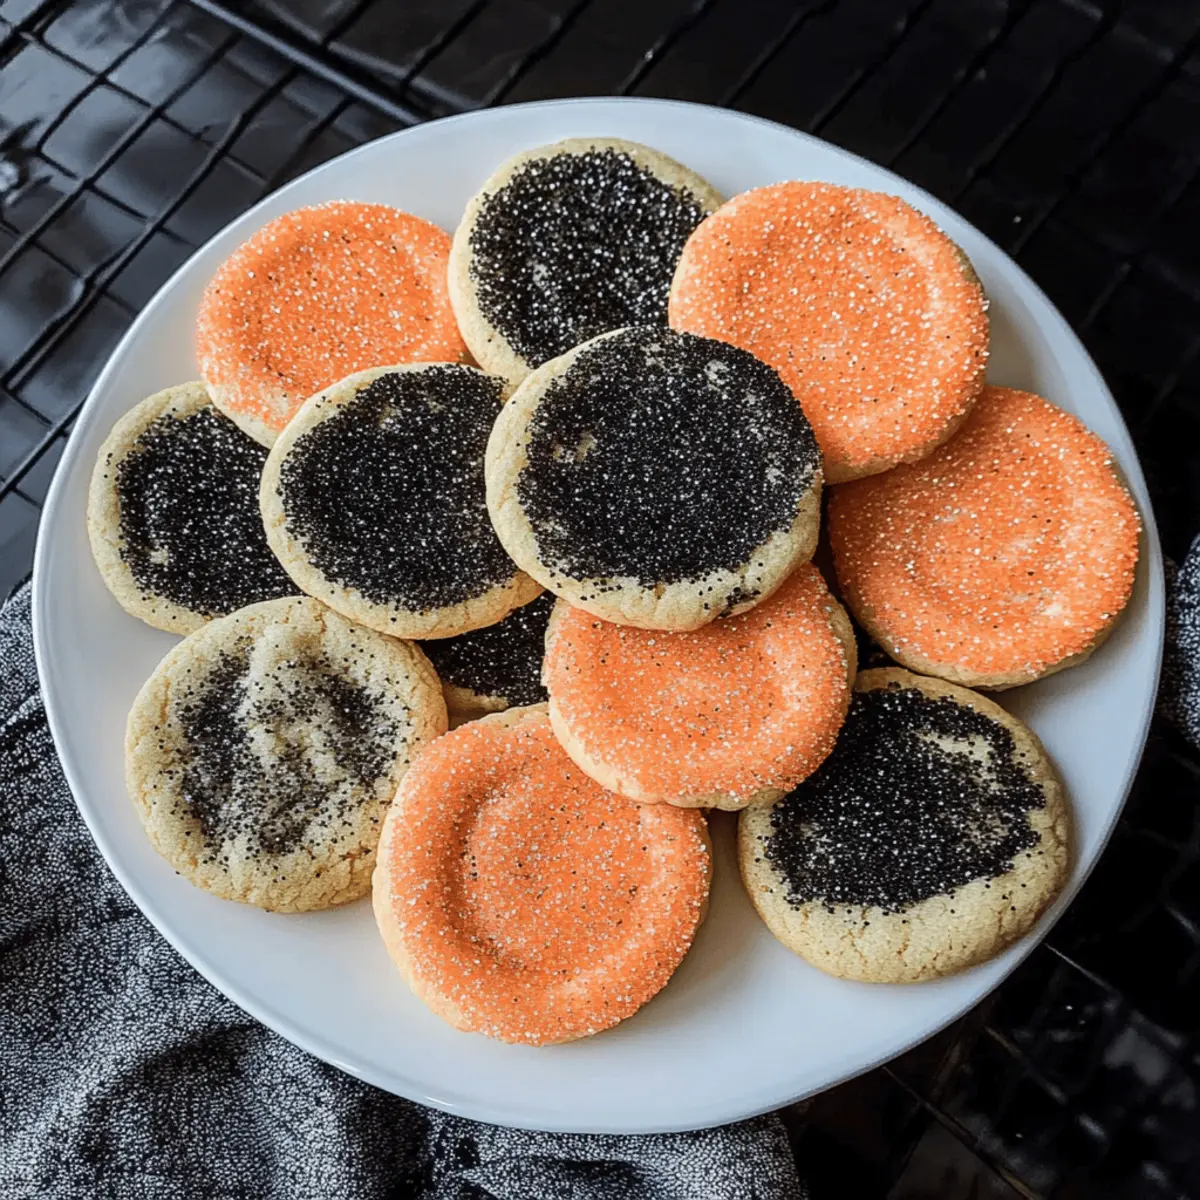
As I gathered the ingredients for my Halloween celebration, I couldn’t shake the memory of munching on soft, chewy sugar cookies as a kid—so perfect for the spooky season. This year, I decided to bring that nostalgia back with my Chewy Halloween Sugar Cookies, an easy recipe that welcomes everyone to the kitchen, whether you’re a baking novice or a seasoned pro. The beauty of these cookies lies in their simplicity; there’s no need for chilling the dough or fancy cookie cutters, making them a crowd-pleaser that’s quick to whip up. Plus, with a gluten-free option available, everyone can join in on the fun! So why settle for store-bought when you can create vibrant, delicious treats that fill your home with joy? Ready to transform your baking game this Halloween? Let’s dive into those scrumptious cookie details!
Why Choose Halloween Sugar Cookies?
Nostalgic Comfort: Reminiscent of childhood treats, these chewy cookies evoke warm memories of festive celebrations, making them a hit with all ages.
Easy to Make: No chilling or complicated techniques involved—just mix, scoop, and bake! Perfect for busy bakers or family fun.
Customization Galore: You can personalize these cookies with your choice of sprinkles or flavored extracts, such as in my Brown Butter Cookies, to suit your taste.
Gluten-Free Friendly: A simple swap for gluten-free flour ensures everyone can enjoy these delightful bites, just like my festive Cauldron Cookies.
Crowd-Pleaser: Their festive colors and soft texture make these cookies perfect for Halloween parties or as gifts, enchanting all your guests!
Quick Cleanup: With minimal ingredients and few dishes to wash, these cookies are a breeze to make! What’s not to love?
Halloween Sugar Cookies Ingredients
For the Dough
• All-Purpose Flour – Provides structure to the cookies; substitute with a gluten-free flour blend for a gluten-free option.
• Cornstarch – Helps achieve a softer cookie texture; no substitutions necessary for desired fluffiness.
• Baking Soda – Acts as a leavening agent for rise; always use fresh for optimal results.
• Salt – Enhances the overall flavor; a crucial ingredient for balancing sweetness.
• Unsalted Butter – Adds richness and moisture; margarine can be used as a dairy-free substitute.
• Granulated Sugar – Sweetens the cookies and contributes to their chewy texture; brown sugar will give a deeper flavor.
• Large Egg – Binds ingredients and adds moisture; an egg substitute works for a vegan option.
• Vanilla Extract – Adds classic flavor; consider almond extract for a variety.
• Almond Extract (optional) – Provides a subtle nutty flavor; simply omit for a nut-free version.
For the Decoration
• Sanding Sugar (orange/black) – Ideal for decoration and giving the cookies a fun Halloween appearance; any colored sprinkles can be used as an alternative.
These Halloween Sugar Cookies not only delight the taste buds but also embody the spirit of the season—perfect for sharing and savoring with friends and family!
Step‑by‑Step Instructions for Chewy Halloween Sugar Cookies
Step 1: Mix Dry Ingredients
In a medium-sized bowl, whisk together 2 ¾ cups of all-purpose flour, 2 tablespoons of cornstarch, 1 teaspoon of baking soda, and ½ teaspoon of salt until thoroughly combined. This creates a light and airy base for your Halloween sugar cookies. Set aside the dry mixture while you prepare the wet ingredients, ensuring everything is well-measured for the best results.
Step 2: Cream Butter and Sugar
In a large mixing bowl, use an electric mixer to beat together 1 cup of room temperature unsalted butter and 1 ½ cups of granulated sugar until the mixture is light and fluffy, which should take about 3-5 minutes. The color should become pale and creamy, indicating that air is being incorporated, which will help give your cookies a perfect chewy texture.
Step 3: Add Egg and Extracts
Beat in 1 large egg, 2 teaspoons of vanilla extract, and ½ teaspoon of almond extract (if using) to the butter and sugar mixture. Mix until well blended, about 1-2 minutes. This step adds moisture and vital flavor to your Halloween sugar cookies, creating a deliciously sweet blend that packs a punch of nostalgic taste.
Step 4: Combine Mixtures
Gradually add the dry ingredient mixture to the wet ingredients, mixing on low speed until just incorporated. Avoid over-mixing, as this can affect the cookie’s chewy texture. The dough will be soft and slightly sticky, a sign that you’re on the right track to creating sweet, festive treats.
Step 5: Form Dough Balls
Using a cookie scoop or your hands, portion out heaping tablespoons of dough and roll them into smooth balls. This should yield about 2 dozen cookies. To amp up the festive spirit, roll each dough ball in colored sanding sugar before placing them on a lined baking sheet, ensuring they’re evenly coated for that fun Halloween flair.
Step 6: Preheat Oven
While shaping the dough, preheat your oven to 350°F (175°C). This will help ensure your Halloween sugar cookies bake evenly and develop that lovely golden edge. Make sure the oven is fully preheated before you place the cookies in, which will help them rise perfectly.
Step 7: Bake Cookies
Arrange the dough balls on a parchment-lined baking sheet, spaced about 2 inches apart. Bake in the preheated oven for 12-14 minutes, until the edges are set but the centers remain soft. Once you see the edges just starting to turn golden, it’s time to remove them—this will keep your cookies delightfully chewy.
Step 8: Cool
After removing the baking sheet from the oven, allow the cookies to cool on the sheet for about 5 minutes. This helps them firm up, making it easier to transfer them. Then, gently move the cookies to a wire rack to cool completely. This final step is essential for achieving that perfect chewy texture in your Halloween sugar cookies.
What to Serve with Chewy Halloween Sugar Cookies?
These delightful cookies bring warmth and joy to any Halloween gathering, making them the perfect centerpiece for your festive spread.
- Crispy Apple Cider Donuts: The tangy sweetness of these donuts beautifully contrasts the chewy texture of the cookies, enhancing your autumn treats.
- Warm Spiced Cider: A comforting drink, its blend of cinnamon and cloves pairs wonderfully with the playful sweetness of the cookies. Imagine sipping this while nibbling on a sugar cookie—pure bliss!
- Pumpkin Spice Latte: This seasonal favorite adds a cozy, aromatic flavor that perfectly complements the festive vibes of your Halloween cookies.
- Chocolate Dipped Pretzels: Providing a fun salty-sweet crunch, these treats offer a different texture that delights the palate and balances sweetness.
- Ghostly Marshmallow Treats: Light and airy, these playful snacks create a haunted theme while their mild sweetness matches seamlessly with the sugar cookies.
- Milk or Hot Chocolate: Classic pairings for a reason! The richness balances the cookies’ sweetness, creating a nostalgic experience for all ages.
When it comes to Halloween festivities, these pairings will ensure your Chewy Halloween Sugar Cookies shine even brighter amid the celebration!
Halloween Sugar Cookies Variations & Substitutions
Feel free to let your creativity shine by customizing these delightful cookies with various flavors and textures!
- Gluten-Free: Substitute all-purpose flour with a gluten-free flour blend to make these cookies accessible for everyone. Your friends will love that everyone can join in on the fun!
- Dairy-Free: Replace unsalted butter with margarine or vegan butter. This tasty adjustment ensures those avoiding dairy can still savor every bite.
- Nut-Free: Simply omit almond extract and any additional nuts to keep these cookies safe for those with nut allergies. Everyone deserves a sweet treat!
- Flavor Twist: Swap out vanilla extract for maple extract for a distinct flavor that adds a warm, autumnal note. Just imagine the rich taste enhancing your Halloween gatherings!
- Add-Ins: Toss in chocolate chips, candy corn, or seasonal sprinkles into the dough for a flavor and texture boost. The surprises in each bite will surely delight your guests!
- Spooky Shapes: Use themed cookie cutters to shape your dough into ghosts, pumpkins, or bats for a thrilling visual touch. Decorating will be just as much fun as eating these cookies!
- Decorative Glaze: Try a simple glaze made from powdered sugar and milk or water for an elegant finish. Top with additional sprinkles for an eye-catching surprise that wraps your cookies in festive cheer!
- Spicy Variation: Add a pinch of cinnamon or nutmeg to the dough. This subtle infusion will evoke the warm flavors of fall, perfect for cozy gatherings around the fire.
With these fun twists, you’ll always have a new treat to share—just like my popular Chocolate Oat Cookies that never cease to impress! Enjoy the creative process and happy baking!
Expert Tips for Halloween Sugar Cookies
-
Precise Measuring: Use accurate measuring techniques to avoid dry cookies. Spoon flour into the measuring cup instead of scooping directly from the bag for best texture.
-
Avoid Overbaking: Keep an eye on the cookies as they bake. They should be slightly underbaked in the center for that chewy Halloween sugar cookie texture.
-
Size Matters: If you opt for larger dough balls, be prepared to adjust the baking time. They may need extra minutes, but be cautious not to overbake.
-
Chilling Dough: While not necessary, chilling the dough for about 30 minutes can enhance flavor and make the dough easier to handle, especially in warm conditions.
-
Experiment with Flavors: Try swapping vanilla extract for almond or maple extract for a unique twist in your Halloween sugar cookies.
-
Decorating Fun: Get creative with your sanding sugar! Use various colors for different designs, making the cookies more festive and visually appealing for your gathering.
Make Ahead Options
These Halloween Sugar Cookies are perfect for meal prep, allowing you to save time during the busy holiday season! You can prepare the cookie dough up to 24 hours in advance; just scoop the dough into balls and refrigerate them in an airtight container. This keeps the cookies fresh and helps the flavors meld beautifully. When you’re ready to bake, simply place the chilled dough balls on a parchment-lined baking sheet and bake them directly from the fridge, adding an extra minute or two to the baking time if needed. With these make-ahead tips, you can enjoy delightful, festive cookies just as delicious and chewy, ensuring your baking experience is fun and stress-free!
How to Store and Freeze Halloween Sugar Cookies
Room Temperature: Store your Halloween sugar cookies in an airtight container at room temperature for up to 5 days to maintain their soft and chewy texture.
Fridge: If you prefer, you can keep the cookies in the fridge; they will last about 1 week. Ensure they are sealed well to prevent drying out.
Freezer: For longer storage, freeze your cookies in a single layer on a baking sheet until firm, then transfer them to an airtight container or freezer bag. They will stay fresh for up to 3 months.
Reheating: To enjoy the cookies warm, place them in a preheated oven at 350°F (175°C) for about 5-7 minutes. This will refresh their delightful chewiness and flavor, perfect for a Halloween treat!
Halloween Sugar Cookies Recipe FAQs
How do I choose the right ingredients for my Halloween Sugar Cookies?
Absolutely! When selecting ingredients, make sure your all-purpose flour is fresh for the best texture. If you’re opting for the gluten-free version, look for a trusted gluten-free flour blend that contains xanthan gum for structure. Always check your baking soda for freshness, as older products may not leaven the cookies properly.
What is the best way to store Halloween Sugar Cookies?
To keep your Halloween sugar cookies fresh and chewy, store them in an airtight container at room temperature for up to 5 days. If you live in a humid climate, refrigerating them in a sealed container will extend their freshness to about one week.
Can I freeze my Halloween Sugar Cookies?
Absolutely! To freeze your Halloween sugar cookies, first place them in a single layer on a baking sheet and freeze until solid, which typically takes about 1-2 hours. Once frozen, transfer them to an airtight container or freezer bag, separating layers with parchment paper. They will maintain their best quality for up to 3 months. When you’re ready to enjoy them, thaw at room temperature or pop them in a preheated oven at 350°F (175°C) for about 5-7 minutes to revive their chewiness!
What if my cookies spread too much while baking?
Very good question! If your Halloween sugar cookies spread excessively during baking, it could be due to a few reasons—your butter may have been too soft, or perhaps the dough wasn’t chilled enough. To combat this, ensure your butter is at room temperature but not overly warm, and consider chilling the dough for 30 minutes before scooping. Additionally, avoid overmixing once you combine the dry and wet ingredients, as this can also lead to spreading.
Are there any dietary considerations for my Halloween Sugar Cookies?
Definitely! If you have allergies, you can easily customize the recipe. For nut allergies, simply omit almond extract, and for gluten sensitivity, use a gluten-free flour blend. If making them vegan, substitute the large egg with a flax egg (1 tablespoon of ground flaxseed mixed with 2.5 tablespoons of water, let sit until gel-like) and replace the butter with margarine or coconut oil. This way, everyone can join in on the fun without worries!
How long will my Halloween Sugar Cookies last?
These delightful treats will stay fresh in an airtight container at room temperature for up to 5 days. If you decide to freeze them, they will maintain their deliciousness for up to 3 months. Just remember to let them cool completely before freezing to avoid ice crystal formation.
Spooktacular Halloween Sugar Cookies for Festive Fun
Ingredients
Equipment
Method
- Mix together the flour, cornstarch, baking soda, and salt until thoroughly combined.
- Cream together butter and sugar until light and fluffy, about 3-5 minutes.
- Beat in the egg and extracts until well blended, about 1-2 minutes.
- Gradually mix in the dry ingredients until just incorporated.
- Portion out heaping tablespoons of dough and roll into balls, then coat in sanding sugar.
- Preheat the oven to 350°F (175°C).
- Bake cookies for 12-14 minutes until edges are set but centers remain soft.
- Cool on the baking sheet for 5 minutes before transferring to a wire rack to cool completely.
Leave a Reply