
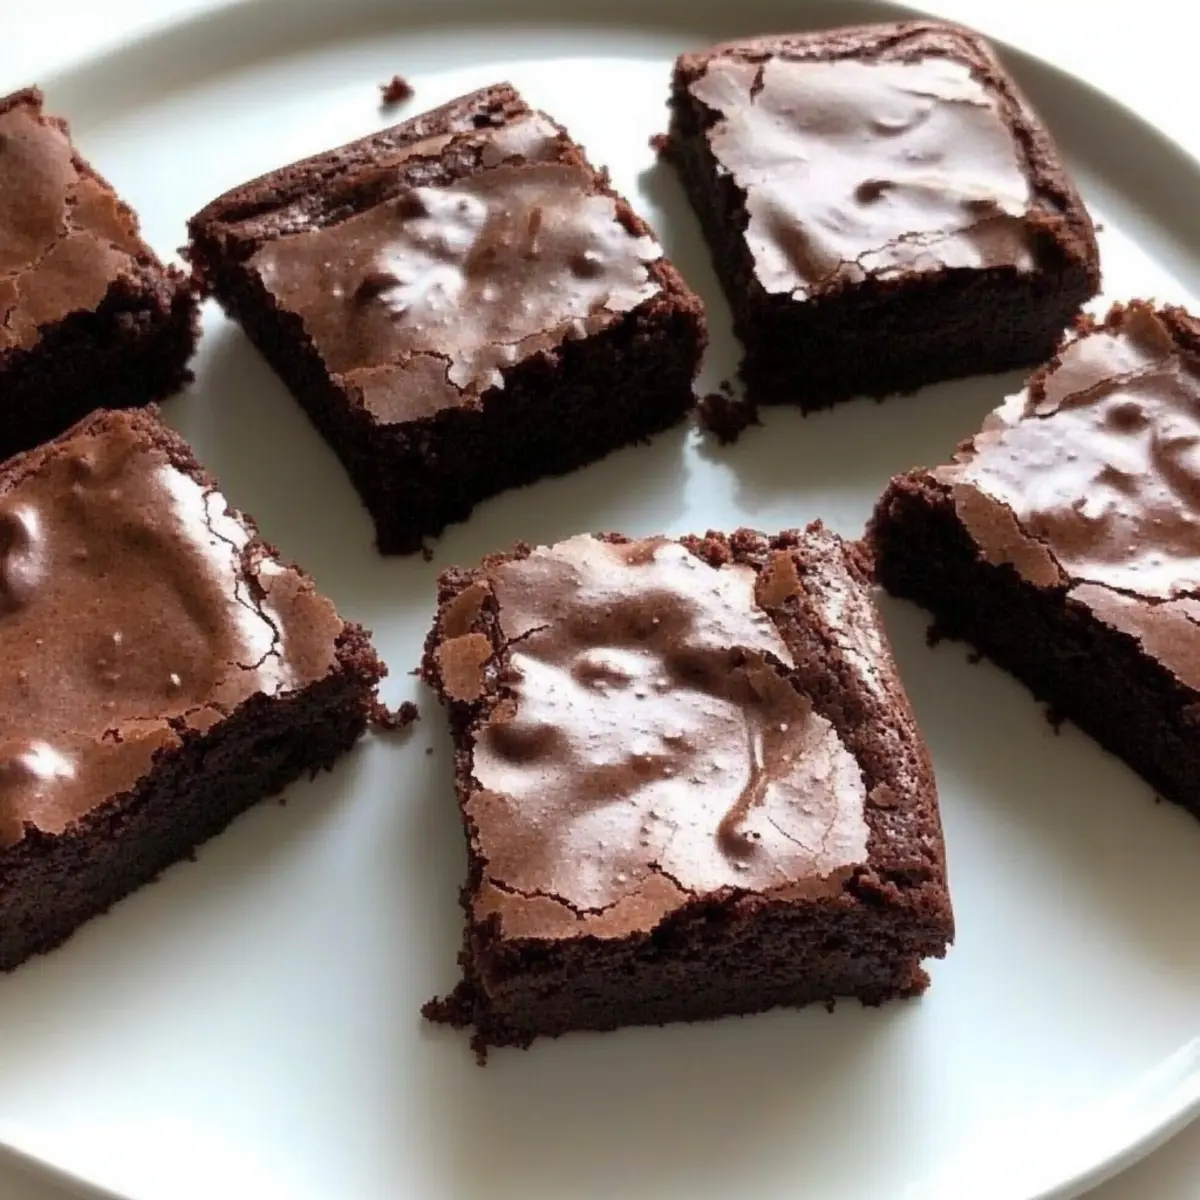
As I whisk together the ingredients for these Greek Yogurt Brownies, the smooth texture and rich aroma of chocolate envelop the kitchen, promising a delightful treat. What sets these brownies apart is the use of Greek yogurt, which not only reduces fat but also adds a luscious creaminess—making them an irresistible guilt-free indulgence. Filled with protein and moisture, this recipe is perfect for satisfying those chocolate cravings without compromising on health. Whether you’re a devoted home-chef or simply someone looking for a tasty alternative to fast food desserts, these brownies deliver both flavor and nutrition. Curious about how this healthier twist can become your new go-to? Let’s dive into the recipe!
Why Choose Greek Yogurt Brownies?
Indulgent without the guilt: These brownies offer all the rich, fudgy goodness you crave while using Greek yogurt to lower fat content.
High Protein delight: Packed with protein, they’re a smart choice for health-conscious dessert lovers.
Flavor Versatility: Feel free to experiment with add-ins like nuts or chocolate chips, creating endless variations to keep things fresh.
Quick and Easy: Whip these up in just a few steps, perfect for busy weeknights or unexpected guests.
Crowd-Pleasing: With a delightful texture and rich chocolate taste, they’re sure to impress anyone who takes a bite.
Give them a try alongside some delicious Apple Brownies Chewy for a sweet treat you won’t forget!
Greek Yogurt Brownie Ingredients
For the Brownies
• Greek Yogurt – Adds creaminess and moisture while reducing fat; use plain, unsweetened yogurt for best results.
• Applesauce – Provides natural sweetness and additional moisture; substitute with mashed banana for a unique twist.
• Granulated Sugar – Sweetens the brownies; can be replaced with coconut sugar for a healthier option.
• Brown Sugar – Contributes to a deeper flavor and moisture; try maple sugar for a different taste profile.
• Eggs – Binds ingredients and adds richness; substitute with flax eggs for a vegan alternative.
• Vanilla Extract – Enhances overall flavor; opt for pure vanilla extract for the best taste experience.
• Whole Wheat Flour – Adds structure and fiber; all-purpose flour can be used for a lighter texture.
• Cocoa Powder – Provides the rich chocolate flavor; use high-quality unsweetened cocoa for deeper taste.
• Baking Powder – Helps the brownies rise; ensure it’s fresh for proper leavening.
• Salt – Balances sweetness and enhances flavors.
• Dark Chocolate Chips – Optional for added richness; feel free to swap for milk chocolate chips or chopped chocolate.
Step‑by‑Step Instructions for Greek Yogurt Brownies
Step 1: Preheat the Oven
Begin by preheating your oven to 350°F (175°C). This will ensure that your Greek Yogurt Brownies bake evenly and come out perfectly fudgy. While the oven heats up, gather your baking supplies and prepare your baking pan for the brownie batter.
Step 2: Prepare the Baking Pan
Grease an 8×8-inch baking pan or line it with parchment paper for easy removal later. Ensure the edges are well-covered to prevent any sticking. This step is crucial for achieving that beautifully moist texture of the brownies without any mess.
Step 3: Mix Wet Ingredients
In a large mixing bowl, whisk together the Greek yogurt, applesauce, granulated sugar, and brown sugar until the mixture is smooth and creamy. This will take about 2-3 minutes. The combination of these ingredients is what makes the Greek Yogurt Brownies moist and rich, enhancing their chocolatey goodness.
Step 4: Incorporate Eggs and Vanilla
Add the eggs and vanilla extract to the wet mixture. Whisk again until fully incorporated, ensuring that no lumps remain. The eggs will bind the ingredients together while adding richness to the brownies, making them even more decadent.
Step 5: Combine Dry Ingredients
In a separate bowl, mix together the whole wheat flour, cocoa powder, baking powder, and salt. Stir this mixture until combined. Adding these dry ingredients separately prevents clumping and ensures an even distribution throughout the Greek Yogurt Brownies.
Step 6: Mix Dry into Wet Ingredients
Gradually add the dry mixture to the wet ingredients, stirring gently until just combined. Be careful not to overmix; this will maintain the moisture and fudginess of your brownies. A few flour streaks are perfectly fine—making them light and tender.
Step 7: Add Chocolate Chips
If you choose to enhance your brownies with dark chocolate chips, gently fold them into the batter at this stage. This adds an extra layer of chocolate richness that complements the Greek yogurt beautifully, creating delightful bites of gooey chocolate in every piece.
Step 8: Pour into the Pan
Carefully pour the brownie batter into the prepared baking pan, spreading it evenly with a spatula. This ensures uniform baking. The batter will be thick, so take your time to spread it smoothly for even cooking and optimal texture throughout.
Step 9: Bake for Perfect Fudginess
Place the pan in the preheated oven and bake for 20-25 minutes. Keep an eye on the brownies, checking doneness with a toothpick. It should come out clean or with a few moist crumbs, signaling that your Greek Yogurt Brownies are ready to come out of the oven.
Step 10: Cool Before Serving
Once baked, let the brownies cool in the pan for about 10 minutes before transferring them to a wire rack to cool completely. This cooling period allows the texture to set, ensuring your brownies maintain that perfect fudgy center.
Step 11: Slice and Serve
After the brownies have cooled completely, slice them into your desired portions. Enjoy this healthier alternative to traditional brownies, packed with protein and goodness from Greek yogurt, perfect for indulging without the guilt.
Storage Tips for Greek Yogurt Brownies
Room Temperature: Store Greek Yogurt Brownies in an airtight container at room temperature for up to 3-4 days to retain their moist texture and delicious flavor.
Fridge: If you live in a particularly warm climate or want to extend the shelf life, keep the brownies in the fridge for up to a week. Just allow them to come to room temperature before serving for the best taste.
Freezer: For long-term storage, freeze the brownies for up to 2-3 months. Wrap them tightly in plastic wrap and then place them in a freezer-safe bag to prevent freezer burn.
Reheating: When ready to enjoy, thaw the brownies in the fridge overnight, or microwave them briefly on low power for a warm, fudgy treat.
Greek Yogurt Brownies Variations
Feel free to unleash your creativity and customize these delightful brownies with these fun and flavorful ideas!
-
Regular Yogurt: Substitute Greek yogurt with regular yogurt for a slightly different texture that still keeps things creamy.
You might find it adds a little extra tanginess to the brownies that can enhance the chocolate flavor. -
Nutty Goodness: Add chopped walnuts or pecans for a crunchy twist.
The nuts provide a delightful contrast to the fudgy texture of the brownies, elevating your sweet treat to the next level. -
Nut Butter Boost: Swirl in peanut butter or Nutella for a rich and decadent flavor.
A little goes a long way in making each bite creamy and indulgent, perfect for those nut butter lovers out there! -
Lower Sugar: Use stevia or monk fruit sweetener instead of traditional sweeteners for a lower-sugar treat.
This swap allows you to enjoy the brownies with less guilt while still satisfying your sweet cravings. -
Fruit Fusion: Add dried fruits like cranberries or cherries for a tangy twist.
Their natural sweetness pairs beautifully with chocolate, making every bite a unique experience! -
Vegan Version: Replace eggs with flax eggs for a vegan-friendly alternative.
The flaxseeds will bind your ingredients just like regular eggs, ensuring your brownies stay moist and delicious. -
Spicy Delight: Add a pinch of cayenne pepper or chili powder for a subtle kick.
This unexpected twist can enhance the chocolate flavor and make your brownies truly stand out. -
Decadent Toppings: Top your brownies with a scoop of ice cream or a dollop of whipped cream.
Pairing these brownies with a creamy topping can transform them into a sumptuous dessert, perfect for special occasions.
For more sweet inspirations, don’t miss out on these amazing treats like Cookie Fudgy Brownies or indulge in the festive flavors of Halloween Oreo Brownies!
Make Ahead Options
These Greek Yogurt Brownies are perfect for meal prep, allowing you to enjoy a delicious treat without added stress! You can prepare the brownie batter up to 24 hours in advance. Simply mix the wet and dry ingredients together, but avoid adding the chocolate chips until you’re ready to bake, to maintain their texture. Once combined, cover the bowl tightly and refrigerate. When you’re set to bake, transfer the batter to your prepared pan, fold in the chocolate chips, and bake as usual. This way, you’ll have fudgy, healthier brownies ready in no time, making busy weeknights a little sweeter!
Expert Tips for Greek Yogurt Brownies
-
Quality yogurt matters: Use plain, unsweetened Greek yogurt for the best flavor and moisture in your brownies. Avoid flavored varieties to control sugar content.
-
Mix gently: Be cautious when combining wet and dry ingredients. Overmixing could lead to dense brownies, so stir until just combined for the best texture.
-
Perfect timing: Start checking for doneness at 20 minutes to avoid overbaking. The brownies should look slightly underbaked with a few moist crumbs on the toothpick.
-
Flavor variations: Feel free to experiment with add-ins! Nuts, dried fruits, or a sprinkle of sea salt can elevate your Greek Yogurt Brownies to a whole new level.
-
Storage solutions: Keep leftovers in an airtight container at room temperature for a few days. For longer storage, freeze them with parchment paper in between layers.
What to Serve with Greek Yogurt Brownies?
Indulging in these fudgy delights opens a world of mouthwatering pairings that elevate your dessert experience.
-
Fresh Berries:
The tartness of raspberries or strawberries complements the rich chocolate beautifully, adding a burst of freshness with every bite. -
Vanilla Ice Cream:
A scoop of creamy vanilla ice cream on the side adds a delightful contrast to the warmth of the brownies, creating a heavenly, indulgent dessert. -
Nut Butter Drizzle:
Whether it’s almond or peanut butter, a drizzle adds a nutty richness that enhances the brownies’ flavors, bringing a satisfying creaminess to each bite. -
Chia Seed Pudding:
This healthy option adds a unique textural contrast and a nutty flavor that pairs perfectly with the chocolatey goodness of the brownies, making for a nutritious dessert combo. -
Greek Yogurt Topping:
A dollop of Greek yogurt provides a cool, creamy texture that balances the sweetness, enriching each bite while keeping it healthier. -
Coffee:
A cup of freshly brewed coffee enhances the chocolate flavors, providing a beautiful balance of warmth and richness, perfect for an afternoon treat. -
Dark Chocolate Ganache:
A silky ganache adds an extra layer of chocolatey indulgence—perfect for those truly decadent moments when you want to elevate your dessert game. -
Caramel Sauce:
Drizzling some warm caramel over the brownies adds a luxurious touch, intensifying their fudgy texture and introducing a delightful sweetness.
Each of these pairings not only complements the rich flavors of Greek Yogurt Brownies but also transforms your dessert into a memorable experience you’ll want to share with family and friends!
Greek Yogurt Brownies Recipe FAQs
How do I choose the right Greek yogurt for this recipe?
Absolutely! It’s crucial to choose plain, unsweetened Greek yogurt for your brownies. This will help control the sweetness and provide the best texture. Avoid flavored options, as they can add unwanted sugars and alter the chocolate flavor. Look for brands that have higher protein content for a richer taste and texture.
How should I store leftover Greek Yogurt Brownies?
To keep those fudgy delights fresh, store them in an airtight container at room temperature for about 3-4 days. If you live in a hot climate, consider refrigerating them for up to a week—a quick tip is to let them return to room temperature for optimal taste. For longer storage, they freeze beautifully—just wrap tightly in plastic wrap and pop them in a freezer-safe bag.
Can I freeze Greek Yogurt Brownies, and if so, how?
Yes, you can definitely freeze these goodies! First, let the brownies cool completely. Then, wrap them in plastic wrap and place them in a freezer-safe bag, ensuring to remove as much air as possible. They can be frozen for up to 2-3 months. When you’re ready to enjoy them, simply thaw them in the fridge overnight or microwave on low power to warm them back up.
What if my brownies turned out too dry?
Very! If your Greek Yogurt Brownies are too dry, it could be due to overmixing or overbaking. Remember, it’s important to mix the batter until just combined and check for doneness at around 20 minutes—take them out of the oven when a toothpick reveals a few moist crumbs. If they are already baked, consider serving them with a dollop of Greek yogurt or ice cream to add moisture and creaminess!
Are Greek Yogurt Brownies safe for those with dietary restrictions?
Absolutely! This recipe can be adjusted to suit various dietary needs. To make them vegan, simply substitute the eggs with flax eggs (1 tablespoon of ground flaxseed mixed with 2.5 tablespoons of water for each egg). For gluten-free versions, use a gluten-free all-purpose flour blend. Always check labels for any potential allergens if you’re serving guests with food sensitivities.
Greek Yogurt Brownies: Indulgent Yet Guilt-Free Chocolate Fudge
Ingredients
Equipment
Method
- Preheat your oven to 350°F (175°C).
- Grease an 8×8-inch baking pan or line it with parchment paper.
- Whisk together Greek yogurt, applesauce, granulated sugar, and brown sugar until smooth.
- Add eggs and vanilla extract, whisking until fully incorporated.
- In a separate bowl, mix together whole wheat flour, cocoa powder, baking powder, and salt.
- Gradually add dry mixture to wet ingredients, stirring until just combined.
- Fold in dark chocolate chips if using.
- Pour batter into the prepared baking pan, spreading evenly.
- Bake for 20-25 minutes, checking doneness with a toothpick.
- Let the brownies cool in the pan for 10 minutes before transferring to a wire rack.
- Slice and serve once cooled completely.
Leave a Reply