
Sautéing onions and garlic in olive oil is one of the simplest ways to elevate a meal, but it gets even better when you stuff that fragrant mixture into vibrant bell peppers! Enter my Classic Stuffed Peppers, a delightful dish that captures the essence of comfort food in every bite. Whether you’re in a rush on a busy weeknight or enjoying a cozy family dinner, these easy-to-make stuffed peppers will steal the show. They’re incredibly versatile, allowing you to customize the filling with ground turkey, luscious cheeses, or even a hearty vegetarian twist. Ready in just 20 minutes, this meal not only ensures you stay away from fast food but also fills your table with color and nutrition. What’s your favorite way to stuff a pepper? Let’s dive in!
Why Are Classic Stuffed Peppers So Irresistible?
Vibrant Color: These beautiful bell peppers bring a splash of color to your table, making every meal a feast for the eyes.
Quick and Easy: Made in just 20 minutes, you can delight your family without spending hours in the kitchen.
Customizable: Whether you prefer ground turkey or a vegetarian option, this recipe adapts to suit any preference, as seen in my delicious Pesto Sauce Pasta twist!
Hearty Comfort: With a warm filling of beef and gooey cheese, each bite feels like a warm hug, perfect for those chilly evenings.
Perfect for Meal Prep: Assemble ahead of time for busy weeknights, so you can enjoy homemade goodness even on your busiest days!
Make your next dinner memorable with these delightful stuffed peppers; you can’t go wrong!
Classic Stuffed Peppers Ingredients
• Here’s everything you need to create these crowd-pleasing Classic Stuffed Peppers!
For the Filling
- Bell Peppers – Choose vibrant ones for a colorful dish; zucchini can work as a fun substitute!
- Ground Beef – The traditional protein choice; replace with ground turkey for a lighter option.
- Cooked Rice – Adds bulk and texture; try cauliflower rice for a low-carb variation!
- Onion – Infuses sweetness; finely chop for quicker cooking and deeper flavor.
- Garlic – Brings aromatic goodness to the filling; minced garlic releases more flavor.
- Tomato Sauce – Adds moisture and richness; crushed tomatoes can be used if preferred.
- Diced Tomatoes – Helps enhance the filling’s texture; be sure to drain excess liquid.
- Italian Seasoning – Gives a fragrant herby profile; a mix of oregano and basil works well too.
- Salt & Black Pepper – Essential for flavor enhancement; season to taste.
For the Toppings
- Mozzarella Cheese – Melts deliciously on top; use cheddar for a sharper flavor twist.
- Parmesan Cheese – Adds a salty, rich finish; finely grated for optimal melting.
For Cooking
- Olive Oil – Perfect for sautéing the aromatic base; feel free to substitute with canola or avocado oil.
- Fresh Parsley – Adds a delightful fresh touch to serve; totally optional but highly recommended!
These ingredients create not just a meal but a heartwarming experience infused with love and care!
Step‑by‑Step Instructions for Classic Stuffed Peppers
Step 1: Preheat the Oven
Begin by preheating your oven to 375°F (190°C). This will ensure it’s ready to bake those delicious Classic Stuffed Peppers to perfection. While the oven warms up, gather your ingredients and baking dish, setting the stage for a comforting meal that’s just minutes away.
Step 2: Prepare the Peppers
Slice the tops off the bell peppers and carefully remove the seeds inside. Rinse them under cool water and set them upright in a baking dish, ensuring they’re stable. Their vibrant colors will soon sparkle with a savory filling, making them the star of your dinner table.
Step 3: Sauté Aromatics
In a large skillet, heat a drizzle of olive oil over medium heat, allowing it to shimmer. Add the finely chopped onion and minced garlic, sautéing them until the onion is translucent, about 3-5 minutes. This aromatic foundation brings warmth and sweetness to your Classic Stuffed Peppers that everyone will adore.
Step 4: Brown the Beef
Next, add the ground beef to the skillet, breaking it up with a spatula. Cook for 5-7 minutes until the meat is browned and no longer pink, stirring occasionally. The combination of beef and sautéed onions will create a rich flavor that forms the heart of your stuffed peppers.
Step 5: Mix in the Filling
Stir in the cooked rice, both tomato sauces, and Italian seasoning to the skillet. Allow this mixture to simmer for 5 minutes, blending the flavors together beautifully. The filling should be thick and fragrant—an indication that it’s ready to stuff into those colorful bell peppers.
Step 6: Stuff the Peppers
Carefully spoon the filling into each pepper until they are packed and overflowing slightly. Press down gently to ensure they are filled generously. This step is where your Classic Stuffed Peppers truly come to life, creating a deliciously hearty meal for your family.
Step 7: Add Water and Cover
Pour about 1/4 inch of water into the bottom of the baking dish; this moisture will help steam the peppers as they bake. Cover the dish with aluminum foil tightly to trap the steam. This method guarantees your peppers cook evenly and remain tender, not dry.
Step 8: Bake the Peppers
Place the baking dish in the preheated oven and bake for 35 minutes. This allows the peppers to become tender while the flavors of the filling meld together beautifully. You’ll know they’re ready when the peppers are vibrant and soft to the touch.
Step 9: Add Cheese and Finish Baking
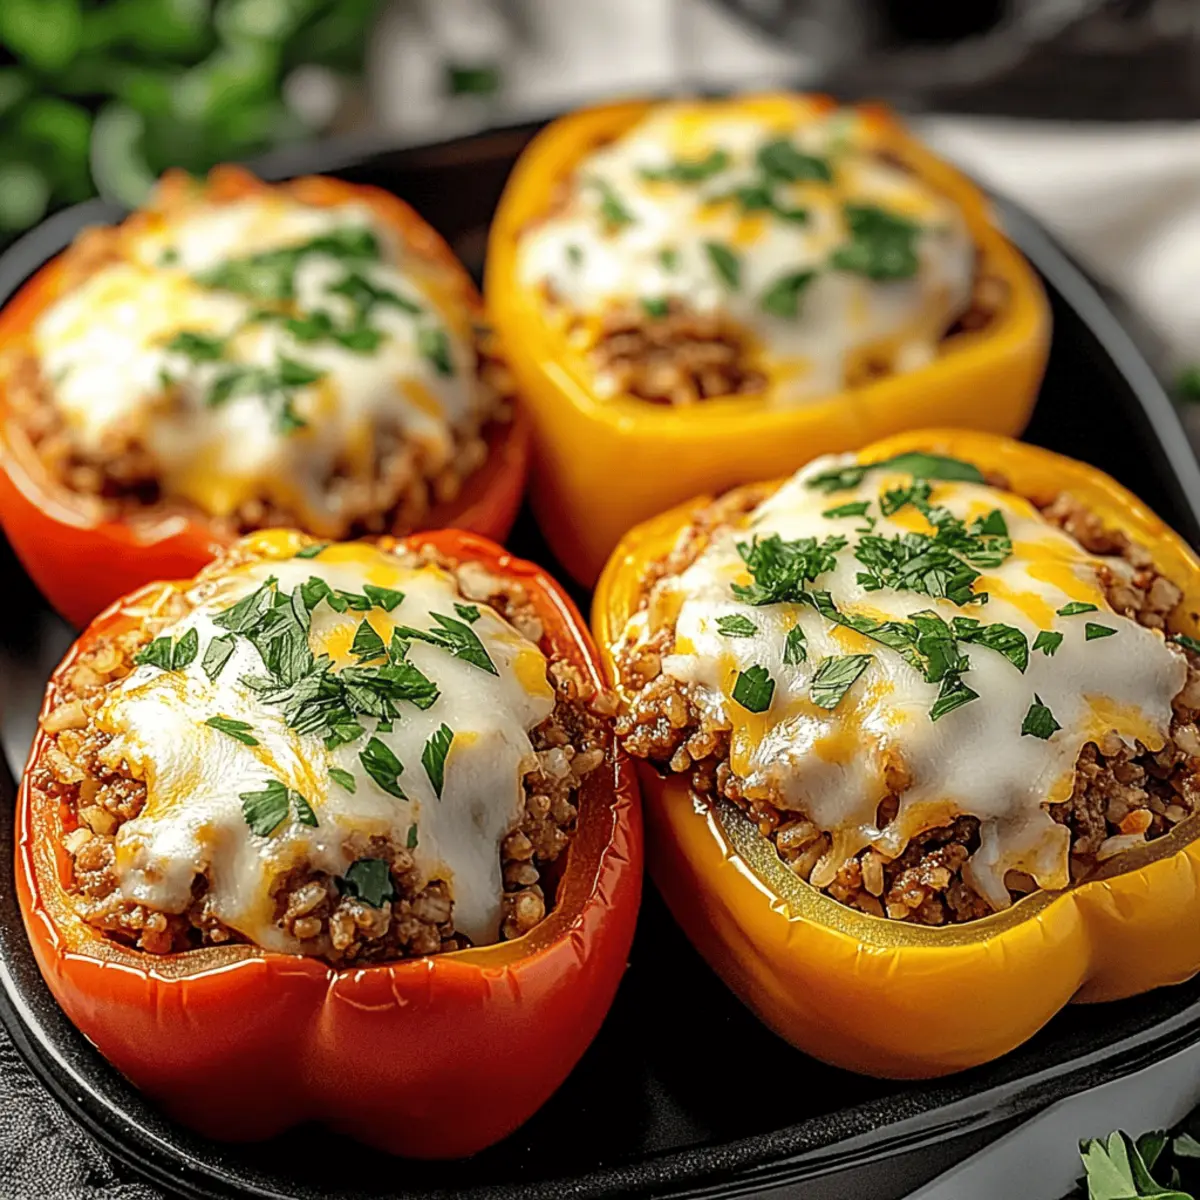
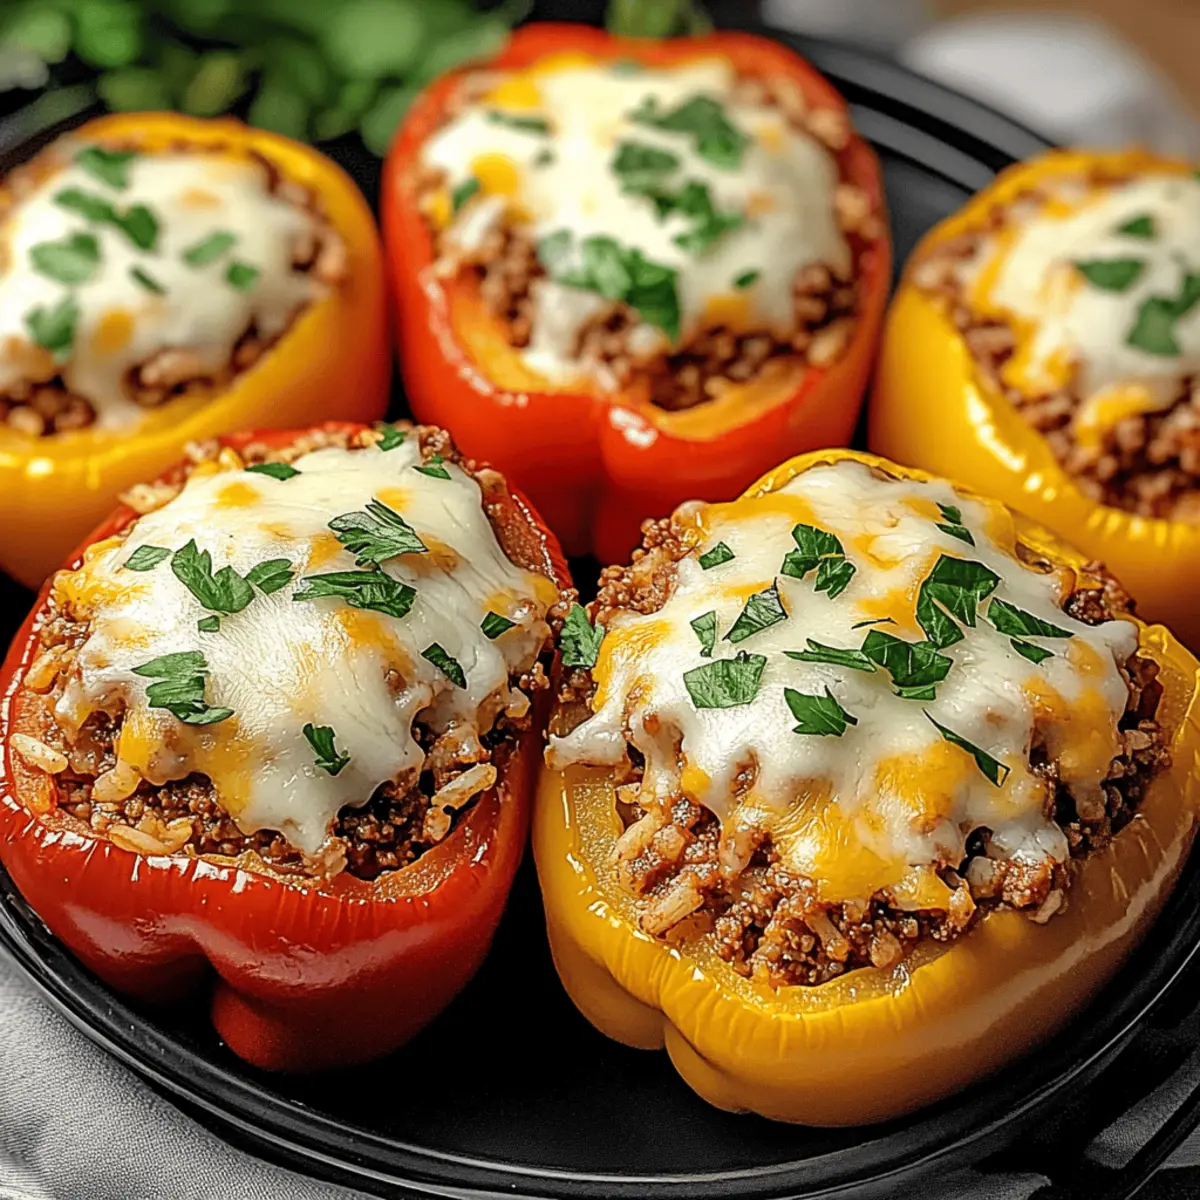
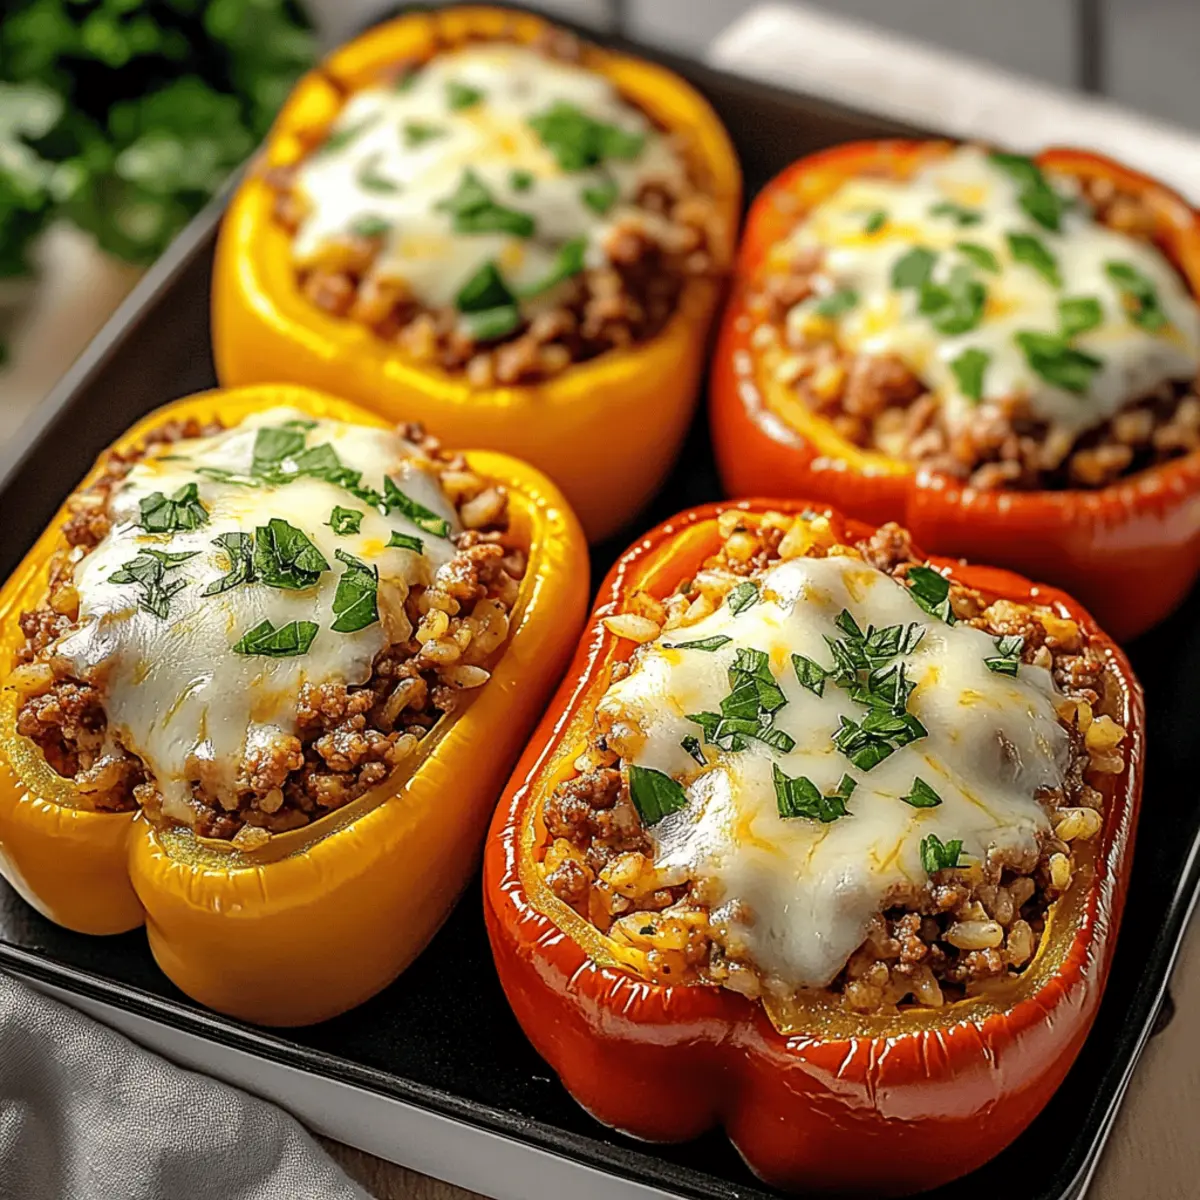
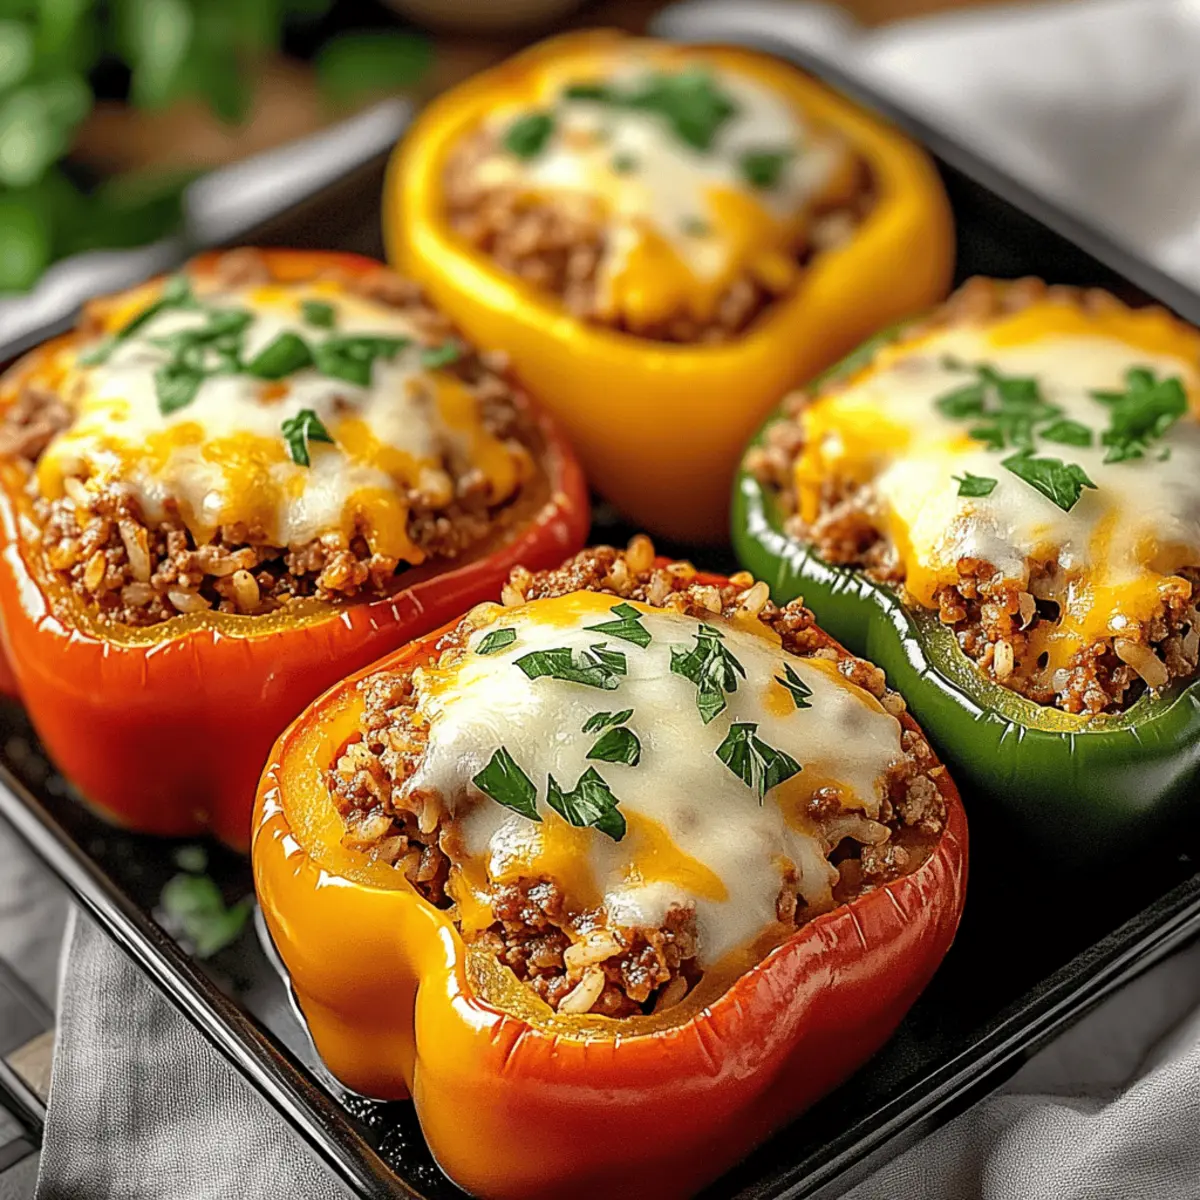
Remove the foil carefully, and sprinkle the mozzarella and Parmesan cheese generously over the tops of the stuffed peppers. Bake uncovered for another 10-15 minutes until the cheese is bubbly and golden brown. This melty layer brings a comforting touch to your Classic Stuffed Peppers.
Step 10: Cool and Serve
Once baked, let the stuffed peppers cool slightly for about 5 minutes. Garnish with fresh parsley for a pop of color and a fresh flavor note, and serve warm. Your family will be delighted by the heartwarming experience that these Classic Stuffed Peppers bring to the table!
How to Store and Freeze Classic Stuffed Peppers
Fridge: Store leftovers in an airtight container for up to 3 days to maintain freshness and flavor. Reheat gently in the microwave or oven when ready to enjoy.
Freezer: Assemble unbaked Classic Stuffed Peppers and wrap tightly in plastic wrap and foil for up to 2 months. When ready to cook, thaw overnight in the fridge and bake as directed.
Reheating: For best results, reheat baked stuffed peppers in the oven at 350°F (175°C) until heated through, about 15-20 minutes. This keeps the peppers tender and the filling flavorful.
Meal Prep: Prepare the filling a day in advance for a quick dinner solution. Just fill the peppers and bake when ready for a wholesome meal without last-minute fuss!
Make Ahead Options
These Classic Stuffed Peppers are a fantastic meal prep solution for busy home cooks! You can prepare the filling up to 24 hours in advance by sautéing the onions, garlic, and ground beef, then mixing in the rice and sauces. Simply store the filling in an airtight container in the refrigerator. When you’re ready to enjoy, stuff the prepped filling into the peppers and add a splash of water to the baking dish to keep them moist during baking. Bake as directed, and you’ll have delicious, homemade stuffed peppers that taste just as wonderful as when made fresh, saving you time on hectic weeknights!
Expert Tips for Classic Stuffed Peppers
-
Choose Uniform Sizes: Ensure all peppers are similar in size for even cooking. This guarantees each pepper is perfectly tender and flavorful.
-
Keep it Moist: Pouring water into the baking dish prevents the peppers from drying out during baking. This is key for ensuring delicious, juicy Classic Stuffed Peppers.
-
Don’t Overstuff: Pack the filling firmly, but avoid overflowing the peppers to prevent mess during baking. A well-stuffed pepper is not only neat but also holds its shape beautifully.
-
Make Ahead: Prepare the filling a day in advance and refrigerate it. Just add cheese before baking for a quick dinner solution that saves you time.
-
Experiment with Flavors: Don’t hesitate to customize your filling with spices or different cheese types. It’s a fun way to make your Classic Stuffed Peppers uniquely yours!
-
Use Fresh Ingredients: Fresh herbs and quality ingredients enhance the overall flavor, making your Classic Stuffed Peppers not just delicious, but truly memorable.
What to Serve with Classic Stuffed Peppers
Elevate your dinner experience with delicious side dishes and drinks that perfectly complement the flavors of these heartwarming stuffed peppers.
-
Crisp Green Salad: A simple salad of mixed greens and vinaigrette adds freshness that balances the savory richness of the stuffed peppers.
-
Garlic Bread: The warm, buttery aroma of garlic bread provides a comforting contrast to the hearty filling, perfect for soaking up any extra sauce from your plate.
-
Quinoa Side Salad: A light quinoa salad with cherry tomatoes and cucumber offers a nutty flavor and a refreshing crunch that pairs beautifully with the peppers.
-
Roasted Vegetables: Seasoned vegetables like zucchini and carrots bring extra nutrients and a caramelized sweetness, enhancing the meal’s vibrant palette.
-
Cheesy Cauliflower Gratin: Creamy and decadent, this dish complements the stuffed peppers’ moist filling, adding layers of comfort to your dinner spread.
-
Red Wine: A glass of medium-bodied red wine brings depth and enhances the savory flavors of the beef and cheese in the stuffed peppers.
-
Light Dessert: A fresh fruit sorbet provides a refreshing end to your meal, cleansing the palate after the rich flavors of stuffed peppers.
Each of these pairings brings a unique element to your dinner, creating a wholesome, flavorful experience that everyone will savor. Enjoy your meal!
Classic Stuffed Peppers Variations
Feel free to let your creativity shine and customize your Classic Stuffed Peppers with these delightful twists!
-
Ground Turkey: Swap out ground beef for ground turkey for a lighter option that’s still packed with flavor. It’s a great way to keep the comfort while cutting down on some calories.
-
Vegetarian Delight: Use a mixture of quinoa and black beans instead of meat for a hearty, plant-based alternative that’s rich in protein and nutrients. The texture combination offers a satisfying bite, perfect for any meatless Monday!
-
Cheese Variety: Experiment with different cheeses like gouda or pepper jack to find your perfect melt. Each cheese adds a unique flavor profile that transforms your classic dish into something new and exciting!
-
Spicy Kick: Add diced jalapeños or red pepper flakes to the filling for heat that excites the palate. A little spice can elevate your meal while complementing the sweetness of the bell peppers beautifully.
-
Cauliflower Rice: For a low-carb version, swap traditional rice with cauliflower rice. It lightens the meal without compromising on heartiness, letting the pepper flavor shine.
-
Wild Rice: Incorporate wild rice for a richer texture and nutty flavor. The unique chewiness pairs wonderfully with the savory filling, offering a delightful twist that keeps everyone guessing.
-
Herb Boost: Try adding fresh basil or cilantro into the filling for a fragrant herbaceous note that brings fresh life to your Classic Stuffed Peppers. It’s an easy way to brighten the flavors!
Whether you decide to experiment with these variations or keep it classic, your stuffed peppers will surely impress—just like the comforting satisfaction of my flavorful Pesto Sauce Pasta. Which variation are you excited to try first?
Classic Stuffed Peppers Recipe FAQs
How do I choose ripe bell peppers?
Absolutely! Look for bell peppers that are firm and have vibrant, glossy skin. Avoid any with dark spots, wrinkles, or soft patches, as these can indicate overripeness. If you prefer sweeter flavors, opt for yellow or red bell peppers; green ones tend to be slightly bitter.
What is the best way to store leftover stuffed peppers?
Very! Store any leftovers in an airtight container in the fridge for up to 3 days. Make sure they cool to room temperature before sealing. Reheat gently in the microwave or oven until warmed throughout, as this will help retain the peppers’ flavor and texture.
Can I freeze unbaked stuffed peppers?
Yes! To freeze your Classic Stuffed Peppers, prepare them up until the baking step, then wrap each pepper tightly in plastic wrap followed by aluminum foil. They can be frozen for up to 2 months. When you’re ready to cook, let them thaw in the fridge overnight and bake according to the recipe instructions, adding a few extra minutes if baking from frozen.
What should I do if my filling is too dry?
If your filling seems dry, don’t worry! You can add a splash of chicken or vegetable broth to moisten it. Alternatively, a bit more tomato sauce can help add moisture. Mixing in a tablespoon of olive oil can also enhance the richness! The key is to ensure the filling is slightly wet but not soupy before stuffing the peppers.
Can my pet eat these stuffed peppers?
It’s best to keep this dish away from your furry friends! Ingredients like onion and garlic can be harmful to pets, so avoid sharing your Classic Stuffed Peppers with them. If you’re looking to let them enjoy something home-cooked, consider making a plain quinoa and veggie mix without harmful additives!
How can I adapt the recipe for dietary restrictions?
Very! For gluten-free options, ensure your rice is certified gluten-free and replace traditional tomato sauce with a gluten-free variant. For dairy-free modifications, consider using plant-based cheeses or omitting them entirely. You can also substitute the ground beef with lentils or quinoa for a hearty vegetarian version that’s still packed with nutrients!
Classic Stuffed Peppers: Comfort Food in 20 Minutes
Ingredients
Equipment
Method
- Preheat your oven to 375°F (190°C).
- Slice the tops off the bell peppers and remove the seeds. Rinse under cool water and set upright in a baking dish.
- Heat olive oil in a skillet over medium heat, add onion and garlic, and sauté for 3-5 minutes until translucent.
- Add ground beef to the skillet, breaking it up and cooking for 5-7 minutes until browned.
- Stir in cooked rice, tomato sauces, and Italian seasoning. Simmer for 5 minutes.
- Spoon the filling into each pepper until packed and overflowing slightly.
- Pour about 1/4 inch of water in the dish, cover with foil, and bake for 35 minutes.
- Remove the foil, sprinkle cheese on top, and bake uncovered for another 10-15 minutes.
- Let the stuffed peppers cool for 5 minutes, garnish with parsley, and serve warm.
Leave a Reply