
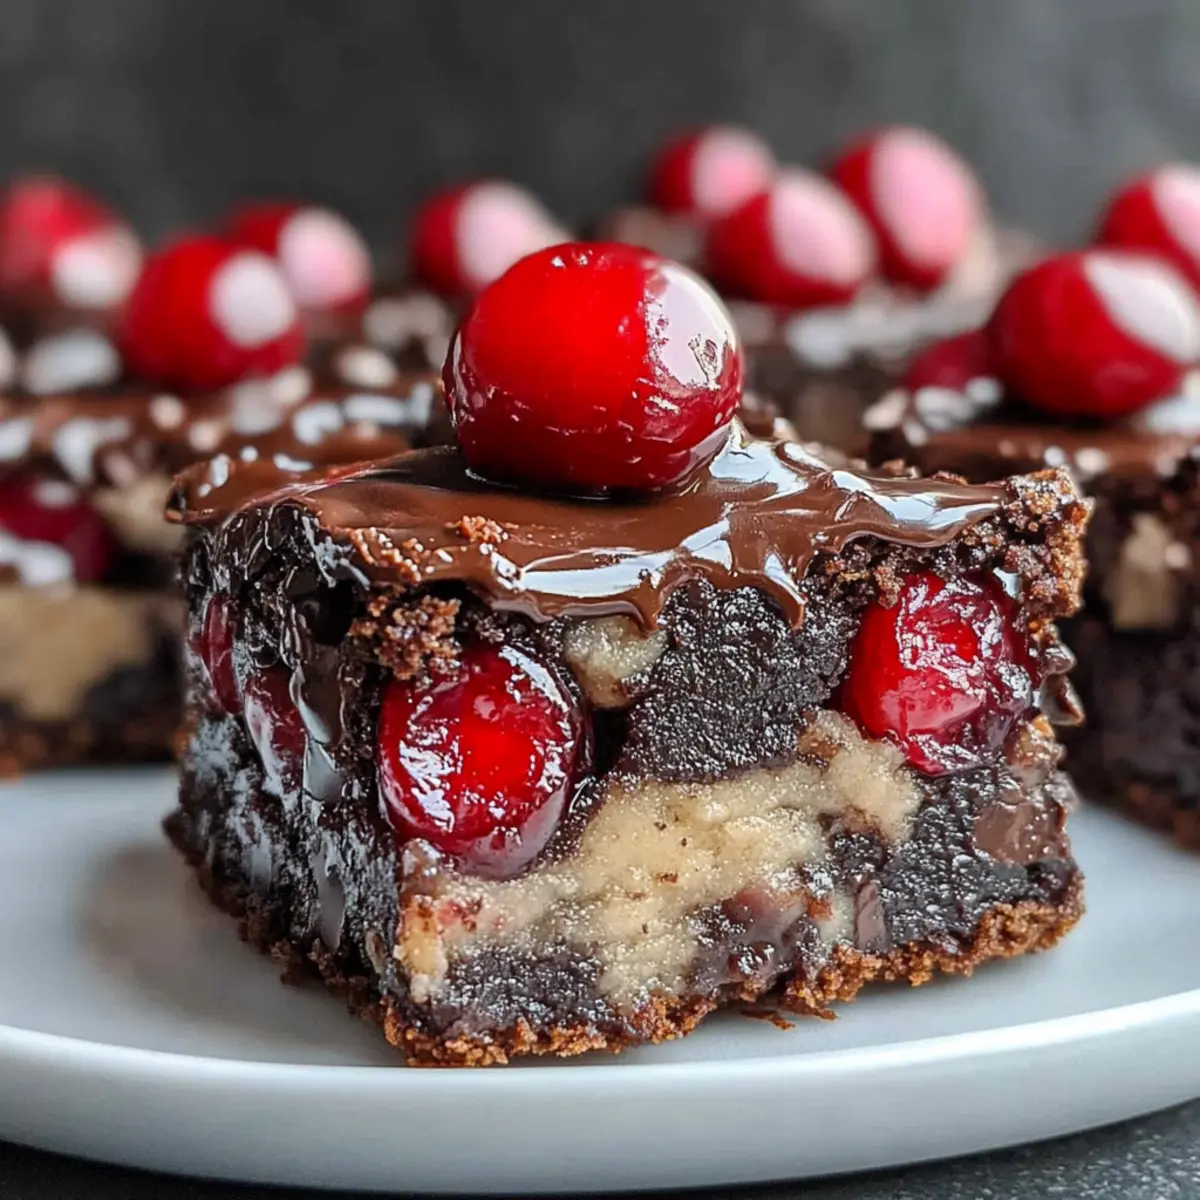
As I stood in my kitchen, the rich aroma of melting chocolate wafted through the air, instantly transporting me to a cozy café where indulgence reigns supreme. That’s the moment I decided to create these Chocolate Covered Cherry Magic Bars. A perfect marriage of fudgy brownie goodness and the sweet tartness of juicy cherries, these bars are not just a dessert; they’re an experience. What I love most about this easy dessert is how adaptable it can be—whether you’re prepping for a potluck or a quiet night in, they’re a guaranteed crowd-pleaser. Plus, they store beautifully in the fridge, allowing you to savor each blissful bite for days. So, who’s ready to sweeten up their day with this delightful treat? Let’s dive into the recipe!
Why are Chocolate Covered Cherry Magic Bars amazing?
Irresistible Flavor: Each bite bursts with rich chocolate and juicy cherries, delivering a sweet yet tart explosion that will leave your friends and family begging for more.
Easy to Make: With simple ingredients and straightforward instructions, anyone can whip up these bars in no time. Perfect for those who want to ditch the fast food for homemade goodness!
Versatile Treat: Whether you prefer fresh maraschino cherries or dried fruit soaked in spirit for an adult twist, feel free to customize to your taste!
Crowd-Pleaser: Ideal for potlucks and gatherings, these bars are sure to impress guests at your next event. Serve them up alongside comforting recipes like classic chocolate chip cookies or easy brownie recipes for a sweet spread!
Make Ahead: These bars not only store well, but their flavors deepen after a day in the fridge, making them a fantastic make-ahead option. Enjoy them fresh or chilled for irresistible delight!
Chocolate Covered Cherry Magic Bars Ingredients
• Truly delightful, so let’s get started!
For the Brownie Base
- All-purpose flour – Provides structure; use a scoop and level method to prevent dense bars.
- Granulated sugar – Adds sweetness; feel free to reduce by 1/4 cup for a less sweet version.
- Salt – Enhances overall flavor and balances the sweetness.
- Baking powder – Gives the bars a light texture; don’t skip it!
- Cocoa powder – Infuses rich chocolate flavor and dark color.
- Butter – Adds moisture and a velvety richness; melt with chocolate chips for the best blend.
- Eggs – Imparts structure and moisture; using room temperature eggs ensures even mixing.
For the Cherry Layer
- Maraschino cherries – Offers tartness and vibrant color; remember to drain and dry them well to avoid sogginess!
For the Topping
- Semi-sweet chocolate chips – Deepens the chocolate flavor in the topping; use high-quality for better taste.
- Sweetened condensed milk – Binds all toppings together and adds a creamy sweetness; this is essential for achieving that gooey texture.
Include these essential ingredients, and you’ll be well on your way to baking your very own Chocolate Covered Cherry Magic Bars that will delight anyone who takes a bite!
Step‑by‑Step Instructions for Chocolate Covered Cherry Magic Bars
Step 1: Preheat the Oven
Begin by preheating your oven to 350°F (175°C). While the oven warms up, take a 9×13-inch baking pan and line it with parchment paper, allowing some excess paper to hang over the sides. This will make it easier to lift the finished Chocolate Covered Cherry Magic Bars out of the pan for slicing later.
Step 2: Mix Dry Ingredients
In a large mixing bowl, whisk together the all-purpose flour, granulated sugar, salt, baking powder, and cocoa powder until well combined. This step is crucial as it blends the dry ingredients evenly, ensuring a consistent texture in your brownie base. Set this dry mixture aside while you prepare the wet ingredients.
Step 3: Melt Butter and Chocolate
In a microwave-safe bowl, combine the butter and ¼ cup of semi-sweet chocolate chips. Microwave in 30-second intervals, stirring in between until the mixture is creamy and smooth. Allow this melted mixture to cool slightly; it adds richness to the Chocolate Covered Cherry Magic Bars without cooking the eggs when combined.
Step 4: Combine Ingredients
Pour the cooled melted butter and chocolate mixture into the dry ingredients. Using a spatula, mix gently until just combined; it’s important not to over-mix to maintain a fudgy texture. Once fully mixed, spread the batter evenly in the prepared baking pan, leveling it out with the spatula.
Step 5: Add Cherry Layer
Carefully halve the maraschino cherries and distribute them evenly over the chocolate brownie base. Gently press the cherries into the batter to ensure they adhere as the bars bake, enhancing the flavor and aesthetic of your Chocolate Covered Cherry Magic Bars.
Step 6: Top Bars
Sprinkle the remaining semi-sweet chocolate chips generously over the cherry layer. For an extra touch of sweetness, drizzle the sweetened condensed milk evenly across the top. This combination creates the delightful gooey topping that complements the fudgy base perfectly.
Step 7: Bake the Bars
Slide the pan into the preheated oven and bake for 25-30 minutes. You’ll know they’re done when the edges are set and the center remains slightly jiggly. Keep an eye on them; over-baking can lead to dry bars, which we want to avoid for these decadent Chocolate Covered Cherry Magic Bars.
Step 8: Cool Completely
Once baked, remove the pan from the oven and set it on a wire rack to cool. Allow the bars to cool in the pan for at least 2 hours; this resting time is essential for achieving the perfect texture. For best results, refrigerate for a few hours before slicing, as this helps to firm them up beautifully.
Chocolate Covered Cherry Magic Bars Variations
Feel free to get creative with your Chocolate Covered Cherry Magic Bars for a personalized touch that tantalizes your taste buds!
-
Dried Cherries: Substitute maraschino cherries with dried cherries soaked in warm water for a chewy texture. This swap adds a delightful depth to your bars!
-
Boozy Cherries: For an adult twist, soak your cherries in cherry brandy or rum before adding them to the mixture. It’s a fantastic way to elevate the flavor profile for a more sophisticated dessert.
-
Chocolate Bliss: Swap semi-sweet chocolate chips for dark chocolate chips for a richer and slightly less sweet taste. Each bite will be an explosion of deep chocolate flavor!
-
Nutty Crunch: Add chopped nuts such as pecans or walnuts to the brownie layer for an added crunch. The nuts provide a perfect contrast to the chewy texture of the bars.
-
Gluten-Free Option: Use a gluten-free flour blend in place of all-purpose flour to cater to gluten-sensitive friends, ensuring everyone can enjoy this sweet treat without compromise.
-
Less Sugar: Reduce the sugar in the base by 1/4 cup for a subtler sweetness. Perfect for those who enjoy a balance between sweet and chocolatey without overwhelming their palate.
-
Floating Marshmallows: Sprinkle mini marshmallows on top before baking for a twist! They’ll melt into gooey clouds on top of your bars, adding a sweet, toasted flavor.
-
Spice It Up: Add a pinch of cayenne pepper or cinnamon to the brownie batter for a warm, spicy kick. This unexpected twist will have your taste buds singing with joy!
You can explore these variations based on your cravings and enjoy serving these delightful bars alongside favorites like classical chocolate chip cookies or a rich caramel dessert to create a scrumptious dessert spread!
What to Serve with Chocolate Covered Cherry Magic Bars
Indulging in these sweet treats is an experience meant to be savored alongside other delicious dishes that complement their rich flavors.
- Vanilla Ice Cream: A classic pairing, the creamy coldness balances the warm, fudgy texture of the bars perfectly.
- Fresh Berries: Juicy strawberries or raspberries add a refreshing tartness, enhancing the flavors of the cherries.
- Coffee: The bold notes of freshly brewed coffee offer a delightful contrast to the sweetness, making for a cozy dessert experience.
- Chocolate Sauce: Drizzle additional chocolate sauce over the top for an extra indulgent layer of chocolaty goodness.
- Whipped Cream: Light and airy, it adds a touch of elegance and balances the rich brownie base beautifully.
- Mint Leaves: A few fresh mint leaves add a bright pop of flavor and freshness, perfect for a festive touch.
- Hazelnut Coffee: Pair these magic bars with a warm cup of hazelnut coffee for a delightful afternoon pick-me-up.
- Caramel Sauce: A drizzle of caramel sauce introduces a lovely sweetness that pairs beautifully with the chocolate and cherries.
- Pistachios: Chopped, toasted pistachios add a crunchy texture and nutty flavor that complements the bars’ fudgy nature.
With these delightful pairings, you can create a dessert spread that will leave everyone wanting more!
Expert Tips for Chocolate Covered Cherry Magic Bars
-
Perfect Baking Time: Keep a close eye on your bars during baking. They should be set at the edges yet slightly jiggly in the center for that fudgy texture.
-
Room Temperature Eggs: Using room temperature eggs helps incorporate them better into the batter, ensuring a smooth and even consistency in your Chocolate Covered Cherry Magic Bars.
-
Avoid Sogginess: Properly dry your maraschino cherries after draining them. Excess moisture can lead to soggy bars, so a little extra care goes a long way!
-
Cooling Matters: Let the bars cool completely in the pan before cutting them. This helps maintain clean slices and enhances the overall presentation.
-
Ingredient Substitutions: If aiming for a gluten-free version, swap the all-purpose flour with a gluten-free blend to keep the deliciousness intact without compromising texture.
How to Store and Freeze Chocolate Covered Cherry Magic Bars
Room Temperature: Store the bars in an airtight container at room temperature for up to 3 days. This keeps them fresh and gooey, perfect for quick cravings!
Fridge: For longer-lasting freshness, keep the Chocolate Covered Cherry Magic Bars in the fridge. They can be stored there for up to a week; just ensure they’re sealed to prevent drying out.
Freezer: If you want to enjoy these delightful bars even later, freeze them wrapped tightly in plastic wrap and aluminum foil for up to 3 months. Thaw overnight in the fridge before serving.
Reheating: For a warm treat, reheat individual bars in the microwave for about 10-15 seconds until they’re just warmed through, enhancing the gooey texture.
Make Ahead Options
These Chocolate Covered Cherry Magic Bars are a dream for meal prep enthusiasts! You can mix the dry ingredients and prepare the brownie batter up to 24 hours in advance by storing it in the refrigerator. Additionally, you can halve and dry the maraschino cherries ahead of time, which helps prevent any sogginess when you bake. When you’re ready to bake, simply spread the batter in the pan, layer the cherries, sprinkle the chocolate chips, and drizzle the sweetened condensed milk. This approach not only saves you precious time on busy weeknights but also enhances the flavors, making these bars just as delicious after a day in the fridge! Enjoy a delightful homemade dessert with minimal effort.
Chocolate Covered Cherry Magic Bars Recipe FAQs
What kind of cherries should I use for the best flavor in my Chocolate Covered Cherry Magic Bars?
I recommend using maraschino cherries for their sweet and tart contrast. Ensure they’re well-drained and dried before adding to your bars. Alternatively, for a unique twist, you can use dried cherries soaked in warm water to give a chewier texture!
How should I store Chocolate Covered Cherry Magic Bars?
For best results, store your bars in an airtight container at room temperature for up to 3 days. For longer storage, they can last up to a week in the fridge. Just remember to let them cool completely before sealing to maintain their gooey texture!
Can I freeze Chocolate Covered Cherry Magic Bars?
Absolutely! You can freeze these bars for up to 3 months. To do this, wrap them tightly in plastic wrap and then in aluminum foil to prevent freezer burn. When you’re ready to enjoy, thaw them in the fridge overnight for the best texture.
What should I do if my bars turn out too dry?
If your Chocolate Covered Cherry Magic Bars are dry, they may have been overbaked. Keep a close watch during the last few minutes of baking—when the edges are set and the center is still slightly jiggly, it’s time to take them out. You can also add a drizzle of chocolate or a scoop of ice cream when serving to add moisture!
Are there any dietary considerations I should be aware of?
Yes! If you’re concerned about gluten, you can easily make these bars gluten-free by substituting all-purpose flour with a gluten-free blend. Additionally, always check ingredient labels for allergens if you’re serving guests with dietary restrictions.
How long do the flavors deepen after making the bars?
I often find that these Chocolate Covered Cherry Magic Bars taste even better the next day! Allowing them to sit in the fridge for at least 2 hours helps meld the flavors. However, for optimal taste, I suggest waiting a full day if you can!
Irresistible Chocolate Covered Cherry Magic Bars for Sweet Lovers
Ingredients
Equipment
Method
- Preheat your oven to 350°F (175°C) and line a 9x13-inch baking pan with parchment paper.
- In a large bowl, whisk together flour, sugar, salt, baking powder, and cocoa powder until well combined.
- Melt butter and 1/4 cup of chocolate chips in a microwave-safe bowl until creamy and cool slightly.
- Combine the melted mixture with dry ingredients, mix gently, and spread evenly in the prepared pan.
- Halve the maraschino cherries and press them into the chocolate brownie base.
- Sprinkle remaining chocolate chips over the cherry layer and drizzle with sweetened condensed milk.
- Bake in the preheated oven for 25-30 minutes, the edges should be set and center slightly jiggly.
- Cool in the pan for at least 2 hours, refrigerate for best results before slicing.
Leave a Reply