
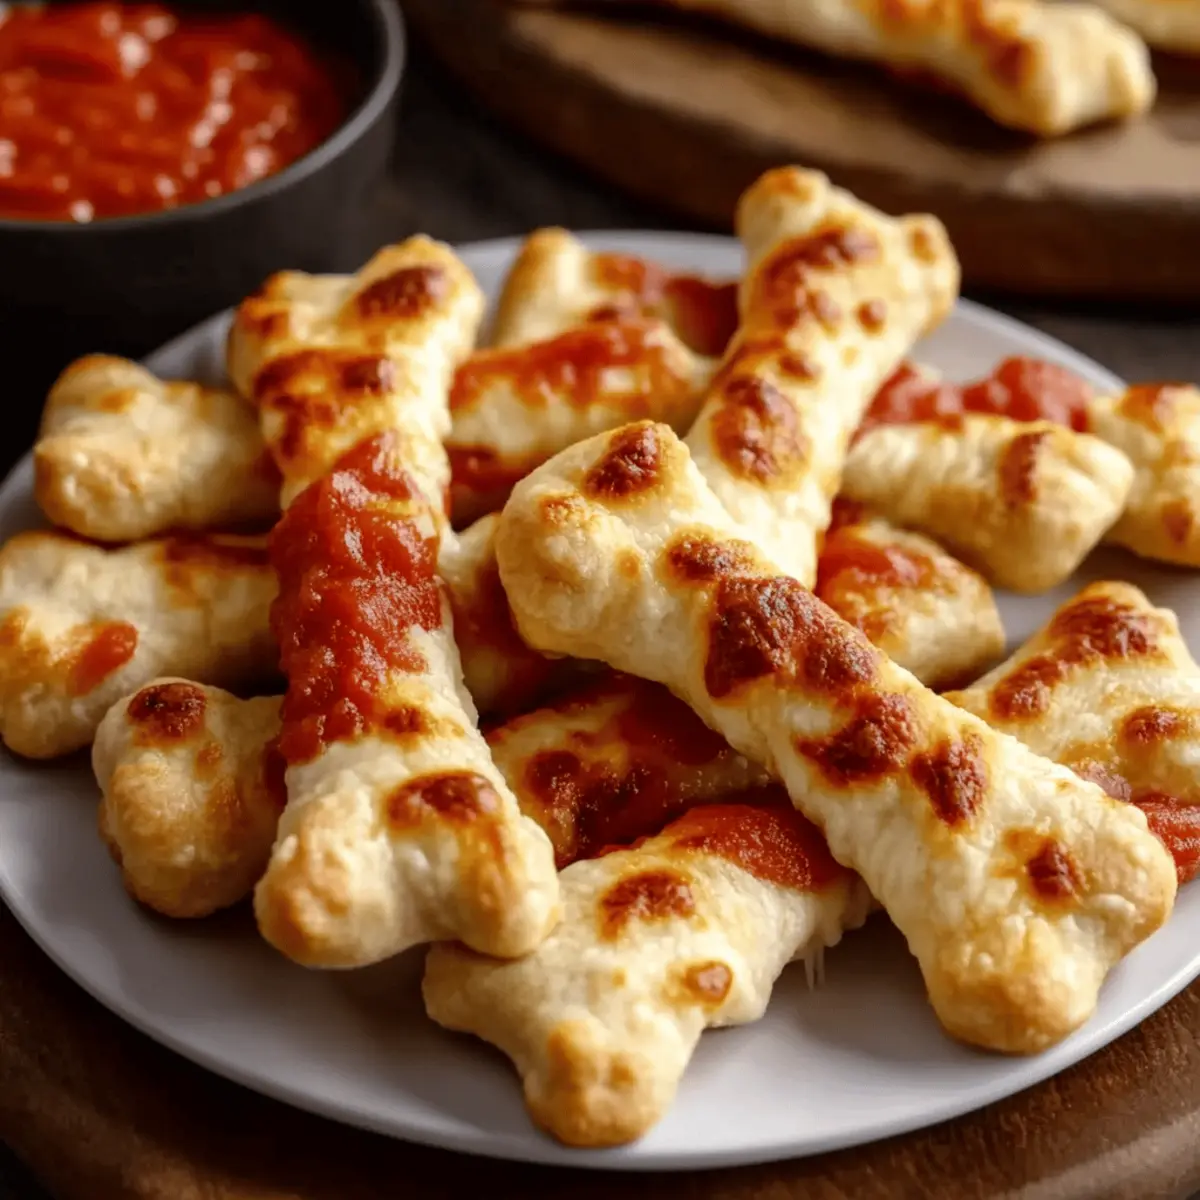
As I was whisking flour and unrolling dough, a ghostly idea crept into my mind: why not create a whimsical Halloween snack? Enter these Cheesy Halloween Breadstick Bones, crafted to bring a delightful twist to your autumn gatherings. Perfectly spooky and vegetarian-friendly, they’re not only an easy appetizer but also a hit with guests of all ages. Imagine a crispy, golden crust giving way to gooey, melty cheese, served warm with marinara sauce for that perfect “bloody” dip. Whether you’re hosting a Halloween bash or just craving something fun and festive, these breadstick bones promise to add a sprinkle of magic to your table. Ready to conjure up some kitchen fun?

Why Are These Breadstick Bones a Must-Try?
Simplicity makes these Cheesy Halloween Breadstick Bones incredibly easy to whip up, even for novice bakers. Crowd-Pleasing appeal ensures that kids and adults alike will be reaching for these cheesy treats at your Halloween gathering. Versatility allows you to customize the recipe with various cheeses and dips, like Cheesy Garlic Chicken or spicy marinara. Spooky Presentation will impress your guests, transforming ordinary dough into playful, bone-shaped snacks. Plus, they’re perfect for make-ahead gatherings; simply prepare in advance and bake when you’re ready!
Cheesy Halloween Breadstick Bones Ingredients
For the Dough
- All-purpose flour – Perfect for dusting the surface to prevent sticking while shaping.
- Pizza dough – The main structure providing a chewy, fluffy texture; store-bought works well for convenience.
For the Flavor
- Unsalted butter (2 tablespoons, melted) – Adds richness and helps achieve a golden crust; substitute olive oil for a lighter option.
- Grated Parmesan cheese (½ cup) – Enhances flavor and creates a delightful crispy top layer; nutritional yeast is a great dairy-free alternative.
- Shredded mozzarella cheese (1 cup) – Offers that stretchy, melty quality everyone loves; for a different taste, try provolone or Gruyère.
For Dipping
- Marinara sauce – A classic for dipping those spooky breadstick bones; ranch, pesto, or a cheesy dip make excellent alternatives too.
These Cheesy Halloween Breadstick Bones are sure to be a hit as part of your spooky snack spread!
Step‑by‑Step Instructions for Cheesy Halloween Breadstick Bones
Step 1: Preheat the Oven
Begin by preheating your oven to 375°F (190°C). While that heats up, prepare your workspace by lining two baking sheets with parchment paper. This will ensure your Cheesy Halloween Breadstick Bones bake evenly and won’t stick, making for an easier cleanup afterward.
Step 2: Prepare the Dough
Take your pizza dough and let it sit out for about 20-30 minutes so it reaches room temperature, making it easier to shape. Dust your clean surface with a light coating of all-purpose flour to prevent sticking, then divide the dough into 10 equal pieces, setting them aside as you prepare to shape those whimsically spooky bones.
Step 3: Shape the Breadsticks
Now it’s time to roll! Grab each piece of dough and roll it into an 8-inch long rope. Ensure the ends are a bit thicker for that typical bone appearance. To create bone-like details, snip the ends of each breadstick about 1 inch deep, gently pulling them apart to emphasize the shape, bringing your Cheesy Halloween Breadstick Bones to life.
Step 4: Arrange on Baking Sheets
Carefully place each shaped breadstick onto the lined baking sheets, making sure to leave enough space between them so they don’t stick together during baking. This step is crucial to maintaining the playful bone shapes, allowing your appetizer to retain its fun presentation while baking.
Step 5: Add Butter and Cheese
Brush the melted unsalted butter generously over each breadstick, ensuring every bit is coated for a rich flavor. Follow this by sprinkling a generous amount of grated Parmesan cheese over the top, which will create a deliciously crispy layer on your Cheesy Halloween Breadstick Bones as they bake.
Step 6: Bake the Breadsticks
Place your baking sheets into the preheated oven and let the breadsticks bake for about 15 minutes. Keep a close eye on them, as they should puff up and turn a lovely light golden color, signaling they’re ready for the next step in this Halloween fun!
Step 7: Melt the Mozzarella
Once you’ve removed the breadsticks from the oven, it’s time to amp up the cheesy goodness! Sprinkle shredded mozzarella cheese on top of each breadstick, creating a gooey and melty layer. Return them to the oven for an additional 5-7 minutes, or until the mozzarella is bubbling and has reached a delightful golden brown.
Step 8: Cool and Serve
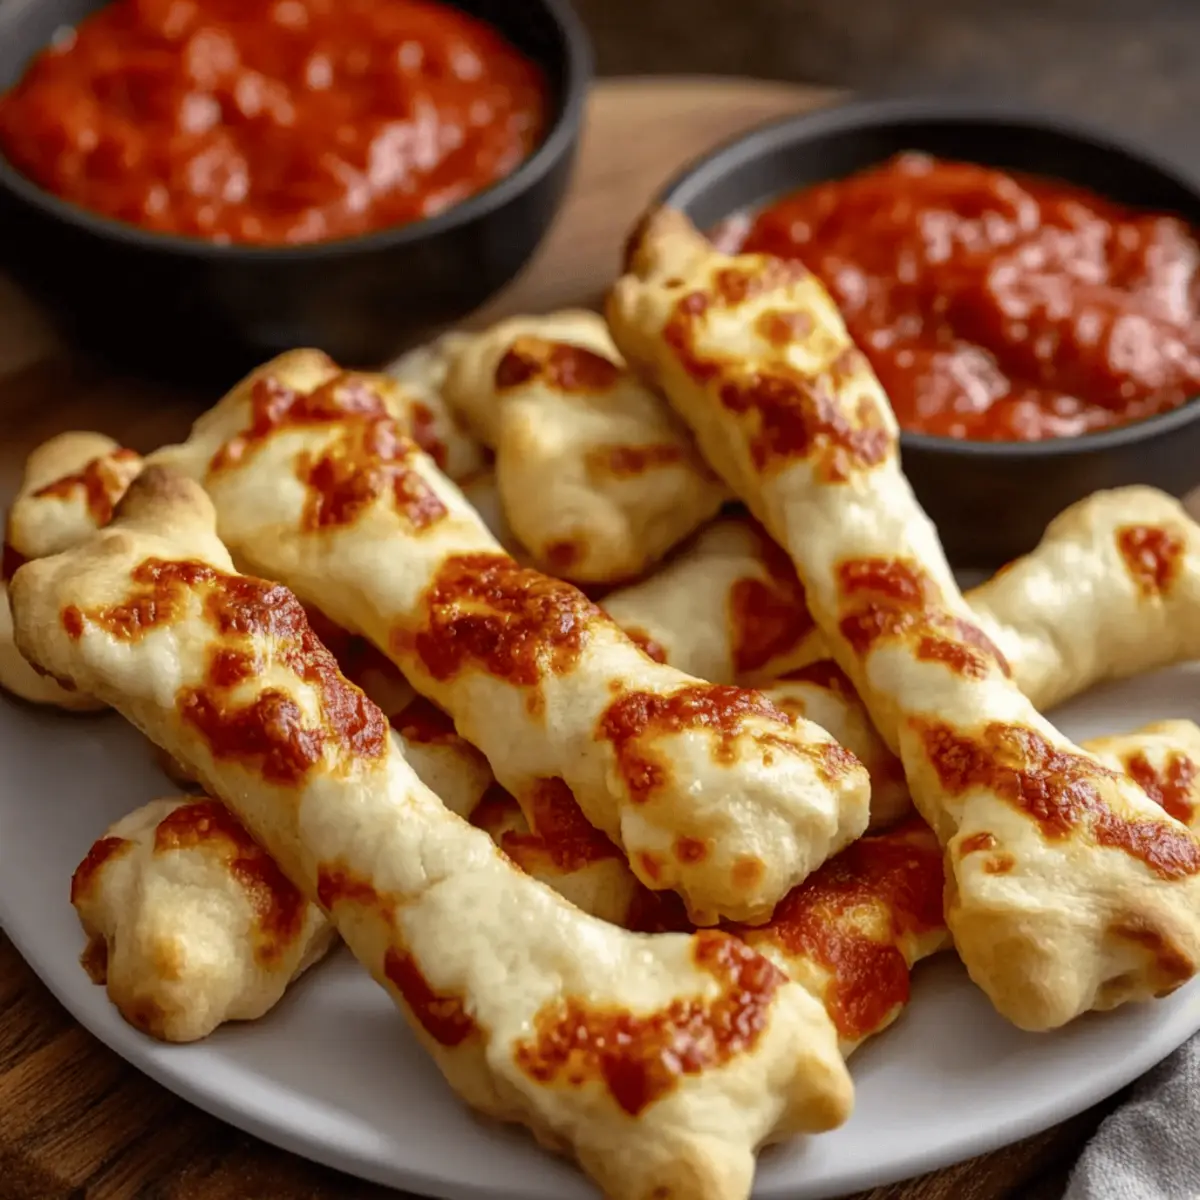
After they’re beautifully melted and bubbly, take the breadsticks out of the oven and allow them to cool slightly for about 5 minutes. This cooling period will help them set a little bit, making them easier to handle. Serve warm alongside marinara sauce for dipping, and get ready for your guests to enjoy these Cheesy Halloween Breadstick Bones!
Tips for the Best Cheesy Halloween Breadstick Bones
Room Temperature Dough: Let the pizza dough sit out for at least 20-30 minutes to make it easier to shape and avoid cracks.
Avoid Overcrowding: Give your breadsticks space on the baking sheets to help them maintain their shape and prevent sticking during baking.
Perfect Cheese Melting: Add mozzarella cheese towards the end of baking for that gooey, bubbling effect that makes these Cheesy Halloween Breadstick Bones truly irresistible.
Watch for Color: Keep an eye on the breadsticks during baking; remove them when they are lightly golden to avoid overcooking, keeping that delicate texture intact.
Storage Tips: To enjoy leftovers, store them in an airtight container for up to 3 days. Reheat in the oven rather than the microwave to maintain the crispy exterior.
Make Ahead Options
These Cheesy Halloween Breadstick Bones are perfect for busy cooks looking to save time during festive gatherings! You can prepare the breadsticks up to 24 hours in advance. Simply shape the dough into bone forms, brush with melted butter, and sprinkle with Parmesan cheese before covering and refrigerating them. This prepped dough will stay fresh in the fridge, ready to bake when you’re set to impress your guests. When it’s time to serve, just take them out, let them sit at room temperature for about 15 minutes, then sprinkle on the mozzarella cheese and bake as directed. This will keep your Cheesy Halloween Breadstick Bones just as delicious and cheesy as if they were made fresh!
Cheesy Halloween Breadstick Bones Variations
Feel free to get creative and customize these Cheesy Halloween Breadstick Bones to suit your taste and dietary needs!
-
Whole Wheat Dough: Swap regular pizza dough for whole wheat for a heartier flavor and a healthier option.
-
Dairy-Free Delight: Use nutritional yeast instead of Parmesan and a dairy-free cheese for a fully vegan snack that everyone can enjoy.
-
Spicy Twist: Incorporate pepper jack cheese for a surprising kick, elevating the flavor profile to a whole new level.
-
Smoky Flavor: Try smoked gouda instead of mozzarella for a deliciously unique breadstick that even smoky flavor lovers will adore.
-
Herbed Goodness: Add a teaspoon of garlic powder or Italian herbs into the dough for an aromatic twist that adds an extra pop of flavor.
-
Cheesy Dip Replacement: Instead of marinara, serve with a creamy ranch or a zesty pesto for a different dipping experience that brightens your appetizer spread.
-
Halloween Shapes: Use cookie cutters to create other spooky shapes like bats or pumpkins from your pizza dough, making it more festive for the occasion.
-
Cheesy Garlic Variation: Brush the breadsticks with a mixture of melted butter and minced garlic before sprinkling cheese for a delectable cheesy garlic bread effect.
Experimenting with these variations will keep your gatherings lively and engaging while ensuring everyone finds something to love! For more inspiration, check out the zesty Spicy Southern Cheesy recipe, or try serving your breadsticks alongside a warm Cheesy Garlic Chicken dip!
How to Store and Freeze Cheesy Halloween Breadstick Bones
Room Temperature: Store leftover Cheesy Halloween Breadstick Bones in an airtight container at room temperature for up to 1 day. They will stay fresh as long as they are properly sealed.
Fridge: If you need to keep them longer, refrigerate in an airtight container for up to 3 days. This helps maintain their cheesy goodness while preventing them from becoming stale.
Freezer: For longer storage, you can freeze the breadsticks for up to 2 months. Place them in a freezer-safe container, ensuring they are well-wrapped to avoid freezer burn.
Reheating: To reheat, simply place the frozen Cheesy Halloween Breadstick Bones in a preheated oven at 350°F (175°C) for about 15-20 minutes or until heated through and crispy.
What to Serve with Cheesy Halloween Breadstick Bones
As you prepare to thrill your guests with spooky snacks, consider these perfectly compatible pairings to elevate your autumn feast.
- Creamy Tomato Soup: A warm bowl of tomato soup complements the gooey cheese, enhancing the breadsticks’ flavors while adding comfort to your Halloween spread.
- Garlic Butter Dip: This lush dip brings a burst of flavor and pairs beautifully with the soft, cheesy bones, making each bite even more indulgent.
- Spicy Marinara Sauce: Adding a kick and vibrant taste, it’s the classic dip that transforms your breadstick bones into a transcendent snack experience.
- Pumpkin Spice Hummus: An unexpected twist, this creamy dip adds an autumnal touch that balances the cheesiness with a hint of sweetness—perfect for adventurous palates!
- Stuffed Mini Peppers: These bright and crunchy bites add freshness to your plate, complemented by your cheesy treats’ warmth, providing a delightful contrast.
- Crisp Garden Salad: A fresh salad with tangy vinaigrette offers a refreshing crunch, cleaning the palate between bites of rich, cheesy goodness.
- Caramel Apples: For dessert, these sweet treats invoke a sense of nostalgia and fun, making them a festive finish to your Halloween gathering.
- Sparkling Cider: This bubbly drink adds a festive flair, delightfully pairing with the savory snack while appealing to both kids and adults at the party.
Cheesy Halloween Breadstick Bones Recipe FAQs
How do I select the best pizza dough for my Cheesy Halloween Breadstick Bones?
Absolutely! For the best results, choose fresh, high-quality pizza dough from your local bakery or grocery store. Look for options that are slightly elastic and smooth; they should not feel overly sticky or dry. If you prefer to make your own, a simple homemade dough with flour, water, yeast, and salt can yield delicious results too!
How should I store leftover Cheesy Halloween Breadstick Bones?
After enjoying your spooktacular snack, store any leftovers in an airtight container at room temperature for up to 1 day. For longer storage, you can refrigerate them for about 3 days. Just make sure to let them cool completely before sealing them up to maintain their freshness!
Can I freeze Cheesy Halloween Breadstick Bones for later enjoyment?
Certainly! You can freeze your Cheesy Halloween Breadstick Bones for up to 2 months. To do this, place the cooled breadsticks in a freezer-safe container or wrap them tightly in plastic wrap followed by aluminum foil to prevent freezer burn. When you’re ready to enjoy them, bake from frozen at 350°F (175°C) for about 15-20 minutes or until heated through and crispy.
What should I do if my breadsticks become soggy after baking?
If your breadsticks end up soggy, it likely means they were either overcrowded on the baking sheet or not baked long enough. To prevent this, ensure that the breadsticks are well spaced apart on the baking sheet, allowing for proper air circulation. For a crispier result, consider baking them a few extra minutes, keeping an eye on their color to avoid overbaking.
Are these Cheesy Halloween Breadstick Bones suitable for people with dietary allergies?
These breadsticks can easily be adapted for various dietary needs! For a dairy-free option, substitute the Parmesan cheese with nutritional yeast and use dairy-free mozzarella. Ensure that the pizza dough you select is also free from dairy and eggs. Always check the labels if you’re dealing with specific allergies, and feel free to reach out with questions about substitutions.

Cheesy Halloween Breadstick Bones: A Fun Snack for Everyone
Ingredients
Equipment
Method
- Preheat your oven to 375°F (190°C) and line two baking sheets with parchment paper.
- Let the pizza dough sit for about 20-30 minutes to reach room temperature, then dust your surface with flour.
- Divide the dough into 10 equal pieces and roll each into an 8-inch long rope.
- Place each shaped breadstick onto the lined baking sheets, leaving enough space in between.
- Brush melted butter over each breadstick and sprinkle with grated Parmesan cheese.
- Bake in the preheated oven for about 15 minutes until slightly golden.
- Remove from oven and sprinkle with shredded mozzarella cheese; return to the oven for 5-7 minutes until bubbly.
- Cool for 5 minutes before serving with marinara sauce.
Leave a Reply