
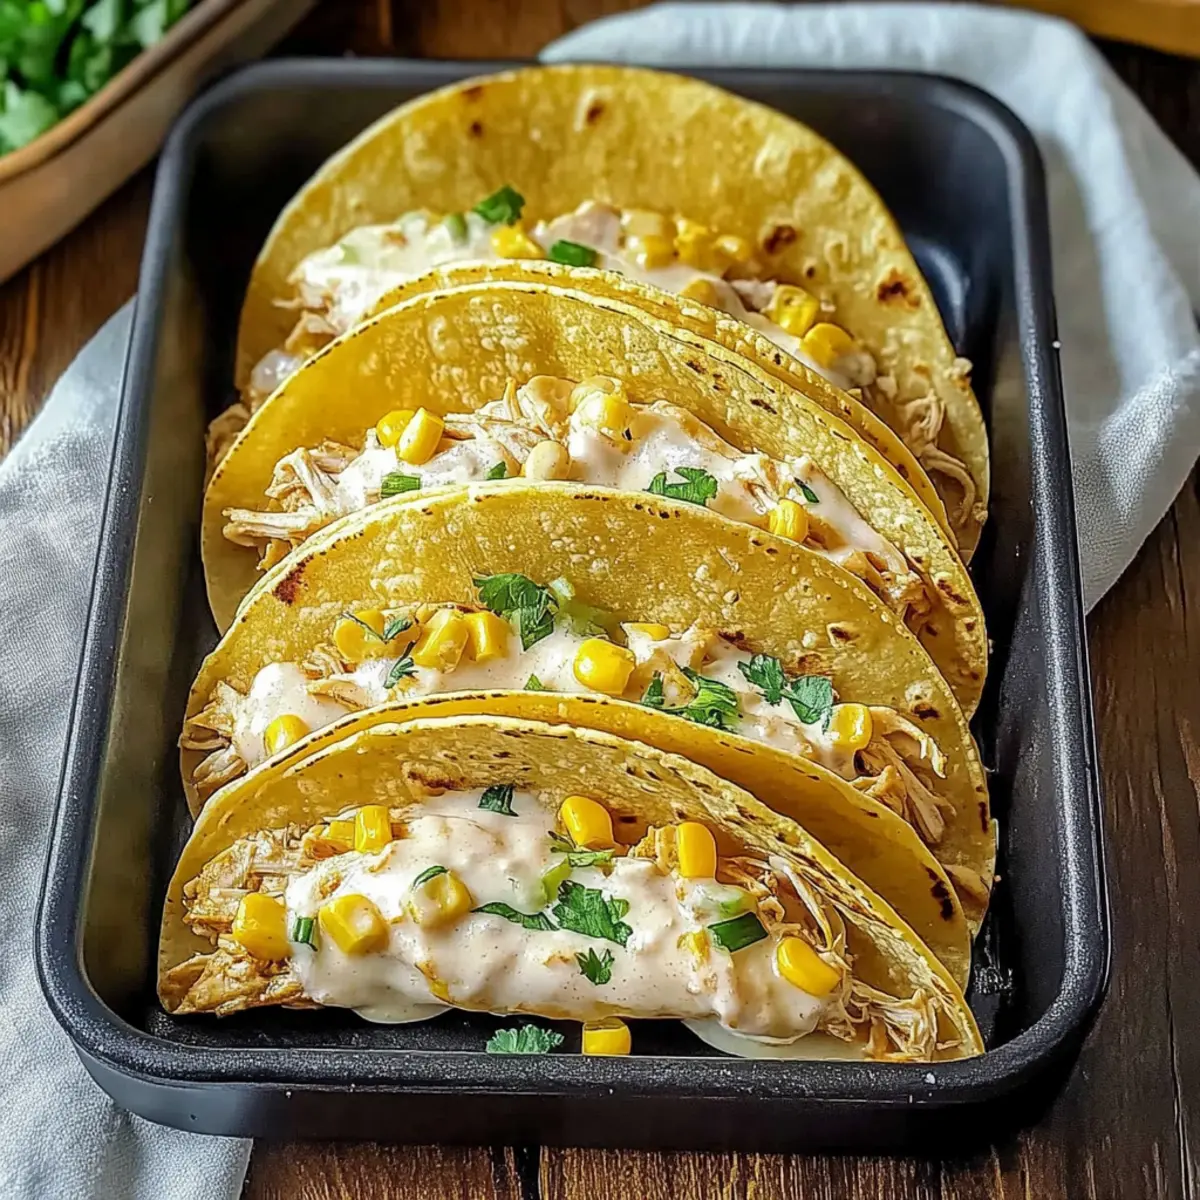
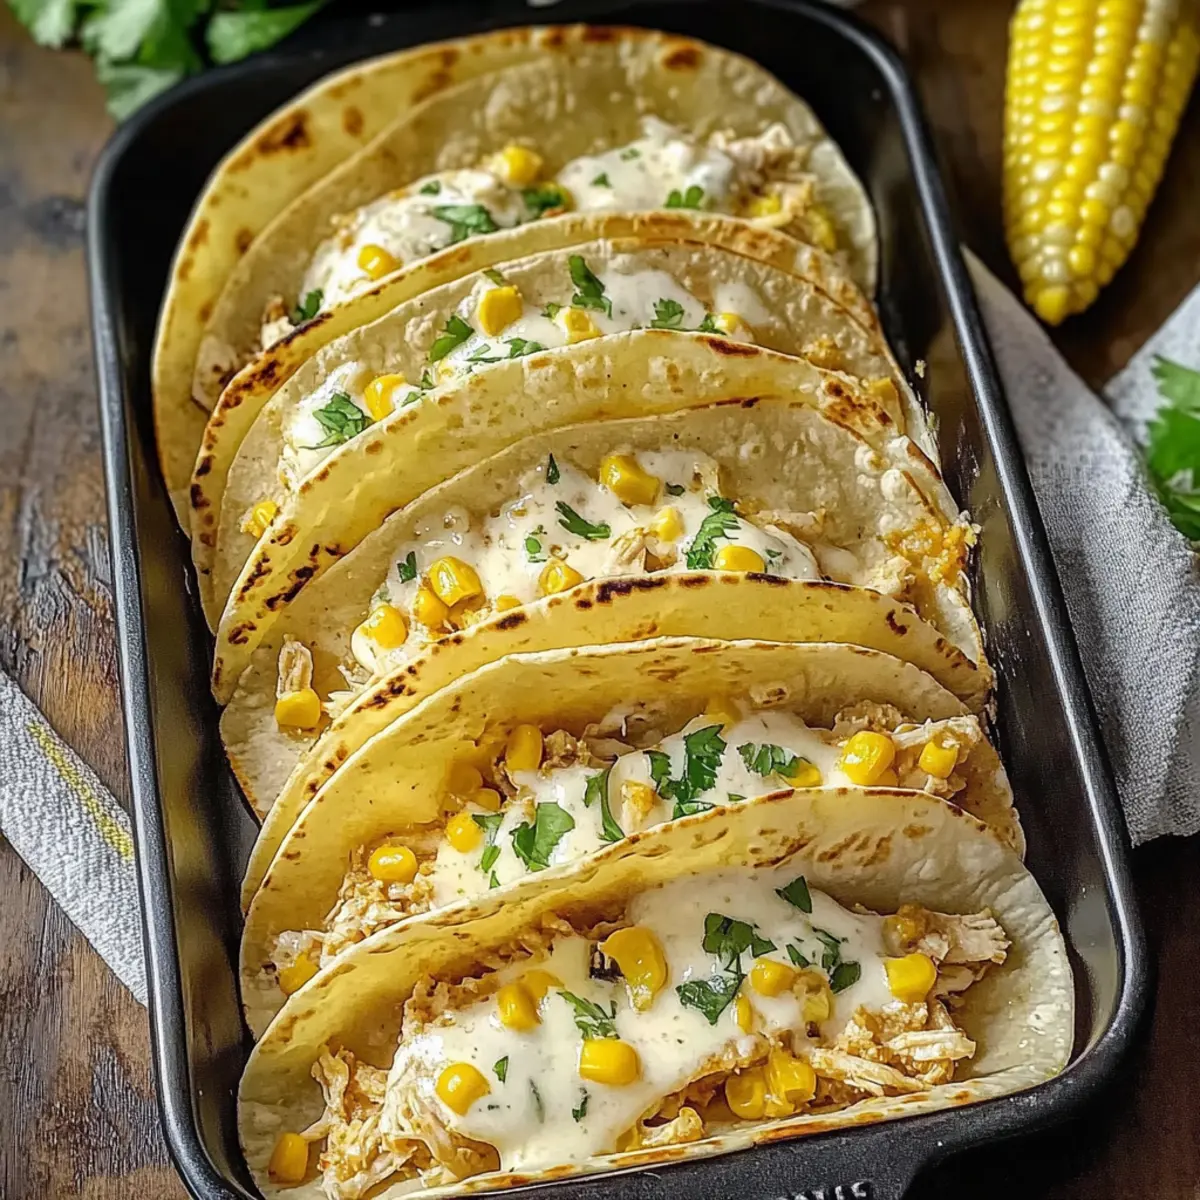
As I took a bite of my first white chicken chili taco, the warmth of the creamy sauce and tender chicken wrapped in a soft corn tortilla felt like a cozy hug on a cold day. This recipe is my go-to for quick weeknight dinners, ready in under an hour, effortlessly marrying comfort food with ease. Perfect for pleasing even the pickiest of eaters, these creamy White Chicken Chili Tacos offer a healthful upgrade to your typical takeout. With endless variations to suit your tastes, you’ll never tire of this delicious twist. Are you ready to ditch the drive-thru and elevate your taco game?

Why are These Tacos So Irresistible?
Creaminess: The rich, creamy sauce brings a delightful smoothness that perfectly complements the tender chicken, making each bite feel satisfying and indulgent.
Quick Preparation: With a cooking time of under an hour, these tacos are perfect for busy weeknights when you’re short on time but still want to serve something homemade.
Kid-Friendly: The mild flavors and familiar ingredients make these tacos a hit with kids, ensuring even the pickiest eaters will enjoy them.
Endless Variations: Feel free to experiment by swapping chicken with turkey or trying a vegan version! The adaptable nature of this recipe guarantees freshness every time.
Crowd-Pleasing: Whether it’s a family dinner or a casual gathering, these tacos are sure to impress guests and leave everyone wanting more! Don’t forget to pair them with a side of fresh pico de gallo or Mexican rice for the complete experience.
White Chicken Chili Taco Ingredients
• Delicious ingredients for a crowd-pleaser!
For the Sauce
- Sour Cream – Adds creaminess to the sauce; use at room temperature for better blending.
- Canned Green Chilis – Provides mild heat; substitute with fresh chilis for a spicier kick.
- Ground Cumin – Enhances the taco flavor profile; freshly ground is preferred for optimal taste.
- All-Purpose Flour – Essential for making the roux; ensure it’s cooked for a minute to avoid a raw taste.
- Chili Powder – Adds warmth and depth; adjust quantity based on your spice preference.
- Skim Milk – Creates a creamy texture without heaviness; can be swapped with whole or dairy-free alternatives.
- Chicken Broth – Enriches the sauce flavor; homemade or store-bought works well.
- Unsalted Butter – For depth of flavor in the roux; olive oil can be used for a lighter choice.
For the Filling
- Green Onions – Provides a fresh, mild onion flavor; you can use other onion varieties too.
- Shredded Chicken – The essential protein; rotisserie chicken is quick, but cooking your own works great too.
- Frozen Corn – Adds sweetness and texture; fresh or canned corn can be used as alternatives.
For the Tacos
- Corn Tortillas – The base for your tacos; warm before filling to prevent tearing.
- Shredded Mozzarella Cheese – Offers a melty finish; swap for cheddar or pepper jack for a different flavor.
Step‑by‑Step Instructions for White Chicken Chili Tacos
Step 1: Preheat the Oven
Start by preheating your oven to 400°F (200°C). This will ensure that your White Chicken Chili Tacos are perfectly cooked and crispy by the time you’re ready to enjoy them. While the oven warms up, gather your ingredients and prepare your workspace for a seamless cooking experience.
Step 2: Prepare Your Ingredients
Measure out your liquids and spices, including chicken broth, milk, sour cream, and all the seasonings. Chop the green chilis and green onions, shred your chicken, and measure the corn. Having everything ready before cooking will simplify the process and keep your focus on crafting those delicious tacos.
Step 3: Create the Roux
In a medium saucepan, melt 2 tablespoons of unsalted butter over medium heat for about 1-2 minutes until foamy. As the butter melts, whisk in 2 tablespoons of all-purpose flour. Cook this mixture for 1 minute, continuously stirring to create a roux that will thicken your sauce and avoid a raw flour taste.
Step 4: Whisk in the Liquids
Gradually add 1 cup of skim milk and 1 cup of chicken broth, whisking constantly. This gradual addition ensures a smooth sauce without lumps. As the mixture starts to thicken, incorporate 1 cup of sour cream. Stir until everything is well blended and the sauce is creamy, about 3-5 minutes.
Step 5: Season the Sauce
Once your sauce is creamy and combined, stir in 1 teaspoon of ground cumin, 1 can of chopped green chilis, 1 tablespoon of chili powder, and salt and pepper to taste. Allow the sauce to simmer for an additional 3-5 minutes until it thickens slightly, enhancing the aroma of your White Chicken Chili Tacos.
Step 6: Combine Filling Ingredients
In a mixing bowl, combine 2 cups of shredded chicken, 1 cup of frozen corn, and the chopped green onions. Pour the warm sauce over this mixture and mix well until everything is evenly coated. This flavorful filling is the heart of your tacos, providing warmth and comfort in every bite.
Step 7: Warm the Tortillas
Heat a skillet over medium-high heat and warm your corn tortillas for about 30 seconds on each side, just until they are pliable and slightly toasted. This step will prevent the tortillas from tearing when you fill them with your luscious chicken mixture, preparing them for the ultimate taco experience.
Step 8: Fill the Tortillas
Take each warm tortilla and spoon about 3 tablespoons of the filling onto the center. Sprinkle some shredded mozzarella cheese on top before folding the tortilla in half. This combination of creamy filling and melty cheese will ensure every bite of your White Chicken Chili Tacos is indulgently satisfying.
Step 9: Bake the Tacos
Arrange the filled tacos on a baking sheet and place them in the preheated oven. Bake for 12-15 minutes until the cheese is bubbling and the edges of the tortillas are golden brown. This baking step enhances the flavor and texture, creating a delicious, crispy exterior for your tacos.
Step 10: Let Them Rest
After baking, remove the tacos from the oven and allow them to cool for 1-2 minutes. This brief resting period ensures that the ingredients set slightly, making them easier to handle and enhancing the flavors before serving your delightful White Chicken Chili Tacos.
Step 11: Serve with Your Favorite Toppings
Serve your tacos warm, ready to be enjoyed! Consider offering a side of fresh pico de gallo, avocado slices, or even some sour cream as toppings, allowing each person to customize their White Chicken Chili Tacos to their liking for a fun and interactive meal.

How to Store and Freeze White Chicken Chili Tacos
Fridge: Store leftover filling in an airtight container for up to 4 days. Keep tortillas separate to prevent them from becoming soggy.
Freezer: The filling can be frozen for up to 3 months. Portion out into freezer bags, removing as much air as possible to maintain freshness.
Reheating: Thaw the filling in the fridge overnight before reheating. Warm it in a skillet over medium heat until heated through, then fill your tortillas and enjoy!
What to Serve with Creamy White Chicken Chili Tacos
Bring your dining table to life with these delightful additions.
-
Cilantro Lime Rice: This fragrant rice adds a zesty kick, perfectly offsetting the creamy taco filling. Its lightness complements the meal beautifully.
-
Fresh Pico de Gallo: A vibrant mix of tomatoes, onions, and cilantro, this salsa adds freshness and crunch that harmonizes with the soft tacos.
-
Guacamole: Creamy and rich, guacamole provides a contrasting texture and flavor, elevating your taco experience to new heights.
-
Simple Avocado Salad: Dressed with lime juice and herbs, this refreshing salad adds a cool contrast to the warm tacos, enhancing every bite.
-
Mexican Street Corn (Elote): Grilled corn drizzled with lime and cheese offers a buttery, sweet flavor that pairs wonderfully with the tacos’ spicy elements.
-
Ice-cold Margaritas: The citrusy tang of margaritas not only refreshes the palate but also allows for a fun dining vibe, perfect for taco night!
-
Churros for Dessert: End your meal on a sweet note with cinnamon-sugar-coated churros that bring warm, golden indulgence to your table, complementing your savory tacos perfectly.
Make Ahead Options
These White Chicken Chili Tacos are perfect for busy home cooks looking to save time during the week! You can prepare the filling (shredded chicken, corn, green onions, and the creamy sauce) up to 3 days in advance; just store it in an airtight container in the refrigerator. To maintain quality, warm the filling in a saucepan before filling the tortillas. Assemble the tacos just before baking for the best texture; simply spoon the filling into warmed corn tortillas, sprinkle with cheese, and bake at 400°F for 12-15 minutes. By prepping ahead, you’ll enjoy a delicious and easy homemade meal that feels fresh and satisfying!
White Chicken Chili Tacos Variations
Feel free to let your creativity shine and customize these delicious tacos to fit your taste buds!
-
Protein Swap: Change shredded chicken to diced turkey or beef for a tasty twist. This simple swap can add new flavors to your already delightful meal.
-
Vegan Option: Opt for plant-based chicken or black beans instead, adding dairy-free cheese and cream for a satisfying meal that everyone can enjoy.
-
Extra Heat: If you love some spice, add sliced jalapeños or a dash of hot sauce to the filling. This will give your tacos a fiery kick that spice lovers will appreciate.
-
Herb Infusion: Incorporate fresh cilantro or parsley into the chicken filling for an aromatic lift. The fresh herbs add brightness that elevates the entire dish.
-
Cheese Variations: Experiment with different cheeses! Swap mozzarella for cheddar or pepper jack, both of which bring distinct flavors and melt beautifully.
-
Crunchy Texture: Add crushed tortilla chips or chopped nuts as a topping. The crunch enhances each bite and adds a delightful contrast to the creamy filling.
-
Citrus Zing: Squeeze some fresh lime juice over the filling before serving for an extra burst of flavor. This simple addition refreshes the taste and elevates the overall experience.
Looking for more delicious ideas? Why not try these Grilled Chicken Sweet tacos or perhaps some Cowboy Butter Chicken that your family will adore?
Expert Tips for White Chicken Chili Tacos
-
Roux Perfection: Ensure your roux is cooked long enough to avoid a raw flour taste. The golden color enhances flavor significantly.
-
Whisk Wisely: Add liquids gradually while whisking to prevent lumps in your creamy sauce. This step ensures a smooth texture that everyone will love.
-
Tortilla Toasting: Lightly toast your corn tortillas to maintain their structure. This prevents tearing when filled.
-
Avoid Overfilling: Fill each tortilla with just enough filling to avoid spillage. Too much can lead to messy tacos!
-
Rest for Flavor: Let the filling rest briefly before assembling to allow the flavors to meld together beautifully, enhancing your tacos’ taste.
White Chicken Chili Tacos Recipe FAQs
How do I select ripe ingredients for my White Chicken Chili Tacos?
Absolutely! For ripe ingredients, choose sour cream that is fresh and within its expiration date. For green chilis, look for those without dark spots or blemishes; they should feel firm and have a vibrant color. Corn should be sweet—fresh corn will give your tacos a delightful crunch, but frozen corn is just as good when fresh isn’t an option!
What’s the best way to store leftover White Chicken Chili Taco filling?
Very! Store your leftover filling in an airtight container in the fridge for up to 4 days. Make sure to keep the tortillas separate to avoid them getting soggy. If you’re not eating it right away, the filling can be frozen for up to 3 months. Just portion it into freezer bags, removing as much air as possible before sealing for the best taste and texture!
Can I freeze the filling for my White Chicken Chili Tacos? If so, how?
Absolutely! To freeze the chicken chili filling, let it cool to room temperature first. Then, portion it into airtight freezer bags, pressing out excess air before sealing. Date the bags and place them in the freezer where they can last for up to 3 months. When it’s time to use the filling, thaw it in the refrigerator overnight, and then reheat in a skillet over medium heat, stirring until heated through.
What should I do if my sauce is too thick?
Very simple! If your sauce turns out too thick, add a splash of chicken broth or milk to loosen it up while stirring over low heat. This will help achieve the desired consistency. If it’s too thin, let it simmer a bit longer to thicken up naturally.
Are these tacos suitable for people with dietary restrictions?
I often make them easily adaptable for various diets! If you or your guests have allergies to dairy, substitute sour cream and cheese with dairy-free alternatives. For gluten sensitivities, use corn tortillas that are labeled gluten-free. If you’re looking for a vegetarian option, you can swap shredded chicken for plant-based protein or beans, and they’ll still be just as delicious!
Can I make these tacos ahead of time?
Absolutely! You can prepare the filling a day in advance and store it in the fridge, then just warm it up before filling your tortillas. If you’d like, you can assemble the tacos beforehand too. Simply bake them as instructed and reheat them in the oven at 350°F for about 10-15 minutes when you’re ready to serve, ensuring they’re heated through and the cheese is melty again!
Delicious White Chicken Chili Tacos for Family Fun Nights
Ingredients
Equipment
Method
- Preheat the oven to 400°F (200°C).
- Measure out liquids and spices, then chop green chilis and onions.
- Melt butter in a saucepan, whisk in flour to create a roux.
- Gradually add milk and chicken broth, whisk until smooth, then stir in sour cream.
- Season the sauce with cumin, green chilis, chili powder, salt, and pepper.
- Combine shredded chicken, corn, green onions in a bowl, then mix in the sauce.
- Warm corn tortillas in a skillet for about 30 seconds each side.
- Spoon filling onto tortillas and sprinkle with mozzarella cheese before folding.
- Bake in the oven for 12-15 minutes until cheese is bubbling and tortillas are golden.
- Let the tacos cool for 1-2 minutes before serving.
- Serve with toppings like pico de gallo or avocado slices.
Leave a Reply