
As I pulled the tray of brownies from the oven, an irresistible aroma filled my kitchen, instantly transporting me back to Halloween nights filled with laughter and spooky fun. These Spooktacular Mummy Brownies are not just a feast for the senses; they’re a delightful way to celebrate the season while creating lasting memories with family and friends. What’s great about this recipe is that it combines rich, fudgy chocolate flavors with a playful mummy-themed decoration, making it an easy and enchanting treat for any Halloween gathering. Whether you’re hosting a party or preparing goodies for your little ghouls, these brownies promise to be a crowd-pleaser while keeping your prep time quick and hassle-free. And the best part? You can easily make them gluten-free—just switch out the all-purpose flour! Are you ready to craft these spooky delights that are sure to brighten your Halloween festivities?
Why Are These Mummy Brownies a Must-Try?
Easy to Make: The straightforward steps make these brownies a breeze, even if you’re short on time.
Deliciously Rich: Expect a gooey, fudgy texture that will have your taste buds singing with joy!
Playful Presentation: With their spooky mummy look, these treats become a fun conversation starter at any Halloween gathering.
Customizable Options: Feeling adventurous? Add chocolate chips or nuts for extra flavor, or try different icing colors!
Gluten-Free Friendly: Swap regular flour for a gluten-free blend, so everyone can join in the Halloween fun!
Whether you want to impress your guests or just indulge your sweet tooth, these Cucumber Mozzarella Salad or these delightful Halloween Oreo Brownies are perfect for pairing with your Mummy Brownies. Get ready for a spooktacular treat!
Spooktacular Mummy Brownies Ingredients
• Get ready to make frighteningly delicious treats!
For the Brownie Batter
• Unsweetened Cocoa Powder – Adds a deep chocolate flavor; try Dutch-processed cocoa for a smoother taste.
• Granulated Sugar – Provides the necessary sweetness; coconut sugar is a great lower-glycemic substitute.
• All-Purpose Flour – Gives structure to the brownies; swap with a gluten-free flour blend for a spooky gluten-free version.
• Large Eggs – Serve as a binder for moisture; flax eggs work for a vegan alternative.
• Unsalted Butter (melted) – Contributes to the richness; vegetable or coconut oil can be used for a dairy-free option.
For the Decoration
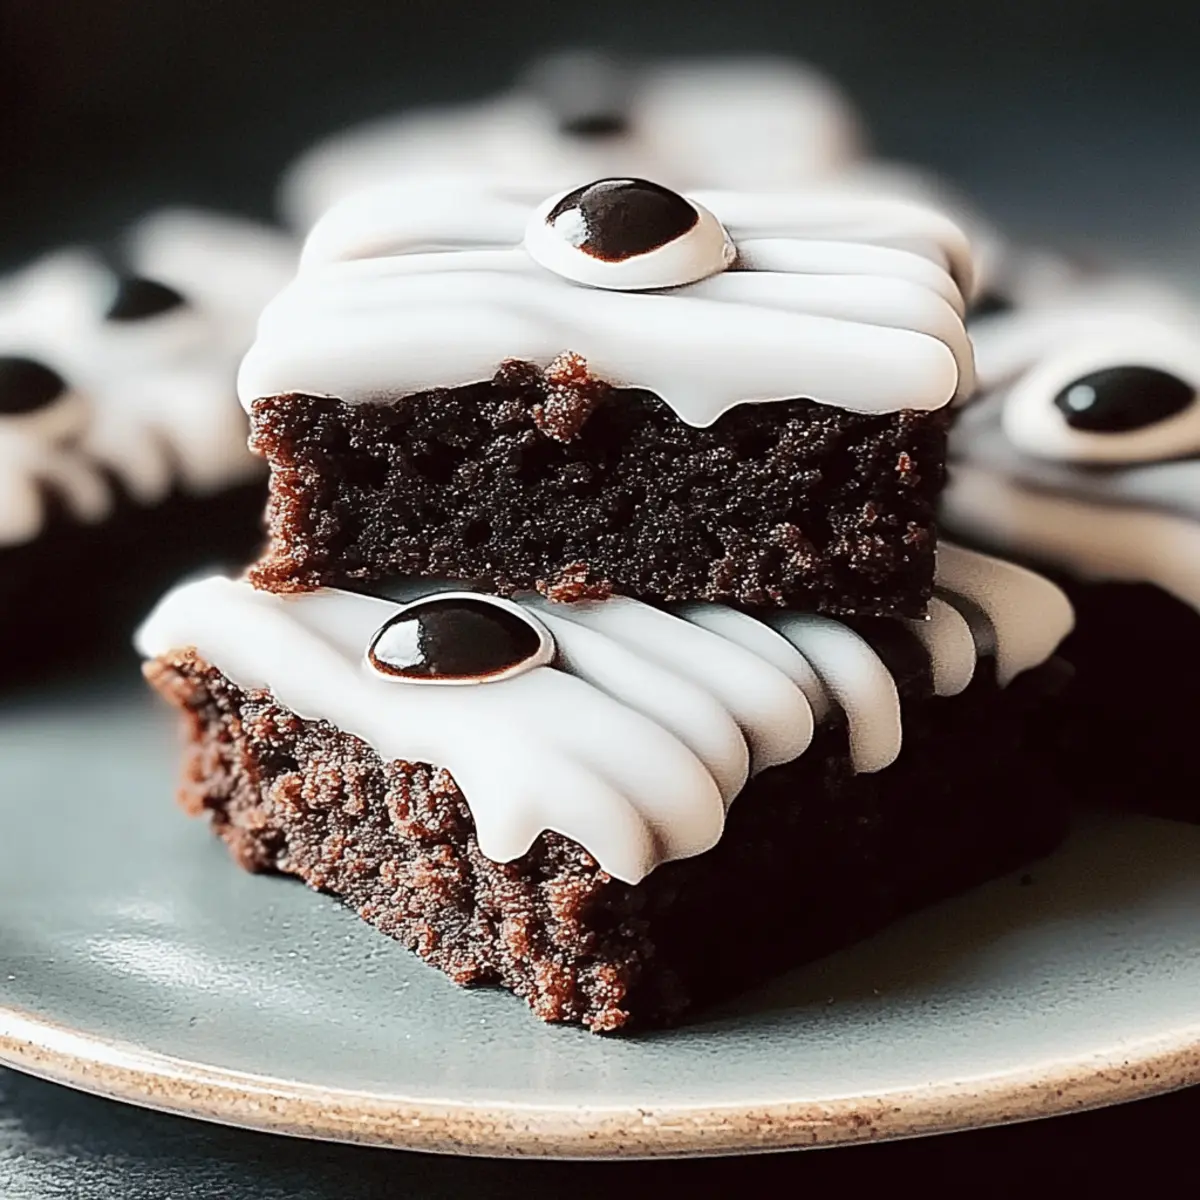
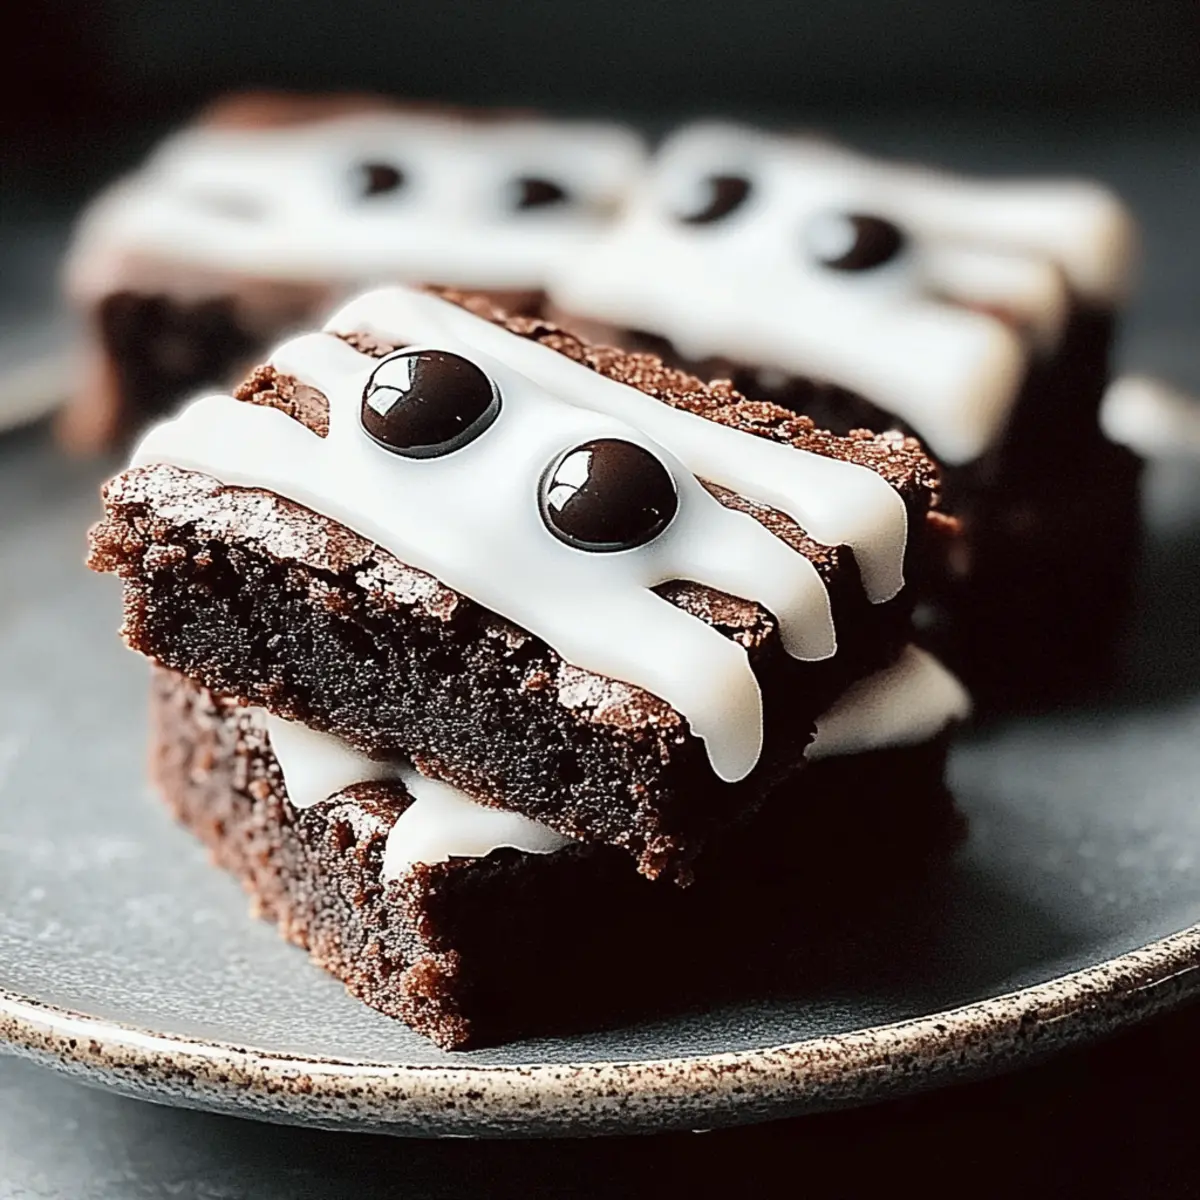
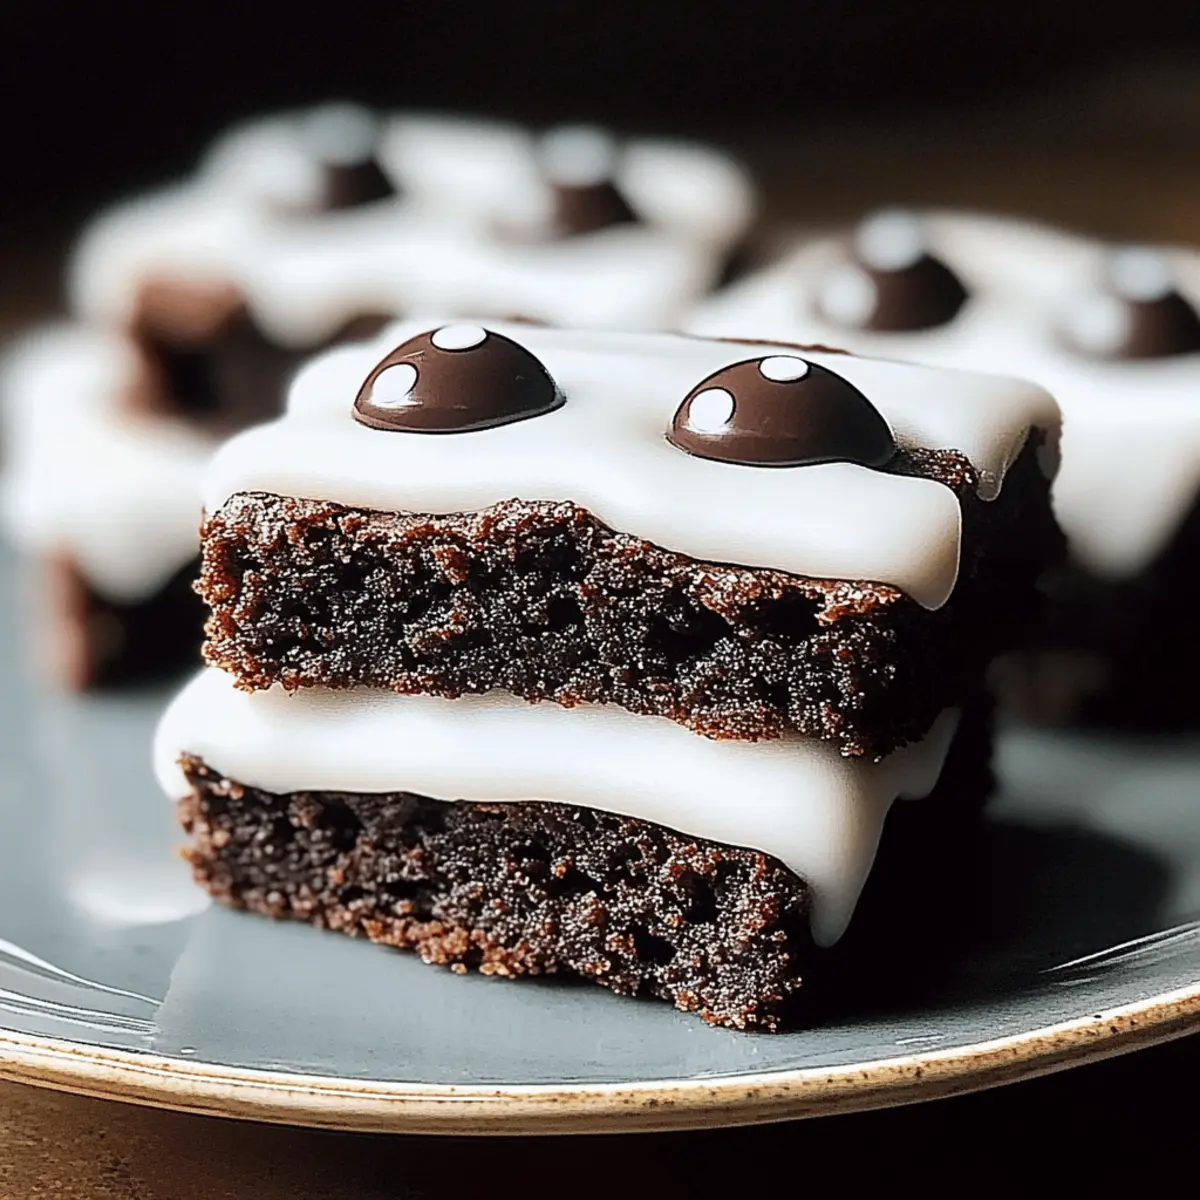
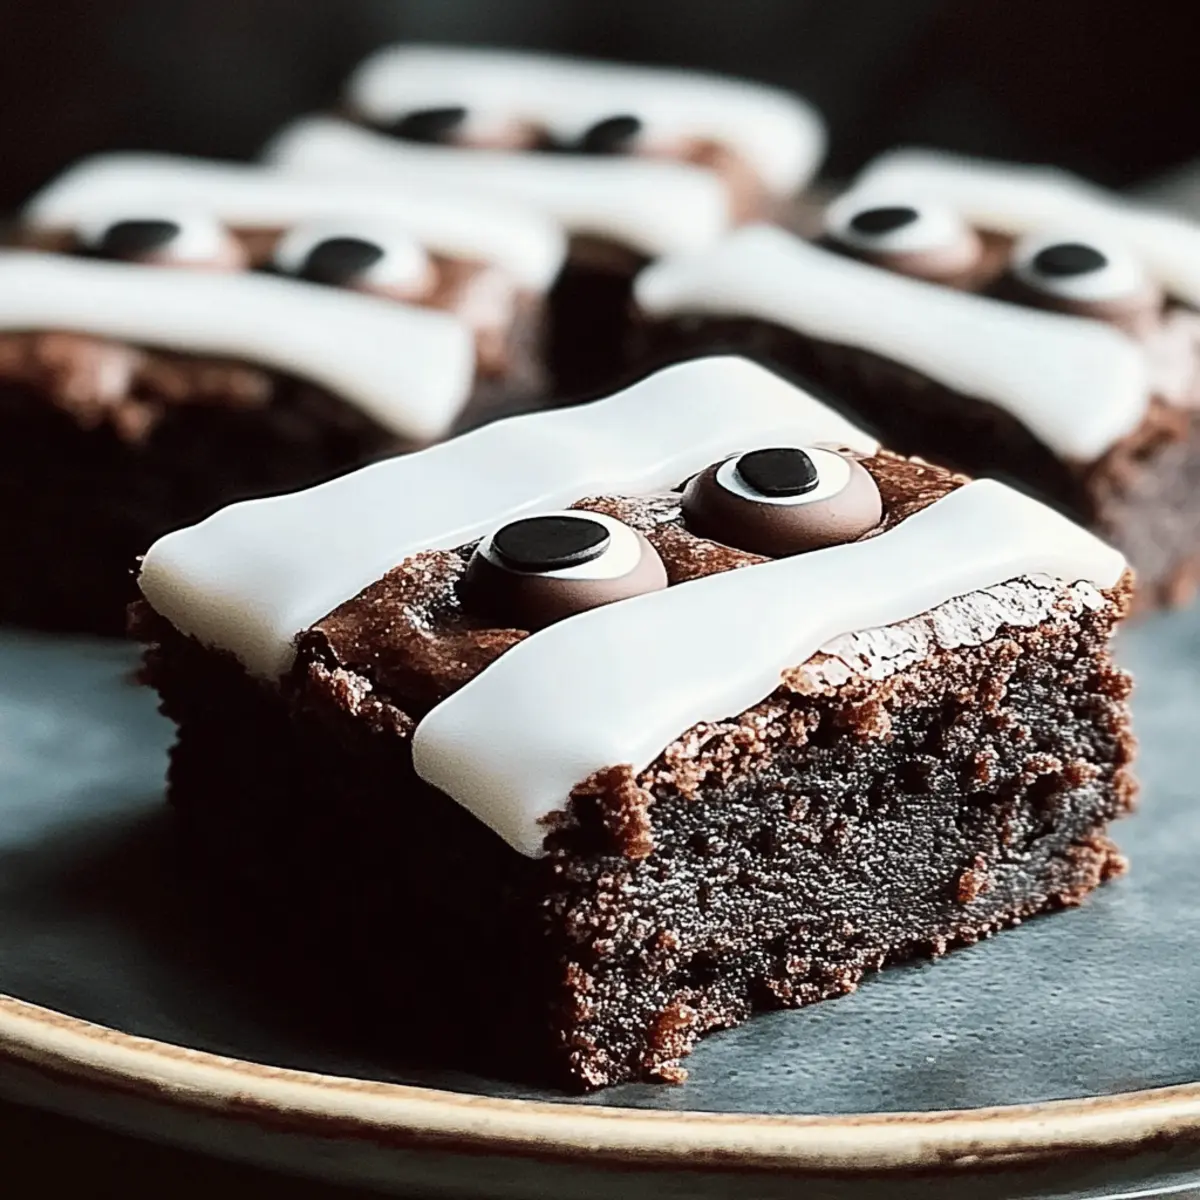
• White Icing – Used to create the mummy’s wrappings; consider colored candy melts for fun variations.
Get ready to dive into these Spooktacular Mummy Brownies that are sure to be the highlight of your Halloween festivities!
Step‑by‑Step Instructions for Spooktacular Mummy Brownies – Easy Halloween Treats
Step 1: Preheat the Oven
Begin by preheating your oven to 350°F (175°C). While the oven warms up, generously grease a 9×13-inch baking pan or line it with parchment paper for easy removal. This ensures your Spooktacular Mummy Brownies come out perfectly without sticking to the sides, ready to deliver top-notch fudginess.
Step 2: Mix the Dry Ingredients
In a large mixing bowl, combine the unsweetened cocoa powder, granulated sugar, all-purpose flour, and a pinch of salt. Using a whisk, stir these dry ingredients together until they form a uniform mixture, which takes about a minute. This blend will contribute to the rich flavor of your brownies, setting a strong foundation for that gooey texture everyone loves.
Step 3: Combine the Wet Ingredients
In a separate bowl, melt the unsalted butter and allow it to cool slightly. Once cooled, add two large eggs and whisk the mixture until smooth and well-integrated. This step is crucial, as the eggs will bind the batter together and add moisture, ensuring your Spooktacular Mummy Brownies are perfectly fudgy.
Step 4: Incorporate the Mixtures
Gently pour the wet ingredient mixture into the bowl of dry ingredients. Using a spatula, stir the batters together until just combined—be careful not to overmix. A few streaks of flour are fine; this preserves the fudginess of your brownies, which is essential for that melting-in-your-mouth experience!
Step 5: Bake the Brownies
Spread the brownie batter evenly into the prepared baking pan, smoothing out the top with your spatula. Place the pan in the preheated oven and bake for 25-30 minutes. You’ll know the brownies are ready when a toothpick inserted into the center comes out with moist crumbs, signaling that they are fudgy and delicious.
Step 6: Cool & Decorate
Once baked, remove the brownies from the oven and allow them to cool in the pan on a wire rack for about 20-30 minutes. After cooling completely, cut them into squares and prepare to decorate. Pipe white icing in zigzag patterns to create the mummy wrappings—get creative! Finally, add candy eyes to complete the Spooktacular Mummy Brownies look, giving them personality and charm.
Expert Tips for Spooktacular Mummy Brownies
-
Fudgy Perfection: Avoid overmixing the batter; this ensures your brownies remain incredibly fudgy and moist after baking.
-
Cooling Time: Let the brownies cool completely before decorating. If they’re warm, the icing may melt away, ruining the spooky look!
-
Test Baking Time: Ovens vary, so consider baking a test brownie. This way, you can adjust the timing to achieve the perfect fudgy texture without under or over-baking.
-
Creative Decoration: Get creative with decoration! Use colored icing or different candy shapes to personalize your Mummy Brownies for your Halloween theme.
-
Storage Secrets: Keep leftovers fresh in an airtight container at room temperature for up to 3 days. For longer storage, freeze them—just thaw at room temperature before enjoying!
What to Serve With Spooktacular Mummy Brownies
As you prepare for Halloween festivities, pair these enchanting treats with delightful accompaniments that elevate your dessert experience.
-
Vanilla Ice Cream: Creamy and cool, it balances the rich chocolate flavor of the brownies, creating a decadent combination.
-
Pumpkin Spice Latte: Warm spices and coffee create a cozy drink option perfect for chilly October evenings, enhancing the Halloween spirit.
-
Caramel Sauce: Drizzling warm caramel over the brownies adds a sweet, buttery note that beautifully contrasts with the chocolate.
-
Fresh Fruit Salad: Bright, juicy bites of fruit provide a refreshing counterpoint, bringing balance to the richness of the brownies.
-
Chocolate Milk: A childhood favorite, the smooth and sweet chocolate milk pairs perfectly, delighting kids and adults alike.
-
Ghostly Marshmallows: Fun and fluffy, these spooky treats are a whimsical touch that fits the Halloween theme and adds a playful edge to your dessert table.
Spooktacular Mummy Brownies Variations
Feel free to put your twist on these fun Halloween treats, crafting variations that delight every palate!
-
Gluten-Free: Substitute all-purpose flour with a gluten-free flour blend for magically delicious treats everyone can enjoy. It’s a simple swap that keeps the rich taste intact!
-
Nutty Crunch: Add chopped walnuts or pecans for added texture and nutty flavor. This creates a delightful contrast to the fudgy brownies, bringing a satisfying crunch in every bite.
-
Chocolate Chip Boost: Fold in semi-sweet or dark chocolate chips for a double chocolate experience. Who can resist more chocolate? They melt beautifully and elevate the decadent flavor!
-
Spiced Pumpkin: Mix in a few spoonfuls of pumpkin puree and a dash of pumpkin spice for a festive fall twist. This can bring a wonderfully moist texture and seasonal flavor that will enchant your taste buds!
-
Halloween Colors: Use colored candy melts for decorating instead of white icing to create vibrant mummy wrappings. Your ghoulish friends will love the creative flair!
-
Caramel Surprise: Add a layer of caramel sauce in the middle of the brownie batter. This delightful surprise adds a sweet gooeyness that will have everyone coming back for seconds!
-
Coconut Bliss: Fold in shredded coconut to the batter for a tropical flavor. The richness of coconut pairs beautifully with chocolate, creating a heavenly combo that takes these brownies to the next level.
-
Spicy Kick: Add a pinch of cayenne pepper to the mixture for a surprisingly delightful heat that pairs with the sweet chocolate. It’s a fun twist that will have guests guessing the secret ingredient!
As you explore these variations, consider pairing your Spooktacular Mummy Brownies with a refreshing Cucumber Mozzarella Salad or indulge next to some irresistible Halloween Oreo Brownies. Happy Halloween baking!
Make Ahead Options
These Spooktacular Mummy Brownies are perfect for busy home cooks looking to save time while still impressing guests! You can prepare the brownie batter up to 24 hours in advance; simply mix the dry and wet ingredients separately, refrigerate them in airtight containers, and combine them just before baking. The baked brownies can be stored, unfrosted, at room temperature for up to 3 days, ensuring they remain just as fudgy and delicious. To maintain quality, allow the brownies to cool completely before slicing and decorating. When ready to serve, just pipe on the white icing and add the candy eyes for that delightful mummy touch! This way, you can enjoy the fun of decorating while saving time on the baking day.
How to Store and Freeze Spooktacular Mummy Brownies
Room Temperature: Store completely cooled brownies in an airtight container at room temperature for up to 3 days to maintain freshness and texture.
Fridge: If you prefer them chilled, place the brownies in the fridge for up to a week, but keep them wrapped to prevent drying out.
Freezer: For longer storage, freeze brownies in a sealed container for up to 3 months. Make sure to separate layers with parchment paper to avoid sticking.
Thawing: When ready to enjoy, simply take the brownies out and thaw at room temperature for a couple of hours before serving.
Spooktacular Mummy Brownies Recipe FAQs
What type of cocoa powder should I use for the best flavor?
Absolutely! Unsweetened cocoa powder is ideal for these brownies as it adds depth to the chocolate flavor. If you prefer a milder taste, Dutch-processed cocoa is a wonderful substitute as it leads to a smoother, more luxurious brownie.
How should I store leftover brownies to keep them fresh?
To store your Spooktacular Mummy Brownies, place them in an airtight container at room temperature for up to 3 days. If you want to keep them for longer, moving them to the fridge is an option, but make sure they’re wrapped to avoid drying out.
Can I freeze Mummy Brownies for later enjoyment?
Yes, you can freeze these delightful treats! Wrap each brownie individually in plastic wrap, then place them in a sealed container or freezer bag to prevent freezer burn. They’ll keep well for up to 3 months. When you’re ready to indulge, simply thaw them at room temperature for a couple of hours.
What if my brownies are too dry or crumbly?
No worries! If you find that your brownies turned out dry, it’s often due to overbaking or overmixing the batter. To fix this, ensure you bake them only until a toothpick comes out with moist crumbs—testing at the lower baking time is best. If they’re already baked and dry, serving them with ice cream or a drizzle of warm chocolate sauce can help bring them back to life!
Are these brownies safe for children with allergies?
It’s important to consider allergies! While this recipe doesn’t include nuts, make sure to double-check your ingredient labels for potential allergens. If you’re serving to kids with gluten sensitivities, simply swap regular flour with a gluten-free flour blend to make them safe for everyone to enjoy!
Can I use a dairy-free option for these brownies?
Very much so! Substitute unsalted butter with coconut oil or vegetable oil to make your brownies suitable for dairy-free diets. If you’re going vegan, replace the eggs with flax eggs by mixing one tablespoon of ground flaxseed with two and a half tablespoons of water—let it sit for about 5 minutes to thicken before combining it with the other ingredients. Enjoy your spooky baking!
Irresistible Spooktacular Mummy Brownies – Easy Halloween Treats
Ingredients
Equipment
Method
- Preheat your oven to 350°F (175°C) and grease a 9x13-inch baking pan or line it with parchment paper.
- In a large mixing bowl, combine cocoa powder, sugar, flour, and a pinch of salt.
- In another bowl, melt the butter and let it cool. Whisk in the eggs until smooth.
- Pour the wet ingredients into the dry ingredients and mix until just combined.
- Spread the batter in the prepared baking pan and bake for 25-30 minutes.
- Cool in the pan on a wire rack for about 20-30 minutes before cutting into squares and decorating.
- Pipe white icing in zigzag patterns and add candy eyes to complete the mummy look.
Leave a Reply