
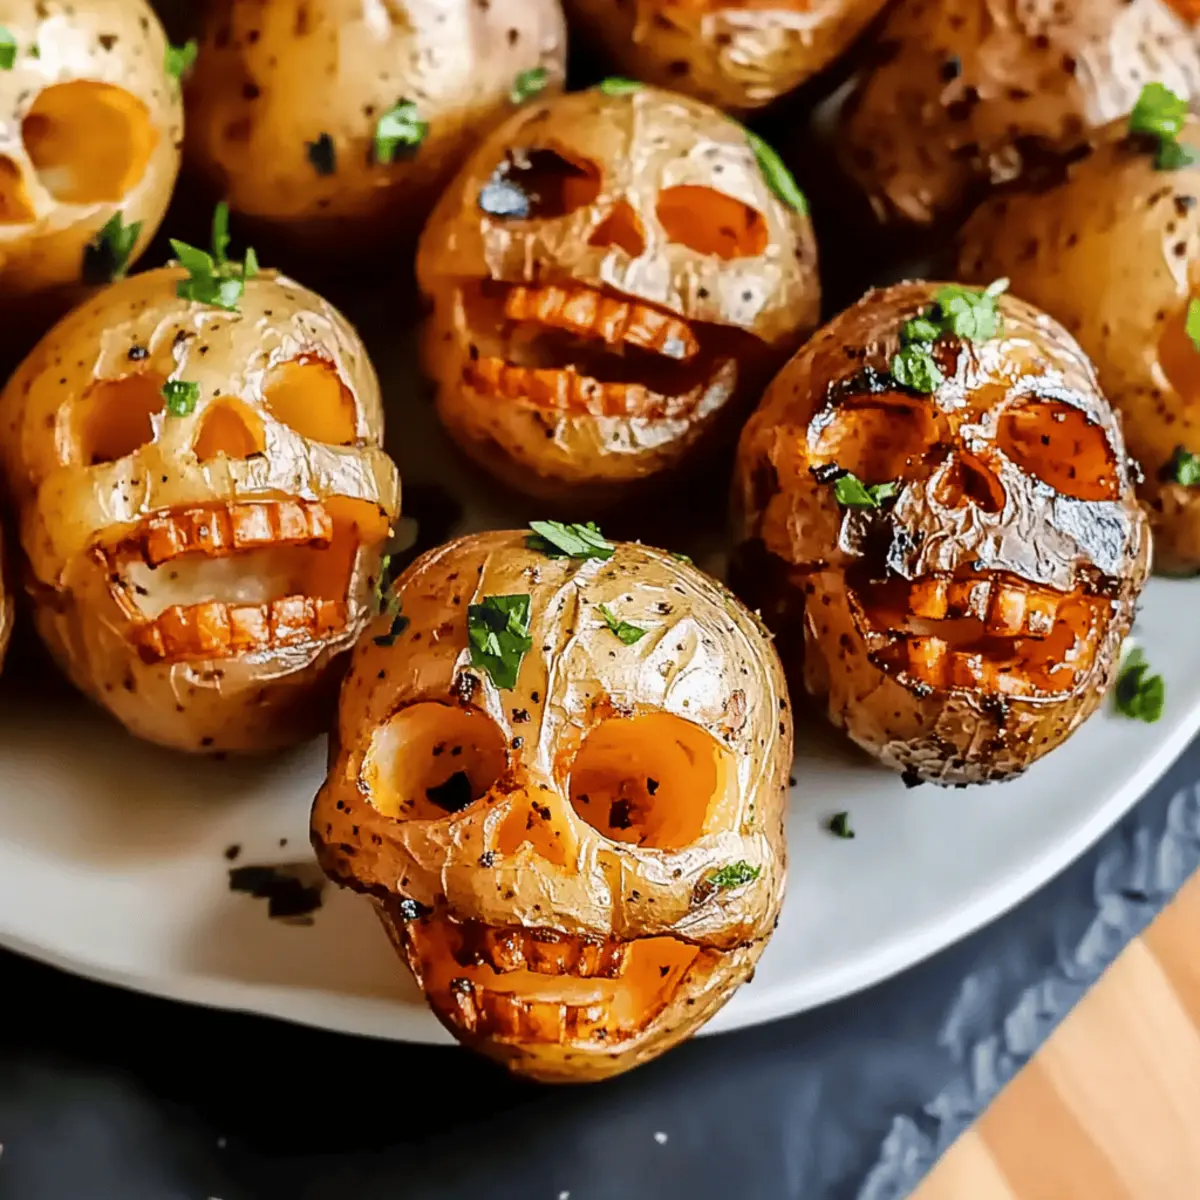
As the leaves turn to hues of orange and gold, a gentle chill fills the air, signaling that Halloween is just around the corner. I’ve come up with a fun twist on a classic side dish that’s sure to impress your ghoulish guests: Halloween Skull Potatoes! These crispy beauties are not only a delight to the eyes but also incredibly simple to make. Fluffy on the inside and crunchy on the outside, they’re the perfect blend of taste and festivity, making them an ideal companion for your spooky gatherings. Imagine serving these spooky spuds, carved with playful expressions, at your Halloween party or as a fun snack during movie nights. Are you ready to unleash your inner artist in the kitchen? Let’s get carving!

Why You’ll Love Halloween Skull Potatoes
Crispy Perfection: These potatoes achieve a delightful crunch that keeps everyone coming back for more. Each bite reveals a fluffy interior, making them the ideal side dish or snack.
Festive Fun: Not only do they taste amazing, but their spooky designs add a playful element to any Halloween gathering, ensuring your table looks just as festive as it tastes.
Easy Customization: Create a variety of expressions and add cheese or herbs to personalize each potato. From creepy to cute, let your culinary creativity shine!
Quick Prep Time: With just a few simple steps, you’ll have these tasty treats out of the oven and on the table in no time—perfect for last-minute gatherings or parties!
For an extra sweet treat, consider pairing these with some Cauldron Cookies to enchant your guests.
Halloween Skull Potatoes Ingredients
For the Potatoes
- Mini Creamer Potatoes – Perfect for carving spooky faces and roasting evenly; these are your canvas for creativity!
- Olive Oil – This adds richness and crispiness; feel free to use melted butter for a buttery flavor twist.
For Seasoning
- Salt – Enhances the overall flavor of your Halloween Skull Potatoes; try flavored salts like garlic or herb for a tasty kick.
- Pepper – Adds a subtle spiciness that can be adjusted based on your taste preferences.
This combination of ingredients will help you create the most irresistible Halloween Skull Potatoes, making your spooky gatherings a hit!
Step‑by‑Step Instructions for Halloween Skull Potatoes
Step 1: Preheat the Oven
Begin by preheating your oven to 425°F (220°C). This high temperature will ensure that your Halloween Skull Potatoes turn out crispy and golden. While the oven heats up, wash the mini creamer potatoes thoroughly under cold water to remove any dirt, setting the stage for your artistic endeavors.
Step 2: Carve Spooky Faces
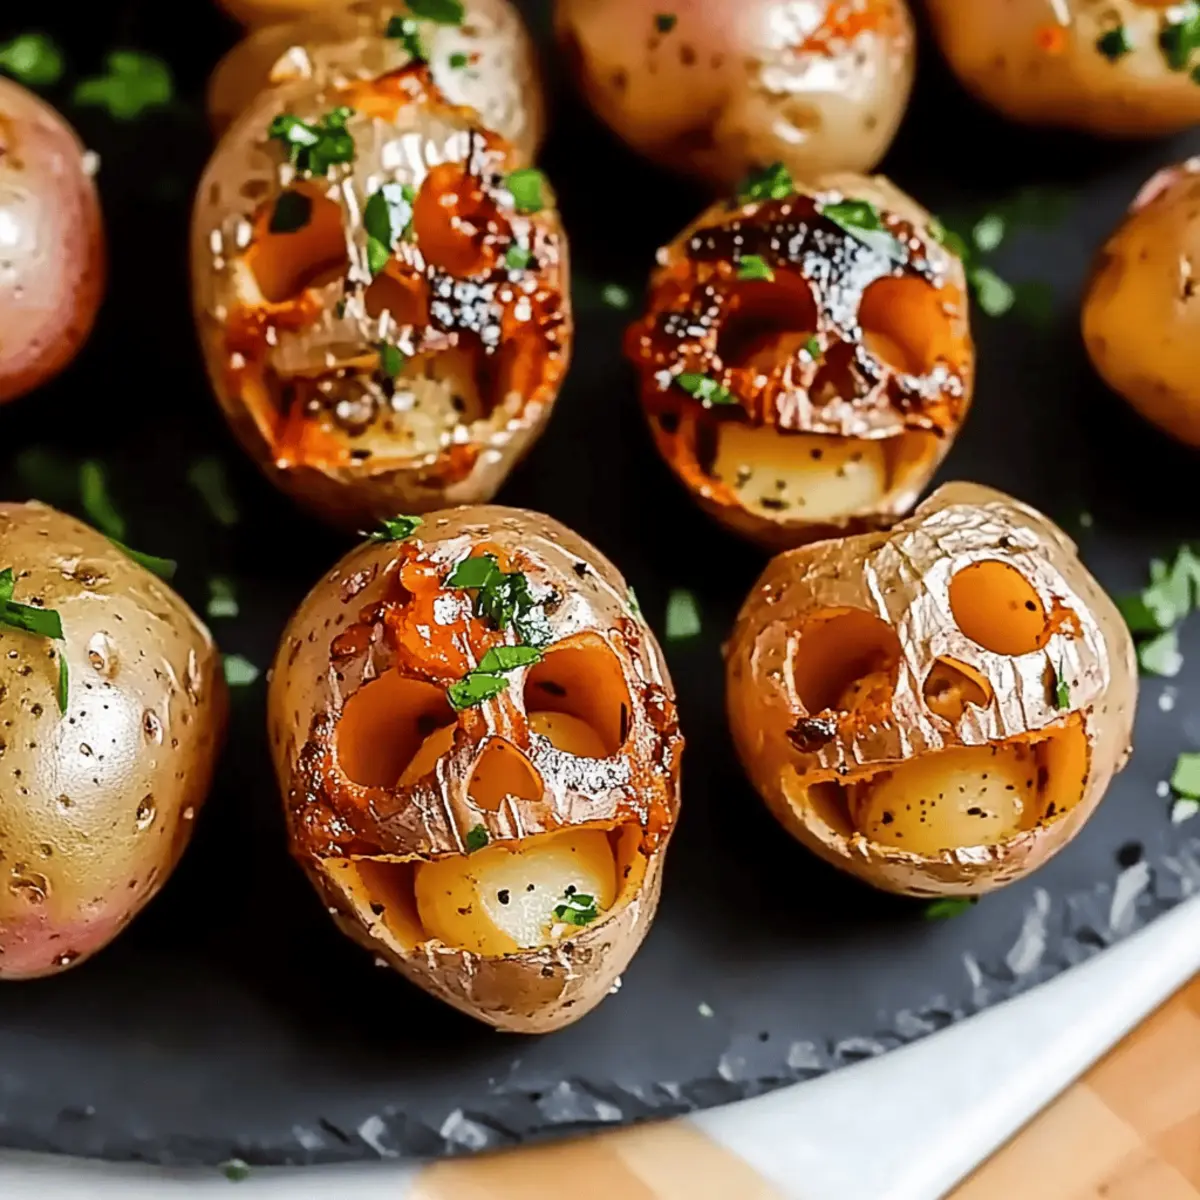
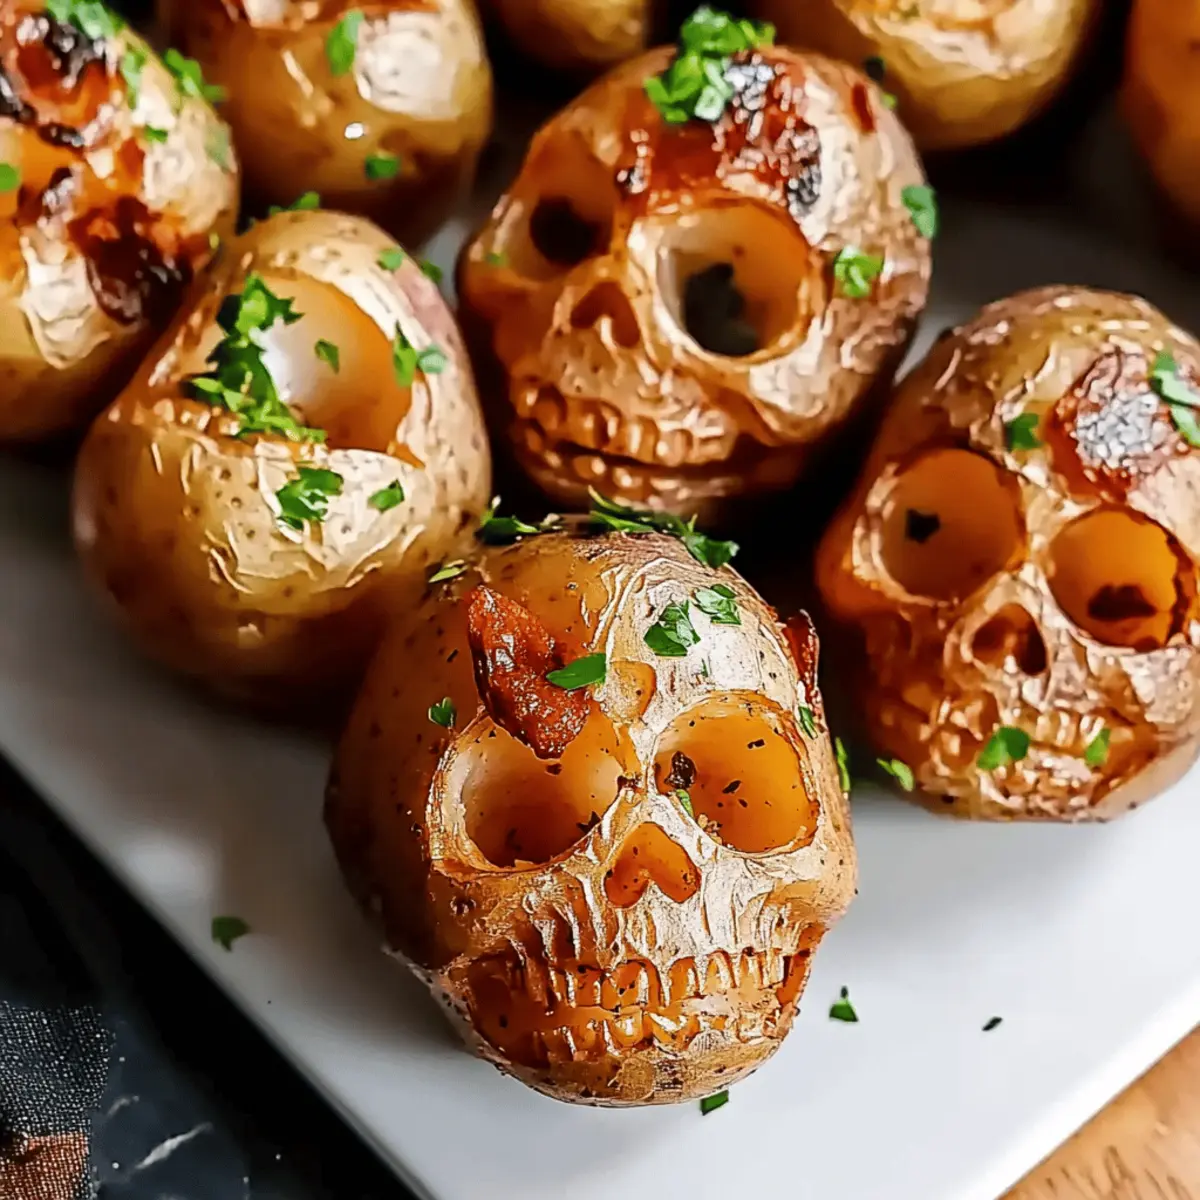
Once your potatoes are clean, carefully use a sharp paring knife to carve spooky faces into each one. Start by sketching your designs gently before making deeper cuts to create features like eyes, noses, and mouths. Take your time to ensure safety and precision, as these fun carvings will make your skull potatoes truly festive.
Step 3: Season the Potatoes
After you’ve carved your potatoes, it’s time to season them! In a large bowl, toss the carved potatoes with olive oil, ensuring they’re evenly coated. Sprinkle with salt and pepper according to your taste, giving them a delightful flavor that pairs perfectly with the crispy exterior of your Halloween Skull Potatoes.
Step 4: Arrange and Bake
Spread the seasoned potatoes in a single layer on a baking sheet lined with parchment paper. Make sure not to overcrowd the pan, as this will prevent them from crisping up. Bake the potatoes in the preheated oven for about 25-30 minutes, turning them halfway through until they are golden and crispy on the outside.
Step 5: Cool and Serve
Once your potatoes are beautifully browned, remove them from the oven and let them cool for a few minutes on the baking sheet. This allows the exterior to become even crunchier. Serve your Halloween Skull Potatoes warm, showcasing their spooky designs to delight your guests at any gathering!
How to Store and Freeze Halloween Skull Potatoes
-
Room Temperature: Enjoy your Halloween Skull Potatoes fresh out of the oven for the best flavor. If needed, they can be left at room temperature for up to 2 hours before serving.
-
Fridge: Store leftover Skull Potatoes in an airtight container in the fridge for up to 3 days. Reheating is essential to restore some crispiness.
-
Freezer: For longer storage, freeze the carved but unbaked potatoes. Place them on a baking sheet until frozen, then transfer to a freezer bag for up to 1 month.
-
Reheating: To reheat, bake leftover Skull Potatoes in a preheated oven at 400°F (200°C) for about 10-15 minutes until heated through and crispy again. This method ensures those flavorful, crispy bites!
Halloween Skull Potatoes Variations
Feel free to unleash your creativity with these fun and festive twists on the classic Halloween Skull Potatoes!
-
Different Faces: Change things up by carving unique expressions on each potato, from happy to spooky, for a delightful variety at your table. Let your imagination run wild—each potato can tell a different story!
-
Cheesy Touch: Add a layer of shredded cheese on top after baking for a gooey, delicious finish. Cheese brings a whole new world of flavor to these eerie spuds, making them even more irresistible to guests.
-
Herb Infusion: Sprinkle fresh herbs like rosemary or thyme over the potatoes before roasting. The aromatic herbs elevate the dish, providing not only a decorative element but also a burst of flavor that complements the crispy texture.
-
Spicy Kick: Incorporate a pinch of cayenne or paprika into your seasoning for a fun kick. The added heat creates a scrumptious contrast with the creamy interior of the potatoes, tantalizing the taste buds.
-
Garlic Lovers: Toss the potatoes with minced garlic and olive oil before baking for a savory punch. Garlic enhances the flavor profile significantly, making your Skull Potatoes a hit among garlic fans.
-
Bacon Bits: Top your Skull Potatoes with crispy bacon bits post-baking for a delightful crunch. The smoky flavor further deepens the enjoyment, transforming your Halloween treat into a decadent experience.
-
Sweet Twist: Try a sprinkle of cinnamon and sugar on some potatoes for those who lean toward the sweet side. This surprising twist pairs beautifully with the soft interior of the potatoes, making for a unique treat.
-
Accompaniment Ideas: Serve these spooky delights alongside Crockpot Garlic Potatoes or mix them in with some Halloween Oreo Cookie desserts for a festive feast that balances sweet and savory.
These variations not only enhance your Halloween Skull Potatoes but also provide a delightful experience that will have everyone excited to dig in!
What to Serve with Halloween Skull Potatoes
As you prepare to dazzle your guests with these whimsical treats, consider complementing their playful nature with a range of delicious sides and drinks.
-
Crispy Brussels Sprouts: These add a delightful crunch and a burst of earthy flavor, creating a fantastic contrast to the savory potatoes.
-
Garlic Butter Corn on the Cob: Sweet and buttery, this dish enhances the festive vibe while balancing the spookiness of the potatoes with its comforting flavor.
-
Roasted Pumpkin Soup: A warm and creamy soup that resonates with Halloween vibes, bringing coziness to your gathering and pairing beautifully with the crunchy skulls.
-
Witch’s Brew Salad: A fresh mix of greens, cranberries, and nuts adds a vibrant pop of color and flavor, lightening the meal while keeping things seasonal.
-
Cinnamon Sugar Fried Apples: Sweet and warm, these spiced apples provide a delightful dessert that echoes the fall flavors, perfect after enjoying your eerie potatoes.
-
Creepy Chillers Cocktail: A fun, themed cocktail with a spooky twist will raise spirits at your party. Think black vodka, tonic, and dry ice for an enchanting effect.
-
Spiced Cider: Nothing says autumn like a warm cup of spiced cider. This drink will warm your guests and evoke the cozy essence of Halloween.
-
Toasted Marshmallow Milkshake: For a playful dessert option, this sweet treat combines nostalgic flavors with fun, making it a perfect finish after the savory festivities.
Make Ahead Options
These Halloween Skull Potatoes are perfect for meal prep, allowing you to save time during your festivities! You can carve and season the potatoes up to 24 hours in advance, storing them in an airtight container in the refrigerator to maintain freshness. Just coat the carved potatoes with olive oil, salt, and pepper, then cover them well to prevent browning. When you’re ready to enjoy, simply remove them from the fridge and bake them for about 25-30 minutes until golden and crispy. This way, you can focus on other delightful festivities while still serving up a spooky side dish that’s just as delicious!
Expert Tips for Halloween Skull Potatoes
-
Carving Safety: Always cut away from your hands and use a sharp paring knife. Take your time to avoid accidents and achieve precise cuts.
-
Craving Crispiness: Allow the potatoes to cool for a few minutes after baking; they will crisp up even more as they rest, ensuring the ultimate Halloween Skull Potatoes experience.
-
Spaced Out Baking: Ensure you don’t overcrowd the baking sheet. Each potato needs space to crisp properly, so use multiple trays if necessary.
-
Flavor Variations: Experiment with different flavor combinations by using flavored salts or adding herbs before roasting to elevate your spooky side dish.
-
Creative Design: Don’t hesitate to mix up the facial expressions! Playful, creepy, or funny—having fun with the designs makes your Halloween Skull Potatoes stand out.
Halloween Skull Potatoes Recipe FAQs
What type of potatoes should I use for Halloween Skull Potatoes?
I highly recommend using Mini Creamer Potatoes or Baby Yukon Golds as they are perfect for carving and roast evenly. If those are unavailable, small waxy potatoes can work as a substitute.
How should I store leftover Halloween Skull Potatoes?
To keep your Halloween Skull Potatoes fresh, place them in an airtight container in the fridge. They can last for up to 3 days. When you’re ready to enjoy them again, a quick reheat in the oven will help regain some of that beloved crispiness!
Can I freeze Halloween Skull Potatoes?
Absolutely! To freeze your Halloween Skull Potatoes, carve and season them but don’t bake them first. Lay the carved potatoes on a baking sheet lined with parchment paper and freeze until solid. After that, transfer them to a freezer bag, and they can be stored for up to 1 month. When you’re ready to enjoy, bake them from frozen, adjusting the cooking time accordingly.
What if my Halloween Skull Potatoes don’t get crispy?
If your potatoes aren’t achieving that desired crispiness, ensure they aren’t overcrowded on the baking sheet, as that can trap moisture. Space them out for optimal air circulation. Also, letting them cool for a few minutes after baking can help them crisp up even more. If you’re still having trouble, consider increasing the oven temperature slightly or giving them an extra few minutes in the oven.
Are there any dietary considerations when making Halloween Skull Potatoes?
These potatoes are generally safe, but if you’re considering dietary restrictions, be cautious with seasoning. Always check for allergies related to salt or any flavored salts you might use. As a friendly tip, if serving at a gathering with pets, keep the leftovers stored out of reach, as certain seasonings can be harmful to animals.
How can I customize my Halloween Skull Potatoes?
Get creative! You can carve different facial expressions to make each potato unique. After baking, consider adding toppings such as melted cheese or fresh herbs for an extra burst of flavor. Spices like paprika or garlic powder can also take the spooky designs to the next level!
Crispy Halloween Skull Potatoes for Spooky Delights
Ingredients
Equipment
Method
- Preheat the oven to 425°F (220°C). Wash the mini creamer potatoes under cold water.
- Carefully carve spooky faces into each potato using a sharp paring knife.
- Toss the carved potatoes in a large bowl with olive oil, salt, and pepper.
- Spread the seasoned potatoes on a baking sheet and bake for 25-30 minutes, turning halfway through.
- Remove from the oven, let cool for a few minutes, then serve warm.
Leave a Reply