
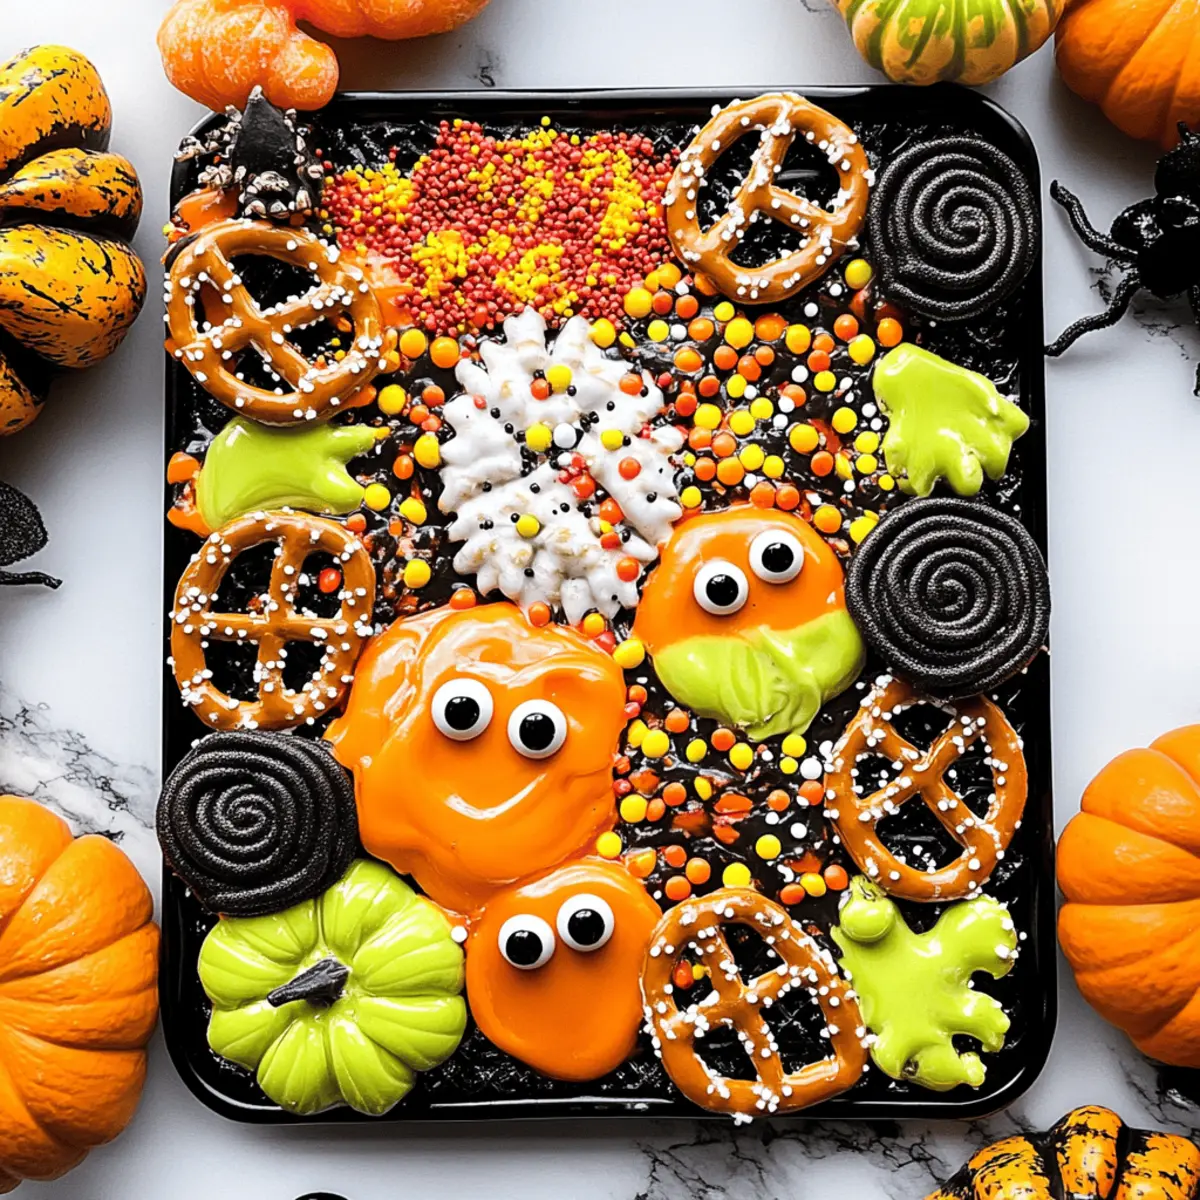
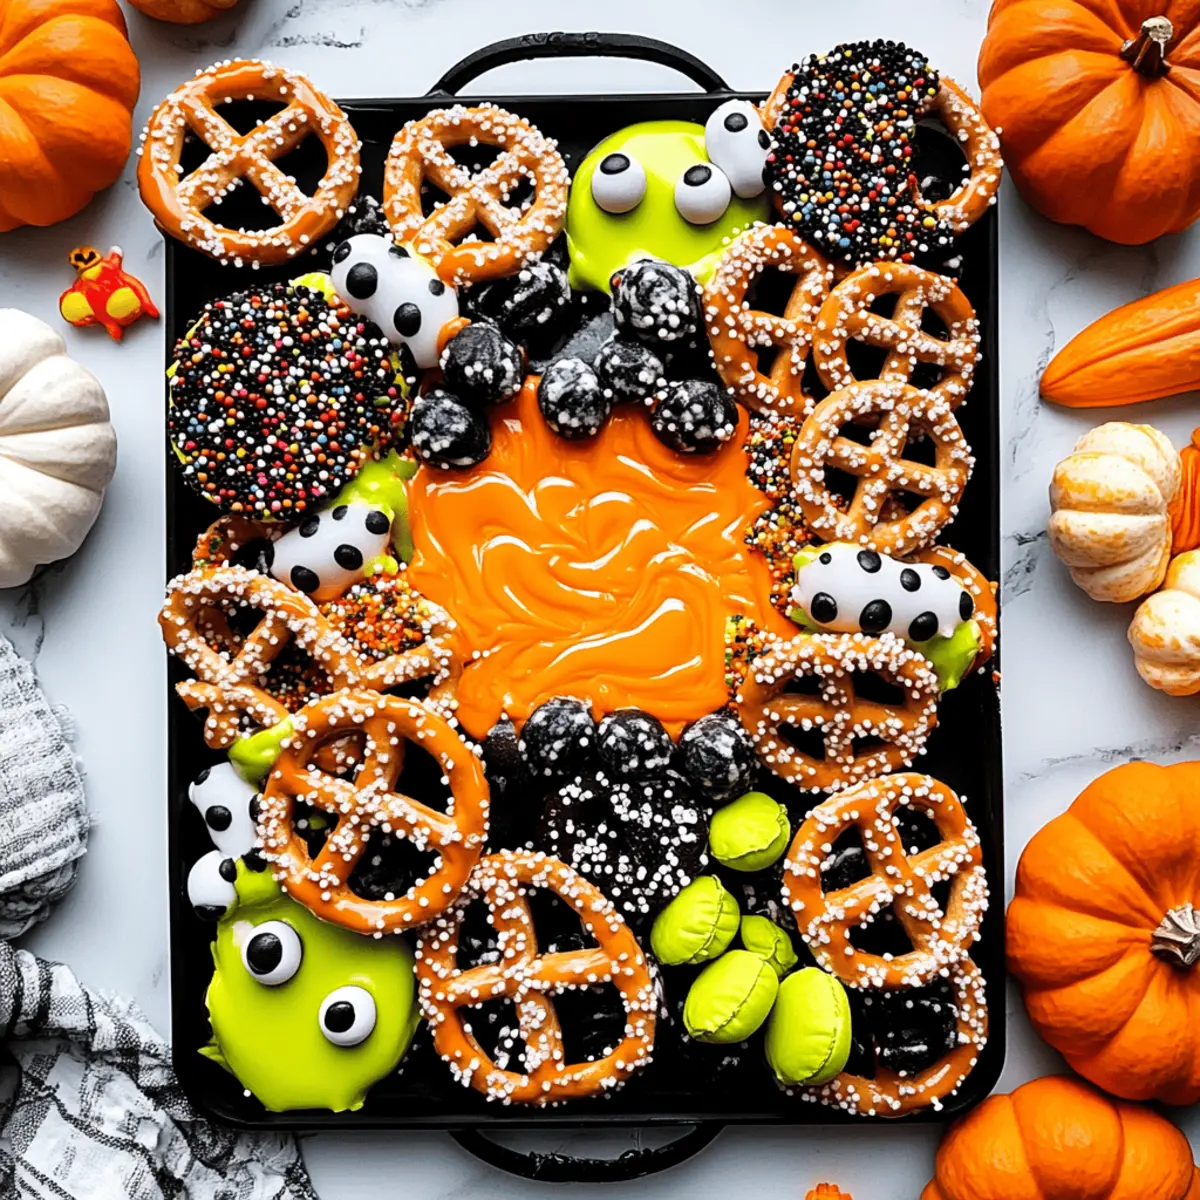
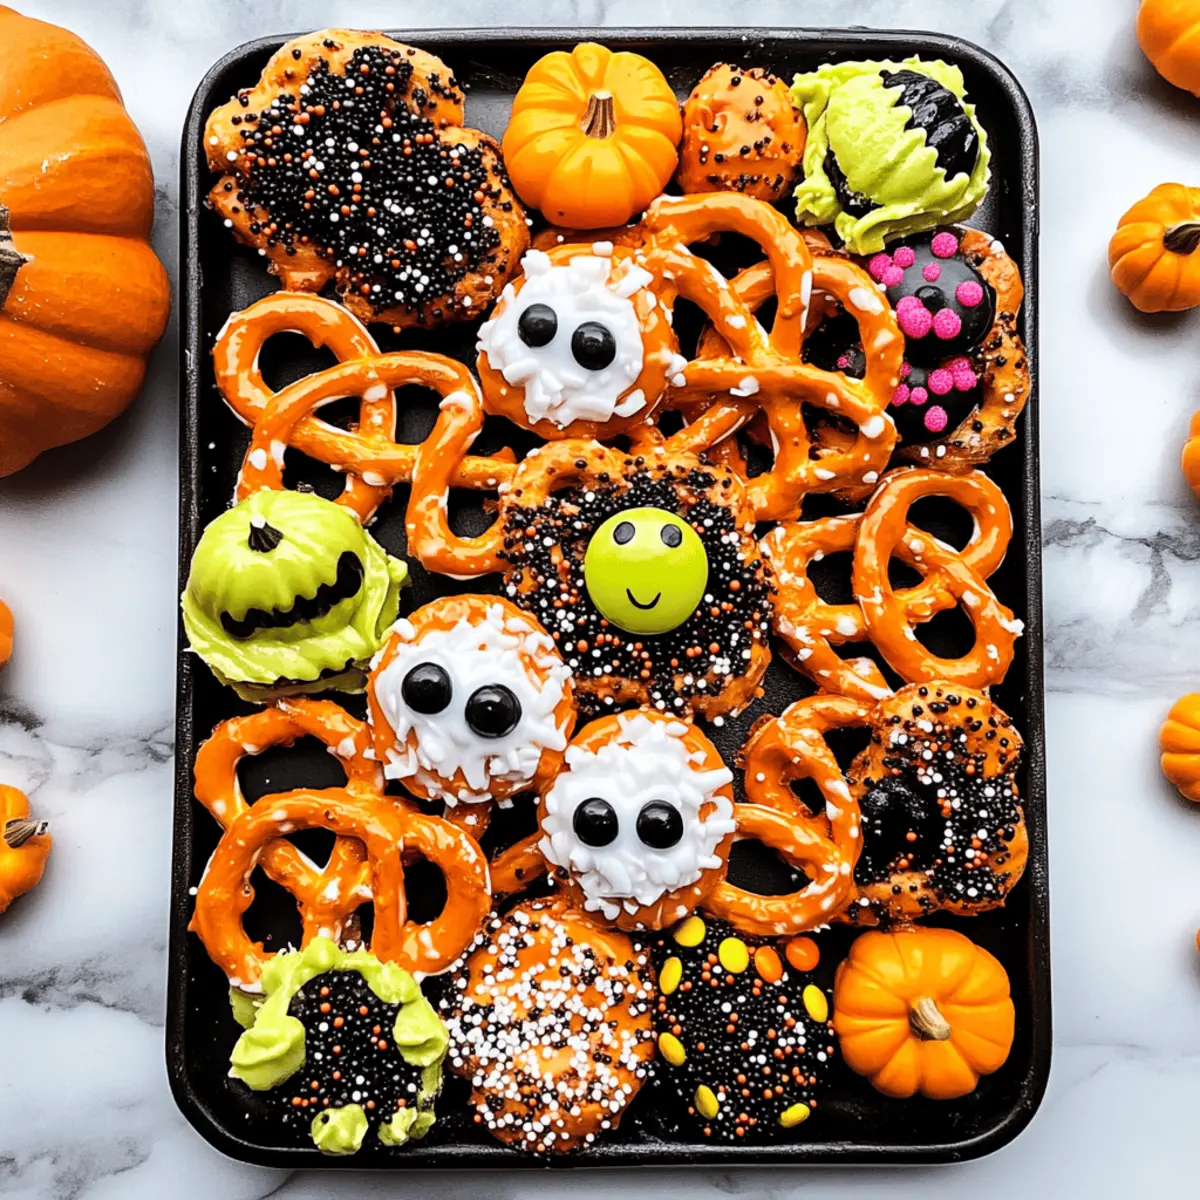
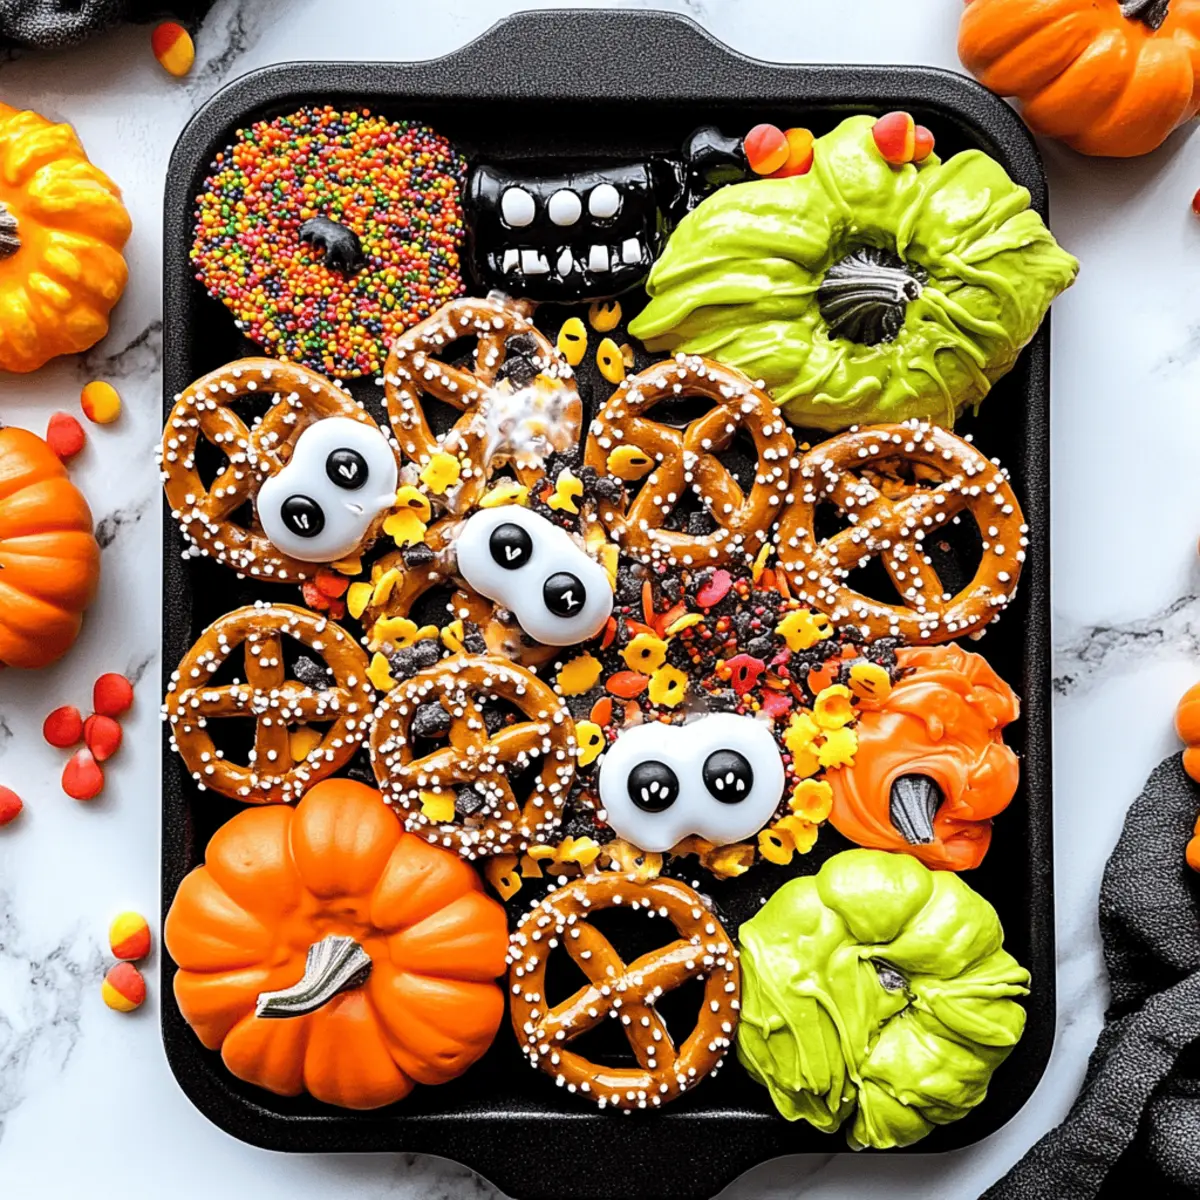
The crisp smell of autumn fills the air, and with it comes the excitement of Halloween treats! I can’t resist the charm of these Easy No-Bake Halloween Pretzels, which bring together the perfect combination of sweet and salty flavors. In just 20 minutes, you can whip up these delightful snacks that are not only fun to make but also a hit at any gathering. Kid-friendly and completely customizable, they make for a fantastic project with little ones, allowing everyone to unleash their creativity with colorful sprinkles and candy eyes. Plus, adapting this recipe for gluten-free pretzels means everyone can join in on the fun! So, are you ready to dive into a world of spooky deliciousness? Let’s create these Halloween Pretzels together!
Why Are Halloween Pretzels So Adorable?
Kid-Friendly Fun: These Easy No-Bake Halloween Pretzels allow children to get creative with decorating, making them a fantastic family activity!
Customizable Treats: The recipe is versatile; use various candies and sprinkles to match your Halloween theme, just like with Cauldron Cookies Spooky!
Quick and Simple: Ready in just 20 minutes, they’re perfect for last-minute gatherings or surprise snacks.
Crowd-Pleasing Appeal: Their vibrant colors and playful designs are sure to be a hit at Halloween parties or classrooms, just like Halloween Oreo Cookie and other treats!
Guilt-Free Option: Easily adapt the recipe to be gluten-free, ensuring everyone can indulge in these delicious snacks.
Get ready to enchant your guests with a treat that’s not only tasty but also a joy to make!
Halloween Pretzel Ingredients
For the Pretzels
• Mini Pretzels – The crunchy base is perfect for contrasting the sweet candy coating.
For the Coating
• Candy Melts (white, orange, black) – These colorful melts give a sweet and festive coating; substitute with melted chocolate chips mixed with coconut oil for added shine.
For the Decorations
• Halloween Sprinkles – Use vibrant sprinkles to bring your Halloween Pretzels to life with fun designs!
• Candy Eyes – These add a whimsical touch and enhance the spooky look of your pretzels.
• Crushed Oreos (optional) – Incorporate these to add an extra layer of flavor and texture.
For Preparation
• Parchment Paper – Line your baking sheet with this to prevent sticking and make cleanup a breeze.
Step‑by‑Step Instructions for Halloween Pretzels
Step 1: Prepare Your Baking Sheet
Begin by lining a baking sheet with parchment paper. This will prevent your Halloween Pretzels from sticking and make cleanup a breeze. Make sure the parchment paper is smooth and covers the entire sheet to provide a flat surface for your treats.
Step 2: Melt the Candy Melts
In a heatproof bowl, melt your candy melts (white, orange, or black) according to the package instructions. Use a microwave in 30-second intervals at low power, stirring after each interval until fully melted and smooth. The melted candy should have a glossy appearance, perfect for dipping your mini pretzels.
Step 3: Dip the Pretzels
Once your candy melts are ready, dip each mini pretzel into the melted candy, ensuring it’s fully coated. Allow any excess candy to drip off before placing it on the prepared baking sheet. If you prefer a drizzling technique, use a spoon to pour the melted candy over the pretzels for a lovely artistic effect.
Step 4: Add Festive Decorations
While the candy coating is still warm and soft, generously sprinkle your Halloween sprinkles over the pretzels. This will ensure that they stick well. Don’t forget to add candy eyes on top for a playful spooky touch! Be creative with your designs and let your imagination run wild.
Step 5: Allow to Set
Let your decorated Halloween Pretzels sit at room temperature for about 15 minutes, or until the candy coating has fully hardened. You’ll know they’re ready when the coating feels firm to the touch and the vibrant colors glisten beautifully in the light.
Step 6: Store Your Treats
Once set, gently transfer your Halloween Pretzels to an airtight container for storage. Keep them at room temperature, where they will stay fresh for up to 7 days. These delightful no-bake treats are perfect for snacking and sharing at Halloween gatherings!
Storage Tips for Halloween Pretzels
Room Temperature: Store your Halloween Pretzels in an airtight container at room temperature for up to 7 days to retain their crispiness and vibrant colors.
Fridge: If you prefer, the treats can be kept in the fridge, but allow them to come to room temperature before serving for the best texture.
Freezer: You can freeze your Halloween Pretzels for up to 2 months. Make sure to layer them between parchment paper in an airtight container to prevent sticking.
Reheating: If you want to soften the candy coating slightly, heat them in the microwave for a few seconds at a low power setting before serving.
Make Ahead Options
These Easy No-Bake Halloween Pretzels are perfect for meal prep, making your Halloween festivities a breeze! You can prepare the pretzels by dipping them in the melted candy and decorating them up to 24 hours in advance. Just be sure to allow them to set completely before transferring them to an airtight container. For optimal freshness, store them at room temperature, as refrigerating can cause the candy coating to lose its glossy finish. When you’re ready to serve, simply place them on a festive platter and watch them disappear. With these make-ahead tips, you’ll have more time to enjoy the spooky season with family and friends!
Halloween Pretzels Variations & Substitutions
Feel free to unleash your creativity and customize these treats to suit your tastes and festivities!
-
Gluten-Free Option: Use gluten-free mini pretzels so everyone can enjoy this delightful treat.
-
Chocolate-Covered Twist: Swap candy melts for melted dark or milk chocolate for a rich flavor explosion.
-
Nutty Delight: Add a sprinkle of chopped nuts or nut butter for a delightful crunch and extra nutrition.
-
Seasonal Sprinkles: Replace Halloween sprinkles with holiday-themed ones for a versatile treat all year round. Think red and green for Christmas!
-
Spicy Kick: For those who love heat, add a pinch of cayenne pepper to the chocolate for a surprising twist. It’s a delightful combination of sweet and spicy!
-
Dark Chocolate Drizzle: Drizzle some dark chocolate over your candy-coated pretzels for an elegant touch and deeper flavor.
-
Crispy Additions: Crush up some pretzel sticks and sprinkle them on top for an additional crunchy texture, just like in our Candy Corn Cookies.
-
Colorful Layers: Instead of one candy coating, do two or three layers of different colors for a more festive and vibrant appearance!
Happy snacking, and enjoy the spooky creativity of making your own Halloween Pretzels!
Tips for the Best Halloween Pretzels
• Use Quality Ingredients: Choose high-quality candy melts for vibrant colors and flavors. This ensures your Halloween Pretzels taste as good as they look.
• Avoid Overheating: When melting candy, use low heat. Overheating can cause the candy to seize, ruining the smoothness needed for dipping.
• Watch the Sprinkles: Add sprinkles immediately after dipping, while the coating is warm. If it hardens, sprinkles won’t stick, leaving your pretzels plain.
• Mix and Match: Feel free to experiment with various sprinkles and toppings to make your Halloween Pretzels uniquely festive. Personalizing them makes the process even more enjoyable!
• Store Properly: To keep your Halloween Pretzels fresh, ensure they are stored in an airtight container. They stay delicious for up to a week!
What to Serve with Easy No-Bake Halloween Pretzels?
These festive treats are delightful on their own, but pairing them with the right accompaniments can elevate your Halloween gathering to a spooky celebration!
-
Spooky Cheese Platter: A mix of creamy cheeses and seasonal fruits adds a savory touch, contrasting beautifully with the sweetness of your pretzels. Include some ghost-shaped crackers for extra fun!
-
Pumpkin Spice Hot Chocolate: This rich, warm drink complements the pretzels’ sweetness while providing that cozy autumn vibe. Top it off with whipped cream and a sprinkle of cinnamon.
-
Apple Slices with Caramel Dip: Bright, crisp apples served with buttery caramel make for a fresh yet indulgent snack that balances the salty and sweet notes of your Halloween Pretzels.
-
Monster Fruit Cups: Create fun fruit cups using an assortment of colorful fruits, adding googly eyes for a whimsical presentation. It’s a healthy option that kids will love!
-
Ghoulish Guacamole: A zesty guacamole served with bagel chips can provide a delightful contrast to the sugary pretzels, ensuring there’s something savory to enhance the snack table.
-
Creepy Caprese Skewers: Assemble cherry tomatoes, mozzarella balls, and basil for a fresh bite. Drizzle with balsamic glaze for that extra layer of flavor, creating a colorful addition to your spread.
-
Halloween-themed Punch: Whip up a fun punch using fruit juices and soda, garnished with gummy worms or floating ‘eyeballs’ made from lychee, blueberries, or peeled grapes to grab attention!
These pairings not only complement your Easy No-Bake Halloween Pretzels but also create a memorable culinary experience that brings everyone together in the spirit of Halloween.
Halloween Pretzels Recipe FAQs
How do I choose the best mini pretzels for this recipe?
Look for pretzels that are crisp and free from any dark spots or signs of staleness. Ideally, they should be fresh and crunchy to ensure the perfect pairing with the sweet candy coating.
What is the best way to store Halloween Pretzels?
Store your Halloween Pretzels in an airtight container at room temperature for up to 7 days. If you have a sweet tooth like I do, they may not last that long! Ensure they are fully set and cooled before sealing to avoid any moisture accumulation.
Can I freeze Halloween Pretzels?
Absolutely! To freeze your Halloween Pretzels, layer them between sheets of parchment paper in an airtight container. They can be stored in the freezer for up to 2 months. When you’re ready to enjoy them, allow them to thaw at room temperature; this preserves their delightful crunch.
What should I do if the candy coating hardens too quickly?
If your candy coating hardens before you can sprinkle decorations, don’t worry! You can gently reheat the pretzels in the microwave for 5-10 seconds at a low power setting to soften the coating slightly. Then, proceed to add your fun Halloween sprinkles and candy eyes.
Are Halloween Pretzels gluten-free?
Yes, just make sure to use gluten-free mini pretzels. There are many brands available, and they taste just as delicious! Check the packaging to confirm their gluten-free status, allowing everyone to enjoy these treats without worry.
Can I use chocolate instead of candy melts?
Certainly! If you prefer chocolate, melting chocolate chips mixed with a teaspoon of coconut oil gives a shiny finish similar to candy melts. Just remember to heat slowly to avoid seizing, ensuring your Halloween Pretzels remain as delightful as ever!
Delightful Halloween Pretzels: Easy No-Bake Fun for Kids!
Ingredients
Equipment
Method
- Prepare Your Baking Sheet: Line a baking sheet with parchment paper.
- Melt the Candy Melts: Melt candy melts in a microwave, stirring until smooth.
- Dip the Pretzels: Dip each pretzel into the melted candy, ensuring full coating.
- Add Festive Decorations: Sprinkle Halloween sprinkles and add candy eyes while coating is warm.
- Allow to Set: Let pretzels sit at room temperature for about 15 minutes.
- Store Your Treats: Transfer to an airtight container for storage at room temperature.
Leave a Reply