
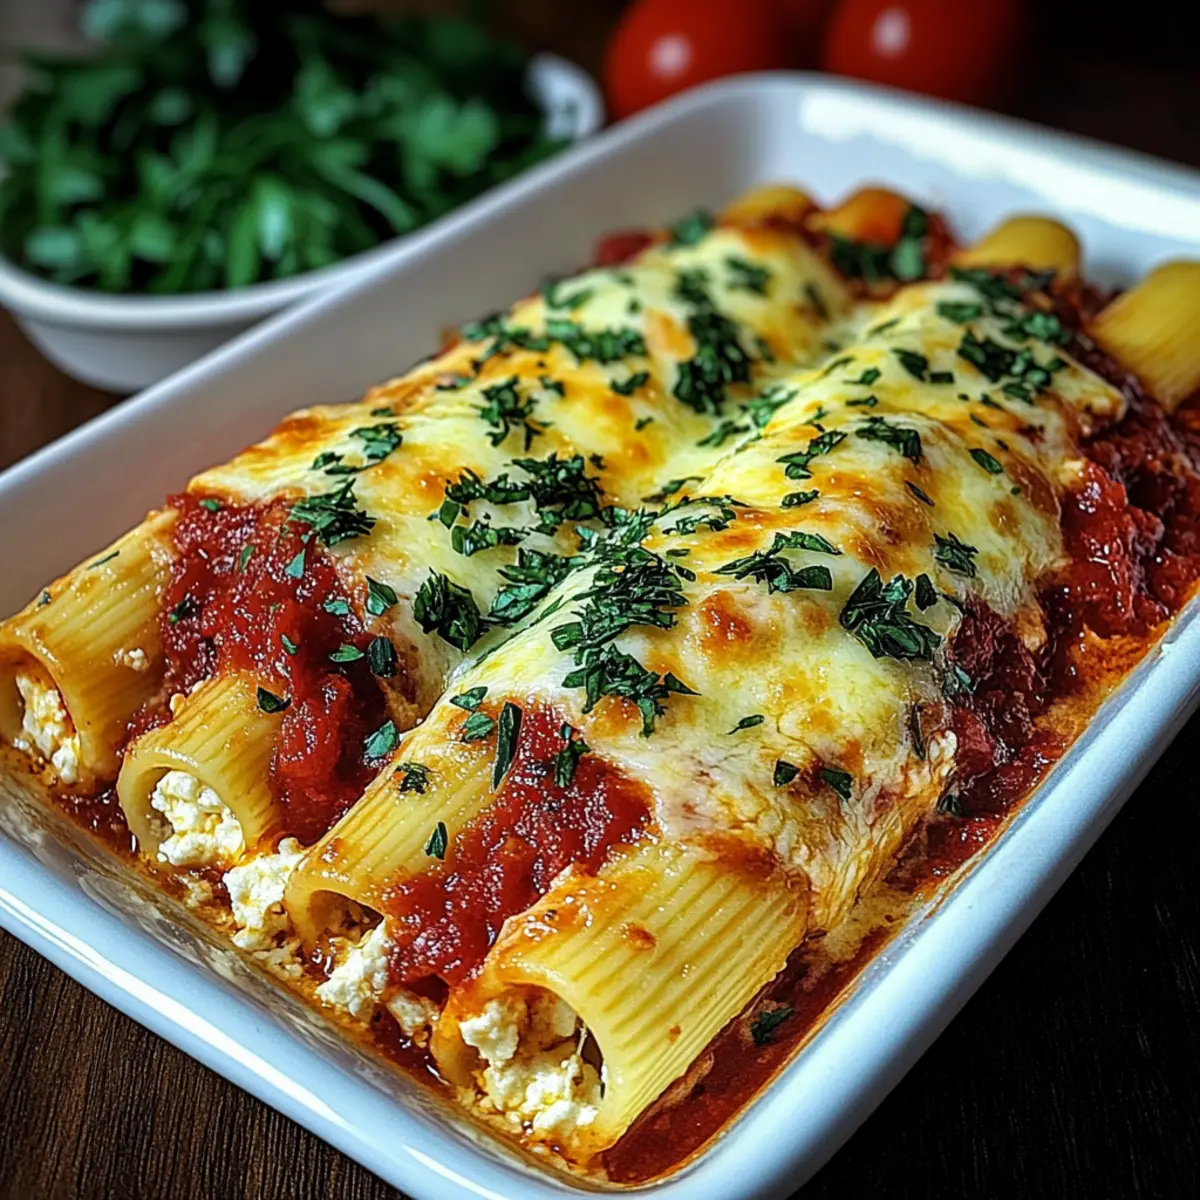
As I watched the rain patter against the window, the thought of cozying up with a plate of Cheesy Chicken Manicotti made my heart flutter. This classic dish offers a delicious mix of tender pasta shells filled with a scrumptious chicken and ricotta blend, all enveloped in a rich marinara sauce and topped with gooey mozzarella. What’s not to love? Perfect for busy weeknights, this crowd-pleaser is not only simple to whip up but also effortlessly adaptable, allowing you to swap ingredients based on what you have on hand. Whether you’re a seasoned cook or just starting your culinary journey, this recipe is bound to turn dinner into a delightful occasion. So, are you ready to bring some Italian comfort into your home?
Why is Cheesy Chicken Manicotti a Must-Try?
Irresistible Comfort Food: There’s something magical about cheesy, gooey pasta that wraps you in warmth!
Easy to Make: With just a handful of ingredients, this meal is perfect for even the busiest of weeknights.
Flexible Ingredients: You can easily substitute chicken with shredded turkey or even sautéed vegetables for a vegetarian twist!
Crowd-Pleaser: Whether it’s a family dinner or a gathering with friends, this dish always impresses.
Perfect for Leftovers: This Cheesy Chicken Manicotti stores beautifully, making it an excellent choice for meal prep. Don’t forget to enjoy it alongside a fresh salad and maybe some garlic bread for the full experience!
Cheesy Chicken Manicotti Ingredients
- For the Pasta
• Manicotti Pasta Shells – Ensure they’re al dente to prevent mushiness when baked. - For the Filling
• Shredded Cooked Chicken – Use rotisserie chicken for convenience and great flavor.
• Ricotta Cheese – Adds creaminess; substitute with cottage cheese for a different texture.
• Mozzarella Cheese – Freshly shredded mozzarella melts beautifully for that perfect cheese pull.
• Parmesan Cheese – Enhances flavor depth; can be omitted for dietary restrictions.
• Garlic – Fresh minced garlic adds aromatic flavor; garlic powder is a quick substitute. - For the Sauce
• Marinara Sauce – Use homemade for freshness, or store-bought for a quick option. - Seasoning
• Dried Italian Seasoning – Provides a blend of herbs for added flavor; substitute with basil or oregano if needed.
• Black Pepper and Salt – Essential for seasoning; remember to salt your pasta water generously. - For Baking
• Olive Oil – Grease your baking dish to prevent sticking. - For Garnish
• Fresh Parsley – Optional, but it adds a touch of color and freshness to your dish.
This Cheesy Chicken Manicotti recipe strikes the perfect balance between comfort and convenience, making it a delightful addition to your dinner repertoire!
Step‑by‑Step Instructions for Cheesy Chicken Manicotti
Step 1: Preheat the Oven
Begin by preheating your oven to 350°F (175°C). This ensures a perfectly baked Cheesy Chicken Manicotti. While the oven heats, gather your ingredients and prepare your greased 13×9 inch baking dish with a drizzle of olive oil to prevent sticking.
Step 2: Cook the Manicotti Shells
In a large pot, bring salted water to a boil and carefully add the manicotti shells. Cook them for 7-8 minutes until they’re al dente, then drain and lay them flat on a baking sheet to cool slightly. This will prevent them from sticking together as you prepare to fill them.
Step 3: Prepare the Filling
In a mixing bowl, combine the shredded cooked chicken, ricotta cheese, half of the shredded mozzarella, Parmesan cheese, minced garlic, and a pinch of salt and pepper. Mix all ingredients thoroughly until well blended. This creamy filling will be the heart of your Cheesy Chicken Manicotti.
Step 4: Stuff the Manicotti
Carefully take each cooled manicotti shell and use a spoon or a piping bag to fill them with the chicken and cheese mixture. Place the filled shells seam-side down in your greased baking dish. This helps keep the filling secure and makes for a beautiful presentation.
Step 5: Add the Sauce
Once all the manicotti shells are filled and in the baking dish, pour marinara sauce generously over the top. Make sure to cover the shells entirely; this provides moisture during baking. Then sprinkle the remaining mozzarella cheese evenly over the sauce for that delightful, gooey topping.
Step 6: Bake the Manicotti
Cover the baking dish with aluminum foil and place it in the preheated oven. Bake for 30 minutes, allowing the flavors to meld together beautifully. After 30 minutes, remove the foil and continue baking for another 10 minutes. You’ll know it’s ready when the cheese is bubbly and lightly golden.
Step 7: Rest and Garnish
Once out of the oven, let the Cheesy Chicken Manicotti rest for about 5 minutes. This helps the dish set slightly, making it easier to serve. Garnish with fresh parsley if desired, adding a pop of color and freshness to this comforting meal.
What to Serve with Cheesy Chicken Manicotti?
When it comes to transforming your Cheesy Chicken Manicotti into a delightful meal experience, consider these hearty and complementary dishes that will tantalize your taste buds.
-
Garlic Bread:
Crispy on the outside and soft on the inside, garlic bread is perfect for scooping up marinara sauce. The buttery garlic flavor pairs beautifully with the richness of the manicotti. -
Caesar Salad:
With its crisp romaine, creamy dressing, and crunchy croutons, a Caesar salad adds a refreshing crunch to your meal. The tanginess of the dressing balances the richness of the manicotti nicely. -
Steamed Broccoli:
Lightly steamed broccoli brings a vibrant green color and some nutritious fiber to your plate. Its mild flavor complements the cheesy filling, making it a healthy addition! -
Roasted Vegetables:
A medley of seasonal roasted vegetables adds a lovely caramelization and natural sweetness to the meal. The various textures from the veggies create a wonderful contrast with the creamy manicotti. -
Italian Potatoes:
Crisp and seasoned Italian-style roasted potatoes offer a delightful, savory counterpart. The crispy edges and fluffy interiors match the comforting textures of the cheese-filled pasta. -
Red Wine:
A glass of smooth red wine enhances the meal with notes of deep fruit and subtly spicy undertones. It heightens the flavors of the cheesy chicken manicotti while adding a touch of elegance. -
Tiramisu:
End your dining experience on a sweet note with a classic tiramisu. The rich coffee flavors and creamy layers provide an indulgent contrast to your hearty main course.
With these delightful pairings, your Cheesy Chicken Manicotti will shine even brighter, creating a memorable dining experience for you and your loved ones.
Expert Tips for Cheesy Chicken Manicotti
-
Pasta Perfection: Always salt your pasta water generously. This enhances the flavor of the shells and prevents blandness in your dish.
-
Watch the Time: Monitor the cooking time for the manicotti shells. Overcooking can lead to mushy pasta that doesn’t hold its shape well when stuffed.
-
Fill Steadily: Use a sturdy piping bag or a spoon to fill each manicotti shell carefully. This prevents leaks and ensures a generous filling, making each bite delightful.
-
Flavor Boost: Consider adding sautéed vegetables like spinach or mushrooms to the filling for an extra layer of flavor and nutrition in your Cheesy Chicken Manicotti.
-
Rest for Greatness: Let the manicotti rest for a few minutes after baking. This allows the cheese to set and makes serving easier while keeping the filling intact.
Make Ahead Options
These Cheesy Chicken Manicotti are perfect for meal prep enthusiasts! You can prepare the filling (shredded chicken, ricotta, and spices) up to 24 hours in advance and store it in an airtight container in the refrigerator. Additionally, you can stuff the manicotti shells and assemble the dish with marinara sauce and cheese up to 2 days ahead. Just cover the baking dish tightly with foil for best results. When you’re ready to enjoy this creamy delight, bake straight from the fridge, adding an extra 5-10 minutes to the cooking time to ensure it’s warmed through. This way, your weeknight dinner is effortlessly delicious and just as satisfying!
Variations for Cheesy Chicken Manicotti
Feel free to make this Cheesy Chicken Manicotti your own—after all, every palate deserves a unique touch.
- Turkey Swap: Replace chicken with shredded turkey for a delightful twist on flavor. It’s perfect for those leftover holiday meals!
- Veggie Delight: Fill the shells with a mixture of sautéed spinach, mushrooms, and bell peppers for a hearty vegetarian option. This colorful blend makes each bite a burst of goodness.
- Low-Fat Option: Use low-fat ricotta and mozzarella cheese to lighten up the dish while keeping it creamy and delicious. You won’t sacrifice flavor—just enjoy a guilt-free indulgence!
- Alfredo Adventure: Swap marinara sauce for a rich Alfredo sauce. This creamy twist adds a new dimension and pairs wonderfully with the cheesy filling.
- Spicy Kick: Add a dash of red pepper flakes or diced jalapeños to the filling for some heat. This adds a surprising and delightful zing that spice lovers will adore!
- Herb Infusion: Incorporate fresh herbs like basil or parsley into the filling for an aromatic upgrade. It elevates the classic dish into a fresh culinary experience.
- Cheese Lovers’ Dream: Mix in a blend of different cheeses like gouda or fontina for an extra cheesy delight that will make your heart skip a beat.
- Tortilla Version: Swap out the manicotti shells for large flour tortillas for a fusion-style roll-up. It’s an unexpected and fun twist on this comfort classic!
For even more delightful variations, try adding some sautéed vegetables or spices to the filling for a unique flair. And if you’re in the mood for something equally comforting, don’t miss out on my Southern Cheesy Chicken or Cowboy Butter Chicken recipes!
How to Store and Freeze Cheesy Chicken Manicotti
- Fridge: Store any leftovers in an airtight container for up to 3 days. Reheat in the microwave or oven until heated through for a comforting meal option.
- Freezer: For longer storage, freeze the unbaked Cheesy Chicken Manicotti. Wrap tightly in plastic wrap and foil; it will keep well for up to 3 months.
- Reheating: To reheat frozen manicotti, bake from frozen at 375°F (190°C) for about 45-60 minutes covered, then uncover for the last 10-15 minutes until bubbly and golden.
- Serving Tip: After reheating, let the dish rest for a few minutes before serving to enhance the flavors and texture.

Cheesy Chicken Manicotti Recipe FAQs
What kind of manicotti pasta should I use?
For the best results, I recommend using traditional manicotti pasta shells, as they hold the filling beautifully and provide that desired texture. Always look for shells that have a firm structure and are free from cracks to ensure they can withstand the filling process.
How can I store leftover Cheesy Chicken Manicotti?
Absolutely! Store any leftovers in an airtight container in the refrigerator for up to 3 days. When you’re ready to enjoy, simply reheat in the microwave or oven. For oven reheating, cover the dish with foil to prevent drying out, and bake until heated through.
Can I freeze Cheesy Chicken Manicotti?
Yes, you can! To freeze, you can either freeze the unbaked manicotti or after cooking. If unbaked, wrap the assembled dish tightly in plastic wrap and aluminum foil, ensuring it’s sealed well, and it can last up to 3 months in the freezer. When you’re ready to bake, there’s no need to thaw; simply bake from frozen at 375°F (190°C) for about 45-60 minutes, covered with foil, then uncover for the last 10-15 minutes to achieve that bubbly, golden top.
What if my manicotti shells break while cooking?
No worries! If you find your manicotti shells breaking, simply use them as a fun lasagna alternative by layering the broken pieces with filling and sauce in a baking dish. It will still taste delicious, even if it doesn’t have the traditional shape. Additionally, make sure you’re boiling the shells in salted water and not overcooking them to help maintain their integrity.
Can I make Cheesy Chicken Manicotti vegetarian?
Absolutely! To create a vegetarian version, simply swap the shredded chicken for sautéed vegetables like spinach, mushrooms, or zucchini. You can also add a mixture of ricotta and some herbs for extra flavor. This adaptation keeps all the creamy goodness while catering to vegetarian dietary preferences.
What if I have a dairy allergy?
If you have a dairy allergy, you can replace the ricotta and mozzarella with dairy-free alternatives made from plant-based ingredients. Vegan cheese options are widely available and can achieve that gooey texture you love, while a dairy-free cashew cream can offer a delightful creaminess in place of ricotta. Always check ingredient labels to ensure they are completely dairy-free.
Cheesy Chicken Manicotti: A Family Favorite You'll Crave
Ingredients
Equipment
Method
- Preheat your oven to 350°F (175°C) and grease a 13x9 inch baking dish with olive oil.
- Bring salted water to a boil in a large pot, add the manicotti shells, cook for 7-8 minutes until al dente, drain and lay flat.
- In a mixing bowl, combine the chicken, ricotta, half of the mozzarella, parmesan, garlic, salt, and pepper, mix thoroughly.
- Fill each manicotti shell using a spoon or piping bag, placing them seam-side down in the baking dish.
- Pour marinara sauce generously over the shells and sprinkle with the remaining mozzarella.
- Cover with aluminum foil and bake for 30 minutes, remove the foil and bake for another 10 minutes.
- Let the dish rest for 5 minutes before serving, garnish with parsley if desired.
Leave a Reply