
The aroma of fresh hash browns sizzling to perfection can brighten any morning. Today, I’m excited to share my Crispy Waffle Maker Hash Browns, a clever twist on a classic breakfast staple that transforms simple ingredients into golden perfection in under 30 minutes. This easy recipe is not only a breeze to whip up, but it’s also gluten-free, making it ideal for everyone in your household, whether you’re rushing out the door or enjoying a leisurely weekend brunch. Imagine crispy edges giving way to a fluffy interior, all thanks to your trusty waffle maker! Plus, the versatility of toppings and ingredients allows you to customize each batch to your heart’s content. So, are you ready to elevate your breakfast game? Let’s dive into this delicious adventure!

Why Are Waffle Maker Hash Browns Perfect?
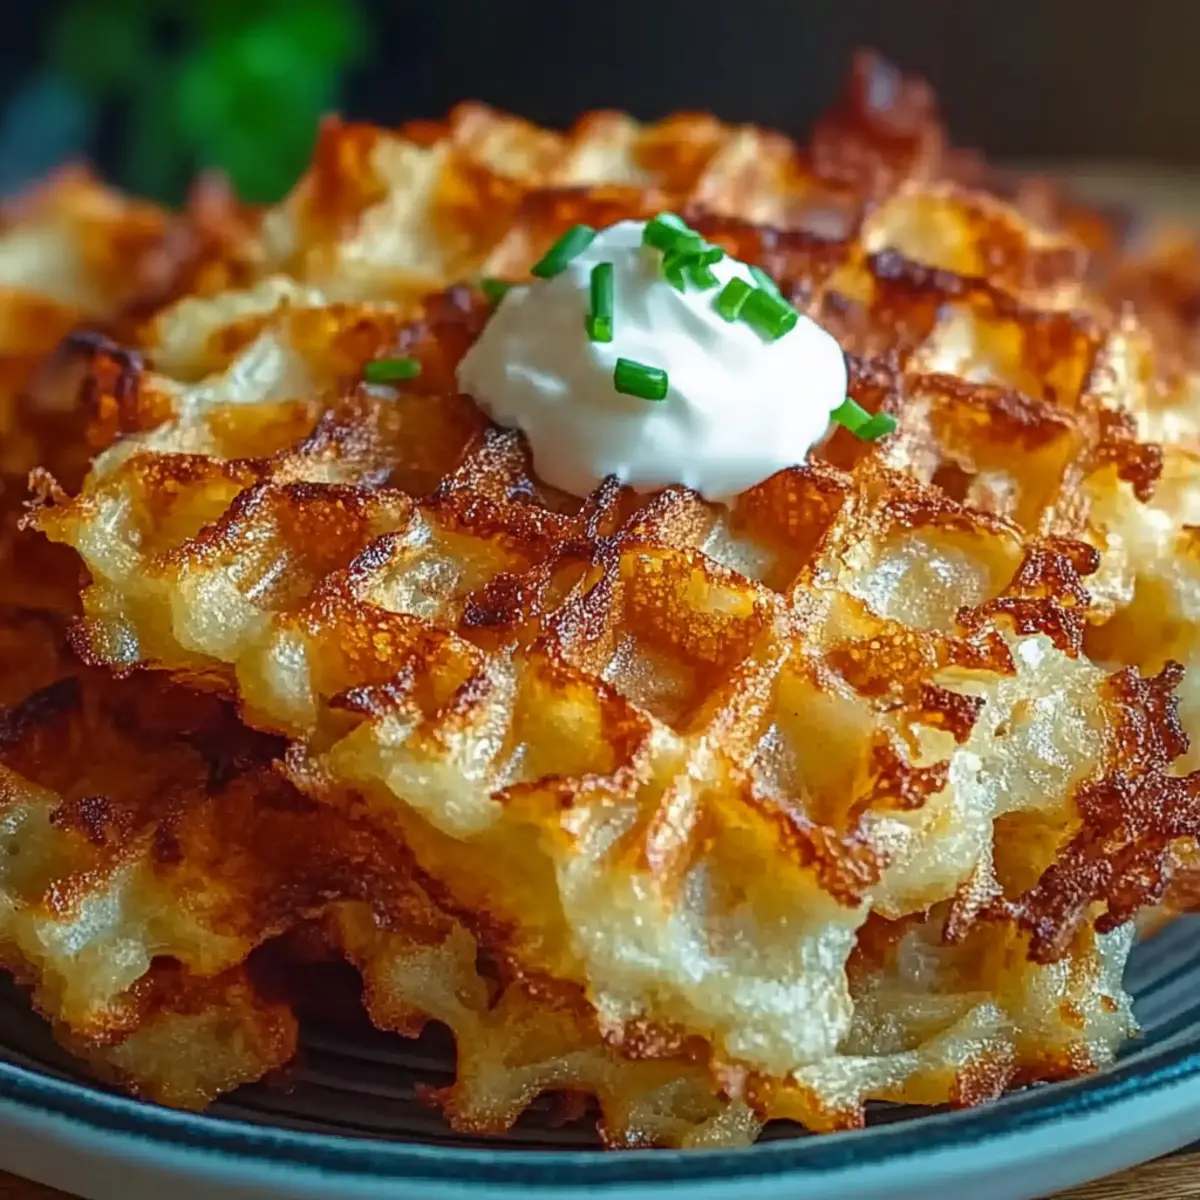
Crispy edges and a fluffy inside come together for the ultimate breakfast treat! These hash browns are a game changer for busy mornings or brunch gatherings. Quick and easy to prepare, you’ll only need about 30 minutes from start to finish! Gluten-free and customizable, you can easily modify ingredients to suit your tastes. Plus, they’re bound to impress anyone around the breakfast table, making them a crowd-pleaser everyone will love! Looking for more breakfast inspiration? Check out our quick breakfast recipes that are equally easy to whip up!
Waffle Maker Hash Browns Ingredients
For the Hash Browns
• Russet Potatoes – The star of the dish, providing the ideal starchiness for that perfect crispy texture; try Yukon Gold for a sweeter twist.
• Salt – A key player that enhances flavor, ensuring every bite is savory and satisfying.
• Black Pepper – Adds just a hint of heat and depth to elevate the dish.
• Garlic Powder – Infuses the potatoes with a savory aroma, making your hash browns irresistible.
• Onion Powder – Complements the garlic and enhances the overall flavor profile beautifully.
• Olive Oil – Helps achieve that required crispy exterior; can be swapped with vegetable oil if desired.
• Cooking Spray – Prevents sticking to the waffle maker, ensuring easy removal and hassle-free cleanup.
Optional Toppings
• Sour Cream – Adds a creamy, tangy element that balances the crunch perfectly.
• Chives – A sprinkle of fresh chives introduces a pop of color and fresh flavor.
• Shredded Cheese – Melts beautifully over the hot hash browns for an extra indulgent touch.
Elevate your breakfast experience with these delightful Waffle Maker Hash Browns! Enjoy the flavors and creative toppings you can explore!
Step-by-Step Instructions for Crispy Waffle Maker Hash Browns
Step 1: Preheat the Waffle Maker
Begin by preheating your waffle maker according to the manufacturer’s instructions. This usually takes about 5 minutes and is crucial for ensuring your Waffle Maker Hash Browns turn golden brown and crispy. A properly heated waffle maker will produce delightful crunchiness, so keep an eye on this step to set yourself up for success!
Step 2: Prepare the Potato Mixture
In a large mixing bowl, grate your russet potatoes and combine them with salt, black pepper, garlic powder, and onion powder. Mix thoroughly until each potato strand is well-coated with the seasonings, which should take about 2-3 minutes. The aroma of the mixture will transport you to breakfast bliss even before cooking begins!
Step 3: Add the Olive Oil
Drizzle olive oil over your seasoned potato mixture and stir gently until all the potato shreds are evenly coated. This will help achieve that crispy, crave-worthy texture in your Waffle Maker Hash Browns. Allow the mixture to sit for a minute, letting the flavors mingle and settle in before cooking.
Step 4: Spray the Waffle Maker
Take your preheated waffle maker and generously coat both plates with cooking spray. This ensures that your hash browns don’t stick during the cooking process, making removal easy and cleanup a breeze. A light spray will help achieve the desired crispiness and prevent any potato bits from clinging.
Step 5: Cook the First Batch
Carefully scoop half of the potato mixture onto the preheated waffle maker, spreading it evenly to cover the surface. Close the lid gently and cook for about 8-10 minutes, keeping a close watch for that golden-brown color. The steam and aroma of the Waffle Maker Hash Browns will be irresistible as they cook!
Step 6: Remove and Continue Cooking
Once the first batch is crispy and golden, carefully open the waffle maker and use a fork or spatula to remove the hash browns. Place them on a plate and repeat the process with the remaining potato mixture. Each batch should be as delightful as the first, so enjoy the anticipation as they cook!
Step 7: Serve Hot with Toppings
After cooking all the batches, serve your crispy Waffle Maker Hash Browns hot. Consider topping them with favorites like sour cream, chives, or shredded cheese for an extra touch of flavor. These toppings will elevate your breakfast experience, adding a deliciously creamy and savory contrast to the crispy texture of the hash browns.

Storage Tips for Waffle Maker Hash Browns
Fridge: Store any leftover Waffle Maker Hash Browns in an airtight container for up to 3-4 days. This will keep them fresh while maintaining their delicious flavor.
Freezer: For longer storage, freeze the hash browns in a single layer on a baking sheet, then transfer to an airtight container or freezer bag. They can last up to 3 months.
Reheating: To reheat, place the frozen or refrigerated hash browns in the waffle maker or a skillet over medium heat. This ensures they regain their crispy texture and definitely enhances their taste!
Quality Check: Always inspect for any signs of freezer burn when thawing. If they look dull or icy, it’s best to discard them for optimal taste.
What to Serve with Crispy Waffle Maker Hash Browns
Elevate your breakfast spread with delicious additions that complement the crispy delight of hash browns.
-
Sunny-Side Up Eggs: The runny yolk provides a rich, creamy contrast to the crunchy texture, creating a breakfast experience that’s simply irresistible.
-
Crispy Bacon: The salty, smoky flavor pairs wonderfully with the potatoes, adding depth to your meal. Plus, who doesn’t love bacon?
-
Fresh Fruit Salad: Bright, juicy fruits like strawberries and blueberries offer a refreshing balance to the savory hash browns, enhancing the overall flavor profile.
-
Avocado Toast: Creamy avocados on toast bring a luscious creaminess that harmonizes perfectly with the crunch of your hash browns, making this a wholesome combination.
-
Sautéed Spinach: Adding some vibrant green veggies not only boosts nutrition but also introduces a slight earthiness that complements the savory potatoes beautifully.
-
Homemade Salsa: A zesty, tangy salsa can elevate the flavors even further, providing a delightful kick that pairs exceptionally well with the crispy texture of the hash browns.
-
Herbed Yogurt Dip: A dollop of tangy yogurt mixed with fresh herbs makes for a light, fresh accompaniment, perfect for scooping up with your hash browns.
-
Orange Juice or Coffee: Starting your day with a refreshing glass of OJ or a steaming cup of coffee creates the perfect breakfast ambiance, enhancing the comfort of your meal.
Waffle Maker Hash Browns Variations
Feel free to explore endless possibilities with your Waffle Maker Hash Browns for a breakfast experience that excites every palate!
-
Cheesy Delight: Mix in your favorite shredded cheese to the potato mixture before cooking for a melty, indulgent treat. The gooey cheese enhances every bite, providing a comforting richness that’s hard to resist.
-
Loaded Hash Browns: Add cooked bacon bits or sausage to the potato mixture for a hearty breakfast twist. The savory meat elevates the flavor profile, turning your hash browns into a satisfying meal that’s packed with protein.
-
Veggie Boost: Toss in finely diced bell peppers, zucchini, or spinach for added nutrition and color. This not only enhances the dish’s health benefits but also brings a refreshing crunch and brightness to your hash browns.
-
Spicy Kick: Sprinkle in some cayenne pepper or diced jalapeños for a delightful spicy version. Just a touch of heat adds exciting warmth, elevating your breakfast and waking up your taste buds!
-
Herb Infusion: Experiment with fresh herbs like thyme, rosemary, or parsley to infuse the potatoes with earthy flavors. Fresh herbs bring a burst of garden freshness that harmonizes beautifully with the crispy potatoes.
-
Sweet Variation: Swap potatoes with grated sweet potatoes for a sweeter, nutrient-rich alternative. This will offer a delightful different flavor that pairs perfectly with maple syrup or cinnamon for a breakfast treat!
-
Gluten-Free Alternative: Use gluten-free breadcrumbs instead of flour for even crispier hash browns. This ensures everyone’s dietary needs are met without sacrificing texture or taste.
Ready to elevate your breakfast? Consider serving these crispy delights alongside easy-to-make eggs or a light garden salad for a refreshing touch!
Expert Tips for Waffle Maker Hash Browns
• Preheat Wisely: Ensure your waffle maker is fully preheated to achieve the maximum crispiness. A hot surface makes all the difference!
• Coat Between Batches: Don’t skip spraying the waffle maker between batches. A light coat prevents sticking and helps the Waffle Maker Hash Browns release easily.
• Check for Doneness: Monitor the cooking time closely. If you notice the edges browning too quickly, consider adjusting your cooking time or temperature to avoid burning.
• Mix It Up: Feel free to experiment with various add-ins and spices to customize your Waffle Maker Hash Browns. Just remember—keep track of flavors that work harmoniously together.
• Storage Tips: If you have leftovers, store them in an airtight container in the fridge. Reheating in the waffle maker restores their crispy goodness beautifully!
Make Ahead Options
These Crispy Waffle Maker Hash Browns are perfect for meal prep enthusiasts! You can grate and season the russet potatoes up to 24 hours in advance, storing the mixture in an airtight container in the refrigerator to keep it fresh. Just remember to press out any excess moisture before cooking to maintain that coveted crunch. If you prefer, you can also prepare the entire batch and store the cooked hash browns in the fridge for up to 3 days. When you’re ready to serve, reheat them in the waffle maker or skillet for the best texture, ensuring they remain just as delicious as when freshly made. Enjoy effortless breakfasts any day of the week!

Waffle Maker Hash Browns Recipe FAQs
How do I choose the right potatoes for Waffle Maker Hash Browns?
Absolutely! Russet potatoes are ideal for making hash browns due to their high starch content, which helps achieve that perfect crispy texture. If you prefer a slightly different flavor or sweetness, you can also use Yukon Gold or even sweet potatoes, but keep in mind that the texture may differ slightly.
What is the best way to store leftover Waffle Maker Hash Browns?
After enjoying your delicious hash browns, store any leftovers in an airtight container in the fridge for 3-4 days. This method helps retain their flavor and keeps them fresh. Simply reheat them using your waffle maker or in a skillet to bring back that delightful crunch!
Can I freeze Waffle Maker Hash Browns for later use?
Very! To freeze your Waffle Maker Hash Browns, begin by laying them out in a single layer on a baking sheet. Once they’re completely frozen, transfer them to an airtight container or a freezer bag. They will remain fresh for up to 3 months. When you’re ready to enjoy, simply reheat them in the waffle maker for a crunchy treat.
What should I do if my hash browns are sticking to the waffle maker?
If you find the hash browns sticking, make sure your waffle maker is adequately preheated before adding the potato mixture. A thorough spray of cooking spray on both plates is essential to prevent sticking. Additionally, you might want to try using a spatula to gently loosen any stuck bits during cooking if needed.
Are Waffle Maker Hash Browns safe for someone with gluten allergies?
Absolutely! These Waffle Maker Hash Browns are naturally gluten-free, as the primary ingredient is just potatoes and seasonings. However, if you opt for store-bought cooking spray or any additional toppings, be sure to check the labels for gluten-containing ingredients to ensure they’re safe for anyone with gluten allergies.
How can I customize the flavor of my Waffle Maker Hash Browns?
The more the merrier! You can mix in additional seasonings, such as smoked paprika or chili powder, to change the flavor profile. Adding in shredded cheese, cooked bacon bits, or diced vegetables like bell peppers or green onions is a fantastic way to infuse extra taste and texture. Feel free to get creative based on your preferences!
Crispy Waffle Maker Hash Browns for Effortless Breakfast Bliss
Ingredients
Equipment
Method
- Preheat your waffle maker according to the manufacturer’s instructions for about 5 minutes.
- In a large mixing bowl, grate russet potatoes and mix with salt, black pepper, garlic powder, and onion powder.
- Drizzle olive oil over the potato mixture and stir until evenly coated.
- Generously coat both plates of the preheated waffle maker with cooking spray.
- Scoop half of the potato mixture onto the waffle maker and cook for about 8-10 minutes.
- Once crispy and golden, remove the hash browns and repeat with the remaining mixture.
- Serve hot with optional toppings like sour cream, chives, or shredded cheese.
Leave a Reply