
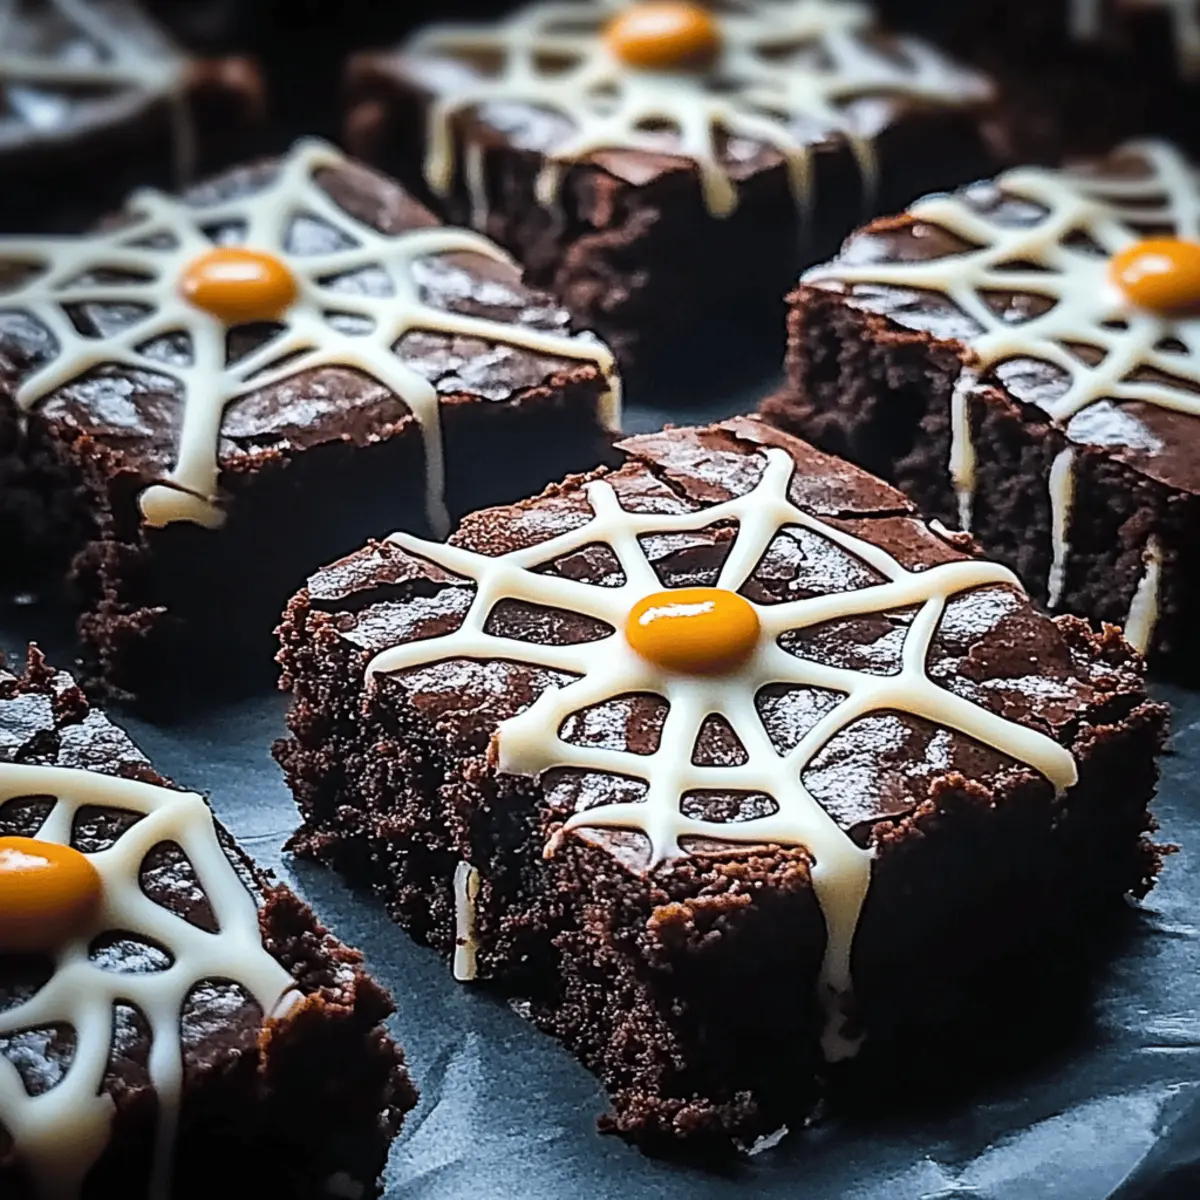
As the leaves change and pumpkins begin to dot the landscape, my excitement for Halloween kicks into high gear. This year, I’ve conjured up a delightfully spooky treat that’s sure to wow your guests: Spooky Spider Web Halloween Brownies! These rich, fudgy bites deliver a comforting chocolate flavor topped with a whimsical white chocolate spider web that transforms them into the perfect festive dessert. Not only are they quick to whip up, but they also double as a stunning centerpiece for your Halloween gatherings, making them a total crowd-pleaser! Ready to create some kitchen magic? Let’s dive into this deliciously eerie recipe!
Why Are These Brownies a Must-Make?
Deliciously Decadent: Each bite of these Spider Web Halloween Brownies delivers a fudgy chocolate explosion, perfect for satisfying your sweet tooth.
Festive Flair: The playful spider web decoration transforms ordinary brownies into a show-stopping treat, ensuring they steal the spotlight at any Halloween party.
Quick and Easy: With simple ingredients and straightforward steps, whipping up these brownies is a breeze—ideal for busy schedules or last-minute gatherings.
Customizable Options: Feeling creative? You can easily swap the white chocolate for caramel or add sprinkles, letting you tailor these brownies to suit your festive vision!
A Treat for Everyone: Whether you’re a fan of rich desserts or just love a good Halloween theme, these brownies are sure to appeal to all, making them a true crowd favorite!
Pair these brownies with a scoop of ice cream or enjoy them alongside a slice of Peach Cobbler for a delightful combo that will impress your guests!
Spooky Spider Web Halloween Brownies Ingredients
For the Brownies
• Unsweetened Cocoa Powder – Provides deep chocolate flavor; can use dark cocoa powder for a richer taste.
• Granulated Sugar – Adds sweetness and enhances the brownie texture; no direct substitutions recommended.
• Unsalted Butter – Contributes moisture and richness; substitute with coconut oil or margarine for a dairy-free option.
• Eggs – Bind ingredients and provide structure; no substitutions without altering texture.
• All-Purpose Flour – Gives structure to brownies; substitute with gluten-free flour for a gluten-free version.
For the Spider Web Decoration
• White Chocolate Chips – Used to create the playful spider web design; substitute with candy melts or omit for a simpler finish.
• Black Gel Food Coloring (optional) – Tints the white chocolate for a classic spider web look; omit if not desired.
Get ready to impress your guests with these delightful Spooky Spider Web Halloween Brownies that combine rich chocolate goodness with a fun Halloween twist!
Step‑by‑Step Instructions for Spooky Spider Web Halloween Brownies Recipe to Wow Guests
Step 1: Preheat and Prepare
Start by preheating your oven to 350°F (175°C) to create the perfect baking environment. While the oven heats up, take a 9×9-inch baking pan and either grease it lightly with butter or line it with parchment paper to ensure easy removal of your Spooky Spider Web Halloween Brownies once baked.
Step 2: Melt the Chocolate Mixture
In a medium saucepan over low heat, combine unsalted butter, unsweetened cocoa powder, and granulated sugar. Stir continuously until the mixture is smooth and glossy, about 3-4 minutes. Once melted, remove it from the heat and allow it to cool slightly before incorporating the eggs, making sure the mixture is not too hot to prevent curdling.
Step 3: Whisk in the Eggs
Next, add the eggs to your cooled chocolate mixture, incorporating one at a time. Whisk vigorously after each addition until the batter is shiny and well combined, which should take about 2 minutes. This step is crucial for achieving the fudgy texture of your Spooky Spider Web Halloween Brownies.
Step 4: Combine Dry Ingredients
In a separate bowl, sift together the all-purpose flour and a pinch of salt to aerate and remove any lumps. Gradually fold the dry ingredients into the chocolate mixture using a spatula. Stir gently until just combined, being careful not to overmix, as this could affect the brownies’ texture.
Step 5: Bake the Brownies
Pour the brownie batter into the prepared baking pan, spreading it evenly. Place the pan in the preheated oven and bake for 25-30 minutes. To check for doneness, insert a toothpick into the center; it should come out with a few moist crumbs but not wet batter, indicating your brownies are ready.
Step 6: Cool and Prepare the Decoration
Once baked, remove the brownies from the oven and let them cool in the pan for about 10-15 minutes. After cooling slightly, lift them out using the parchment paper, and transfer them to a wire rack to cool completely, which is vital for neat decoration later on.
Step 7: Melt the White Chocolate
While the brownies cool, melt the white chocolate chips in a microwave-safe bowl in 30-second intervals, stirring between each until smooth. If you choose to use black gel food coloring for a classic spider web effect, mix it into the melted chocolate once fully melted.
Step 8: Create the Spider Web Design
Once the brownies are completely cool, drizzle the melted white chocolate over the top, starting from the center and working outward in a circular motion to create a whimsical spider web pattern. You can also add additional decorations like Halloween-themed sprinkles if desired, making your Spooky Spider Web Halloween Brownies even more festive.
Expert Tips for Spooky Spider Web Halloween Brownies
-
Temperature Control: Ensure the melted butter mixture is slightly warm, not hot, when adding eggs to avoid curdling them for your spooky spider web Halloween brownies.
-
Mixing Technique: Overmixing the batter after adding flour can lead to a dense texture. Gently fold until just combined for that fudgy finish.
-
Cooling Time: Allow the brownies to cool completely before decorating. This step is key to achieving neat and clean spider web patterns without smudging.
-
Chocolate Melting: Microwave the white chocolate in short intervals, stirring frequently. This prevents burning, ensuring a smooth drizzle for your spooky decoration.
-
Decoration Creativity: Feel free to get creative! Add sprinkles, or even use caramel instead of white chocolate for unique toppings that add flair to your spooky spider web Halloween brownies.
Make Ahead Options
These Spider Web Halloween Brownies are fantastic for busy home cooks looking to save time on festive baking! You can prepare the brownie batter up to 24 hours in advance; simply mix it and refrigerate it immediately after combining the wet and dry ingredients. When you’re ready to bake, allow it to come to room temperature before pouring it into the prepared pan and baking as directed. Additionally, you can also melt the white chocolate for the spider web decoration ahead of time and store it in an airtight container at room temperature. This will ensure you have everything ready for a fun and stress-free Halloween treat that’s just as delicious!
What to Serve with Spider Web Halloween Brownies?
Indulge in a delightful Halloween spread that enhances the rich chocolate charm of these spooky treats.
-
Vanilla Ice Cream: The creamy scoop provides a delightful contrast to the fudgy brownies, creating a deliciously balanced dessert experience.
Serve it with a drizzle of warm chocolate sauce for an extra touch of indulgence. -
Pumpkin Spice Latte: Embrace the seasonal flavor with this cozy drink that complements the chocolate richness while adding a touch of autumn warmth.
The spice in the latte beautifully contrasts with the sweetness of the brownies. -
Whipped Cream: A light and airy topping that adds both texture and sweetness, enhancing the overall experience of the brownies.
Consider adding a sprinkle of cinnamon for an extra festive kick! -
Candy Corn Mix: This colorful and chewy addition adds a playful Halloween twist, providing crunch and vibrant color to your dessert table.
The sweetness of candy corn pairs well with the deep chocolate flavor, making it a treat for all ages. -
Chocolate Milk: The classic comfort of chocolate milk pairs perfectly with these brownies, appealing to nostalgic flavors that everyone loves.
It’s an effortless choice that brings out the brownie’s fudgy notes beautifully! -
Caramel Sauce: Drizzling warm caramel over brownie slices elevates their indulgence and adds a touch of sweetness that plays against the rich chocolate.
This combination creates a mouthwatering treat that’s perfect for your Halloween festivities! -
Mummy Cupcakes: For a fun twist, serve with these festive cupcakes decorated to resemble mummies. Their playful appearance and sweet flavor will delight your guests.
Together, they create a spooky dessert table that guests will love.
These pairings will not only amplify the enjoyment of your Spider Web Halloween Brownies but also create a memorable Halloween experience for everyone. Enjoy your magical evening!
How to Store and Freeze Spider Web Halloween Brownies
Room Temperature: Store leftover brownies in an airtight container at room temperature for up to 3 days. This keeps them fresh and fudgy, perfect for snacking any time!
Fridge: For longer storage, place brownies in an airtight container in the fridge for up to 1 week. Chilling enhances their rich flavor, making them even more delectable!
Freezer: To freeze, wrap brownies individually in plastic wrap, then place them in a freezer-safe bag or container. They can be frozen for up to 3 months. Simply thaw them at room temperature before enjoying!
Reheating: For a warm treat, reheat brownies in the microwave for 10-15 seconds. They’ll be wonderfully gooey and delicious, making your Spider Web Halloween Brownies irresistible!
Spooky Spider Web Halloween Brownies: Variations & Substitutions
Feel free to unleash your creativity and customize these brownies for your Halloween festivities!
-
Gluten-Free: Substitute all-purpose flour with gluten-free flour blend for those needing a gluten-free treat. It’s an easy switch that still maintains the fudgy goodness.
-
Nutty Twist: Add ½ cup of chopped nuts like walnuts or pecans for a delightful crunch. The nuts add extra flavor and texture, making each brownie an adventure!
-
Dairy-Free Option: Replace unsalted butter with coconut oil or dairy-free margarine to ensure everyone can enjoy this spooky delight.
-
Caramel Swirl: Swap white chocolate for caramel sauce for a rich twist. Drizzle the caramel over the cooled brownies for an ooey-gooey addition that enhances the sweetness.
-
Extra Chocolate: Mix in chocolate chips directly into the batter for an extra chocolatey experience that brownie lovers will adore.
-
Heat It Up: Incorporate a pinch of cayenne pepper or a splash of chili powder for an unexpected kick. This adds a fun flavor contrast that pleases the adventurous palate!
-
Festive Sprinkles: Top your brownie design with Halloween-themed sprinkles for festive flair. It transforms your dessert into an irresistible attraction at any gathering.
-
Flavor Infusion: Add a teaspoon of peppermint or orange extract to the brownie batter for a unique flavor twist that complements the chocolate delight beautifully.
With these variations, you can create a wonderfully personalized version of your Spooky Spider Web Halloween Brownies! If you’re feeling inspired, you might also enjoy pairing them with a slice of Apple Brownies Chewy or serving them alongside a scoop of vanilla ice cream for a delightful treat!

Spider Web Halloween Brownies Recipe FAQs
What kind of cocoa powder should I use for the brownies?
Absolutely! I recommend using unsweetened cocoa powder for the best deep chocolate flavor. If you want a more intense chocolate taste, dark cocoa powder is a great substitute. Just keep in mind it may alter the final color a bit.
How should I store leftover Spider Web Halloween Brownies?
For maximum freshness, store any leftover brownies in an airtight container at room temperature for up to 3 days. If you’d like to keep them longer, refrigerate them where they can last up to a week. I often find chilling enhances their flavor, making each bite even more delightful!
Can I freeze Spider Web Halloween Brownies?
Certainly! To freeze, wrap each brownie individually in plastic wrap and place them into a freezer-safe bag or container. They can be stored this way for up to 3 months. When you’re ready to enjoy, just thaw them at room temperature for a yummy treat.
What if my brownies turn out too dry or crumbly?
Very! If the brownies are dry, there could be several factors at play. Make sure you’re measuring ingredients accurately. If you’ve baked them too long, they can dry out, too; a toothpick should come out with a few moist crumbs, not completely clean. If the mixture looks thick before baking, consider adding a splash of water or an extra egg for moisture next time.
Can I use substitutions for dietary restrictions?
Yes, you can! For a dairy-free option, replace unsalted butter with coconut oil or margarine. If you’re looking for a gluten-free version, use a gluten-free all-purpose flour blend. These substitutions maintain the delightful texture and flavor of the Spooky Spider Web Halloween Brownies while catering to dietary needs!
Is there any specific way to decorate the spider web to make it look nice?
Absolutely! To achieve a neat spider web design, start with a drizzle of melted white chocolate from the center, spiraling outwards. You can even use a toothpick to create additional lines radiating from the center for added effect. After drizzling, feel free to sprinkle on Halloween-themed decorations to elevate your spooky presentation!
Spooky Spider Web Halloween Brownies Recipe to Impress Guests
Ingredients
Equipment
Method
- Preheat your oven to 350°F (175°C) and prepare a 9x9-inch baking pan.
- Melt unsalted butter, cocoa powder, and granulated sugar in a saucepan over low heat.
- Once melted, cool slightly and whisk in eggs one at a time.
- Sift together flour and salt, then fold into the chocolate mixture.
- Pour the batter into the prepared pan and bake for 25-30 minutes.
- Cool the brownies in the pan for 10-15 minutes, then transfer to a wire rack.
- Melt white chocolate chips in the microwave, stirring until smooth.
- Drizzle melted white chocolate over cooled brownies to create a spider web design.
Leave a Reply