
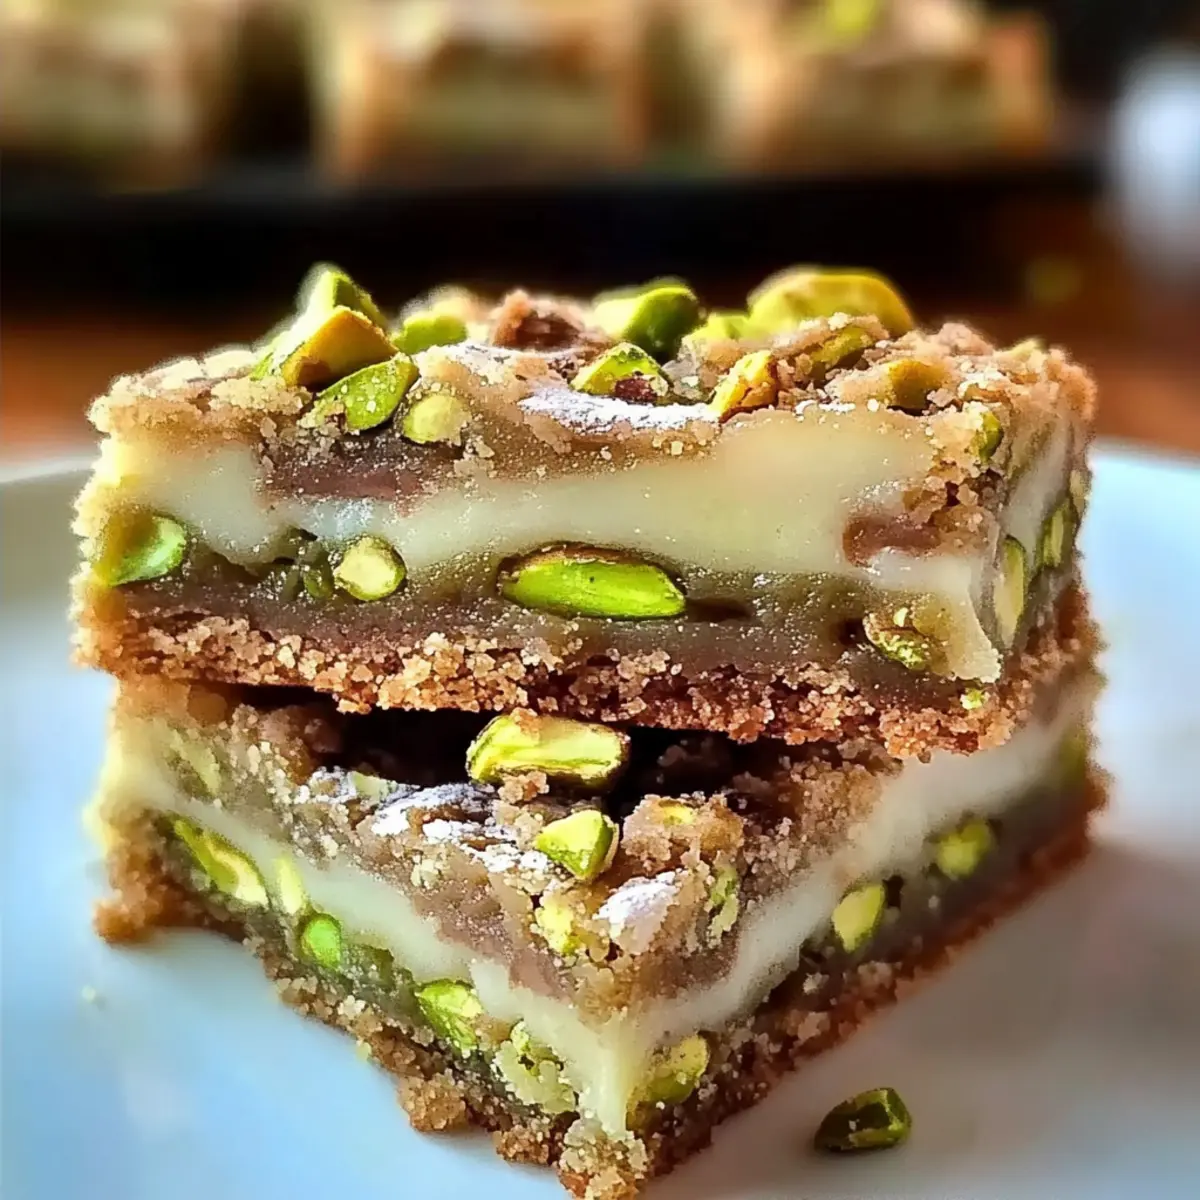
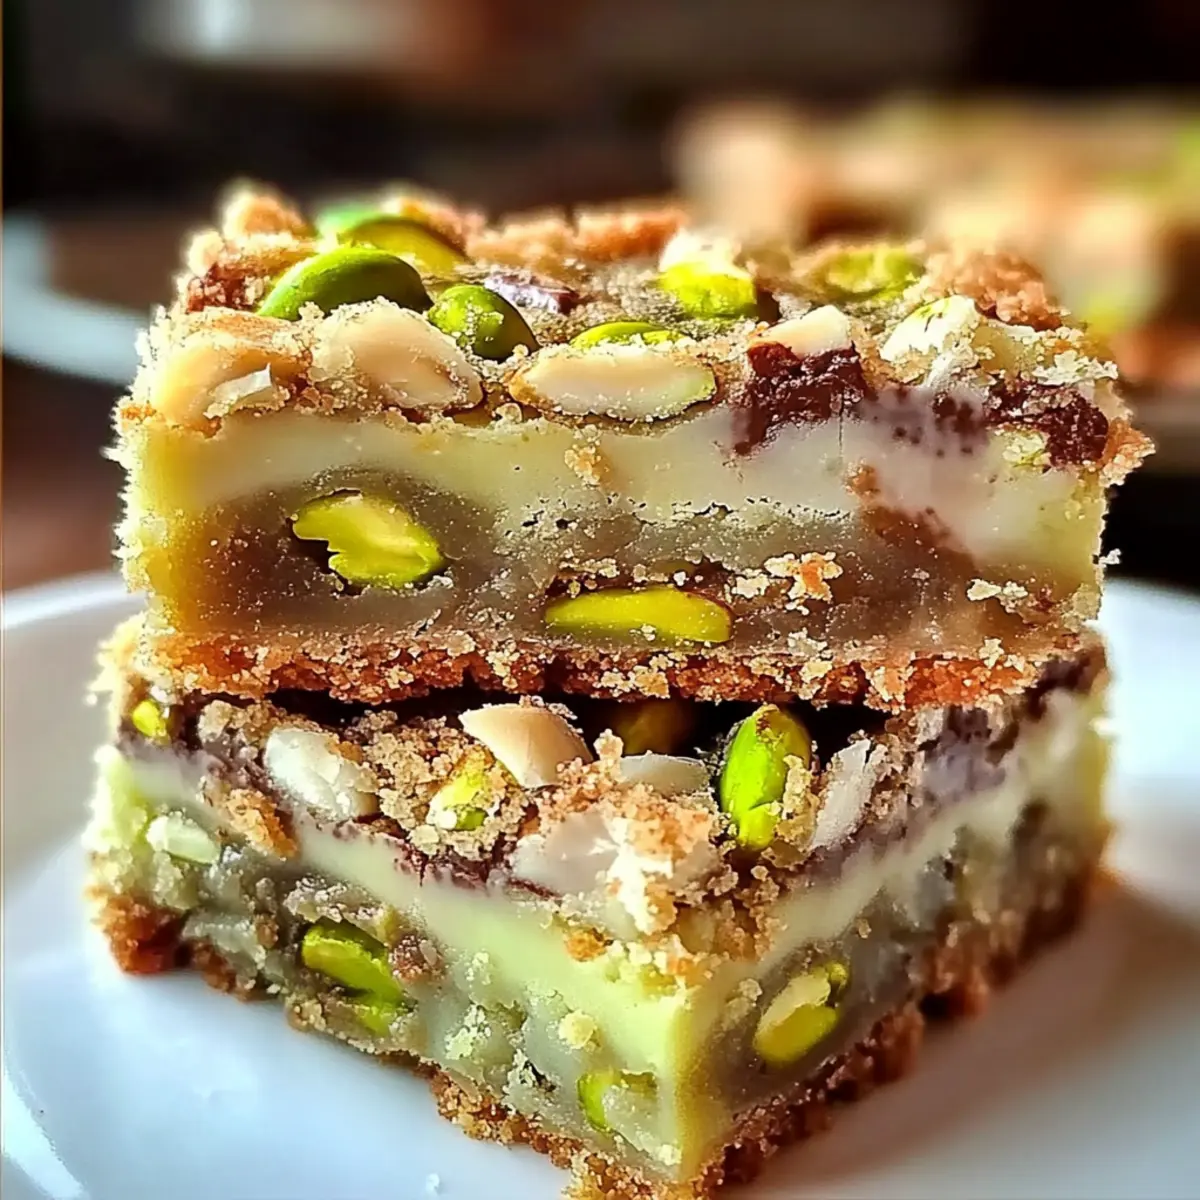
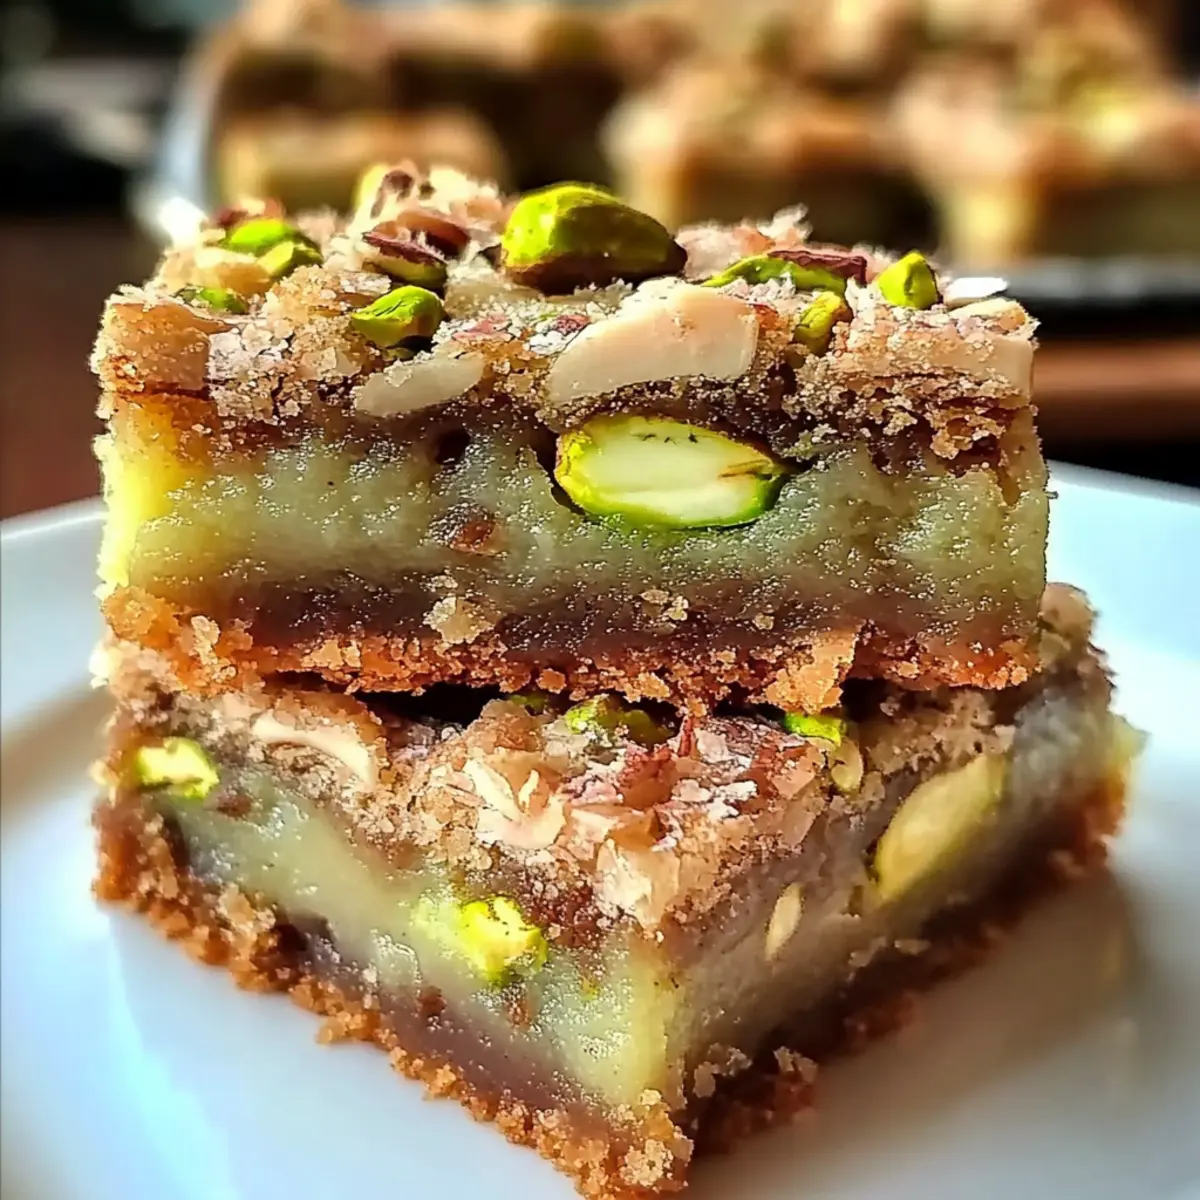
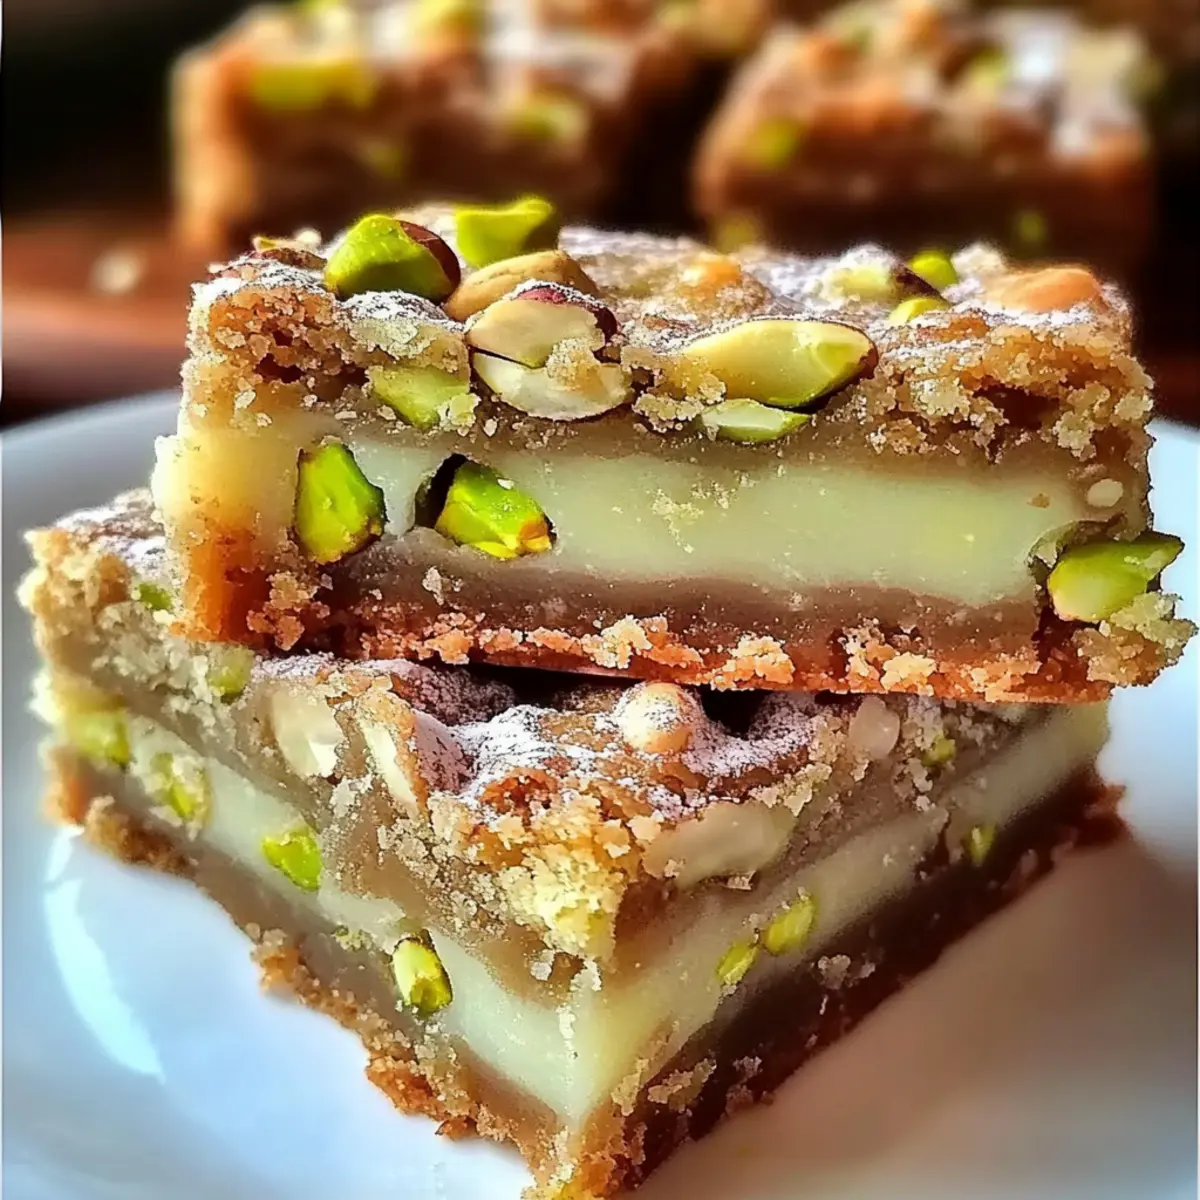
As I was sifting through my pantry, a tantalizing thought struck me: what if I could create a treat that perfectly balances chewiness and crunch? Enter my Pistachio Dream Cookie Bars! These delightful squares boast rich, buttery goodness and the unique bite of crunchy pistachios, making them an irresistible option for any occasion. Whether you’re gathering your favorite people for a cozy night in or looking to impress at a festive gathering, these bars are sure to steal the spotlight. Plus, they’re quick to whip up and can even be made gluten-free with just a simple swap! Ready to dive into a delicious adventure and discover how to elevate your dessert game? Let’s get baking!
Why are these cookie bars a must-try?
Chewy Texture: These Pistachio Dream Cookie Bars offer a luscious, chewy consistency that delights every bite.
Nutty Goodness: The crunchy pistachios add a unique nutty flavor, enhancing the richness of the buttery base.
Quick and Easy: Whipping up these bars requires minimal effort, making them a perfect last-minute treat for gatherings.
Versatile Options: With simple swaps, you can even make them gluten-free, ensuring everyone can enjoy this delicious dessert! Want a burst of extra flavor? Mix in some white chocolate chips or dried fruits for added delight.
Crowd-Pleasing: These bars are a guaranteed hit, putting a gourmet twist on classic cookie recipes that friends and family will love!
Pistachio Dream Cookie Bars Ingredients
For the Cookie Bars
• All-purpose flour – Provides the structure of the bars; substitute with a gluten-free blend for a gluten-free option.
• Baking powder – Adds lift, ensuring the bars are soft and chewy.
• Salt – Enhances the overall flavors of the ingredients.
• Unsalted butter – Softened, it contributes to the bars’ creaminess and rich flavor.
• Brown sugar – Offers caramel-like sweetness, integral to the flavor of the Pistachio Dream Cookie Bars.
• Granulated sugar – Balances sweetness and provides texture.
• Eggs – Binds the ingredients together for a cohesive mixture.
• Vanilla extract – Introduces a warm, classic flavor to the dish.
• Chopped pistachios – The star ingredient, adding nutty flavor and crunchy texture.
• White chocolate chips (optional) – Adds a sweet contrast to the nutty bars, elevating their flavor profile.
Step‑by‑Step Instructions for Pistachio Dream Cookie Bars
Step 1: Preheat and Prepare
Preheat your oven to 350°F (175°C) and line an 8×8-inch baking dish with parchment paper, ensuring to leave some overhanging for easy removal later. This step is crucial for achieving perfectly baked Pistachio Dream Cookie Bars with golden edges that won’t stick.
Step 2: Whisk the Dry Ingredients
In a mixing bowl, whisk together 1 cup of all-purpose flour, 1 teaspoon of baking powder, and a pinch of salt until well combined. This mixture provides the necessary structure to your cookie bars. Set this aside as you prepare the wet ingredients for the Pistachio Dream Cookie Bars.
Step 3: Cream the Butter and Sugars
In a separate bowl, use an electric mixer to beat ½ cup of softened unsalted butter with ½ cup of brown sugar and ¼ cup of granulated sugar for about 2-3 minutes, until the mixture is light and fluffy. This creamy base is crucial for a rich flavor and soft texture in your cookie bars.
Step 4: Incorporate Eggs and Vanilla
Add 2 large eggs and 1 teaspoon of vanilla extract to the butter-sugar mixture, beating until fully combined. The eggs act as a binding agent, holding the wet and dry ingredients together to create a moist and flavorful Pistachio Dream Cookie Bars base.
Step 5: Combine the Mixtures
Gradually stir the dry ingredient mixture into the wet mixture until just combined. Be careful not to overmix; you want to see specks of flour still visible for the best texture in your Pistachio Dream Cookie Bars.
Step 6: Fold in Nuts and Chips
Gently fold in 1 cup of chopped pistachios and, if desired, ½ cup of white chocolate chips for an added sweet contrast. These delightful mix-ins enhance both the flavor and texture of your bars, ensuring each bite is a treat.
Step 7: Bake the Mixture
Pour the cookie batter into the prepared baking dish, spreading it evenly to achieve uniform cooking. Bake for 25-30 minutes until the edges are lightly browned and a toothpick inserted into the center comes out with a few moist crumbs clinging to it.
Step 8: Cool and Cut
Once baked, allow your Pistachio Dream Cookie Bars to cool in the pan for about 10-15 minutes. Use the parchment overhang to lift the bars out and let them cool completely on a wire rack before cutting into squares for serving.
Make Ahead Options
These Pistachio Dream Cookie Bars are perfect for meal prep, saving you precious time on busy days! You can prepare the batter up to 24 hours in advance by mixing the wet and dry ingredients separately, then combining them just before baking to keep them fresh. Store the mixed batter in the refrigerator to maintain its quality, and cover it tightly to prevent any drying out. When you’re ready to enjoy, simply pour the chilled batter into your prepared baking dish and bake as instructed for that delectable, freshly-baked taste. These make-ahead tips ensure your cookie bars remain just as delicious as when made fresh!
What to Serve with Pistachio Dream Cookie Bars
Indulge your senses and elevate your dessert experience by pairing these scrumptious cookie bars with delightful accompaniments.
-
Vanilla Ice Cream: The creamy, cool texture of vanilla ice cream perfectly contrasts the chewy, nutty bars, creating a blissful harmony of flavors.
-
Chocolate Drizzle: A rich, chocolate sauce adds a decadent touch on top, enhancing the bars’ sweetness and creating a beautiful visual appeal.
-
Fresh Berries: Juicy raspberries or strawberries bring a pop of tartness that cuts through the richness, brightening up each slice of cookie bar.
-
Caramel Sauce: A warm, gooey drizzle of caramel adds a luxurious element, enriching the buttery flavor of the bars while providing an extra layer of indulgence.
-
Nutty Hot Cocoa: Serve with a steaming cup of nutty hot cocoa for a cozy pairing. The chocolate and nuts will echo the flavors in the cookie bars beautifully.
-
Chopped Nuts: A sprinkle of additional chopped pistachios or almonds on top adds a delightful crunch and enhances the bar’s nutty flavor, making every bite even more satisfying.
-
Espresso or Coffee: Pairing with a bold espresso or a smooth cup of coffee elevates the dessert experience, perfect for an after-dinner treat that balances sweetness with a touch of bitterness.
Helpful Tricks for Pistachio Dream Cookie Bars
-
Butter Temperature: Make sure your unsalted butter is truly softened, which allows for a light and airy mixture. Cold butter can lead to dense bars.
-
Mixing Technique: Avoid overmixing the batter after adding dry ingredients. This prevents your Pistachio Dream Cookie Bars from becoming tough and chewy instead of soft.
-
Baking Precision: Set a timer and check for doneness a few minutes early. Overbaking will result in dry bars, so aim for slightly undercooked for a chewy texture!
-
Even Cooling: Let the bars cool in the pan before transferring to a wire rack. This ensures they don’t crumble when cutting, allowing for clean, beautiful squares.
-
Storage Savvy: For optimal freshness, always keep leftovers in an airtight container. They can last up to three days at room temperature or longer in the fridge.
Pistachio Dream Cookie Bars Variations
Customize your Pistachio Dream Cookie Bars with these simple and tasty options that will elevate every bite!
-
Nut Substitute: Replace pistachios with chopped almonds or walnuts for a different crunch and flavor profile.
-
Gluten-Free Twist: Use a gluten-free flour blend to easily make these bars gluten-free without sacrificing taste.
-
Add a Fruity Note: Mix in dried cranberries or cherries for a sweet and tart contrast that adds depth to your bars.
-
White Chocolate Boost: For extra sweetness, consider doubling the amount of white chocolate chips to amplify the sugary goodness.
-
Spiced Flavor: Add a teaspoon of ground cinnamon or nutmeg for a warm, spiced twist—perfect for cozy gatherings.
-
Caramel Drizzle: Drizzle caramel sauce over the top before serving for a rich, indulgent finish that will impress your guests.
-
Dark Chocolate Option: Swirl in dark chocolate chips or chunks while mixing for a richer, more decadent dessert experience.
-
Heat it Up: Sprinkle in a pinch of cayenne pepper to take your bars to the next level with a spicy kick that balances the sweetness.
For more delightful flavors, don’t forget to check out how adding spices can transform your baked goods. Happy baking!
Storage Tips for Pistachio Dream Cookie Bars
Room Temperature: Store leftover cookie bars in an airtight container at room temperature for up to 3 days to maintain their soft texture and rich flavors.
Fridge: If you want to keep them fresh for a bit longer, refrigerate the bars in an airtight container for up to 1 week, ensuring they remain deliciously moist.
Freezer: Freeze individual squares of the Pistachio Dream Cookie Bars wrapped tightly in plastic wrap and then placed in a freezer bag for up to 3 months—perfect for savoring a treat later!
Reheating: To enjoy these cookie bars warm, pop them in the microwave for about 10-15 seconds. This will soften them up, enhancing the buttery goodness and nutty flavor.
Pistachio Dream Cookie Bars Recipe FAQs
How do I select the best pistachios for my bars?
Absolutely! Look for freshly roasted, unsalted pistachios without dark spots or signs of moisture. If you’re uncertain, buying pre-packaged pistachios from a reputable brand can guarantee quality.
What’s the best way to store leftover Pistachio Dream Cookie Bars?
For optimal freshness, store your cookie bars in an airtight container at room temperature for up to 3 days. For longer storage, you can refrigerate them for up to a week without sacrificing too much flavor or texture.
Can I freeze my Pistachio Dream Cookie Bars?
Very! To freeze, first cut the bars into squares and wrap them individually in plastic wrap. Place them in a freezer-safe bag or container, and they can last up to 3 months. When you’re ready to enjoy, simply thaw at room temperature or heat in the microwave for a few seconds for that fresh-baked feel.
What should I do if my bars come out too dry?
If your bars are dry, next time make sure to monitor the baking time closely, checking a few minutes early. Also, be sure not to overmix the batter, as this can lead to tough bars. You might even experiment by adding an extra tablespoon of butter or an additional egg for moisture.
Are there any allergy considerations I should keep in mind?
Yes! These Pistachio Dream Cookie Bars contain eggs and nuts, which can be potential allergens. Ensure to inform anyone you’re serving, and consider alternative nut options like almonds or walnuts if nut allergies are a concern. Additionally, use a gluten-free flour blend if needed for those avoiding gluten.
Pistachio Dream Cookie Bars: Chewy Bliss for Every Occasion
Ingredients
Equipment
Method
- Preheat your oven to 350°F (175°C) and line an 8x8-inch baking dish with parchment paper.
- In a mixing bowl, whisk together 1 cup of all-purpose flour, 1 teaspoon of baking powder, and a pinch of salt until well combined.
- In a separate bowl, beat 1/2 cup of softened unsalted butter with 1/2 cup of brown sugar and 1/4 cup of granulated sugar for about 2-3 minutes until light and fluffy.
- Add 2 large eggs and 1 teaspoon of vanilla extract to the butter-sugar mixture, beating until fully combined.
- Gradually stir the dry ingredient mixture into the wet mixture until just combined, being careful not to overmix.
- Gently fold in 1 cup of chopped pistachios and 1/2 cup of white chocolate chips if desired.
- Pour the cookie batter into the prepared baking dish, spreading it evenly.
- Bake for 25-30 minutes until the edges are lightly browned and a toothpick inserted into the center comes out with a few moist crumbs.
- Allow the bars to cool in the pan for about 10-15 minutes before transferring to a wire rack to cool completely before cutting into squares.
Leave a Reply