
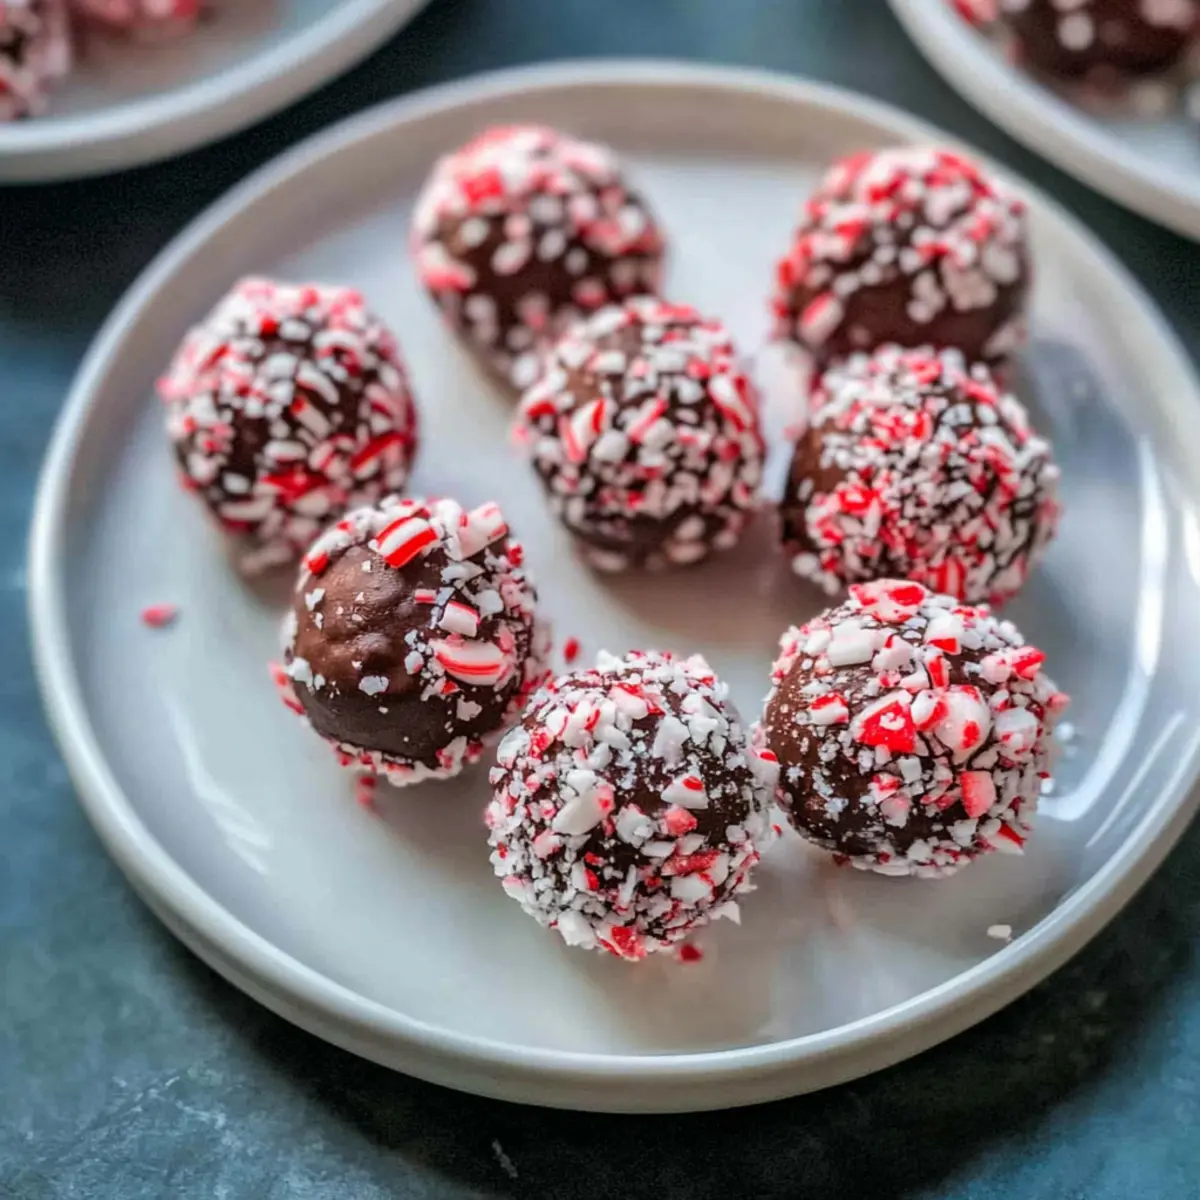
The moment those first flakes of snow begin to fall, my mind starts to wander to the holiday treats that make this season so special. One of my all-time favorites? Peppermint Truffles! These delightful no-bake confections marry rich chocolate with a refreshing hint of peppermint, making them the perfect indulgence for festive gatherings or a sweet escape during a cozy night in. Not only are they incredibly easy to whip up, but they also serve as stunning gifts that will impress friends and family alike. With their creamy interiors and a delightful crunch from crushed candy canes, these truffles promise to reverse any winter blues. Curious to see how simple it is to create these seasonal delights? Let’s dive in!
Why Are These Peppermint Truffles Amazing?
Irresistible Peppermint truffles are a festive treat that brings joy to any holiday gathering. No-Bake Convenience means less time in the kitchen and more time spent with loved ones. Impressive Presentation allows them to shine as the highlight of your dessert table or a charming gift. Flavor Explosion combines rich chocolate with a refreshing peppermint twist, satisfying every sweet tooth. Texture Delight balances creamy interiors with a crunchy candy cane exterior—perfect for those cozy evenings. For more festive inspiration, check out our guide on holiday desserts that will wow your guests!
Peppermint Truffles Ingredients
For the Truffles
- Heavy Cream – Adds richness and moisture; for a dairy-free version, use coconut cream.
- Unsalted Butter – Enhances creaminess and flavor; substitute with vegan butter if desired.
- Semisweet or Bittersweet Chocolate (8 ounces, chopped) – The key ingredient for luscious chocolate flavor; opt for high-quality chocolate for best results.
- Peppermint Extract (1/4 teaspoon) – Infuses the truffles with that refreshing peppermint flavor you crave; mint extract can be used for a different twist.
- Candy Canes (3, crushed) – Provides a festive look and added texture; you can use crushed peppermint candies as an alternative.
For the Toppings
- Finely Crushed Candy Canes – Adds extra crunch and holiday flair to your truffles.
- Red Sanding Sugar – Provides a pop of color and extra sweetness.
- Cocoa Powder – Offers a classic dusting that balances the sweetness.
These Peppermint Truffles are not only simple to make but also delightful to enjoy!
Step‑by‑Step Instructions for Peppermint Truffles
Step 1: Heat the Cream and Butter
In a medium saucepan, combine heavy cream and unsalted butter over low-medium heat. Warm the mixture gently until it begins to bubble softly, about 5 minutes. Stir occasionally to ensure it heats evenly. You want it hot enough to melt chocolate but not boiling vigorously, creating the perfect base for your decadent peppermint truffles.
Step 2: Melt the Chocolate
Remove the saucepan from heat and pour the hot cream-butter mixture over the chopped semisweet or bittersweet chocolate in a mixing bowl. Let it sit undisturbed for about 5 minutes to allow the chocolate to melt completely. Then, gently stir until the mixture becomes smooth and glossy, integrating the delightful richness that will make your peppermint truffles irresistible.
Step 3: Add Flavorings
Once the chocolate mixture is smooth, stir in the peppermint extract and the crushed candy canes. The peppermint extract will infuse your truffles with that refreshing flavor we adore, while the candy canes add a delightful crunch and visual appeal. Mix until evenly incorporated, ensuring each bite of your peppermint truffles is filled with festive flavor.
Step 4: Chill the Mixture
Transfer the chocolate mixture to a shallow dish and refrigerate for about 1 to 2 hours, or until firm. This chilling period is crucial as it allows the mixture to thicken, making it easier to scoop and shape into truffles. The chocolate should be set but still soft enough to roll into perfect balls.
Step 5: Shape the Truffles
Once chilled, use a tablespoon cookie scoop to portion out the chocolate mixture, rolling each scoop into a ball with clean hands. If the mixture feels sticky, dust your hands lightly with cocoa powder to prevent sticking. Aim for uniformity in size, as this will make your peppermint truffles look even more appealing when served.
Step 6: Coat the Truffles
Roll each truffle in your choice of finely crushed candy canes, cocoa powder, or red sanding sugar for extra festive flair. The coating not only adds a decorative touch but also enhances the texture, creating a beautiful contrast with the creamy center of your peppermint truffles. Ensure they are well coated for maximum flavor and visual impact.
Step 7: Set the Truffles
Place the coated truffles onto a lined baking sheet or platter and refrigerate them again for at least 1 to 2 hours to set completely. This final chilling step helps the flavors meld together while ensuring a firm shape. When ready, your peppermint truffles will be beautifully firm and perfectly indulgent, ready to impress your holiday guests.
Variations & Substitutions in Peppermint Truffles
Get creative with these Peppermint Truffles and discover delicious ways to make them your own!
-
Dairy-Free: Substitute heavy cream with coconut cream and butter with vegan butter for a delightful dairy-free treat.
-
Minty Freshness: Swap peppermint extract with orange or almond extract for a refreshing and unique flavor twist.
-
Nutty Delight: Roll your truffles in finely chopped nuts like almonds or hazelnuts for a delightful crunch alongside that creamy filling. The added texture pairs beautifully with the smooth chocolate.
-
Lively Heat: For a spicy twist, add a pinch of cayenne pepper or some finely chopped fresh mint leaves to the mixture for a surprising kick of heat.
-
Flavor Boost: Incorporate a tablespoon of espresso or coffee powder to intensify the chocolate flavor, creating a rich and sophisticated taste.
-
Coconut Twist: Roll the truffles in shredded toasted coconut for a tropical flair that adds both flavor and texture. It’s a delicious surprise that complements the peppermint!
-
Fun Shapes: Use cookie cutters to cut the truffles into festive shapes rather than just rolling them into balls. This is a fun way to present them at holiday gatherings!
-
Gorgeous Glaze: Dip the rolled truffles in a layer of tempered chocolate before rolling them in toppings for an extra glossy finish that will impress everyone.
Feel free to mix and match these variations while you enjoy making your peppermint treats! If you’re up for even more adventure, check out our recipes for holiday desserts that will elevate your festive celebrations!
Make Ahead Options
These Peppermint Truffles are perfect for busy home cooks looking to save time during the holiday rush! You can prepare the chocolate mixture and chill it up to 24 hours in advance, ensuring it’s ready for rolling into truffles whenever suits your schedule. Simply follow the initial steps up to chilling the mixture, then cover it tightly with plastic wrap and refrigerate. When you’re ready to assemble, just scoop and roll the chilled mixture into balls, then coat them in crushed candy canes or cocoa powder for that festive touch. This method ensures your truffles remain just as delicious and beautifully formed, allowing you to enjoy the season without the last-minute stress!
How to Store and Freeze Peppermint Truffles
Fridge: Store your peppermint truffles in an airtight container in the refrigerator for up to 2 weeks to maintain their freshness and texture.
Freezer: For longer storage, freeze the truffles in a single layer on a baking sheet, then transfer them to an airtight container. They can last for up to 3 months in the freezer.
Thawing: To enjoy your frozen peppermint truffles, simply transfer them to the refrigerator to thaw overnight before serving. This will help them regain their creamy texture.
Reheating: If you prefer a slightly melted truffle, you can microwave them for 5-10 seconds, but be cautious not to overheat, as it may change their delightful consistency.
Expert Tips for Peppermint Truffles
-
Quality Matters: Use high-quality chocolate for richer flavor; avoid chocolate chips as they may not melt smoothly. Your peppermint truffles deserve the best!
-
Watch the Heat: Ensure the cream and butter mixture is hot enough to melt the chocolate completely, but don’t let it boil. This makes for perfectly smooth truffles.
-
Chill Thoroughly: If your mixture feels too soft for rolling, chill it longer. A good chill helps in shaping the perfect peppermint truffles.
-
Use Cocoa Powder: Dust your hands with cocoa powder while shaping the truffles to prevent stickiness. This simple trick makes for a smooth rolling process.
-
Experiment with Coatings: Get creative with your toppings! Try rolling in crushed nuts or toasted coconut for an exciting twist on the traditional peppermint truffles.
What to Serve with Peppermint Truffles
Creating a festive spread is the perfect way to elevate your holiday gatherings, and these truffles are just the beginning!
-
Creamy Hot Chocolate: The rich, creamy flavors of hot chocolate enhance the chocolatey goodness of the truffles, creating a warming, cozy pairing for winter nights.
-
Sparkling Cider: The effervescence of sparkling cider complements the refreshing peppermint, providing a delightful contrast that adds a festive touch to your celebrations.
-
Chocolate Fondue: Pair these peppermint truffles with a bowl of rich chocolate fondue for a fun dessert experience where guests can dip fresh fruits or marshmallows.
-
Gingerbread Cookies: The spicy, warm notes of gingerbread contrast beautifully with the cool peppermint and chocolate, making for a comforting classic holiday treat.
-
Peppermint Bark: Enhance the peppermint experience by serving your truffles alongside homemade peppermint bark, doubling down on that festive flavor with additional textures.
-
Coffee or Espresso: A strong cup of coffee or espresso pairs wonderfully, as the bitterness balances the sweetness of the truffles, creating a well-rounded dessert experience to savor.
-
Cheese Platter: Include a variety of cheeses like brie or goat cheese to balance the sweetness of peppermint truffles with creamy and tangy elements for a gourmet touch.
-
Chocolate-Covered Strawberries: These fruity treats add a fresh element, perfect for contrasting the richness of the truffles while keeping your dessert table vibrant.
-
Nutty Biscotti: Serve these truffles with crunchy biscotti to provide a satisfying texture and a nutty flavor that complements the peppermint perfectly.
Peppermint Truffles Recipe FAQs
How do I select the best chocolate for my peppermint truffles?
Absolutely! When choosing chocolate, opt for semisweet or bittersweet varieties from reputable brands like Ghirardelli or Callebaut. Look for chocolate that has a high cocoa content (60-70%) for richer flavor and better melting properties. Avoid chocolate chips as they contain stabilizers that can affect texture and melting, giving you a less smooth truffle.
How should I store peppermint truffles after making them?
You can store your peppermint truffles in an airtight container in the refrigerator for up to 2 weeks. This keeps them fresh and preserves their delightful flavors. If you’re like me and often make extras, they can be stored in the fridge; just be mindful to separate layers with parchment paper to prevent sticking!
Can I freeze peppermint truffles for later enjoyment?
Absolutely! To freeze your peppermint truffles, place them in a single layer on a baking sheet and freeze until solid, about 1-2 hours. Then, transfer them to an airtight container or a freezer-safe bag. They can be frozen for up to 3 months. Just remember to thaw them in the refrigerator before enjoying; this helps maintain their creamy texture!
What can I do if my truffle mixture is too soft to roll?
If your chocolate mixture is too soft, don’t worry! Chill it for an additional 30 minutes to an hour in the refrigerator. Sometimes, warmer room temperatures can affect the mixture’s firmness. Once it’s cool enough, it should scoop and roll easily into those perfect truffle balls. If you’re still having trouble, dust your hands with cocoa powder while shaping them.
Are peppermint truffles safe for people with nut allergies?
Yes! The basic recipe for peppermint truffles is nut-free, but always check your chocolate brand and any additional toppings you may use. If you’re giving these as gifts, it’s a good idea to disclose the ingredients clearly. If you’re looking for nut-free toppings, stick to crushed candy canes or cocoa powder instead of nuts or nut-based coatings.
How long do peppermint truffles last once made?
Once made, peppermint truffles can last in the refrigerator for up to 2 weeks. For the best taste and texture, be sure to keep them sealed in an airtight container. Just remember, the homemade goodness makes them quickly disappear, so savor them while fresh!
Irresistible Peppermint Truffles for Your Holiday Treats
Ingredients
Equipment
Method
- In a medium saucepan, combine heavy cream and unsalted butter over low-medium heat. Warm the mixture gently until it begins to bubble softly, about 5 minutes.
- Remove saucepan from heat and pour the hot cream-butter mixture over the chopped chocolate in a mixing bowl. Let it sit undisturbed for about 5 minutes to allow chocolate to melt completely. Stir until smooth and glossy.
- Stir in the peppermint extract and the crushed candy canes into the chocolate mixture until evenly incorporated.
- Transfer the chocolate mixture to a shallow dish and refrigerate for about 1 to 2 hours, or until firm.
- Use a tablespoon cookie scoop to portion out the chocolate mixture and roll each scoop into a ball with clean hands.
- Roll each truffle in finely crushed candy canes, cocoa powder, or red sanding sugar for extra festive flair.
- Place the coated truffles onto a lined baking sheet and refrigerate for at least 1 to 2 hours to set completely.
Leave a Reply