
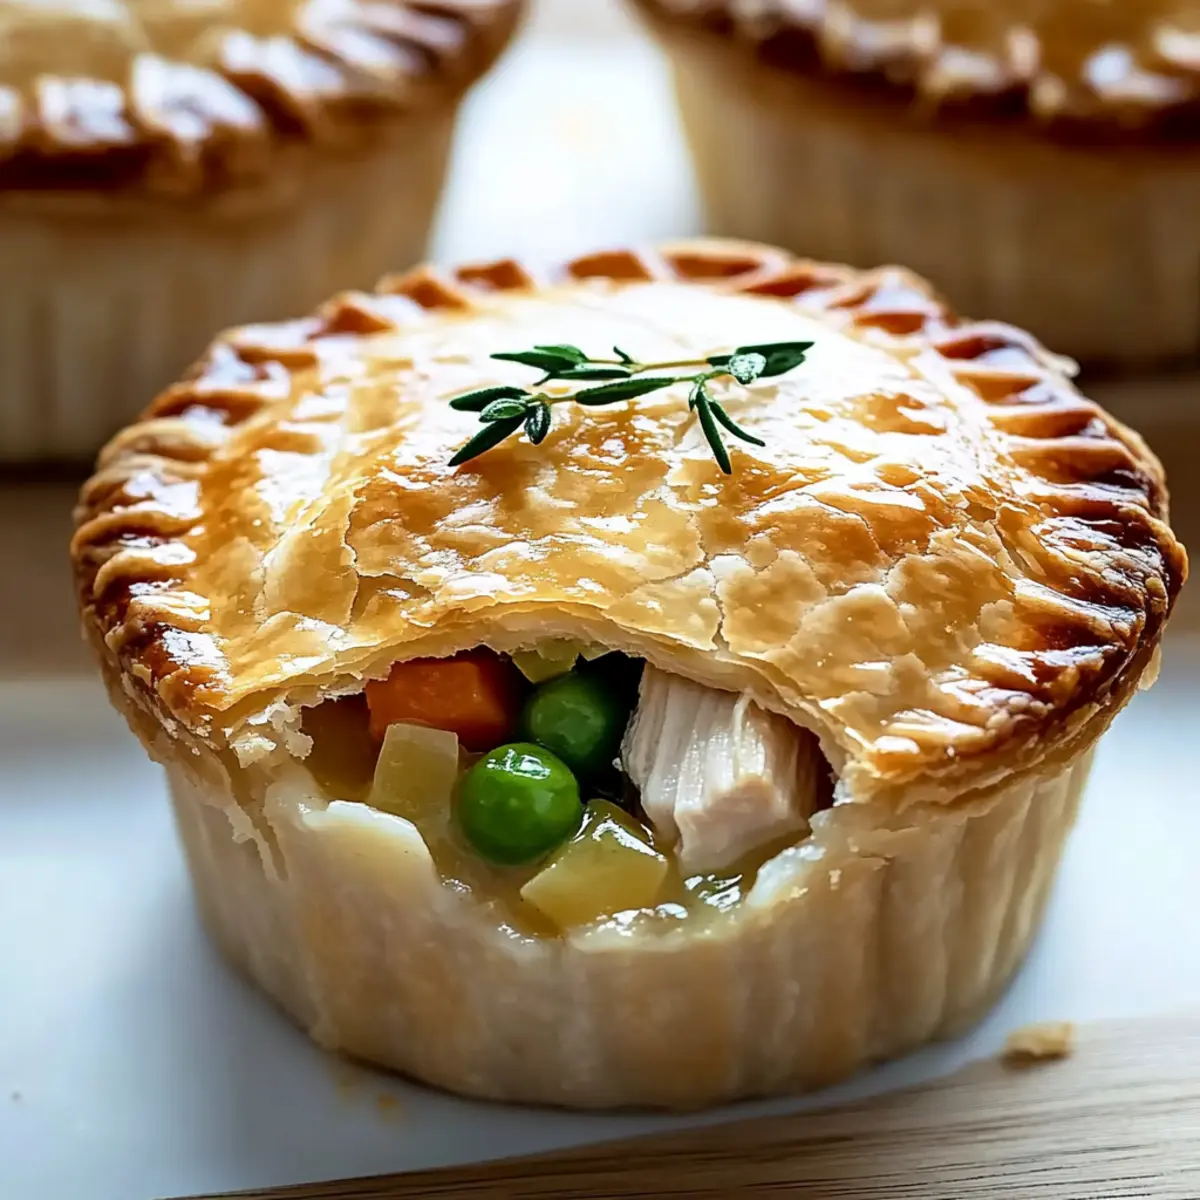
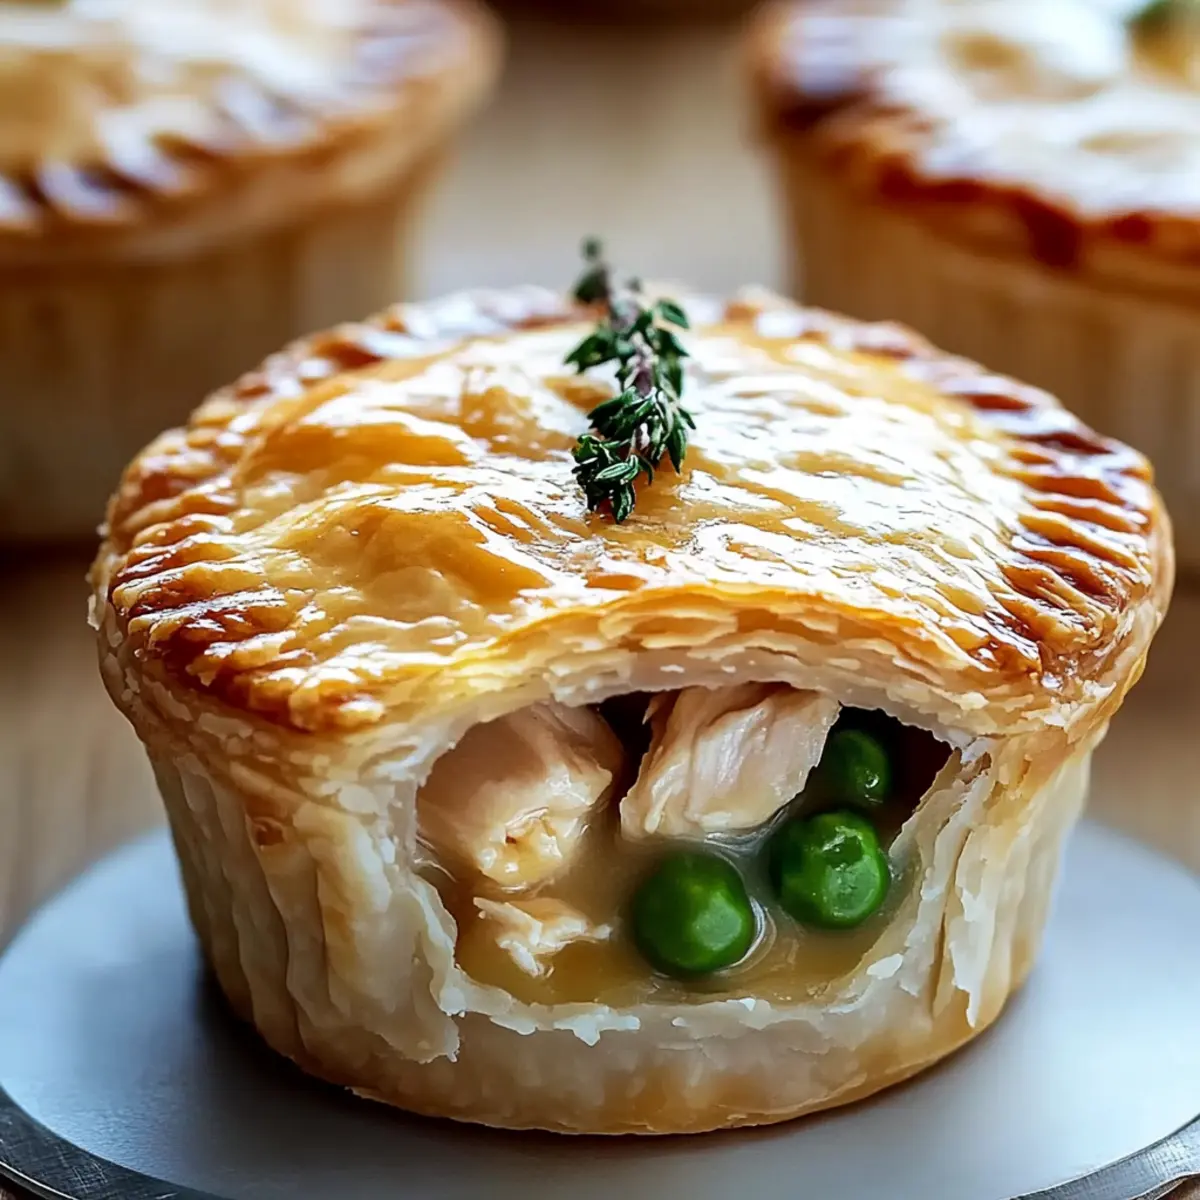
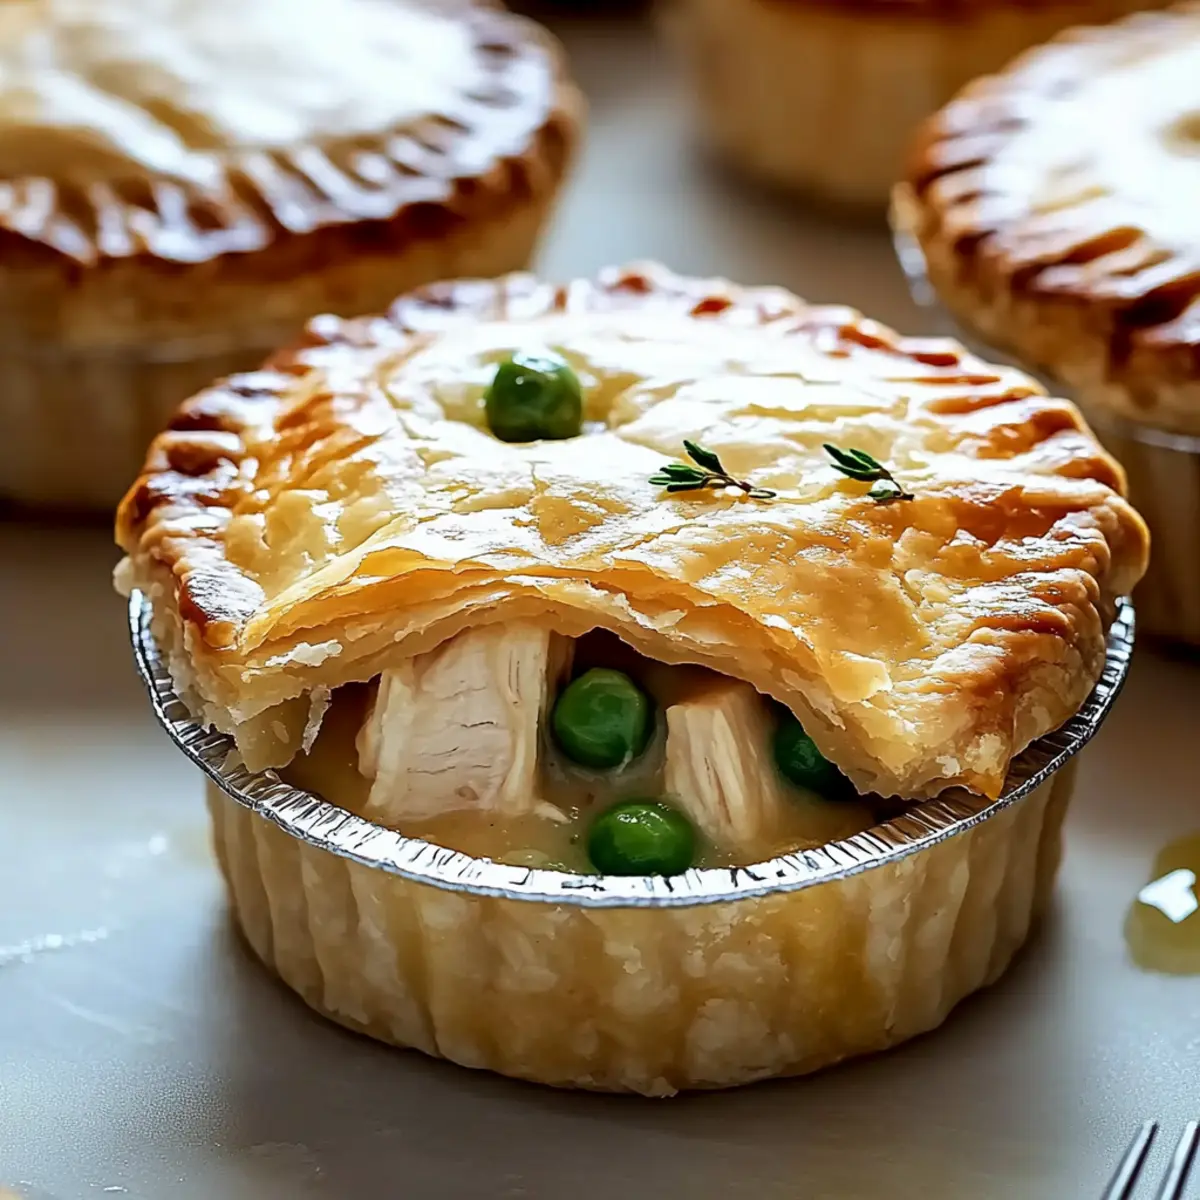
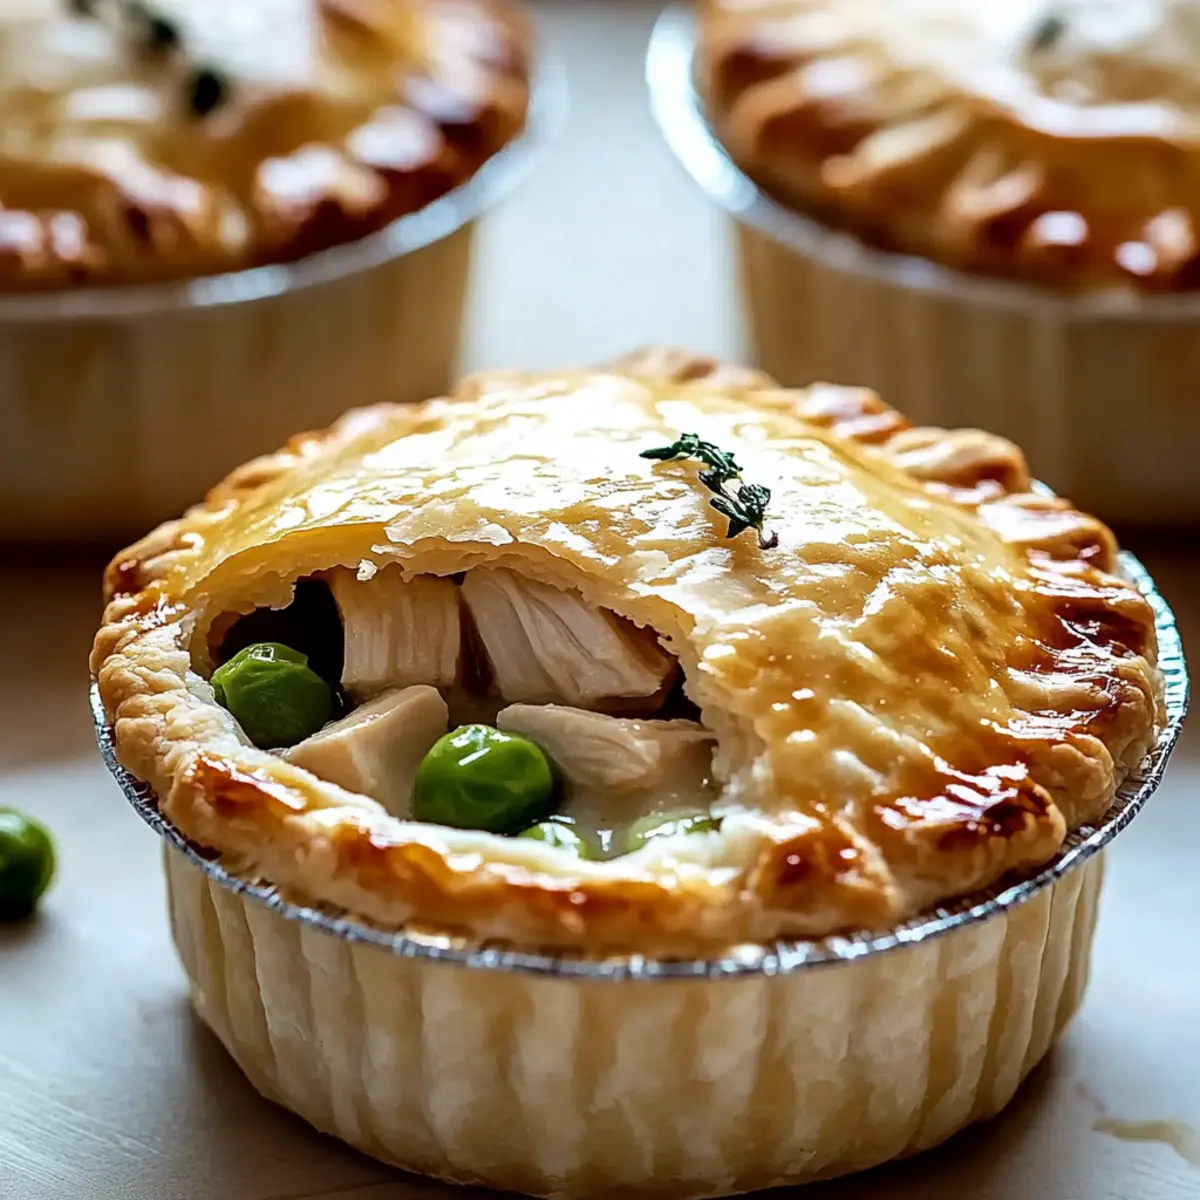
As I stirred the bubbling filling on a chilly evening, the warm, buttery aroma wafted through my kitchen, instantly transporting me to countless cozy family dinners. These Mini Chicken Pot Pies are everything you could wish for in comfort food—perfectly flaky crusts cradling a luscious, savory blend of chicken and vibrant vegetables. Easy to whip up, they’re a hassle-free dinner option that delights both novice cooks and seasoned chefs alike. Whether you’re seeking a hearty dish that will have everyone gathering around the table or looking to satisfy your craving for a homemade cozy meal, this recipe is just what you need. So, are you ready to make your kitchen the heart of comfort on this chilly night?
Why Are Mini Chicken Pot Pies Irresistible?
Comfort in every bite, these mini chicken pot pies bring a heartwarming sense of nostalgia to the table. Easy to prepare, they require minimal effort while delivering maximum flavor, making them a perfect choice for busy weeknights. Flaky pastry enveloping creamy chicken and veggies creates a delightful contrast that everyone will love. Versatile enough to cater to different preferences, consider swapping chicken for turkey or even a wholesome vegetarian blend. Experience a delightful crowd-pleaser that promises to brighten your dinner gatherings and impress guests, leaving them asking for seconds!
Mini Chicken Pot Pie Ingredients
Get ready to create a comforting masterpiece with these essential ingredients!
For the Filling
• Boneless, Skinless Chicken Breasts – the star protein of your pot pies; swap with turkey or mushrooms for a vegetarian delight.
• Frozen Mixed Vegetables – a no-fuss, nutritious option that eliminates chopping; fresh veggies can also bring your own touch.
• Chicken Broth – this imparts rich flavor; opt for low sodium to keep it healthy and savory.
• Heavy Cream – ensures a luscious, creamy filling; use light cream for a lighter version.
• Onion – essential for depth of flavor; fresh is best, but onion powder can substitute in a pinch.
• Garlic – enhances the aroma and taste; fresh minced garlic offers the best results.
• Thyme – brings warmth and an herbal touch to the filling; dried thyme is fine if you’re in a rush.
• Salt and Pepper – the basic seasonings that elevate all flavors; adjust according to your taste.
For the Crust
• Puff Pastry Sheets – creates that irresistible flaky crust; store-bought is a convenient choice for ease.
Optional Extras
• Parsley – adds a fresh pop of flavor and color; feel free to use dried as a quick substitute.
• Egg Wash – brush on the pastry for a golden, glossy finish; simply beat an egg with a tablespoon of water.
Now that you’ve gathered these ingredients for your Mini Chicken Pot Pies, you’re one step closer to a cozy dinner experience!
Step‑by‑Step Instructions for Mini Chicken Pot Pies
Step 1: Preheat the Oven
Start by preheating your oven to 400°F (200°C). This temperature is essential for achieving that golden, flaky crust on your Mini Chicken Pot Pies. While the oven warms up, you can gather your ingredients and have your muffin tin ready for the pastry shells.
Step 2: Sauté Aromatics
In a large skillet, melt 2 tablespoons of butter over medium heat. Once the butter is bubbling, add 1 diced onion and 2 minced garlic cloves. Sauté them for about 3–4 minutes until the onion becomes translucent and fragrant, creating a lovely base for your filling.
Step 3: Cook Chicken and Veggies
Next, incorporate 1 pound of diced boneless, skinless chicken breasts into the skillet. Stir in 2 cups of frozen mixed vegetables, and cook for 5–7 minutes until the chicken is no longer pink and fully cooked. This step ensures that your Mini Chicken Pot Pies have a hearty, savory filling.
Step 4: Create Sauce
Lower the heat and pour in 1 cup of chicken broth and ½ cup of heavy cream. Season the mixture with 1 teaspoon of dried thyme, salt, and pepper to taste. Let it simmer for about 5 minutes, stirring occasionally until the sauce thickens and coats the back of a spoon.
Step 5: Prep Puff Pastry
While your filling simmers, roll out 1 sheet of puff pastry on a lightly floured surface. Cut it into squares large enough to fit your muffin tin cups. This flaky pastry will hold your delicious filling, giving your Mini Chicken Pot Pies their signature texture.
Step 6: Fill and Bake
Spoon the creamy chicken and vegetable filling into each pastry-lined muffin cup, leaving a little room at the top. Cover with additional pastry squares, pinching the edges to seal. Brush each top with an egg wash (1 beaten egg with a tablespoon of water) for a beautiful golden finish, then bake for 25–30 minutes until puffed and golden brown.
Expert Tips for Mini Chicken Pot Pies
- Sauté Carefully: Always sauté onions and garlic until translucent to amplify flavors before adding chicken, creating a robust base for your filling.
- Cook Thoroughly: Ensure chicken is completely cooked before assembling your mini chicken pot pies to avoid any undercooked surprises!
- Herb Variations: Get creative with herbs; try rosemary or basil for a different twist, or add a splash of white wine for more depth.
- Chill Before Baking: Let assembled pot pies chill in the fridge for 15 minutes before baking—this helps the pastry hold its shape and results in a flakier crust.
- Watch the Timer: Keep an eye on baking time; ovens can vary, so check a few minutes earlier to prevent over-browning.
- Cool Down: Allow mini chicken pot pies to cool slightly after baking for better filling consistency and easier serving.
Storage Tips for Mini Chicken Pot Pies
- Fridge: Store leftovers in an airtight container for up to 3 days. Ensure the pot pies are completely cooled before sealing to maintain their delicious texture.
- Freezer: These mini chicken pot pies can be frozen for up to 2 months. Wrap each pie tightly in plastic wrap, then place in a freezer-safe container to prevent freezer burn.
- Reheating: When ready to enjoy, reheat from frozen or thawed in a preheated oven at 350°F (175°C) for 15-20 minutes until heated through and crispy.
- Make-Ahead: If you assemble mini chicken pot pies in advance, store them in the refrigerator until ready to bake. Add an extra few minutes to the baking time if they are cold from the fridge.
Make Ahead Options
These Mini Chicken Pot Pies are perfect for meal prep enthusiasts! You can assemble the pies up to 24 hours in advance, making them a fantastic choice for busy weeknights. To ensure freshness, prepare the filling and spoon it into the pastry cups, then cover them with plastic wrap and refrigerate. When you’re ready to bake, simply remove the plastic and brush with egg wash, adding an extra 5-10 minutes to the baking time if they are cold. This method keeps the flaky crust just right and the filling just as delicious as if you had made them fresh. Enjoy the blend of warm, comforting flavors without the last-minute rush!
Mini Chicken Pot Pies: Customizations Galore
Embrace your creativity in the kitchen and let your taste buds lead the way with these delightful variations!
- Turkey Twist: Substitute chicken with turkey for a flavorful twist; a perfect use for holiday leftovers!
- Mushroom Stunner: Replace chicken with a mix of mushrooms and spinach for a rich, vegetarian option that’s just as comforting.
- Herb Infusion: Experiment with different herbs like rosemary or dill to elevate the flavor profile of your pot pies.
- Creamy Swap: For a lighter filling, swap heavy cream with Greek yogurt or light cream; the result is equally delicious!
- Spicy Kick: Add a pinch of red pepper flakes or a drizzle of hot sauce to the filling for a vibrant, spicy surprise.
- Cheesy Goodness: Incorporate shredded cheese like cheddar or mozzarella into the filling; it’ll melt deliciously into every bite!
- Veggie Boost: Feel free to add more veggies such as carrots, peas, or bell peppers to amplify nutrition and flavor.
- Gluten-Free Option: Use gluten-free puff pastry for a delightful alternative that will please those needing a gluten-free meal.
No matter how you customize your Mini Chicken Pot Pies, they are sure to satisfy your craving for homemade comfort food. Enjoy experimenting and bringing your own flair to this beloved classic!
What to Serve with Mini Chicken Pot Pies
Layering flavors and comforts, these mini chicken pot pies can be effortlessly enhanced with delicious sides that make every bite a celebration.
- Simple Green Salad: A light, refreshing salad balances the richness of the pot pies, adding a burst of freshness with every forkful.
- Garlic Breadsticks: Golden, buttery breadsticks are perfect for mopping up any leftover creamy filling, making them a delightful addition to the meal.
- Roasted Vegetables: Toss seasonal veggies in olive oil and herbs for a savory, roasted side that complements the pot pies’ flavors beautifully.
- Coleslaw: The crunchy texture and slight tang of coleslaw provide a refreshing contrast to the hearty, creamy filling, bringing brightness to the plate.
- Stuffed Mushrooms: Rich, earthy mushrooms filled with cream cheese and herbs add a fancy touch, enhancing the comforting atmosphere of your dinner.
- Cranberry Sauce: A dollop of tangy cranberry sauce can elevate the flavors, providing a pleasing contrast to the savory meat and creamy filling.
- Apple Crisp: For dessert, a warm apple crisp topped with vanilla ice cream rounds out the meal with a sweet touch, leaving everyone satisfied.
Mini Chicken Pot Pies Recipe FAQs
How do I choose the right chicken for my pot pies?
Absolutely! For the best flavor and texture, use boneless, skinless chicken breasts. If you’re looking for a heartier option, turkey works wonderfully as well. Make sure the chicken is fresh and bright in color—avoid any pieces with dark spots or an unpleasant odor.
How should I store leftover mini chicken pot pies?
You’ll want to store any leftovers in an airtight container in the fridge for up to 3 days. It’s best to ensure they have cooled down to maintain that delightful texture. I’m a big fan of letting them sit at room temperature for about 30 minutes before placing them in the fridge; this helps to keep the flaky crust intact!
Can I freeze mini chicken pot pies?
You can definitely freeze them! To do so, tightly wrap each individual pot pie in plastic wrap, followed by aluminum foil to avoid freezer burn. They can last up to 2 months in the freezer. When you’re ready to enjoy, bake them straight from frozen; just add an extra 5-10 minutes of baking time to ensure they’re heated through completely.
What should I do if my filling is too runny?
Very! If your filling turns out too runny, try adding a small amount of cornstarch mixed with cold water to thicken it. Start with one tablespoon of cornstarch mixed in a bit of water, and gradually stir it into the filling while it’s simmering on the stove. Allow it to cook a few minutes longer, stirring continuously until it thickens to your desired consistency.
Can I make these mini chicken pot pies vegetarian?
Of course! Simply swap out the chicken for a delightful mix of hearty vegetables such as mushrooms, spinach, and carrots. You can enhance the flavors with vegetable broth in place of chicken broth and maintain the richness with heavy cream or a dairy-free alternative. These changes will create a delightful meatless option that’s just as satisfying!
How can I reheat my pot pies without losing their crispy texture?
To keep that wonderful crispiness, reheat your mini chicken pot pies in a preheated oven at 350°F (175°C) for about 15-20 minutes. If you’re reheating from frozen, you might need to allow a bit more time—around 25-30 minutes. Cover them loosely with foil during the first half of reheating to prevent over-browning, then remove to finish crisping the tops.
Savor Cozy Evenings with Mini Chicken Pot Pies
Ingredients
Equipment
Method
- Preheat your oven to 400°F (200°C).
- In a large skillet, melt 2 tablespoons of butter over medium heat. Add 1 diced onion and 2 minced garlic cloves. Sauté for 3-4 minutes until the onion is translucent.
- Add 1 pound of diced chicken and 2 cups of mixed vegetables. Cook for 5-7 minutes until the chicken is cooked through.
- Pour in 1 cup of chicken broth and ½ cup of heavy cream. Add 1 teaspoon of dried thyme, salt, and pepper. Simmer for 5 minutes until the sauce thickens.
- Roll out 1 sheet of puff pastry and cut into squares to fit muffin tin cups.
- Fill pastry-lined muffin cups with the chicken filling, cover with pastry squares, pinch to seal, and brush with egg wash. Bake for 25-30 minutes until golden.
Leave a Reply