
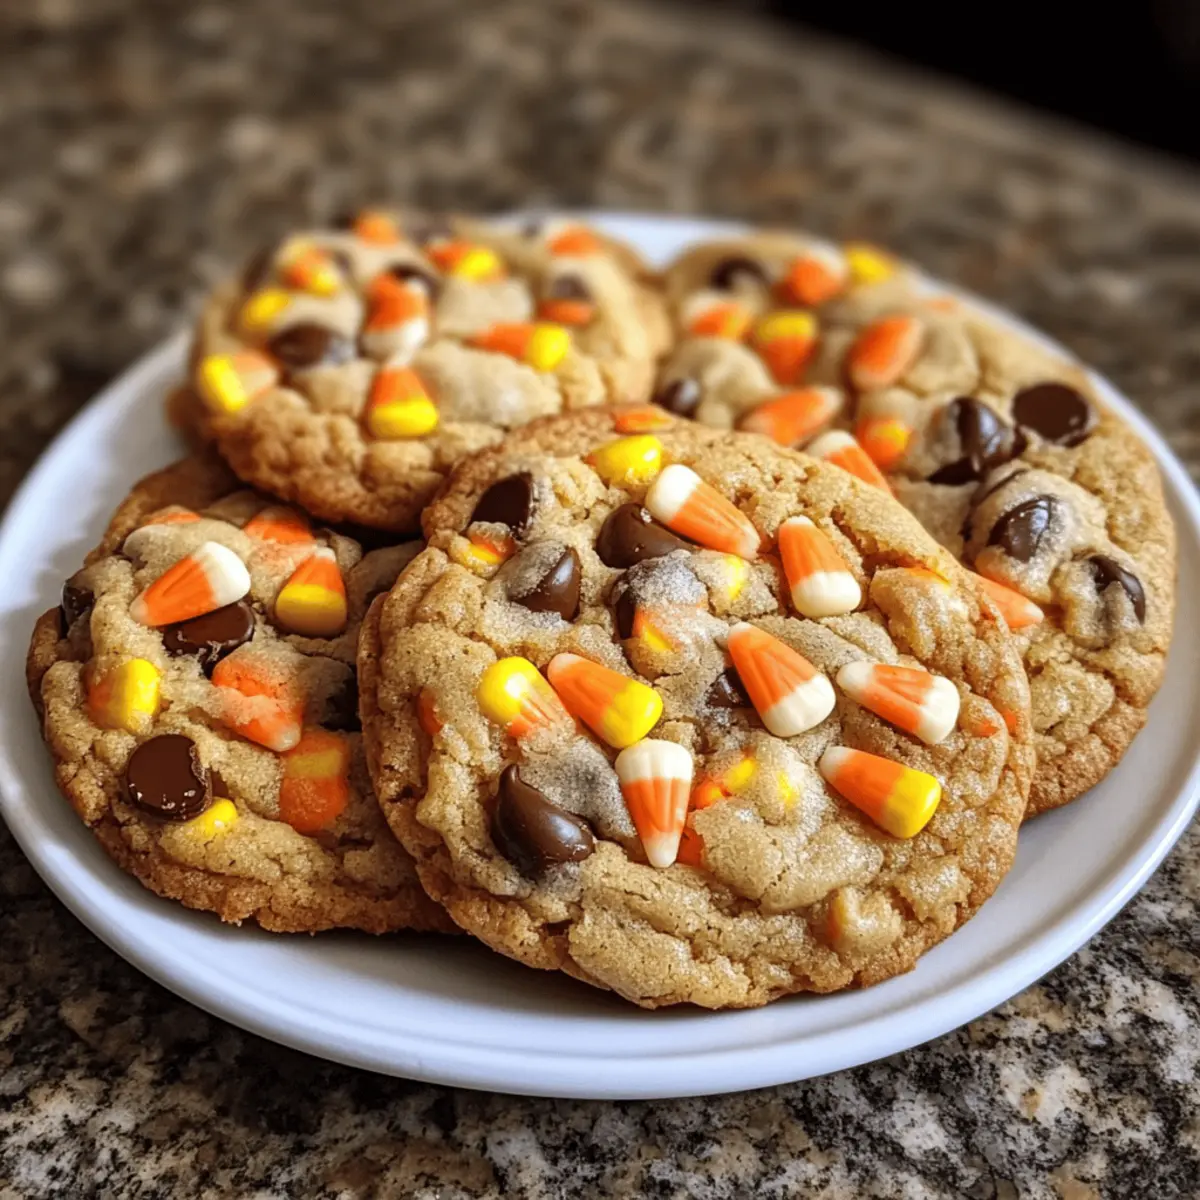
The chill in the air and the fiery shades of fall leaves signal that Halloween is creeping closer, and what better way to celebrate than with a batch of spooky delights? Enter the Halloween Cauldron Cookie Creation, a whimsical treat that’s sure to enchant both kids and adults alike. Picture soft, chewy cookies packed with rich chocolate chips and vibrant candy corn, each bite igniting a sense of festive joy. These cookies not only make for a fun baking project but also serve as perfect additions to any Halloween gathering. Plus, they’re incredibly easy to whip up, allowing you to focus on making new memories with loved ones. Ready to cast a sweet spell in your kitchen? Let’s dive into the enchanting world of Halloween-themed baking!
Why are these cookies so special?
Festive Inspiration: These Halloween Cauldron Cookies embody the spirit of the season with their colorful candy corn and rich chocolate.
Easy to Make: Even beginner bakers will find joy in crafting these whimsical treats, as the process is fun and stress-free.
Versatile Variations: Mix and match chocolate types or candies to suit your taste—feel free to experiment with ideas like Monster Cookie Fudgy Brownies for a delightful twist!
Perfect for Celebrations: Whether it’s a Halloween party or school treats, these cookies will impress both kids and adults, making them a hit at any gathering.
Deliciously Chewy: Expect a perfect texture with each bite—a stunning chewy center paired with a crisp edge creates an irresistible experience.
Quick Prep Time: Whip these up in no time and have them ready for impromptu festivities or cozy nights in. Don’t forget to check out our Candy Corn Cookies for more seasonal fun!
Halloween Cauldron Cookie Ingredients
For the Cookies
- Unsalted Butter – Creates a rich and buttery flavor; substitute with margarine if preferred.
- Granulated Sugar – Adds sweetness and helps achieve a crispy texture; no substitutions necessary.
- Brown Sugar – Provides moisture and a chewy texture; can replace with additional granulated sugar in a pinch.
- Eggs – Binds the ingredients together and contributes to the cookie’s structure; substitute each egg with 1/4 cup of unsweetened applesauce if needed.
- Vanilla Extract – Enhances flavor with a sweet aroma; no substitutions recommended.
- All-Purpose Flour – Forms the base of the cookie; ensure it’s properly measured for best results.
- Baking Soda – Helps cookies rise to the desired fluffiness; can substitute with baking powder (use 3 times the amount) if needed.
- Salt – Balances sweetness and enhances overall flavor; no substitutions necessary.
- Chocolate Chips – Adds a rich chocolate flavor; mix and match with dark, white, or milk chocolate chips.
- Candy Corn – For a festive touch; feel free to swap with other seasonal candies or nuts, as this is integral to the Halloween Cauldron Cookie Creation!
For Topping (Optional)
- Sprinkles – Add color and fun for extra festivity; choose Halloween-themed colors for maximum impact.
- Chopped Nuts – Walnuts or pecans can add a delightful crunch; great if you want to switch up the texture!
Now that we have all the ingredients lined up, it’s time to unleash your creativity and enjoy the fun of baking these spooky treats!
Step‑by‑Step Instructions for Halloween Cauldron Cookie Creation
Step 1: Preheat and Prepare
Begin your Halloween Cauldron Cookie Creation by preheating your oven to 350°F (175°C). While it warms up, line two baking sheets with parchment paper to prevent sticking and allow for easy cleanup. Ensure your ingredients are at room temperature, which is key for achieving that perfect, chewy cookie texture you desire.
Step 2: Cream the Butter and Sugars
In a large mixing bowl, cream together 1 cup of softened unsalted butter, 1/2 cup of granulated sugar, and 1/2 cup of brown sugar using a hand mixer or spatula. Beat for about 2-3 minutes until the mixture is light, fluffy, and pale in color. This step creates a beautiful base for your Halloween Cauldron Cookies that will have everyone asking for seconds!
Step 3: Add Eggs and Vanilla
Next, add 2 large eggs and 1 teaspoon of vanilla extract to the creamed mixture. Mix well on medium speed until the ingredients are fully combined and the mixture is smooth. It should look creamy and well-blended, setting a delightful flavor foundation that enhances the overall taste of your Halloween cookies.
Step 4: Combine Dry Ingredients
In a separate bowl, whisk together 2 1/2 cups of all-purpose flour, 1 teaspoon of baking soda, and 1/2 teaspoon of salt. This dry mixture is essential for building the structure of your cookies. Whisk until there are no lumps, ensuring proper leavening and a consistent texture throughout your Halloween Cauldron Cookie dough.
Step 5: Mix Wet and Dry Ingredients
Gradually add the dry ingredients to the wet mixture, stirring gently until just combined. Do not overmix, as this can lead to tougher cookies. You’ll want to stop when you can still see a few streaks of flour in the dough; this ensures a tender and chewy texture in your Halloween treats.
Step 6: Fold in Chocolate and Candy
Now it’s time to fold in 1 cup of chocolate chips and 1 cup of candy corn. Use a spatula to gently mix these delightful additions into the dough until evenly distributed. The chocolate and candy will create the festive, colorful cauldrons for your Halloween cookies, bringing smiles to all who partake.
Step 7: Portion the Dough
Using a cookie scoop or two spoons, drop spoonfuls of dough onto the prepared baking sheets, spacing them about 2 inches apart. You should aim for about 2 tablespoons of dough for each cookie to achieve the perfect size for your treats. This gives them room to spread while baking while ensuring an even cook throughout the batch.
Step 8: Bake to Perfection
Place the baking sheets in the preheated oven and bake for 10-12 minutes. You’ll know they’re done when the edges are golden brown and the centers are soft but set. This slight underbaking gives your Halloween Cauldron Cookies that delightful chewy texture that’s sure to be a hit!
Step 9: Cool and Enjoy
Once baked, allow the cookies to cool on the baking sheets for about 5 minutes before transferring them to a wire rack. This step lets them firm up further while maintaining that gooey center. Enjoy the enticing aroma filling your kitchen as you prepare to savor these festive treats!
Halloween Cauldron Cookie Creation Variations
Feel free to add your creative twist to these delightful Halloween Cauldron Cookies and make them uniquely yours!
- Dairy-Free: Substitute butter with coconut oil and use dairy-free chocolate chips for a wholesome treat.
- Nutty Crunch: Incorporate chopped walnuts or pecans to add a delightful crunch and depth of flavor.
- Spicy Twist: Add a pinch of cinnamon or nutmeg to the dry ingredients for a warm, spicy kick that perfectly complements the sweetness.
- Chewy Additions: Fold in a handful of oats for extra chewiness; this adds a rustic texture without compromising flavor.
- Colorful Sprinkles: Top cookies with Halloween-themed sprinkles before baking for an extra festive touch.
- Candy Swap: Instead of candy corn, mix in gummy worms or pumpkin-shaped candies for a fun surprise in each cookie.
- Super Chocolatey: Use a combination of dark, white, and milk chocolate chips to satisfy every chocolate lover’s dream.
- Gluten-Free: Substitute all-purpose flour with a 1:1 gluten-free baking blend to make these cookies accessible without sacrificing flavor.
As you bake, get inspired by other Halloween treats; consider pairing these with our Monster Cookie Fudgy Brownies or our spooky Cauldron Cookies Spooky for delightful variations! Don’t forget to explore more festive options like Candy Corn Cookies for your celebrations!
What to Serve with Halloween Cauldron Cookie Creation
Indulge in the spirit of the season with pairings that elevate your Halloween festivities beyond just cookies.
-
Spooky Punch: A vibrant, fruity punch blends perfectly with these sweet treats, creating a festive atmosphere that all ages will enjoy.
-
Freaky Fruit Skewers: Combine seasonal fruits like melon and grapes on skewers; they’re refreshing and visually appealing, adding a healthy contrast to sweet cookies.
-
Mummy Dogs: These fun, playful snacks wrapped in crescent dough bring savory balance to your dessert spread. Their playful appearance will entice kids and adults alike.
-
Witch’s Brew Hot Chocolate: Rich and creamy hot chocolate topped with whipped cream adds a cozy touch that complements the chewy texture of your cookies perfectly.
-
Ghoulish Gelato: Serve a scoop of pumpkin or vanilla gelato alongside the cookies for a delightful temperature contrast and creamy indulgence.
-
Candy Corn Snack Mix: A crunchy mix of pretzels, nuts, and candy corn provides an extra layer of fun that echoes the flavors in your Cauldron Cookies.
-
Ghostly Milkshakes: Thick and frosty milkshakes drizzled with chocolate can be a delectable treat, making a magical pairing with the festive cookies.
-
Pumpkin Spice Latte: This seasonal favorite adds a cozy, spiced flavor that aligns beautifully with Halloween vibes, creating an aromatic experience with each bite and sip.
-
Miniature Pumpkin Pies: These bite-sized desserts introduce a classic autumn flavor that will please party guests and make your spread oh-so-festive.
-
Warm Apple Cider: The warm sweetness of spiced apple cider will wrap around those treats, inviting guests to gather and enjoy them together.
Make Ahead Options
These Halloween Cauldron Cookies are perfect for busy home cooks looking to save time during the spooky season! You can prepare the cookie dough up to 24 hours in advance. Simply mix the dough as instructed, then store it in an airtight container in the refrigerator. This helps maintain the freshness and chewy texture of the cookies. When you’re ready to bake, scoop the dough onto parchment-lined baking sheets and let it sit at room temperature for about 10-15 minutes before popping them in the oven. You’ll enjoy fresh-baked, delicious Halloween Cauldron Cookies with minimal effort, making your festive gatherings even sweeter!
Expert Tips for Halloween Cauldron Cookies
-
Room Temperature Ingredients: Ensure your butter and eggs are at room temperature for a smooth, well-blended dough that results in perfect texture in your Halloween Cauldron Cookie Creation.
-
Avoid Overmixing: Mix just until combined when adding dry ingredients to keep your cookies tender and chewy. Overmixing can lead to a dense texture.
-
Watch the Baking Time: For ideal cookies, remove them from the oven when the edges are golden and the center is still soft. They will continue to set as they cool.
-
Spacing is Key: Give your cookie dough ample space on the baking sheet. This allows the cookies to spread without merging, keeping their delightful shape and texture.
-
Experiment with Mix-Ins: Don’t hesitate to customize! Swap chocolate types or add nuts for unique flavors, making your Halloween Cauldron Cookie Creation truly your own.
How to Store and Freeze Halloween Cauldron Cookies
Room Temperature: Store cookies in an airtight container at room temperature for up to 4-5 days. Layer parchment paper between cookies to prevent sticking.
Fridge: For longer freshness, keep them in the fridge inside an airtight container for up to a week. Allow cookies to come to room temperature before serving for the best texture.
Freezer: Freeze cookies individually wrapped in plastic wrap, then placed in a zip-lock bag for up to 2-3 months. Thaw at room temperature before enjoying your Halloween Cauldron Cookie Creation.
Reheating: For a warm treat, reheat cookies in the oven at 350°F (175°C) for 5-7 minutes, bringing back that gooey center and comforting aroma.
Halloween Cauldron Cookie Creation Recipe FAQs
What should I look for when selecting chocolate chips?
Absolutely! When selecting chocolate chips, look for high-quality brands with a rich flavor. Check the expiration date to ensure freshness, and opt for chips that are well-sized for melting, usually semi-sweet or dark varieties work best for a perfect blend of sweetness and chocolatey goodness.
How should I store leftover Halloween Cauldron Cookies?
To keep your cookies fresh, store them in an airtight container at room temperature for up to 4-5 days. Make sure to layer pieces of parchment paper between cookies to prevent them from sticking to one another. If you happen to have a few (or a lot!) left after your festivities, putting them in the fridge can extend their life for about a week!
Can I freeze these cookies? If so, how?
Absolutely! Freezing is a great way to have these delightful treats ready whenever you’re craving something sweet. To freeze them, wrap each cookie individually in plastic wrap and place them in a zip-lock freezer bag. They can be frozen for up to 2-3 months. When you’re ready to enjoy, let them thaw at room temperature for about 30 minutes or pop them in a warm oven at 350°F (175°C) for 5-7 minutes to regain that perfect chewy texture.
Why did my cookies spread too much while baking?
Very common! If your cookies spread too much, it could be due to several reasons. Most often, it’s because the butter was too warm when mixed, or the dough wasn’t chilled before baking. To fix this in the future, be sure to use room temperature butter and consider chilling the dough for about 30 minutes before spooning it onto your baking sheet. This will help maintain their shape while baking.
Are these cookies suitable for people with egg allergies?
You bet! For those with egg allergies, you can replace each egg in the recipe with 1/4 cup of unsweetened applesauce. It’ll help to bind the ingredients together much like an egg would, maintaining that enjoyable chewy texture in your Halloween Cauldron Cookie Creation.
Can I make these cookies vegan?
Very much so! To convert this recipe to a vegan-friendly version, swap the unsalted butter for a plant-based butter or coconut oil and replace the eggs with flax eggs (1 tablespoon of ground flaxseed mixed with 2.5 tablespoons of water, let it sit for a couple of minutes to thicken). This way, you can enjoy your Halloween treats without sacrificing flavor!
Halloween Cauldron Cookie Creation: Spooky Sweet Delights
Ingredients
Equipment
Method
- Preheat your oven to 350°F (175°C) and line two baking sheets with parchment paper.
- Cream together the unsalted butter, granulated sugar, and brown sugar until light and fluffy.
- Add the eggs and vanilla extract to the mixture and mix until well combined.
- In a separate bowl, whisk together the all-purpose flour, baking soda, and salt.
- Gradually add the dry mixture to the wet ingredients, stirring gently until just combined.
- Fold in the chocolate chips and candy corn until evenly distributed.
- Drop spoonfuls of dough onto the prepared baking sheets, spacing them about 2 inches apart.
- Bake for 10-12 minutes or until the edges are golden brown and centers are soft.
- Allow cookies to cool on the baking sheets for about 5 minutes before transferring them to a wire rack.
Leave a Reply