
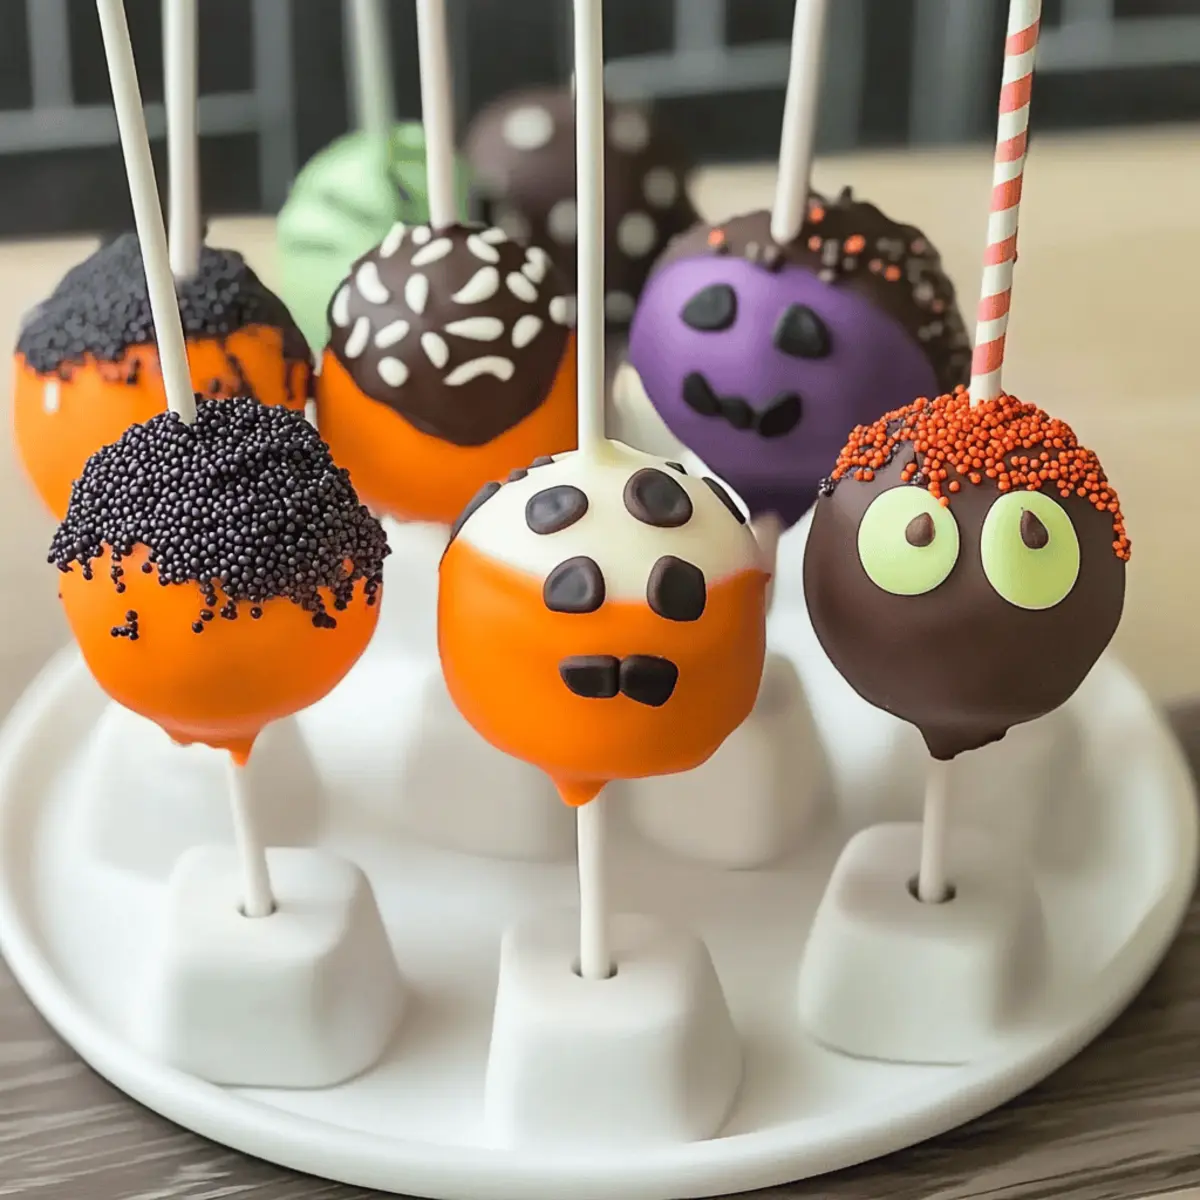
“Watch out for the spooky treats coming your way!” my friend exclaimed as we dove into our Halloween baking adventure. That’s when I decided it was time to whip up some Halloween Cake Pops, the ultimate festive delight that turns any gathering into a celebration. Not only are these bites of joy incredibly easy to make, but their customizable designs—think adorable ghosts, quirky pumpkins, and even eerie eyeballs—make them a hit with kids and adults alike. With a delightful chocolate coating enveloping a moist cake center, these Halloween treats are perfect for school parties or cozy family gatherings. Plus, they’re a great way to unleash your creativity while keeping little hands happily busy in the kitchen. So, are you ready to bring a little frightful fun to your dessert table?
Why Are Halloween Cake Pops So Irresistible?
Fun to Make: These Halloween cake pops are a joyful baking adventure for the whole family, offering a hands-on experience that kids will love.
Customizable Designs: Unleash your creativity! With endless design ideas—spooky ghosts, grinning pumpkins, or creepy eyeballs—you can transform these treats to match your Halloween theme.
Perfect for Any Occasion: Not just for Halloween, these cake pops can be adapted for birthday parties, school events, or festive gatherings year-round.
Moist and Flavorful: The combination of a moist cake interior and a glossy chocolate shell ensures every bite is bursting with flavor.
Quick and Easy: Using a simple box cake mix, these fun treats come together in no time, perfect for those busy days leading up to Halloween.
Once you try these delightful pops, don’t forget to check out my other recipes like Halloween Oreo Cookie and Pumpkin Cupcakes Moist for more festive inspiration!
Halloween Cake Pops Ingredients
• All you need for a spooky bake!
For the Cake Base
- Box Cake Mix – Choose any flavor; chocolate and red velvet are particularly festive for Halloween.
- Eggs – These provide moisture and structure; follow the box instructions.
- Oil – Adds richness to the cake; use vegetable or canola oil.
- Water – Required according to the box mix for the perfect fluffy texture.
For the Frosting Mixture
- Frosting (½ to 1 cup) – Use cream cheese or chocolate frosting for a delicious binding texture.
For the Coating
- Candy Melts (12 oz) – Must-have for coating; select colors like orange and black for Halloween flair.
- Gel Food Coloring – Optional for tinting white chocolate; customize your colors to fit your theme.
For Decoration
- Lollipop Sticks (24) – Ensure these are sturdy enough for holding your cake pops.
- Candy Eyeballs – Create fun, spooky faces for your pops; a must-have for festive decorations.
- Halloween Sprinkles – Add a pop of color and whimsical texture to your treats.
- Colored Sugar (orange, black, purple) – Use this for an extra festive touch; edible glitter works well too.
- Red Gel Icing – Perfect for creating creepy veins on your candy eyeballs.
- Green Frosting or Fondant – Ideal for adding little pumpkin stems to your spooky designs.
With these ingredients in hand, you’re well on your way to crafting the most delightful Halloween cake pops that will have everyone talking!
Step‑by‑Step Instructions for Halloween Cake Pops
Step 1: Bake the Cake
Preheat your oven according to the box cake mix instructions, usually around 350°F (175°C). Prepare your box cake mix as directed, mixing in eggs, oil, and water until smooth. Pour the batter into a greased baking pan and bake for about 25-30 minutes until a toothpick comes out clean. Once baked, let the cake cool completely on a wire rack.
Step 2: Crumble and Mix
Once the cake is cool, crumble it into fine crumbs in a large mixing bowl. Use your hands or a fork to ensure it’s finely crushed. Gradually mix in frosting until the mixture resembles a sticky dough that can hold its shape. This well-combined mixture will serve as the delicious base for your Halloween cake pops.
Step 3: Roll Into Balls
Using your hands, form the cake mixture into 1-inch balls and place them on a lined baking sheet. Make sure the balls are compact and smooth for even coating. Once formed, chill the cake balls in the refrigerator for 1-2 hours or freeze for about 30 minutes to help them firm up before adding the sticks.
Step 4: Insert Sticks
Melt a small amount of candy melts in a microwave-safe bowl according to package instructions, usually in 30-second intervals, stirring until smooth. Dip one end of each lollipop stick into the melted chocolate and gently insert it into each cake ball, about halfway. This will help secure the stick in the treat as they chill for another 10 minutes.
Step 5: Dip in Chocolate
Melt the remaining candy melts in the microwave, ensuring they are smooth and fully liquefied. Take each cake pop and dip it into the melted chocolate, allowing excess chocolate to drip off. Ensure that each cake pop is evenly coated for a glossy finish. Set them upright on a stand or lined tray to dry.
Step 6: Decorate
While the chocolate coating is still wet, unleash your creativity by decorating the cake pops! Sprinkle with Halloween sprinkles, place candy eyeballs, or add any other embellishments you like. This is the fun part where your Halloween cake pops come to life with spooky designs.
Step 7: Let Set
Once decorated, carefully place each cake pop upright into a Styrofoam block or a cardboard box with holes. Allow the coating to set at room temperature for about 15-20 minutes. Once firm, your delightful Halloween cake pops are ready to be enjoyed or presented at your next spooky gathering!
Expert Tips for Halloween Cake Pops
-
Cool Completely: Ensure the cake is fully cooled before crumbling it; warm cake can lead to a gooey mixture that’s hard to shape.
-
Frosting Control: Add frosting gradually to avoid over-moistening your mixture; you want it to be sticky, not soggy for perfect cake pops.
-
Quick Decorating: Work swiftly once dipped in chocolate; add decorations while the coating is still wet to ensure they stick properly.
-
Smooth Dipping: If your melted chocolate is too thick, thin it with a dash of vegetable oil to achieve a smoother, easier dipping consistency.
-
Chill Before Sticking: After rolling into balls, chilling the cake pops helps maintain their shape when inserting the sticks, preventing any mishaps.
-
Fun Variations: Experiment with different cake flavors and toppings to personalize your Halloween cake pops; the possibilities are endless!
What to Serve with Halloween Cake Pops?
Elevate your Halloween festivities with delightful pairings that will complement these sweet, festive treats.
- Hot Apple Cider: The warm, spicy flavors of apple cider create a cozy atmosphere, perfectly contrasting the sweetness of the cake pops.
- Pumpkin Muffins: These moist, flavorful muffins bring the fall spirit to your table and pair wonderfully with the cake pops’ sweetness.
- Ghostly Marshmallow Treats: A fun, chewy addition that echoes the Halloween theme, these add a delightful texture to your dessert spread.
- Chocolate Mousse: This rich and creamy dessert balances the cake pops’ sweetness and creates an indulgent treat for your guests.
- Spooky Fruit Skewers: Fresh, colorful fruit adds a refreshing touch to your dessert table while keeping the festive spirit alive.
- Halloween Punch: A bubbling punch can be both fun and festive, with fruity flavors enhancing the overall dessert experience.
- Whipped Cream: This simple addition enhances the sweetness of the cake pops and evokes a classic dessert feel, making every bite a little more indulgent.
- Mini Pumpkin Pies: These delicious bites not only resonate with the season but also provide a complementary flavor profile to the cake pops.
- Gingerbread Cookies: The spiced flavor of gingerbread cookies mingles beautifully with the cake pops, creating a festive harmony.
- Milk or Hot Chocolate: A classic pairing that never disappoints, the creamy texture of milk or rich hot chocolate complements each cake pop perfectly.
Halloween Cake Pops Variations & Substitutions
Let your creativity run wild as you mix and match these delightful options for unforgettable Halloween cake pops!
- Flavor Swap: Use a different cake mix, like spice or vanilla, to create unique flavors perfectly suited for any festive theme.
- Gluten-Free Option: Substitute the box cake mix with a gluten-free blend to ensure everyone can enjoy these spooky treats! It’s as easy as replacing the cake mix and adjusting liquids slightly.
- Dairy-Free Delight: Swap regular frosting with dairy-free alternatives such as coconut cream frosting for an inclusive treat that doesn’t skimp on flavor.
- Texture Adventure: Add crushed cookies or nuts into the cake mixture for an unexpected crunch that adds delightful texture—think chocolate or vanilla wafer crumbs!
- Chocolate Coating Twist: Experiment with dark chocolate or white chocolate candy melts, or even try a flavored candy coating for a fun spin on the classic look.
- Chilling Variations: Instead of chilling, freeze your cake balls to get a firmer texture for a denser bite. Plus, this can make a great surprise for guests!
- Decorative Fun: Instead of just sprinkles, consider edible glitter or chocolate drizzle for an extra pop of color and flair to each cake pop—a little shimmer never hurt anyone!
- Mummy-Themed Pops: Wrap your cake pops with melted white chocolate “bandages” for a mummy look, and finish with a pair of edible candy eyeballs for a delightful fright!
And if you’re looking for more scrumptious recipes perfect for the spooky season, try out these Halloween Oreo Cookie delights or whip up some delightful Pumpkin Cupcakes Moist for the ultimate festive dessert table!
Storage Tips for Halloween Cake Pops
-
Room Temperature: Store unwrapped cake pops in a cool, dry place for up to 3 days. Use a cake pop stand or styrofoam to keep them upright and fresh.
-
Fridge: Place cake pops in an airtight container to refrigerate for up to 2 weeks. This helps maintain moisture without compromising the chocolate coating.
-
Freezer: For longer storage, freeze the cake pops in a single layer on a baking sheet until firm, then transfer to an airtight container for up to 1 month.
-
Reheating: When ready to enjoy, let frozen cake pops thaw in the fridge for several hours. Avoid microwaving as it can affect the texture and coating.
Make Ahead Options
These Halloween Cake Pops are perfect for meal prep, allowing you to enjoy festive treats without the last-minute rush! You can bake the cake and crumble it up to 3 days in advance, storing it in an airtight container in the refrigerator to maintain freshness. Additionally, you can form the cake mixture into balls and refrigerate them for up to 24 hours before inserting the sticks. When you’re ready to serve, simply dip the chilled pops in melted candy and decorate as desired. This prep-ahead strategy not only saves valuable time on busy days but also ensures that each bite is just as delicious and delightful as if made fresh!
Halloween Cake Pops Recipe FAQs
What type of cake mix should I use for Halloween cake pops?
You can use any flavor of box cake mix; however, chocolate and red velvet are particularly festive for Halloween. These flavors elevate the spooky experience while adding a delicious taste to your cake pops.
How should I store my Halloween cake pops?
Store unwrapped cake pops in a cool, dry place for up to 3 days. If you want to keep them longer, place them in an airtight container in the refrigerator for up to 2 weeks. This keeps them fresh and moist while preventing the chocolate coating from getting damaged.
Can I freeze Halloween cake pops?
Absolutely! For longer storage, freeze your cake pops in a single layer on a baking sheet until they’re firm, then transfer them to an airtight container. They can be frozen for up to 1 month. When you’re ready to enjoy, simply thaw the cake pops in the fridge for several hours, avoiding the microwave to maintain their texture.
What if my cake mixture is too wet?
If your mixture is too wet after adding frosting, don’t worry! Start by adding more cake crumbs—about a tablespoon at a time—until you reach the desired sticky, dough-like consistency. Keep in mind that you want the mixture to hold together but not be soggy. A little patience during the mixing process can save your cake pops!
Are there any dietary considerations for Halloween cake pops?
Definitely! If you’re making these treats for a gathering, be sure to ask about any allergies related to common ingredients like eggs, dairy, and gluten. For vegan versions, consider using egg replacers, dairy-free frosting, and gluten-free cake mixes. Plus, make sure any decorations you choose are free from allergens based on your guests’ needs.
How long can I keep Halloween cake pops after making them?
Homemade Halloween cake pops can last at room temperature for about 3 days, but for optimal freshness, I recommend enjoying them within 2 weeks if stored in the fridge. For best enjoyment, keep an eye on them for any signs of moisture loss or chocolate degradation—this ensures every bite remains delightful!
Delicious Halloween Cake Pops That Delight Every Bite
Ingredients
Equipment
Method
- Preheat your oven to 350°F (175°C). Prepare your cake mix as directed, mixing in eggs, oil, and water until smooth. Pour the batter into a greased baking pan and bake for about 25-30 minutes until a toothpick comes out clean. Let the cake cool completely.
- Crumble the cooled cake into fine crumbs in a large bowl. Gradually mix in frosting until the mixture resembles a sticky dough that can hold its shape.
- Form the cake mixture into 1-inch balls and chill them in the refrigerator for 1-2 hours or freeze for about 30 minutes.
- Melt a small amount of candy melts and dip one end of each stick into it before inserting it into each cake ball.
- Melt the remaining candy melts and dip each cake pop, allowing excess chocolate to drip off before setting them upright to dry.
- While the coating is still wet, decorate with sprinkles, candy eyeballs, or your chosen embellishments.
- Allow the decorated cake pops to set at room temperature for about 15-20 minutes before enjoying.
Leave a Reply