
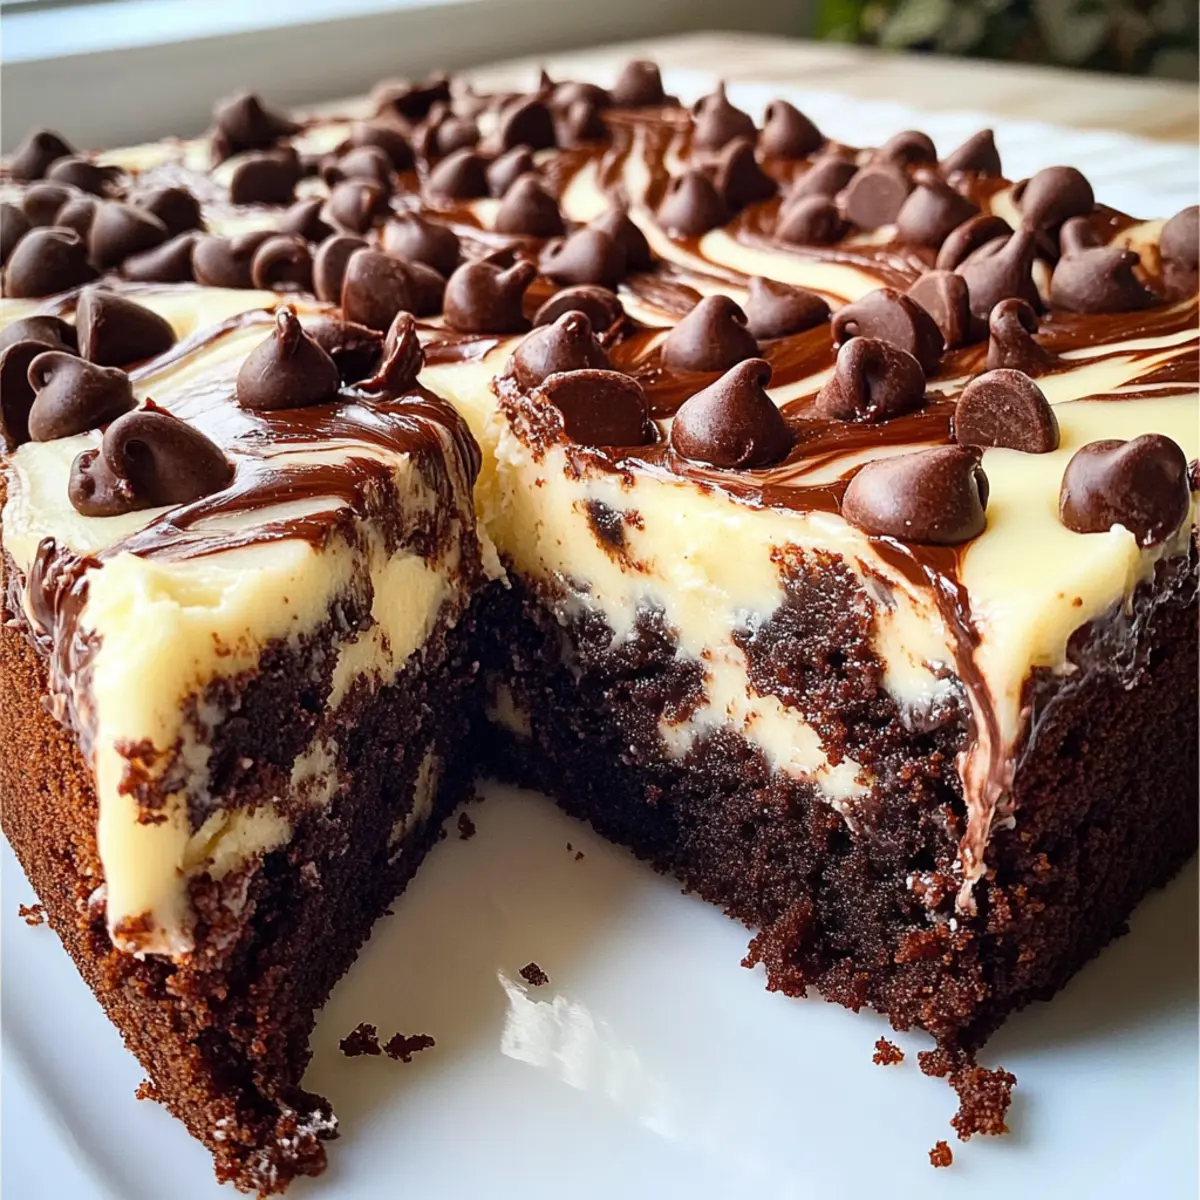
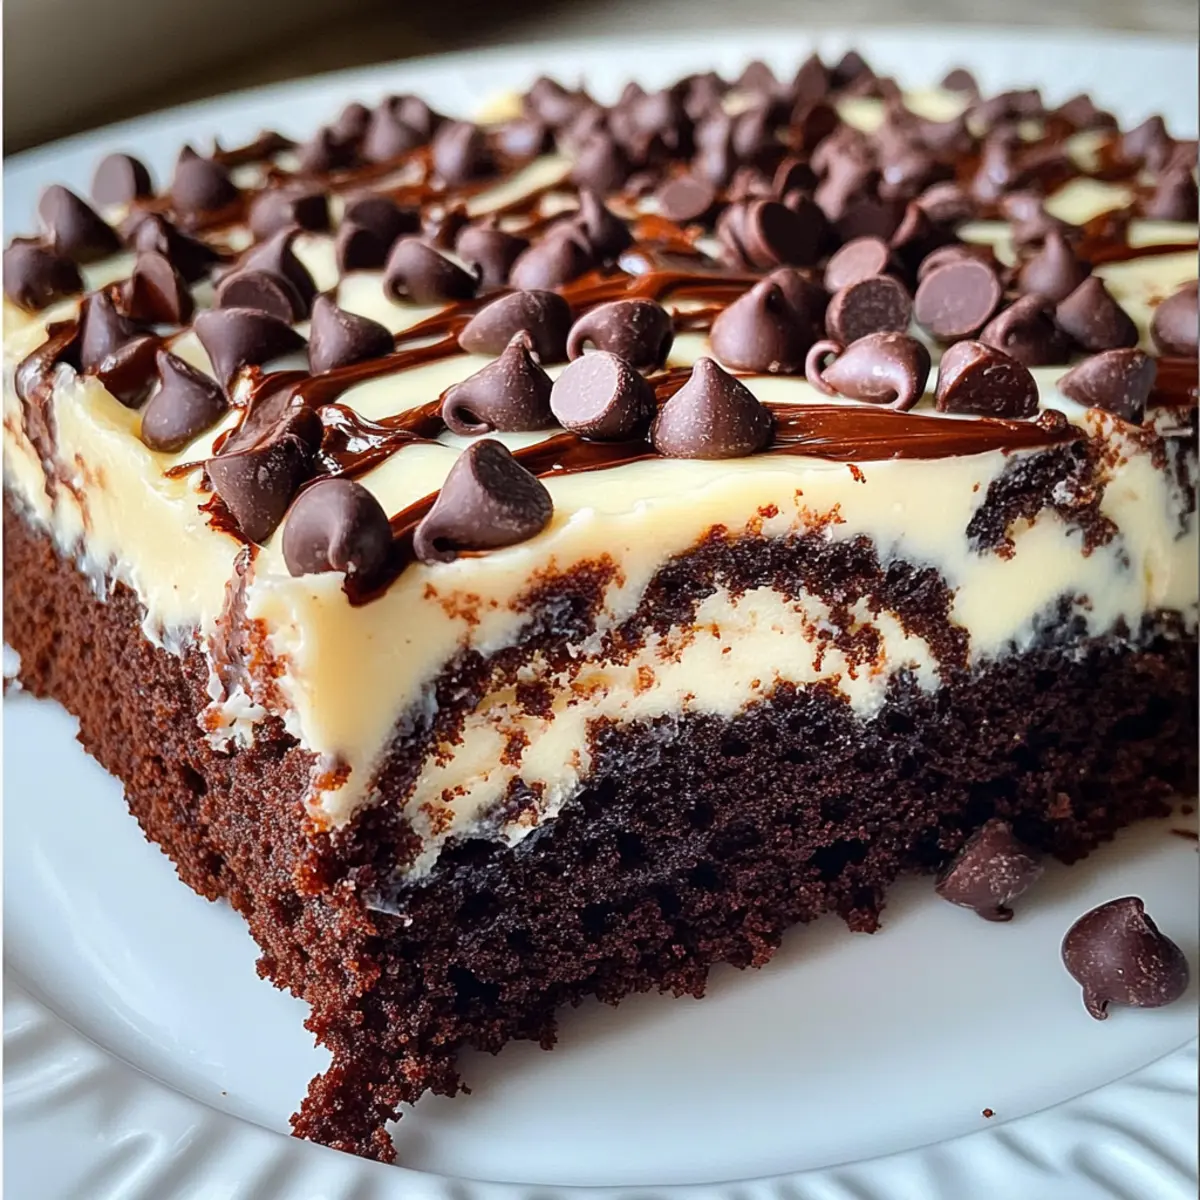
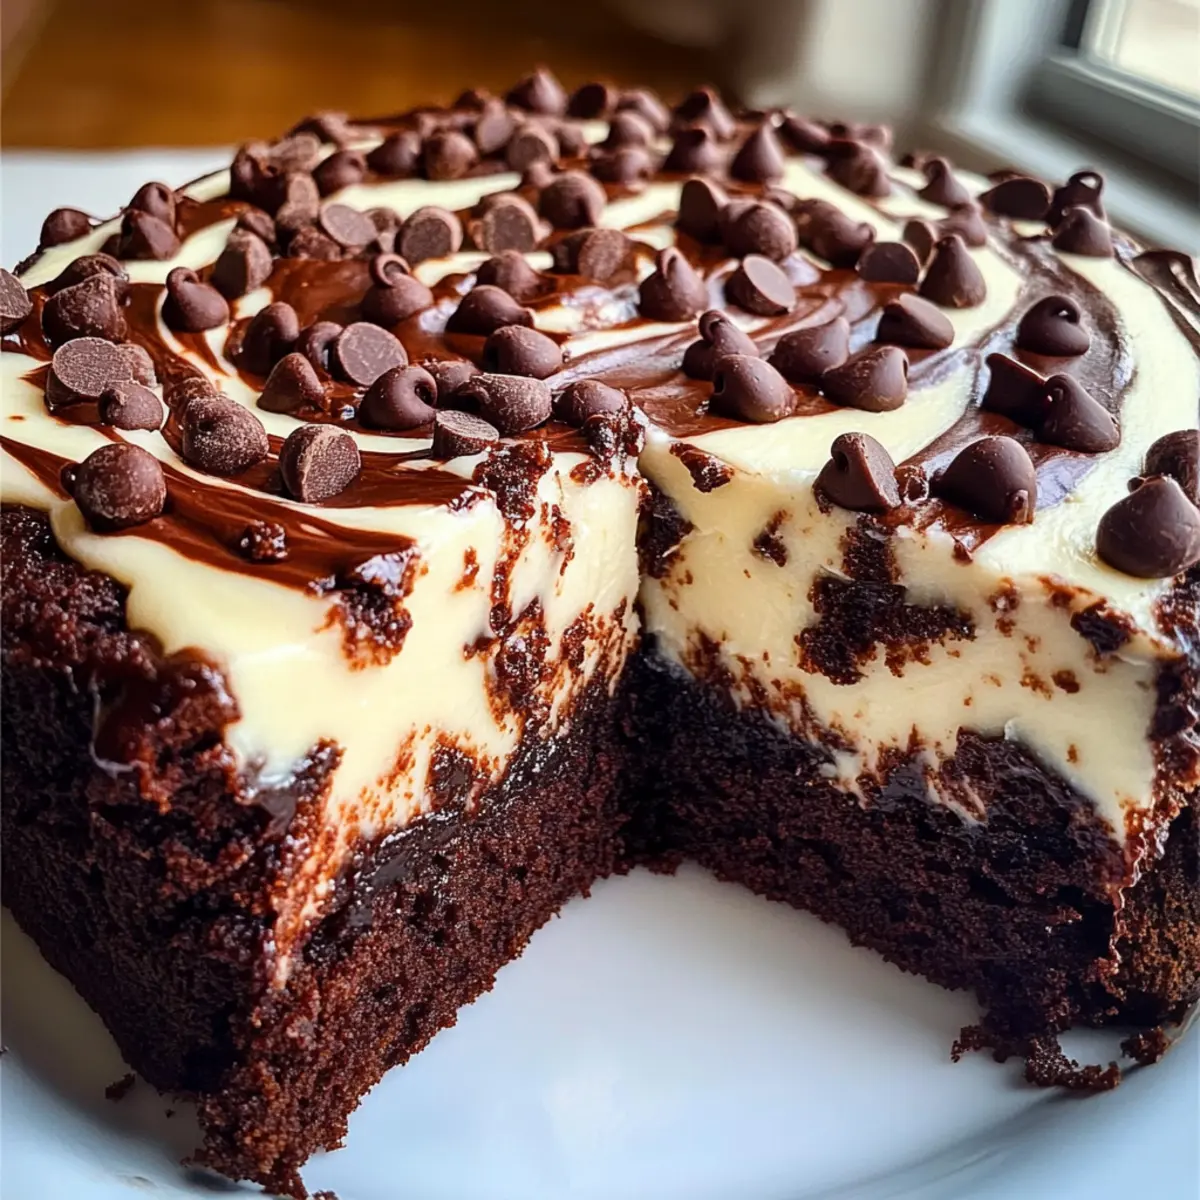
A delightful whirlwind of chocolate and surprises awaits you with Earthquake Cake! This dessert has a way of stealing the show, thanks to its deliciously gooey cream cheese swirls and crunchy pecans nestled in a soft chocolate base. What I love most about this easy-to-make gem is that it calls for a simple chocolate cake mix, making it accessible for anyone, even if you’re new to baking. It’s a crowd-pleaser perfect for potlucks or a cozy night in. Plus, there’s no need for frosting—this cake shines on its own with its beautiful cracks and creamy layers. Ready to indulge in a sweet twist on comfort food? Let’s dive into this irresistible recipe!
Why is Earthquake Cake a Must-Try?
Decadent, This cake combines rich chocolate with creamy swirls, creating a dessert that’s pure bliss.
Simple, With the magic of a chocolate cake mix, even novice bakers can whip up this treat effortlessly.
Versatile, Feel free to swap in your favorite nuts or chocolate types for a personalized twist.
No Frosting Needed, Its delightful cracks and layers mean you can serve it just as it is!
Crowd-Pleasing, Perfect for gatherings or cozy nights, everyone will love the unique flavors. Enjoy it warm with a scoop of ice cream for an extra indulgent experience!
Earthquake Cake Ingredients
For the Cake Base
- Sweetened Shredded Coconut – Adds chewy texture and a sweet tropical flavor; you can swap it with unsweetened flakes or omit it if desired.
- Chopped Pecans – Provides a delightful nutty crunch; walnuts or slivered almonds make great substitutes.
- Chocolate Cake Mix – The foundation of your cake; opt for a 15.25 oz box for the best results.
- Large Eggs – Essential for moisture and helping the cake rise; follow the directions on the cake mix box.
- Vegetable Oil – Ensures the cake remains moist; a key ingredient in the mix preparation.
- Water – Necessary for the cake mix, adding the liquid needed for the perfect batter.
For the Creamy Swirls
- Cream Cheese – Forms the heart of those creamy swirls; ensure it’s softened for smooth mixing.
- Unsalted Butter – Intensifies the richness of the cream cheese layer and promotes easy blending.
- Powdered Sugar – Sweetens and smooths the cream cheese for that dessert-like richness.
- Chocolate Chips – Melt into delicious pockets throughout the cake, enhancing its flavor; go for semi-sweet or dark chocolate for extra decadence.
This Earthquake Cake is sure to impress with its unique textures and comforting flavors!
Step‑by‑Step Instructions for Earthquake Cake
Step 1: Preheat and Prepare the Baking Dish
Begin by preheating your oven to 350°F (175°C). While it’s heating, generously grease a 9×13-inch baking dish with butter or non-stick spray to prevent any sticking. This preparation is crucial for achieving that gooey goodness in your Earthquake Cake, ensuring every slice comes out perfectly.
Step 2: Add Coconut and Pecans
Evenly sprinkle the sweetened shredded coconut and chopped pecans across the bottom of the greased baking dish. This layer creates a delightful crunch and adds flavor to your Earthquake Cake. Take a moment to admire the colorful contrast as these ingredients set the stage for the chocolate layer above.
Step 3: Prepare the Cake Mix
In a mixing bowl, prepare the chocolate cake mix according to the package instructions. Combine the specified number of large eggs, vegetable oil, and water, then mix until smooth. It’s essential to blend well to ensure your cake has that rich, tender texture, so allow about 2 minutes of mixing time.
Step 4: Pour the Cake Batter
Once the batter is well combined, carefully pour it over the layer of coconut and pecans in the baking dish. Use a spatula to spread the batter evenly, ensuring every bit of that delicious base gets a taste of the nutty crunch beneath. This layer of chocolate will be the heart of your Earthquake Cake.
Step 5: Make the Cream Cheese Mixture
In a separate bowl, combine the softened cream cheese, melted unsalted butter, and powdered sugar. Beat this mixture with a hand mixer or whisk until it’s perfectly smooth and creamy, about 3-5 minutes. This step is key for achieving those luxurious swirls that make your Earthquake Cake so delightful.
Step 6: Dollop and Swirl
Spoon the cream cheese mixture over the chocolate batter in dollops, aiming to distribute it evenly. Using a knife or skewer, gently swirl the cream cheese into the batter without overmixing. The goal is to create that signature marbled effect that mimics the cracks of an earthquake, adding to the cake’s unique appeal.
Step 7: Add Chocolate Chips
Generously scatter the chocolate chips on top of the swirled cream cheese mixture. This final touch infuses your Earthquake Cake with melted chocolate pockets, enhancing its rich flavor. Make sure to distribute them evenly for that chocolatey goodness in every bite.
Step 8: Bake to Perfection
Place the baking dish in your preheated oven and bake for 45–50 minutes. Keep an eye on it, and when the center is set but slightly jiggly, and a toothpick inserted comes out with moist crumbs, it’s time to take it out. The top should be beautifully cracked, hinting at the delicious textures inside.
Step 9: Cool Before Serving
Once baked, allow your Earthquake Cake to cool in the dish for about 10-15 minutes. This cooling period makes it easier to slice and enhances the flavors. Serve warm or let it reach room temperature for a comforting dessert that’s perfect for sharing with family and friends.

Earthquake Cake Variations & Substitutions
Feel free to let your creativity flow and adapt this Earthquake Cake recipe to suit your style and tastes!
- Nut-Free: Replace chopped pecans with sunflower seeds or simply omit nuts for a safe dessert option.
- Coconut-Free: Skip the coconut for a purely chocolate experience; your cake will still be luscious and delightful.
- Gluten-Free: Use a gluten-free chocolate cake mix to keep the deliciousness of this cake accessible for all your friends.
- Berry Bliss: Add 1 cup of fresh raspberries or strawberries for a fruity twist that brightens the chocolate flavor.
- Flavor Boost: Swap half the chocolate chips with white chocolate for a dual chocolate extravaganza that’s visually stunning.
- Cream Cheese Alternative: For a lighter version, substitute low-fat cream cheese or Greek yogurt in the cream cheese mixture.
- Spice It Up: Mix in a teaspoon of espresso powder or vanilla extract into the chocolate batter for a deeper flavor.
- Salted Caramel Swirl: Incorporate a drizzle of prepared salted caramel sauce into the cream cheese layer for a sweet, salty surprise.
This Earthquake Cake is a canvas for your imagination, and each variation allows you to shine. So why not enhance your dessert with a scoop of vanilla ice cream or whipped cream? You’ll find that these comforting combinations take this cake to a whole new level! For even more delicious ideas, check out my Serving Suggestions for perfect accompaniments.
How to Store and Freeze Earthquake Cake
Room Temperature: Store the cake covered at room temperature for up to 3 days. This keeps it moist and delicious for spontaneous snacking!
Fridge: If you prefer to store it in the fridge, cover the cake tightly; it will last for up to a week while retaining its rich flavors.
Freezer: For longer storage, individual slices can be frozen for up to 2 months. Wrap each slice tightly in plastic wrap and then place in an airtight freezer bag.
Reheating: When ready to enjoy, simply microwave a slice for 15–20 seconds to bring back the gooey goodness of your Earthquake Cake.
What to Serve with Earthquake Cake?
Indulging in a slice of Earth’s delight is just the beginning of your dessert adventure. Let’s explore some perfect pairings to elevate your experience.
- Vanilla Ice Cream: The creamy, coolness of ice cream contrasts beautifully with the rich, warm cake, creating a heavenly bite.
- Fresh Berries: Whether strawberries or raspberries, the tartness will cut through the sweetness, adding a refreshing touch to each mouthful.
- Whipped Cream: Light and airy, a dollop of whipped cream enhances the cake’s texture, offering a sweet, fluffy counterpart to its density.
For an extra-special treat, try serving each slice with a scoop of vanilla ice cream. The melting creaminess offers a delightful balance to the cake’s gooey swirls while adding an indulgent feel. Enjoy these pairings as you create your own memory-filled dessert experience!
Make Ahead Options
These Earthquake Cakes are perfect for meal prep enthusiasts! You can prepare the chocolate cake batter up to 24 hours in advance and store it in the refrigerator to save time. Additionally, mix the cream cheese layer ahead and keep it in an airtight container for up to 3 days. When ready to bake, simply pour the chilled batter into the dish over the coconut and pecans, dollop in the cream cheese mixture, and swirl gently before baking. This method not only preserves the deliciously gooey texture but also allows for effortless baking on busy weeknights. Your Earthquake Cake will taste just as delightful as if you made it fresh!
Expert Tips for Earthquake Cake
- Room Temperature Ingredients: Use soft cream cheese and eggs at room temperature for a smoother batter. This helps to avoid lumps in your swirl.
- Don’t Overmix: Avoid overmixing the cream cheese swirl to achieve the marbled effect. Just gently incorporate it into the batter for that signature look.
- Check for Doneness: Bake until the center is just set; overbaking can make the cake dry. Look for a slightly jiggly center and moist crumbs on your toothpick.
- Grease Well: Make sure to generously grease your baking dish to prevent sticking. A non-stick spray or butter works wonders for a clean release.
- Stick to the Mix: Use the recommended 15.25 oz chocolate cake mix for the right texture and flavor balance in your Earthquake Cake.
Earthquake Cake Recipe FAQs
How do I choose ripe ingredients for Earthquake Cake?
Absolutely! For the best flavor and texture in your Earthquake Cake, select high-quality ingredients. Use fresh eggs and ensure the cream cheese is softened to room temperature for a smooth mixture. The chopped pecans or walnuts should be fresh and crunchy, while the chocolate chips should be of good quality, ideally semi-sweet or dark, to enhance the overall taste.
What’s the best way to store Earthquake Cake?
You can store your Earthquake Cake covered at room temperature for up to 3 days, which keeps it moist and accessible for those late-night cravings! If you prefer refrigeration, it can be kept tightly covered for up to a week. This helps maintain its rich flavor without much change. Just remember to let it come to room temperature before serving for the best experience!
Can I freeze Earthquake Cake, and if so, how?
Certainly! To freeze your Earthquake Cake, cut it into individual slices. Then wrap each slice tightly in plastic wrap to prevent freezer burn. Place the wrapped slices in an airtight freezer bag, and you can keep them in the freezer for up to 2 months. When you’re ready to indulge, just microwave a slice for 15–20 seconds, and you’re good to go!
What can I do if my cake turns out dry?
Very common! If you find your Earthquake Cake is dry, it likely means it was overbaked. For the perfect texture, aim for a slight jiggle in the center when baking, and remember that a toothpick should come out with moist crumbs, not completely clean. Additionally, using room temperature ingredients helps retain moisture and contributes to a tender crumb. If it’s already baked, serving it warm with a scoop of ice cream can also elevate the experience!
Are there any dietary considerations for making Earthquake Cake?
Yes! Since this Earthquake Cake contains dairy and nuts, it’s important to be mindful of allergies. For those with dairy allergies, you can explore cream cheese alternatives, such as vegan cream cheese, though the texture may vary slightly. For nut allergies, simply omit the pecans altogether, and consider using seeds like sunflower seeds instead for a similar crunch without the nut content. Enjoying without those additions still makes for a delicious dessert!
Earthquake Cake: Indulgent Chocolate Delight with Creamy Swirls
Ingredients
Equipment
Method
- Preheat your oven to 350°F (175°C) and grease a 9x13-inch baking dish.
- Sprinkle sweetened shredded coconut and chopped pecans at the bottom of the baking dish.
- Prepare the chocolate cake mix according to package instructions, mixing eggs, oil, and water until smooth.
- Pour the cake batter over the coconut and pecans in the baking dish.
- In a separate bowl, mix softened cream cheese, melted butter, and powdered sugar until smooth.
- Dollop cream cheese mixture over the chocolate batter and swirl gently with a knife.
- Scatter chocolate chips on top of the swirled mixture.
- Bake for 45–50 minutes until the center is set but slightly jiggly.
- Allow to cool for 10-15 minutes before serving.
Leave a Reply