
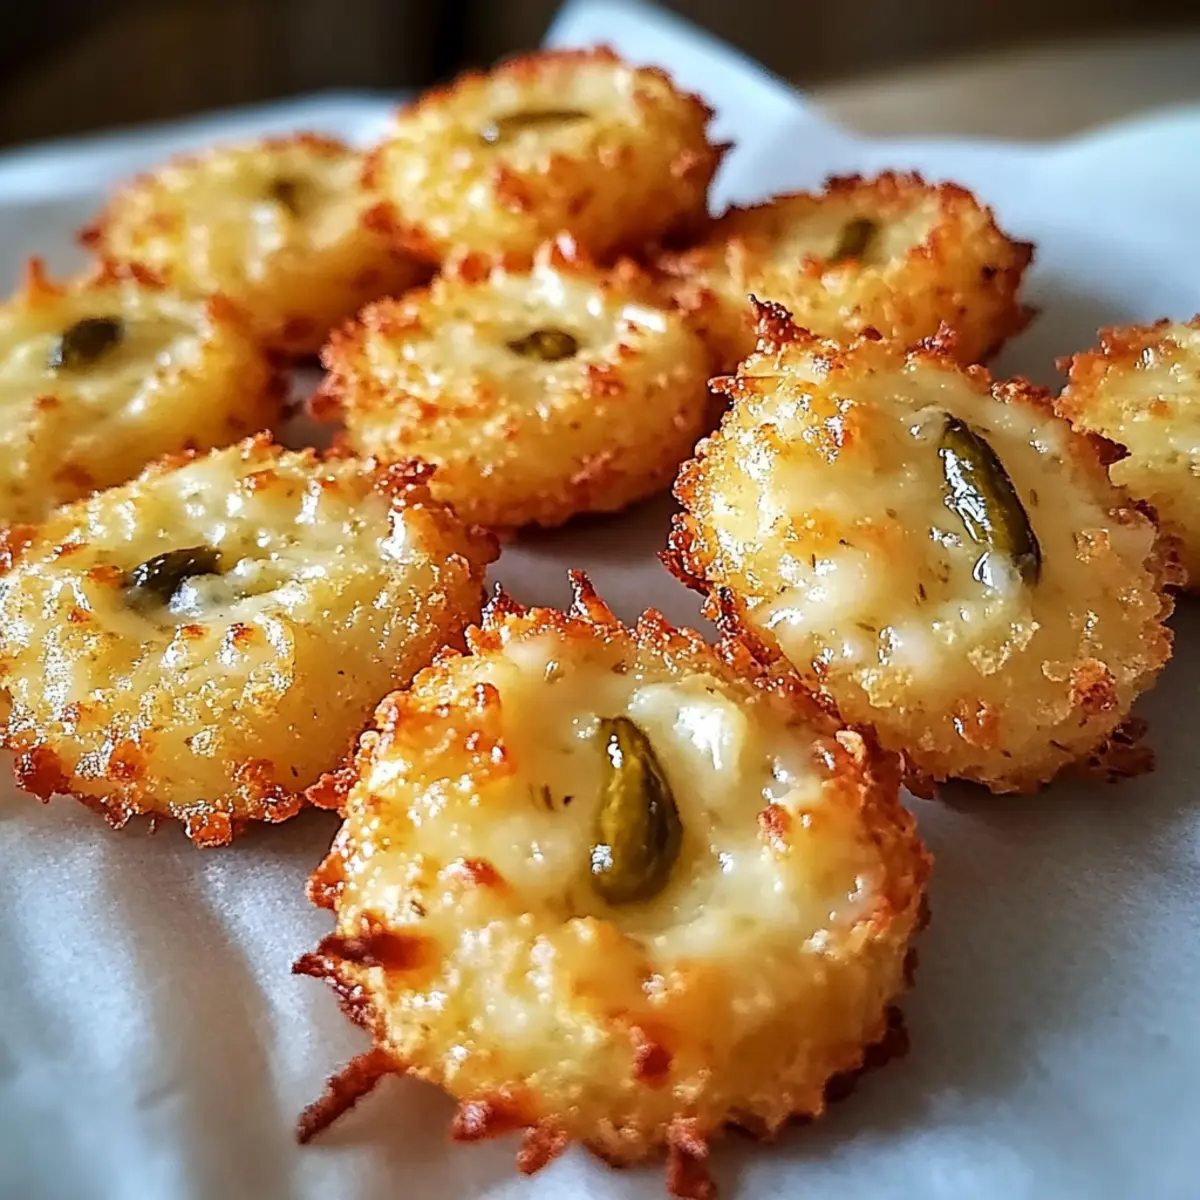
As I opened the fridge hunting for a last-minute snack, my eyes landed on a jar of dill pickles, and just like that, inspiration struck! Crispy Pickle Cheese Bites were born from this serendipitous moment, offering a perfect 20-minute solution to cravings for something delightful and satisfying. These little morsels pack a punch with their crunchy exterior and gooey cheesy center, inspired by the tangy brightness of pickles. They’re not only quick to whip up, but they’re also fully customizable, allowing you to play with flavors and heat levels to suit your fancy. Whether you’re hosting a gathering or just enjoying a cozy movie night, these bites are bound to impress. Curious about how to create this crunchy sensation? Keep scrolling for the delicious details!
Why Will You Love These Bites?
Quick and Easy: You’ll whip up these Crispy Pickle Cheese Bites in just 20 minutes, making them a fantastic option for spontaneous snacking.
Customizable Flavors: Feel free to mix and match the cheeses and add your favorite herbs or spices to create your unique twist, like using pepper jack for a spicy kick or adding fresh dill for an aromatic touch.
Crowd-Pleasing Delight: These bites are perfect for sharing at gatherings, sure to impress friends and family alike. Pair them with a side of creamy ranch or spicy mayo for dipping for an unforgettable experience.
Crunchy and Gooey: Imagine the satisfying crunch of each bite revealing a warm, gooey cheese center, reminiscent of your favorite mozzarella sticks but with a zesty pickle twist.
Gluten-Free Option: Want to enjoy without the gluten? Simply swap regular breadcrumbs with gluten-free options for a deliciously inclusive treat.
Crispy Pickle Cheese Bites Ingredients
For the Cheese Mixture
- Shredded Cheddar Cheese – Adds a rich, tangy flavor; substitute with Monterey Jack or pepper jack for a twist.
- Shredded Mozzarella Cheese – Provides creaminess and stretchiness; alternatives include Provolone or Gouda.
For the Crunch
- Chopped Dill Pickles – Contributes tang and crunch; try bread-and-butter pickles or pickled jalapeños for different flavors.
- Garlic Powder – Enhances overall flavor; onion powder can be added for extra kick.
- Breadcrumbs – Ensures extra crispiness; use gluten-free breadcrumbs to make the recipe gluten-free.
For Baking
- Nonstick Spray – Aids in easy baking and cleanup.
- Parchment Paper – Used to line the baking sheet.
These Crispy Pickle Cheese Bites are sure to become your new favorite snack delight!
Step‑by‑Step Instructions for Crispy Pickle Cheese Bites
Step 1: Preheat and Prepare
Begin by preheating your oven to 375°F (190°C). While waiting, line a baking sheet with parchment paper or give it a light coat of nonstick spray. This ensures your Crispy Pickle Cheese Bites won’t stick, resulting in easy cleanup later. As the oven warms, gather all your ingredients for a smooth cooking experience.
Step 2: Mix the Cheese and Pickles
In a sizable mixing bowl, combine the shredded cheddar and mozzarella cheeses with the chopped dill pickles. Add garlic powder and, if desired, breadcrumbs to achieve that extra crunch. Mix everything thoroughly until evenly combined, ensuring the pickles and cheese are well-distributed throughout the mixture, which creates a delightful flavor in each bite.
Step 3: Shape the Bites
Using your hands, take small portions of the mixture and form them into bite-sized balls or patties, about the size of a tablespoon. Place the shaped Crispy Pickle Cheese Bites on the prepared baking sheet, leaving some space between each one to allow for even baking. This spacing is essential to achieve the perfect texture as they cook.
Step 4: Bake to Perfection
Slide the baking sheet into the preheated oven and bake the cheese bites for approximately 10 minutes. Keep an eye on them, and look for a golden-brown color around the edges, which indicates they are crisping up nicely. You can also give them a gentle shake to feel if they’re firming up.
Step 5: Cool Before Serving
Once your Crispy Pickle Cheese Bites are beautifully golden and crispy, remove the baking sheet from the oven. Allow them to cool for a few minutes, as this will help the cheese set a bit and makes them safer to handle. They will maintain their crunch while still being perfectly gooey inside.
What to Serve with Crispy Pickle Cheese Bites
Picture a festive gathering where your colorful platter of Crispy Pickle Cheese Bites shines as the star, with complementary dishes adding a delightful touch.
- Creamy Ranch Dip: This classic pairing enhances the zesty crunch of the bites while adding a smooth, cool element for contrast.
- Spicy Mayo: A flavorful kick of heat perfectly balances the tangy pickles, making for an exhilarating dip option.
- Crispy French Fries: The crunchy texture of fries echoes the bites, creating a comforting spread that’s perfect for indulging.
- Fresh Vegetable Platter: Vibrant veggies like carrots, cucumber, and bell peppers add freshness, cutting through the richness of cheese bites and providing a colorful contrast.
Imagine a crispy, golden platter with your bites next to a lively assortment of fresh greens or colorful vegetables, all inviting people to dig in!
- Mini Pretzel Bites: For a fun twist, serve warm pretzel bites with a cheese sauce; the salty bite complements the flavor profile beautifully.
- Chilled Sparkling Lemonade: Refreshing and slightly tart, this beverage brightens the palate and enhances the fun, snack-time atmosphere.
- Classic Caesar Salad: With crisp romaine and creamy dressing, this salad provides a refreshing break from the warmth of cheesy, crispy goodness.
- Brownie Bites: End your tasty spread on a sweet note with rich, fudgy brownie bites that create a delightful contrast to the zesty flavors of the cheese bites.
How to Store and Freeze Crispy Pickle Cheese Bites
Fridge: Store any leftover Crispy Pickle Cheese Bites in an airtight container in the refrigerator for up to 2 days. This keeps them fresh and ready for a quick snack.
Freezer: For long-term storage, freeze unbaked bites on a baking sheet until firm, then transfer them to a freezer bag. They can be stored for up to 3 months.
Reheating: Bake directly from frozen, adding a couple of extra minutes to the cooking time. This way, you can enjoy their crispy goodness anytime!
Cooling Tips: Allow baked bites to cool slightly on the baking sheet before transferring them to avoid sticking and help maintain their delightful crunch.
Crispy Pickle Cheese Bites Variations
Embrace the joy of customization with these Crispy Pickle Cheese Bites, turning each batch into a unique creation!
-
Spicy Twist: Add finely chopped jalapeños to the cheese mixture for a delightful kick that spices up every bite. It’s perfect for those who enjoy a little heat!
-
Herb Garden: Toss in freshly chopped dill or chives for an aromatic touch that complements the tangy pickles beautifully. This addition elevates the flavor profile to new heights.
-
Dairy-Free Delight: For a vegan option, substitute the cheeses with dairy-free alternatives and skip the breadcrumbs. You won’t sacrifice flavor while accommodating dietary needs.
-
Texture Boost: Top your bites with toasted panko breadcrumbs before baking for an extra layer of crunchy goodness. This elevates the textural experience, making each bite even more satisfying.
-
Cheese Combination: Swap the cheddar for goat cheese in the mixture for a tangy, creamy twist that pairs perfectly with pickles. This variation is surprisingly delightful!
-
Pickle Variety: Try using bread-and-butter pickles or even pickled jalapeños if you crave something sweeter or spicier. Each type of pickle brings its unique flair to the dish!
-
Stuffed Surprise: Form the cheese mixture around a cube of cream cheese or a slice of pickle heart for bites that burst with melty joy. This hidden surprise makes for a fun snacking adventure.
-
Flavor Bomb: Incorporate some smoked paprika or a splash of hot sauce in the mix for added depth and flavor. These bold moves will ensure every bite is packed with deliciousness.
Each variation is a chance to play in the kitchen, and once you master these Crispy Pickle Cheese Bites, you’ll be inspired to create even more treats. Pair them with a side of your favorite dip, like creamy ranch from our previous recipes, and watch them vanish in no time!
Make Ahead Options
These Crispy Pickle Cheese Bites are a fantastic choice for meal prep! You can prepare the cheese and pickle mixture up to 24 hours in advance by mixing all the ingredients and storing it in an airtight container in the refrigerator. To maintain their crunch, shape the bites just before baking. If you want to go a step further, form the bites and freeze them on a baking sheet; then, transfer them to a freezer bag for up to 3 months. When you’re ready to bake, simply preheat your oven, place the frozen bites on a lined baking sheet, and add an extra couple of minutes to the baking time. This way, you’ll enjoy deliciously crispy snacks with minimal effort!
Expert Tips for Crispy Pickle Cheese Bites
• Fresh Cheese Matters: Using freshly shredded cheese is key for optimal melt and flavor. Avoid pre-shredded cheese that can affect texture due to anti-caking agents.
• Moisture Control: Blot chopped dill pickles with a paper towel to remove excess moisture, ensuring a crunchier result.
• Chill the Mixture: If your cheese mixture becomes too sticky while shaping, refrigerate it for about 15 minutes for easier handling.
• Cooling Time: Let the bites cool for a few minutes after baking to prevent burning your fingers and to allow the cheese to set properly.
• Customize Wisely: To enhance your Crispy Pickle Cheese Bites, consider varying spices or cheeses to suit your palate, but maintain balance to ensure the right flavor profile.

Crispy Pickle Cheese Bites Recipe FAQs
How do I choose the right pickles for this recipe?
Absolutely! For the best flavor, I recommend using tart dill pickles, which give that classic tang. However, if you prefer sweetness, bread-and-butter pickles work well, or even pickled jalapeños for a spicy kick. Just make sure to chop them finely and blot them with a paper towel to reduce moisture!
What’s the best way to store leftover Crispy Pickle Cheese Bites?
You can store any leftovers in an airtight container in the refrigerator for up to 2 days. This will keep them fresh and ready for quick snacking. Just remember, they’re best enjoyed warm and crispy!
Can I freeze Crispy Pickle Cheese Bites?
Very! To freeze, start by placing unbaked bites on a baking sheet in a single layer and freeze until firm (about 1 hour). Once firm, transfer them to a freezer bag and keep in the freezer for up to 3 months. When you’re ready to bake, just pop them in the oven directly from frozen, adding a couple of extra minutes to the baking time.
What if my cheese mixture is too sticky to shape?
No worries! If the mixture feels too sticky, refrigerate it for about 15 minutes. This chilling time helps the cheese firm up, making it easier to roll into balls or bites. And remember, a little extra cold can go a long way toward a smoother cooking process!
Are these bites suitable for people with dietary restrictions?
Absolutely! To make these Crispy Pickle Cheese Bites gluten-free, simply substitute regular breadcrumbs with gluten-free panko or breadcrumbs. You can also explore dairy-free cheese options for a vegan version, ensuring everyone can join the crunchy fun!
How can I ensure my bites are extra crispy?
For maximum crunch, ensure that you blotted the chopped pickles dry to release moisture beforehand. Additionally, use freshly shredded cheese instead of pre-shredded for better texture. Be sure to space the bites on the baking sheet to prevent steaming—each bite deserves some room to crisp up nicely!
Crispy Pickle Cheese Bites: Your New Favorite Snack Delight
Ingredients
Equipment
Method
- Preheat your oven to 375°F (190°C) and line a baking sheet with parchment paper.
- In a bowl, combine shredded cheddar and mozzarella cheeses with chopped dill pickles, garlic powder, and breadcrumbs.
- Form the mixture into bite-sized balls or patties and place them on the baking sheet.
- Bake for approximately 10 minutes until golden brown.
- Let cool for a few minutes before serving.
Leave a Reply