
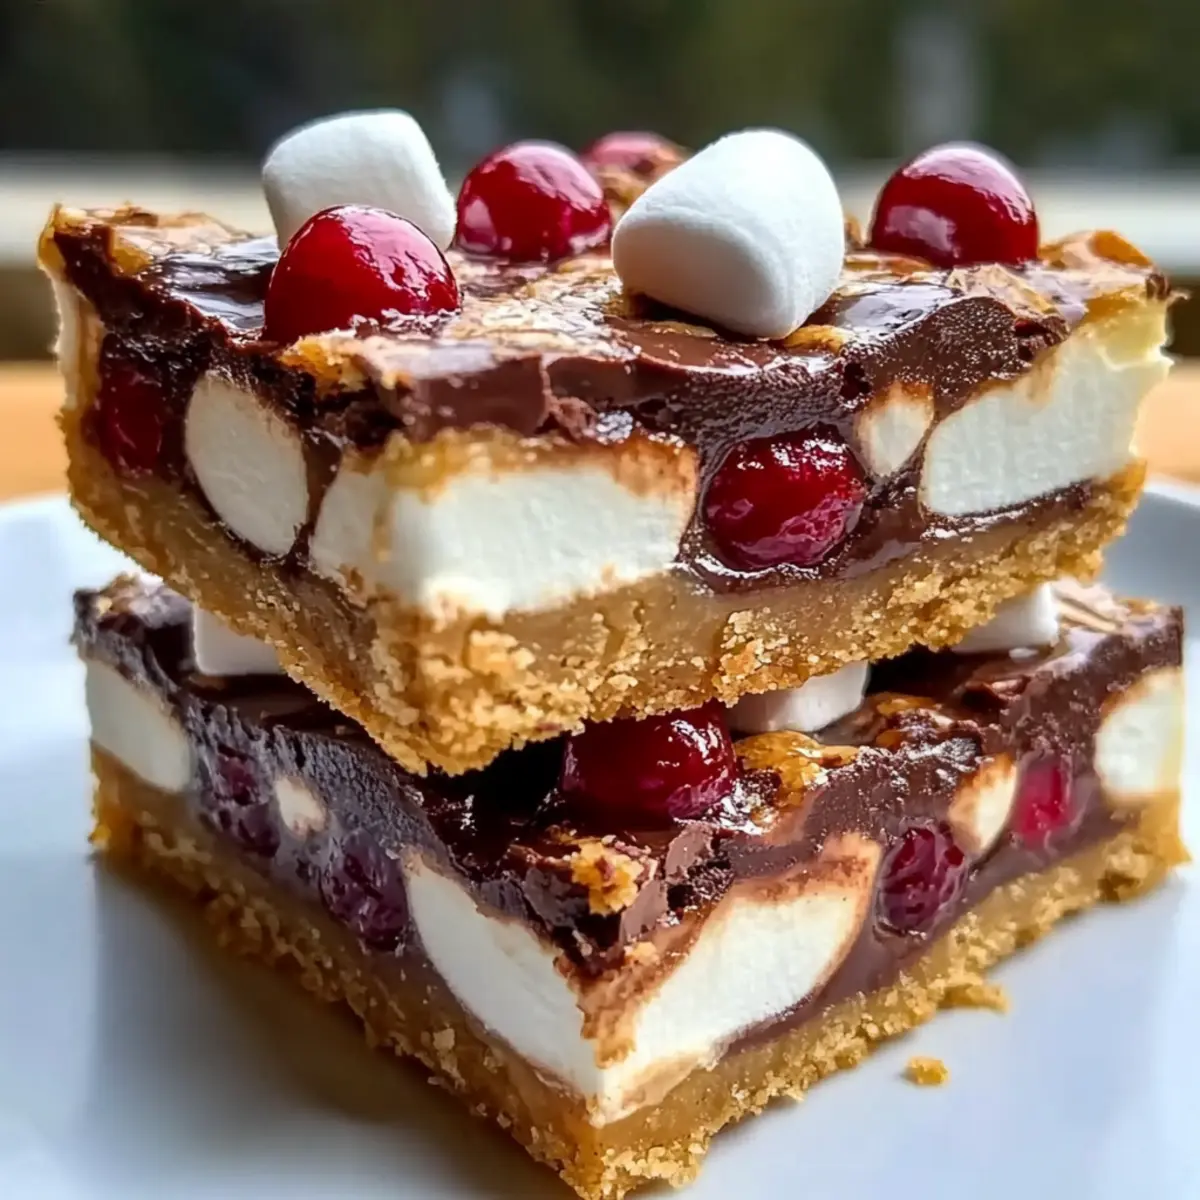
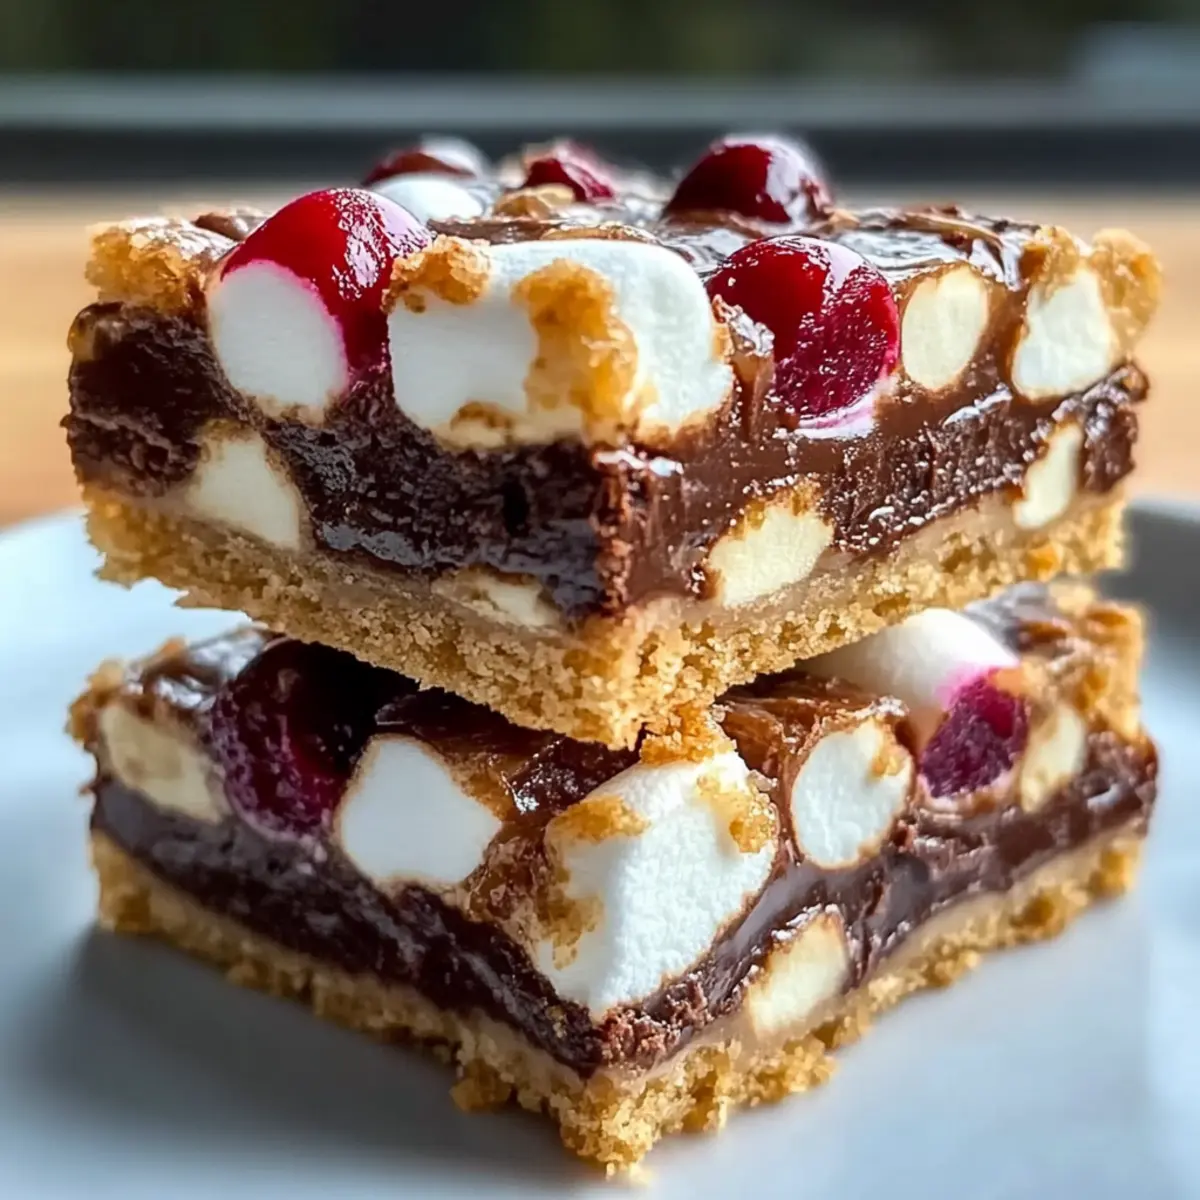
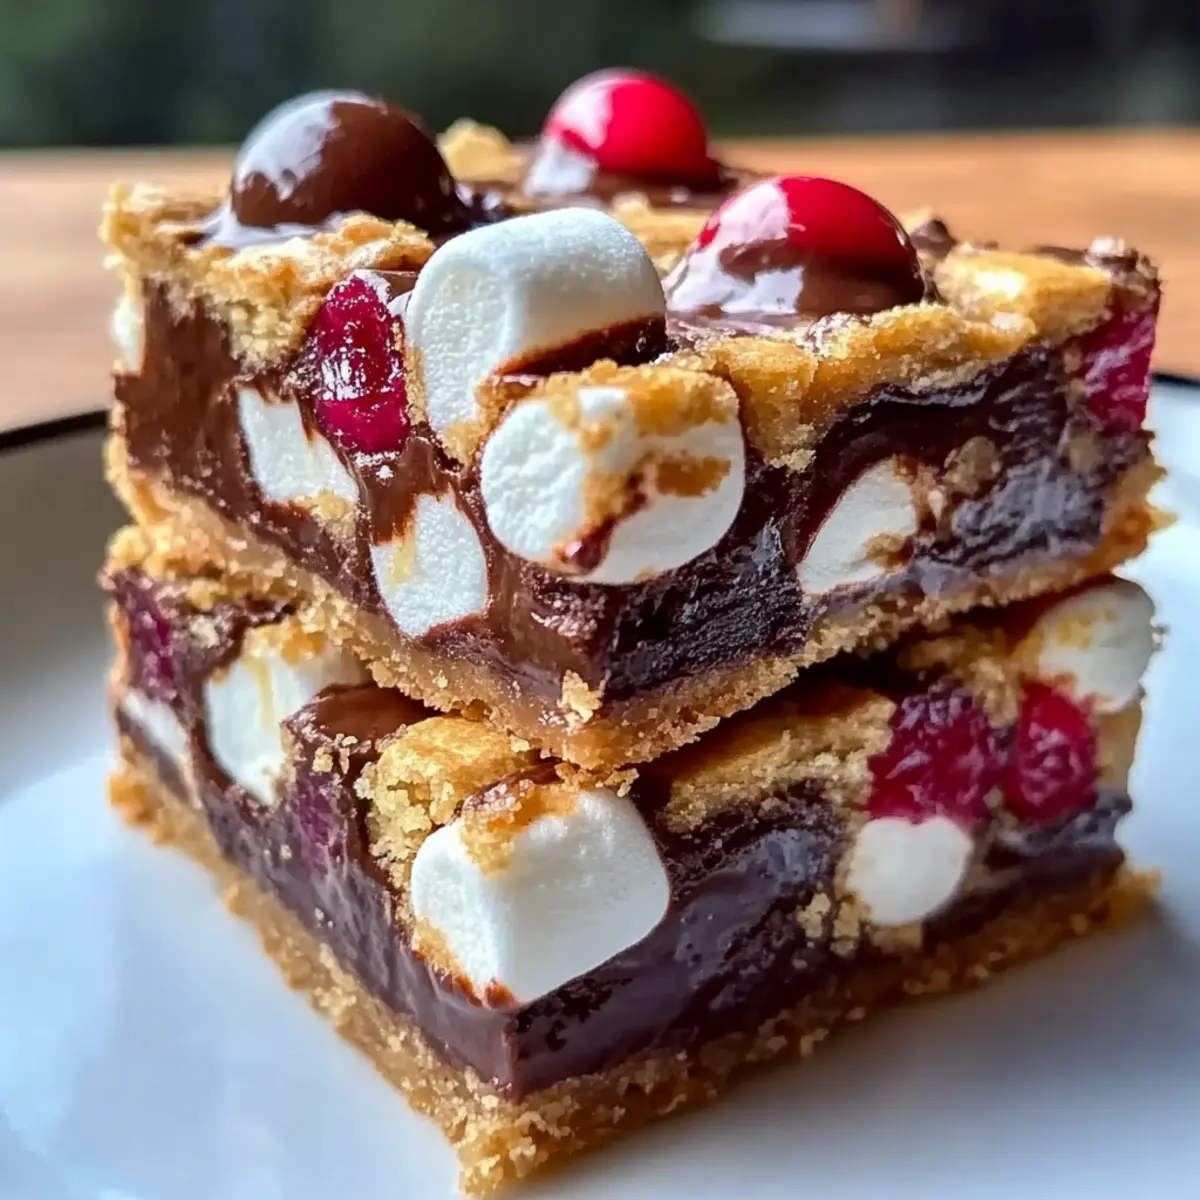
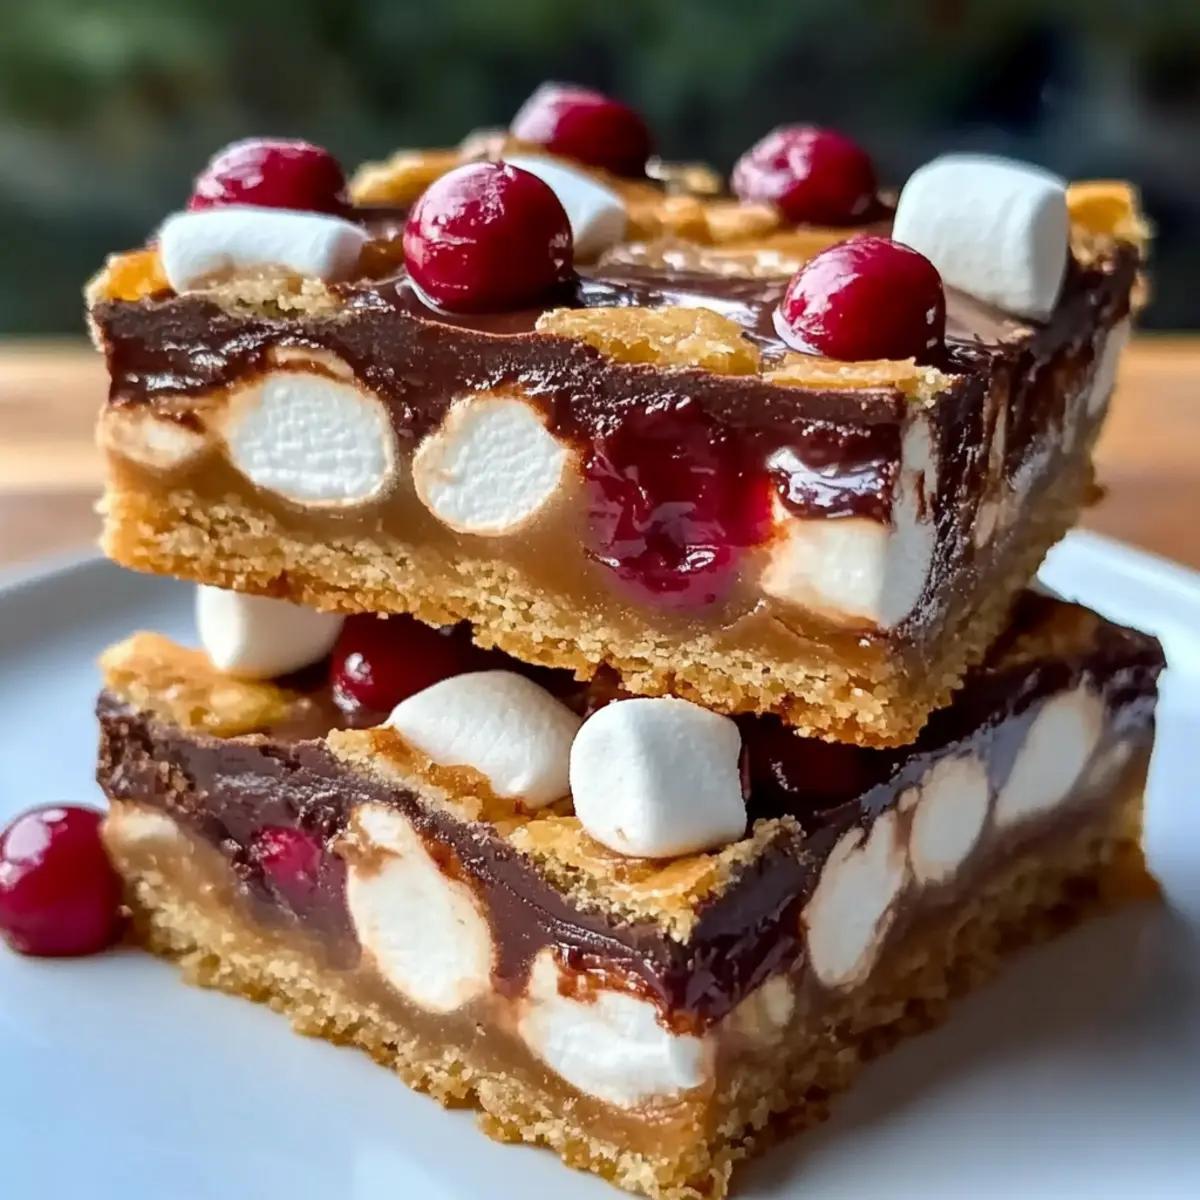
One whiff of these Easy Chocolate Marshmallow Christmas Bars, and you’ll be transported to a cozy winter wonderland. The holidays are all about sharing joy and indulging in sweet treats, and these bars make it effortless. Combining rich chocolate, chewy marshmallows, and a delightful hint of graham cracker crunch, this recipe is a festive crowd-pleaser that takes just 45 minutes to prepare. Whether you’re hosting a gathering or celebrating with your family, they’re perfect for bringing everyone together. Plus, with variations like nut-free, vegan, and gluten-free options available, there’s a version for everyone to enjoy. Curious to discover how to whip up this delightful holiday treat? Let’s dive into the recipe!
Why are Christmas bars a must-try?
Festive Joy: These Christmas bars are the epitome of holiday cheer! With just 45 minutes of prep time, you can whip up a batch that will make your home smell like Christmas.
Crowd-Pleasing Treat: Everyone loves the rich chocolate and chewy marshmallows combined with a graham cracker base, making these bars a guaranteed hit at any gathering.
Variations for All: The flexibility of this recipe is astounding. You can easily adapt it to be nut-free, gluten-free, or vegan, ensuring each guest can indulge without worry.
Easy to Share: Slice into squares and you have the perfect dessert for parties or gift-giving. They are just as delightful as homemade gifts when presented on a festive platter.
Make-Ahead Magic: Prepare them a day or two in advance for stress-free entertaining, leaving you more time to enjoy the festive season with family and friends.
Christmas Bars Ingredients
For the Base
• Graham Cracker Crumbs – Base ingredient providing sweetness and crunch; substitute with gluten-free graham crackers for a gluten-free version.
• Unsweetened Cocoa Powder – Adds rich chocolate flavor; opt for high-quality cocoa for a more intense taste.
• Powdered Sugar – Sweetens the bars and ensures a smooth texture, essential for that melt-in-your-mouth experience.
• Unsalted Butter (or melted coconut oil) – Binds ingredients together and adds richness; use coconut oil for a dairy-free adaptation.
For the Chewy Layer
• Sweetened Condensed Milk – Provides moisture and a chewy texture; crucial for achieving the delightful consistency of the bars.
• Mini Marshmallows – Adds a chewy element and fun texture; feel free to swap with regular marshmallows if needed.
For the Chocolatey Goodness
• Chocolate Chips – Boosts the chocolatey goodness; consider dark, milk, or white chocolate, depending on your preference.
• Chopped Nuts (optional) – Adds crunch and flavor; simply omit for a nut-free version of these tasty Christmas bars.
This delightful combination of ingredients ensures your Christmas bars are not just a treat but an indulgent experience that everyone will love!
Step‑by‑Step Instructions for Christmas Bars
Step 1: Preheat the Oven
Begin by preheating your oven to 350°F (175°C). This essential step ensures that your Christmas bars bake evenly, achieving that perfect fudgy consistency. While the oven heats up, gather your 9×13 inch baking pan and grease it generously to prevent sticking, ensuring the bars release easily once baked.
Step 2: Mix the Dry Ingredients
In a spacious mixing bowl, whisk together the graham cracker crumbs, unsweetened cocoa powder, and powdered sugar until the mixture is well combined. Aim for a uniform texture that allows the flavors to blend beautifully. The combination of the chocolatey cocoa and sweet graham cracker will fill your kitchen with a comforting aroma as you prepare your delightful Christmas bars.
Step 3: Combine Wet Ingredients
Next, pour in the melted unsalted butter (or coconut oil for a dairy-free option) along with the sweetened condensed milk. Stir until everything is thoroughly combined, creating a thick and sticky batter. This mixture should appear smooth and glossy, reflecting the richness of the bars you are about to create, and making it irresistible to anyone nearby.
Step 4: Fold in the Marshmallows and Chocolate
Gently fold in the mini marshmallows and chocolate chips, taking care not to break the marshmallows. This step is crucial as it ensures every bite of your Christmas bars is packed with chewy marshmallow goodness and decadent chocolatey flavor. If you’re opting for nuts, now is the time to incorporate them into the mixture for an added crunch.
Step 5: Spread the Mixture
Pour the luscious mixture into the prepared baking pan. Using a spatula, spread it evenly to create a flat surface, ensuring that the mixture reaches all corners of the pan. The smooth top will give a lovely finish to your Christmas bars, inviting everyone to take a bite once they’re baked.
Step 6: Bake the Bars
Place the baking pan in the preheated oven and bake for 25 to 30 minutes. Keep an eye on the edges; they should be set while the center remains slightly soft and firm to the touch. This slight give will contribute to the perfect, chewy texture of your Christmas bars, allowing them to maintain their festive appeal.
Step 7: Cool and Cut
After baking, remove the pan from the oven and let the bars cool completely in the pan. This step is essential; cooling ensures they firm up and hold together beautifully when cut. Once fully cooled, use a sharp knife to cut the bars into squares, making them manageable for serving or gift-giving during the holiday festivities.
Make Ahead Options
These Easy Chocolate Marshmallow Christmas Bars are perfect for meal prep, saving you precious time during the busy holiday season! You can bake the bars up to 2 days in advance; simply allow them to cool completely and store them in an airtight container at room temperature to maintain their delicious chewiness. If you’d like to prepare the mixture ahead, combine the dry ingredients and store them in a sealed bag or container for up to 24 hours. When ready to bake, just mix in the wet ingredients and follow the remaining steps. By prepping ahead, you’ll ensure that your Christmas bars are fresh and just as delightful when it’s time to serve!
Christmas Bars: Fun Variations to Try
Invite your creative side and customize these delightful Christmas bars with exciting twists and substitutions for everyone to enjoy!
- Nut-Free Version: Omit nuts and add extra chocolate chips for a sweeter, richer bite.
- Gluten-Free Option: Substitute graham cracker crumbs with gluten-free options like almond flour or gluten-free graham crackers, allowing those with dietary restrictions to indulge fully.
- Vegan Adaptation: Swap out unsalted butter for melted coconut oil and replace sweetened condensed milk with a homemade vegan version using coconut milk. This ensures that even plant-based friends can join in the holiday magic.
- Mint Chocolate Twist: A splash of peppermint extract can transform these bars into a festive delight, reminiscent of candy canes. Everyone will love that refreshing touch!
- Fruit and Nut Medley: Mix in some dried cranberries or cherries along with nuts to create a festive explosion of flavor. It adds a lovely seasonal taste that will surprise your guests!
- Spicy Kick: Sprinkle in a pinch of cayenne pepper or chili powder for that unexpected heat. It’s sure to energize the flavor profile and delight adventurous eaters!
- Coffee Infusion: Add a tablespoon of espresso powder to intensify the chocolate flavor, creating an irresistible mocha-like experience. Perfect for coffee lovers!
- Chocolate Lovers Dream: Swap in white chocolate chips or even caramel bits for a different layer of flavor, appealing to those with a sweet tooth craving something unique.
If you’re interested in making your Christmas bars a bit more festive, consider experimenting with mix-ins and adaptations, such as trying out different types of chocolate or incorporating some seasonal spices!
Tips for the Best Christmas Bars
Perfect Butter: Ensure your butter is fully melted for a smooth batter; cool slightly before mixing to avoid cooking the marshmallows.
Parchment Lining: Line your baking pan with parchment paper for effortless removal and cleanup, leaving no delicious morsel behind!
Cooling Time: Allow the bars to cool completely in the pan before cutting; this prevents crumbling and ensures clean edges for beautiful presentation.
Mix-in Magic: Don’t shy away from experimenting with mix-ins—dried fruit, or flavored chocolate can elevate your Christmas bars to delightful new heights.
Storage Tips: For optimal freshness, store the bars in an airtight container. They stay delicious for days, ideal for enjoying throughout the holiday season!
How to Store and Freeze Christmas Bars
Room Temperature: Store cooled Christmas bars in an airtight container at room temperature for up to 3 days, retaining their chewy texture and delightful flavor.
Fridge: For longer freshness, keep the bars in the fridge, where they can last for up to a week. Just ensure they are well-wrapped to avoid drying out.
Freezer: Wrap individual bars in plastic wrap and then in aluminum foil; they can be frozen for up to three months. Thaw overnight in the fridge before enjoying.
Reheating: If you prefer warm bars, you can microwave for 10-15 seconds to refresh the chocolate and marshmallow goodness, making them even more indulgent!
What to Serve with Easy Chocolate Marshmallow Christmas Bars
One bite of these delightful bars and you’ll want to create a whole feast around them.
-
Hot Cocoa: The classic winter drink brings warmth and complements the rich chocolate flavor, enhancing the cozy comfort of your dessert.
-
Vanilla Ice Cream: A scoop of creamy vanilla ice cream adds a luscious contrast, making each bite of the bars even more indulgent and satisfying.
-
Spiced Cider: This warm, spiced drink mirrors the holiday spirit and provides a delightful balance to the sweetness of the bars.
-
Powdered Sugar Dusting: A light dusting before serving adds a festive touch, making the bars visually appealing while enhancing their sweetness.
-
Fresh Berries: Juicy strawberries or raspberries provide a burst of freshness that cuts through the richness, creating a harmonious balance on your plate.
-
Charcuterie Platter: Pair these bars with a variety of cheeses, nuts, and fruits for a sophisticated presentation that offers both sweet and savory delights.
-
Mint Chocolate Shake: Blend this cool, minty shake to elevate the holiday flair and echo the chocolate flavors in the bars, captivating the taste buds.
-
Shortbread Cookies: These buttery delights serve as a perfect crunchy counterpart, creating a delightful mix of textures with every bite.
Christmas Bars Recipe FAQs
How do I choose the right graham cracker crumbs?
Absolutely! For the best flavor and texture, look for finely crushed graham cracker crumbs without any dark spots or moisture. If you’re making gluten-free Christmas bars, opt for certified gluten-free graham crackers to keep the same delightful crunch and taste.
What is the best way to store leftover Christmas bars?
Very simple! Once your bars are completely cooled, store them in an airtight container at room temperature for up to 3 days. If you’d like them to last longer, placing them in the fridge can keep them fresh for up to a week.
Can I freeze Christmas bars, and if so, how?
Yes, indeed! To freeze Christmas bars, wrap each cooled bar tightly in plastic wrap, then in aluminum foil for added protection. This method keeps them fresh for up to 3 months. When you’re ready to enjoy them, simply thaw overnight in the fridge.
What should I do if my bars crumble when cutting?
Oh no! To prevent crumbling, ensure the bars are completely cooled in the pan before cutting. Additionally, using a sharp knife and making gentle, straight cuts can help maintain their shape. If they are still crumbling, it might be that they were underbaked, so keep an eye on the edges during baking next time.
Are these Christmas bars suitable for people with allergies?
Absolutely! This recipe can easily be customized. For those with nut allergies, simply omit the chopped nuts and add extra chocolate chips. For gluten-free options, swap graham cracker crumbs with gluten-free alternatives. Always double-check all ingredient labels to ensure safety for anyone with allergies.
How do I know when my bars are done baking?
Great question! Your Christmas bars are perfectly baked when the edges are set, and the center has a slight firmness to it. They should not look wet in the middle. A little jiggle is okay, as they’ll continue to firm up as they cool.
Decadent Christmas Bars That Will Delight Your Holiday Guests
Ingredients
Equipment
Method
- Preheat your oven to 350°F (175°C) and grease your 9x13 inch baking pan.
- In a mixing bowl, whisk together the graham cracker crumbs, cocoa powder, and powdered sugar.
- Mix the melted butter (or coconut oil) and sweetened condensed milk into the dry ingredients.
- Gently fold in mini marshmallows and chocolate chips.
- Pour the mixture into the prepared pan and spread evenly.
- Bake for 25 to 30 minutes, until the edges are set.
- Cool completely in the pan before cutting into squares.
Leave a Reply