
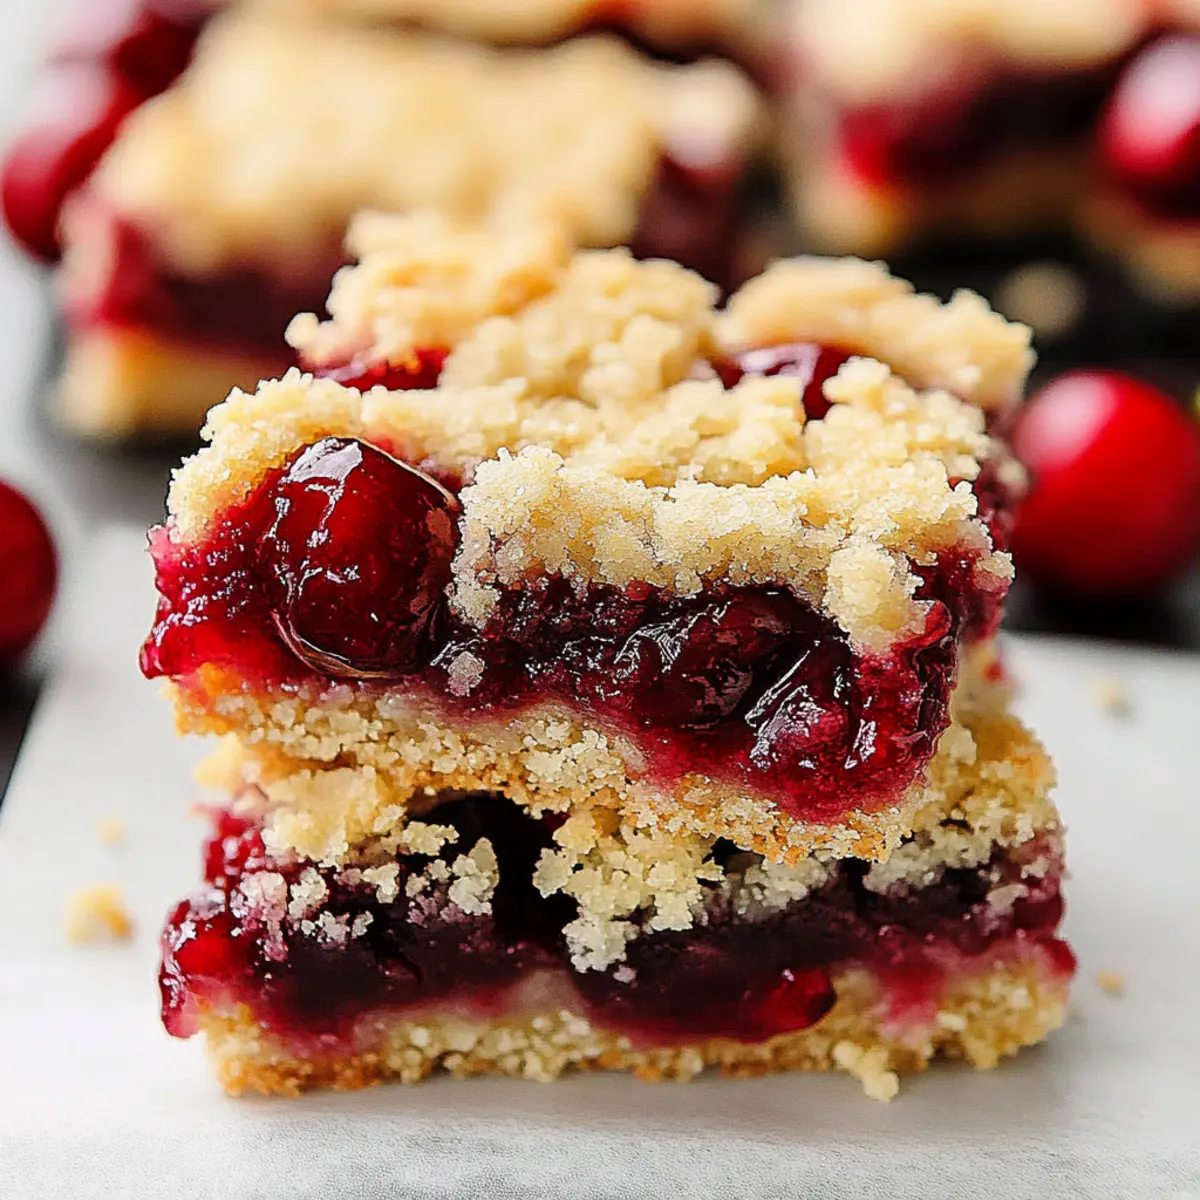
Standing at my kitchen counter, I couldn’t help but notice how the air filled with the comforting scents of melted butter and cherries, a gentle reminder that the holidays are beckoning. I’m excited to share my recipe for Christmas Cherry Bars, an easy festive dessert that brings the joyful spirit of the season right into your home. These buttery bars are not only a treat for the taste buds but are also make-ahead friendly, making them perfect for those busy holiday gatherings or cookie exchanges. With vibrant colors and the delightful combination of shortbread and cherry pie filling, they promise to brighten up any festive table. Wouldn’t you love to impress your friends and family with these charming bites? Let’s dive into the sweet holiday magic together!
Why are Christmas Cherry Bars a must-try?
Deliciously Festive: These bars combine the rich flavor of buttery shortbread with the bright, tart notes of cherry filling, creating a dessert that’s perfect for any holiday gathering.
Make-Ahead Magic: Ideal for busy schedules, whip up a batch in advance and freeze for later enjoyment or quick gatherings.
Versatile Options: Feel free to swap cherry filling for other fruits like blueberries or apples for variations that suit your taste!
Crowd-Pleasing Appeal: The vibrant colors and sweet aroma make these bars an instant hit, whether at cookie exchanges or family dinners.
No-Fuss Baking: Simple ingredients and easy steps ensure you can bake with confidence, even if you’re a beginner in the kitchen.
Add these Christmas Cherry Bars to your holiday repertoire and watch them become a cherished tradition!
Christmas Cherry Bars Ingredients
For the Crust
• Melted Butter – Provides richness and helps create a tender, crumbly texture. Can substitute with vegan butter or coconut oil for a dairy-free version.
• Granulated Sugar – Adds sweetness and aids in the browning of the crust; brown sugar can be used for deeper flavor.
• All-Purpose Flour – Forms the base of the crust, giving structure; use gluten-free all-purpose flour for a gluten-free version.
• Baking Powder – Helps leaven the crust slightly, making it tender; ensure it’s fresh for effectiveness.
• Baking Soda – Aids in browning and enhances texture; can be substituted with additional baking powder if needed.
• Salt – Balances sweetness and enhances flavor; use sea salt for a different texture.
For the Filling
• Cherry Pie Filling – Provides the signature filling with sweet and tart flavors; store-bought or homemade can be used, ensuring it’s thick to prevent sogginess.
For the Topping
• Reserved Crumb Mixture – Saved from the crust to create a delightful topping that adds texture and sweetness.
Get ready to bake these festive Christmas Cherry Bars and share the joy of homemade treats at your holiday celebrations!
Step‑by‑Step Instructions for Christmas Cherry Bars
Step 1: Preheat the Oven and Prepare the Pan
Begin by preheating your oven to 375°F (190°C). While the oven warms up, grab an 8×8-inch baking pan and line it with parchment paper, allowing a bit of overhang for easy removal later. This will ensure your Christmas Cherry Bars come out perfectly without sticking to the pan.
Step 2: Mix the Base Ingredients
In a large mixing bowl, combine melted butter and granulated sugar until smooth and creamy. Next, sift in all-purpose flour, baking powder, baking soda, and salt, mixing gently to create a crumbly dough. The butter’s richness and the flour’s structure will form the base of your delightful bars, making this step key for achieving that buttery texture.
Step 3: Form the Crust
Now, set aside ¾ cup of the crumb mixture for the topping. Firmly press the remaining crumb mixture into the bottom of the prepared baking pan, ensuring an even layer that covers the entire base. This crust layer is crucial for providing a sturdy foundation and should look slightly compacted and even.
Step 4: Spread the Cherry Filling
Open your cherry pie filling and evenly spread it over the pressed crust, ensuring it’s distributed uniformly. The vibrant cherry layer will add sweetness and a burst of color to your Christmas Cherry Bars. Use a spatula to gently coax the filling to the edges for that festive look!
Step 5: Add the Crumb Topping
Take the reserved crumb mixture you set aside and sprinkle it generously over the cherry filling. This topping will add a delightful crunch and additional sweetness to your bars. Ensure that you cover the filling well while still allowing some glimpses of the vibrant cherries peeking through.
Step 6: Bake to Perfection
Carefully place the baking pan in the preheated oven and bake for 23-25 minutes. Keep an eye on your bars; they are done when the top is golden brown and the cherry filling is bubbling. This aromatic moment will signal that your Christmas Cherry Bars are on their way to deliciousness!
Step 7: Cool and Slice
Once baked, remove the pan from the oven and allow the bars to cool completely in the pan. This cooling time will help set the layers. For neat slices, wait until the bars are fully cooled, giving you clean edges that showcase the beautiful layers of crust and cherry filling.
Storage Tips for Christmas Cherry Bars
-
Room Temperature: Store your Christmas Cherry Bars in an airtight container at room temperature for up to 5 days to maintain their deliciousness.
-
Fridge: If you prefer chilled bars, you can refrigerate them for up to a week. Just make sure they’re sealed properly to prevent drying out.
-
Freezer: For longer storage, freeze the bars in an airtight container or wrapped in plastic wrap for up to 3 months. Thaw at room temperature before enjoying.
-
Reheating: If you’d like to warm them up, simply microwave for about 10-15 seconds or pop them in a preheated oven at 350°F (175°C) for a few minutes for that fresh-baked taste.
Expert Tips for Christmas Cherry Bars
-
Thick Filling: Ensure your cherry pie filling is thick and cooled to avoid a soggy crust. Look for “thick” labels or simmer your homemade filling to reduce moisture.
-
Clean Cutting: Allow the bars to cool completely in the pan for clean, bakery-style squares. Cutting too soon can lead to messy edges.
-
Pan Size Substitute: If using a larger 9×13-inch pan, double the ingredients and adjust baking time to approximately 30 minutes for perfectly baked Christmas Cherry Bars.
-
Flavor Variations: Don’t hesitate to experiment! Substitute the cherry filling with other fruits like blueberries or apples for a delightful twist.
-
Check Baking Powder: Ensure your baking powder is fresh; stale leavening can result in dense bars. A simple freshness test is to combine it with vinegar — it should fizz if good!
What to Serve with Christmas Cherry Bars
Imagine the joy of sharing a warm, delightful dessert while your home fills with festive cheer and delicious aromas.
-
Classic Vanilla Ice Cream: The creamy richness of ice cream contrasts beautifully with the tart cherry filling, making each bite a heavenly experience. A scoop on the side adds a touch of indulgence to your holiday treat.
-
Whipped Cream: Light and airy, whipped cream elevates the sweetness of the cherry bars, creating a blissful balance. A dollop on top brings a festive flair that’s sure to impress your guests.
-
Coffee or Espresso: The robust flavor of coffee pairs perfectly with these buttery bars, enhancing their sweetness while providing a cozy, comforting vibe. It’s a classic match that warms the heart during holiday gatherings.
-
Hot Chocolate: Rich and chocolaty, this drink complements the fruity flavors of the cherry bars wonderfully. Top it off with marshmallows or whipped cream for that extra festive touch that just screams holiday cheer!
-
Fruit Salad: Bright, fresh fruit can be a refreshing contrast to the sweetness of your bars. A medley of berries or citrus fruits adds a colorful touch to your dessert table.
-
Eggnog: This creamy, spiced drink brings holiday nostalgia and pairs delightfully with the festive flavors of the cherry bars. It’s a seasonal classic that takes your dessert experience up a notch.
-
Mini Cheesecakes: For a dessert spread, consider serving bite-sized cheesecakes alongside the cherry bars. Their rich, creamy texture offers a delightful contrast to the fruity sweetness and crumbly base.
-
Gingerbread Cookies: The warm spices of gingerbread add a comforting aroma and taste, creating a festive combination when shared with the cherry bars. This pairing embodies the spirit of the season!
Christmas Cherry Bars Variations
Feel free to play around with this recipe to make it truly yours, whether you’re seeking new flavors or accommodating dietary needs!
-
Dairy-Free: Substitute melted butter with vegan butter or coconut oil to keep this recipe dairy-free while still enjoying that rich flavor.
-
Gluten-Free: Use gluten-free all-purpose flour instead of regular flour for a deliciously safe treat that everyone can enjoy together.
-
Fruit Filling Swap: Try using homemade or store-bought filling made from blueberries, raspberries, or apples for a refreshing twist that suits your taste.
-
Nutty Crunch: Add chopped walnuts or pecans to the topping for added texture. This nutty crunch pairs beautifully with the soft cherry filling for a delightful bite.
-
Chocolate Drizzle: Once cooled, drizzle melted white or dark chocolate over the bars for a sweet extra layer that dazzles visually and adds another flavor dimension. Your friends and family will be impressed!
-
Cinnamon Spice: Sprinkle a little cinnamon or nutmeg into the crumb mixture to warm up the flavors for that cozy holiday touch. This subtle spice can elevate your Christmas Cherry Bars into a comforting classic.
-
Extra Sweetness: For those with a sweet tooth, fold in a handful of mini chocolate chips into the cherry filling before spreading. The combination of cherries and chocolate is a timeless match made in heaven!
-
Heat Perks: For something a little different, add a dash of cayenne pepper to the crumb mixture. This unexpected kick can balance the sweetness of the cherries, creating a unique flavor profile that surprises and delights!
If you’re inspired to explore even more, consider checking out my easy cherry pie recipe or learn how to make your own homemade cherry filling for a truly bespoke experience!
Make Ahead Options
These Christmas Cherry Bars are perfect for meal prep, allowing you to enjoy the holiday spirit without the last-minute rush. You can prepare the crumb crust and store it in the refrigerator for up to 3 days before baking; just keep it in an airtight container to maintain its quality. Additionally, the cherry filling can be made ahead of time—if you’re using homemade filling, it can be refrigerated for 2-3 days to enhance the flavors. When you’re ready to serve, simply spread the filling over the crust, add the crumb topping, and bake as directed. This way, you can savor the delightful taste of freshly made Christmas Cherry Bars with minimal effort!
Christmas Cherry Bars Recipe FAQs
What type of cherry filling should I use?
You can use store-bought or homemade cherry pie filling for these bars. If you’re going homemade, ensure it’s thickened properly, as a watery filling can lead to a soggy crust. A good tip is to simmer your cherries until they reduce and thicken before pouring them over the crust.
How should I store Christmas Cherry Bars?
To keep your bars fresh, store them in an airtight container at room temperature for up to 5 days. If you want to keep them longer, you can refrigerate them for up to a week or freeze them in an airtight container for up to 3 months. Just let them thaw at room temperature whenever you’re ready to dive back in!
Can I substitute other fruits for the filling?
Absolutely! These Christmas Cherry Bars are versatile. You can replace the cherry filling with other fruit fillings like blueberry or apple. Just make sure they’re thick enough to hold the crust and not make it soggy. It’s a great way to experiment with flavors and find new favorites!
What should I do if my bars are too crumbly?
If your bars turn out too crumbly, the culprit could be too much flour or not enough melted butter. To avoid this, make sure you accurately measure your ingredients. You can also try pressing the mixture firmly into the pan for a denser crust. If you have leftover crumb topping, use it to help hold the topping together better!
Is there a way to make Christmas Cherry Bars healthier?
Certainly! To create a healthier version, consider reducing the sugar or using natural sweeteners like honey or maple syrup. You can also swap out all-purpose flour for a whole wheat or gluten-free alternative. Keep in mind that changing the ingredients may alter the texture slightly, but it will still be delicious!
Christmas Cherry Bars: Buttery Treats for Holiday Joy
Ingredients
Equipment
Method
- Preheat your oven to 375°F (190°C). Line an 8x8-inch baking pan with parchment paper.
- In a large mixing bowl, combine melted butter and granulated sugar until smooth. Sift in flour, baking powder, baking soda, and salt, mixing to create a crumbly dough.
- Set aside 3/4 cup of the crumb mixture for topping. Press the remaining mixture into the bottom of the prepared baking pan.
- Spread the cherry pie filling evenly over the crust.
- Sprinkle the reserved crumb mixture over the cherry filling.
- Bake for 23-25 minutes, until golden brown and the filling is bubbling.
- Allow to cool completely in the pan before slicing.
Leave a Reply