
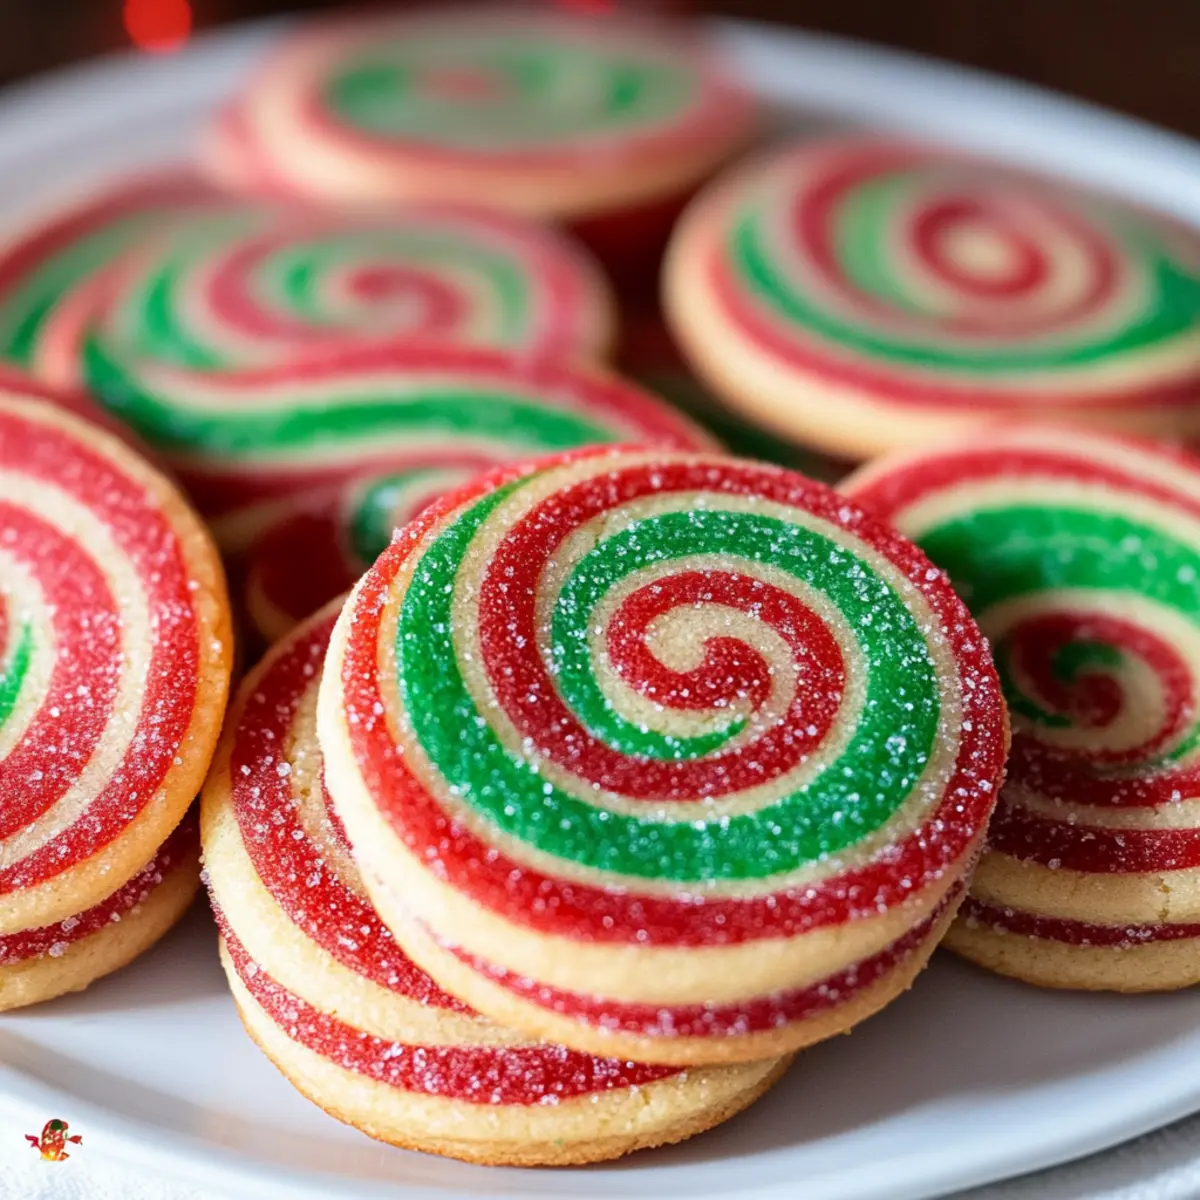
As I sift through the colorful array of holiday treats each year, nothing captures that festive spirit quite like the sight of Christmas Pinwheel Cookies. Their delightful spirals of red and green not only brighten any cookie platter but also invite warmth and joy into our celebrations. This recipe is a true winner, allowing you to channel your inner baker with minimal fuss, so you can focus on enjoying the season with loved ones. With a perfect balance of soft and slightly crisp textures, these cookies aren’t just a feast for the eyes; they’re equally delicious, making them a must-have during your holiday baking marathon. Curious about how to create this vibrant masterpiece in your own kitchen? Let’s get started!
Why Will You Love These Cookies?
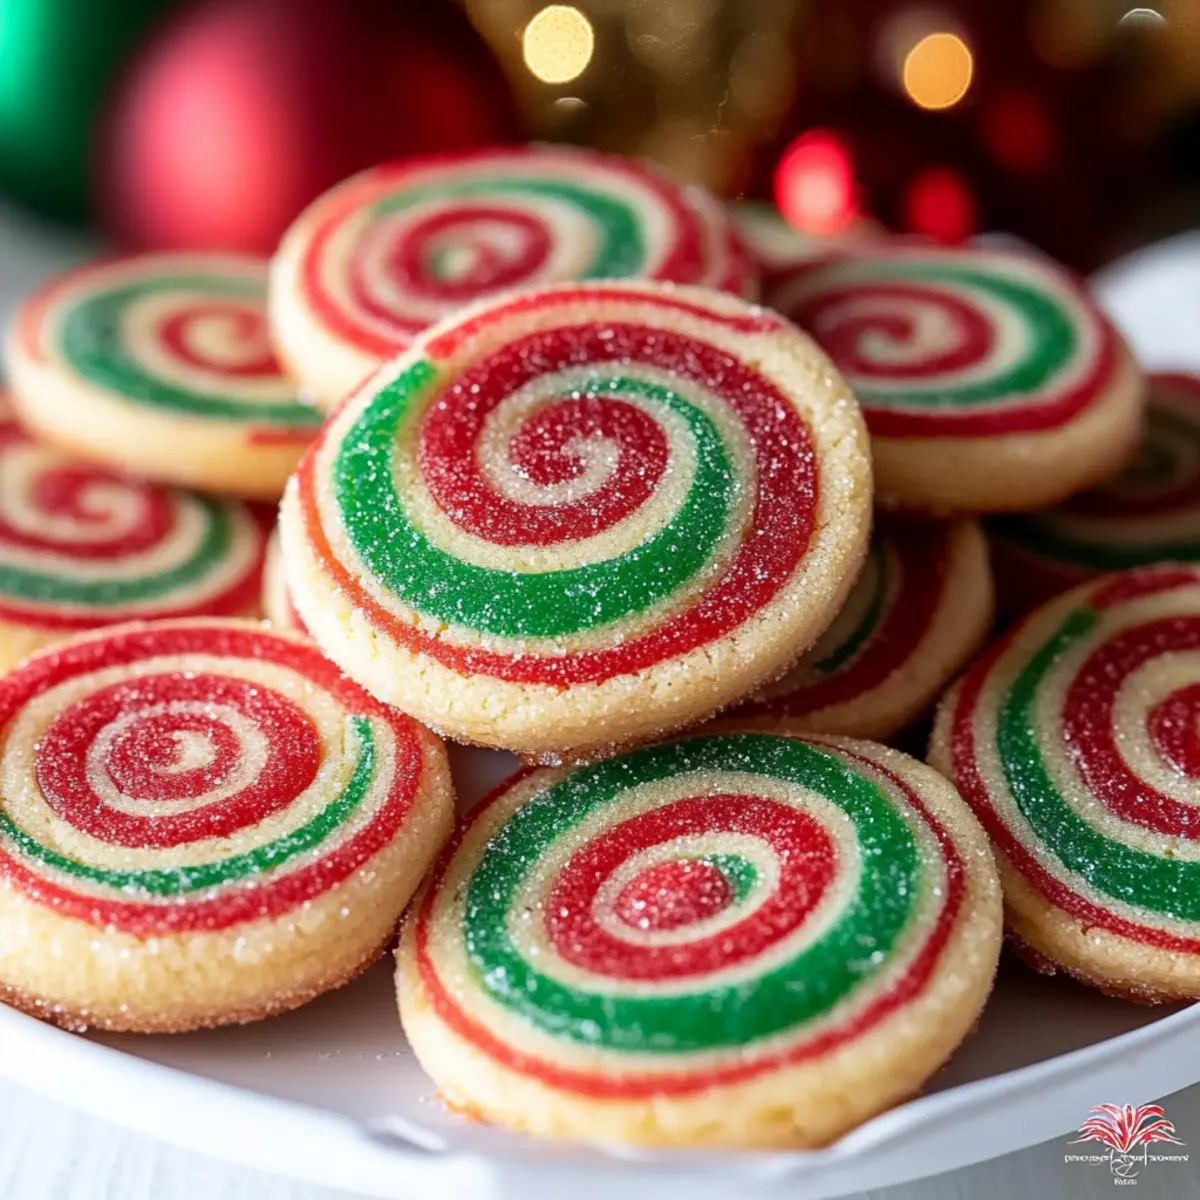
Joyful Presentation: The vibrant red and green swirls are perfect for festive gatherings, making these cookies not just a treat, but a visual delight that brings cheer to your holiday table.
Easy to Make: Simplifying your baking experience, this recipe allows you to create stunning cookies quickly, so you can spend more time creating memories with family.
Customizable Flavors: Feel free to experiment with different extracts or colors to fit any occasion—imagine pastels for spring celebrations or spicy ginger for autumn.
Crowd Pleaser: These Christmas Pinwheel Cookies are a hit with everyone, from kids to grandparents, ensuring your cookie exchange will be a success every time!
Quick Storage Tips: Storing them is a breeze—these scrumptious cookies can remain fresh for up to a week in an airtight container. Want more ways to enjoy cookies? Check out these classic slice-and-bake cookies for a delicious variation!
Christmas Pinwheel Cookies Ingredients
• Get ready to bake these festive treats!
For the Dough
- Unsalted Butter (2/3 cup) – Provides richness and moisture; remember to soften it for easier mixing.
- Sugar (2/3 cup) – Adds sweetness and aids in texture; feel free to substitute with a sugar alternative if desired.
- Egg (1) – Binds the ingredients together, adding structure to your cookies.
- Vanilla Extract (1 teaspoon) – Enhances flavor; using pure vanilla takes it up a notch.
- All-Purpose Flour (1 3/4 cups) – Forms the cookie’s base; can be swapped with gluten-free flour if needed.
- Kosher Salt (1/2 teaspoon) – Balances sweetness while enhancing flavor.
- Baking Soda (1/4 teaspoon) – Helps the cookies rise slightly.
For Coloring
- Red Gel Food Coloring – Used to color one portion of the dough for that festive look.
- Green Gel Food Coloring – Adds beautiful color to another portion; select gel for the best results.
For Garnishing
- Red Sanding Sugar – Sprinkles on top for a sparkling finish and extra texture that ties your Christmas Pinwheel Cookies together beautifully.
Step‑by‑Step Instructions for Christmas Pinwheel Cookies
Step 1: Prepare the Dough
In a large mixing bowl, cream 2/3 cup of softened unsalted butter and 2/3 cup of sugar using an electric mixer on medium speed for about 2–3 minutes until light and fluffy. Add in 1 egg and 1 teaspoon of vanilla extract, mixing until well combined. This fluffy mixture is the perfect base for your Christmas Pinwheel Cookies.
Step 2: Combine Dry Ingredients
In a separate bowl, whisk together 1 3/4 cups of all-purpose flour, 1/2 teaspoon of kosher salt, and 1/4 teaspoon of baking soda until evenly mixed. Gradually add this dry mixture to the wet ingredients, stirring with a spatula until a soft dough forms. This dough will be the canvas for the beautiful swirls of color in your cookies.
Step 3: Color the Dough
Divide the dough into three equal portions. To one portion, add a few drops of red gel food coloring, and to another, add green gel food coloring. Knead each portion until the colors are fully incorporated and vibrant, about 1–2 minutes per dough color. Wrap each colored dough in plastic wrap and refrigerate for 1 hour to firm up.
Step 4: Roll the Dough
Once chilled, place each colored dough between two sheets of parchment paper. Use a rolling pin to roll each portion into a 7-inch square, ensuring the edges are neat and even. After rolling, refrigerate the squares again for about 15 minutes to make them easier to handle when it’s time to stack.
Step 5: Stack and Roll
Take the squares out of the fridge and carefully peel off the top layer of parchment from each. Stack the red square on the bottom, followed by the green, and top with the plain dough. Starting from one edge, roll the layers tightly into a log, making sure the colors remain aligned. Wrap tightly in plastic wrap and freeze for 1 hour.
Step 6: Preheat and Slice
Preheat your oven to 350°F (175°C) while the dough is freezing. Once firm, use a sharp knife to slice the log into 1/3-inch thick cookies. Roll the edges of each slice in red sanding sugar for a festive finish, creating that beautiful sparkle on your Christmas Pinwheel Cookies.
Step 7: Bake
Place the sliced cookies on a lined baking sheet, spacing them about 2 inches apart. Bake in the preheated oven for 8 to 10 minutes, or until the cookies are set and slightly golden at the edges. Keep an eye on them to avoid overbaking, as you want that perfect soft and slightly crisp texture.
Step 8: Cool and Store
Remove the cookies from the oven and let them cool on the baking sheet for about 5 minutes before transferring them to a wire rack to cool completely. Once cooled, store your delightful Christmas Pinwheel Cookies in an airtight container at room temperature for up to a week, perfect for sharing during the holiday season!
Make Ahead Options
These Christmas Pinwheel Cookies are perfect for meal prep, allowing you to get a jump start on your holiday baking! You can prepare the dough up to 24 hours in advance by following the first five steps of the recipe and then refrigerating the colored dough wrapped tightly in plastic wrap. For even greater convenience, you can freeze the rolled log for up to 3 months; just ensure it’s well-wrapped to prevent freezer burn. When ready to bake, simply slice the frozen dough into cookies and bake them straight from the freezer—no need to thaw! This method guarantees that your Christmas Pinwheel Cookies will be just as delicious and vibrant, presenting fresh, festive cheer when it’s time to share.
What to Serve with Christmas Pinwheel Cookies?
The perfect cookie deserves a delightful spread that enhances your holiday gathering and tantalizes the taste buds.
-
Glass of Milk: A classic pairing, the creaminess of milk complements the cookies’ sweetness, offering a delightful balance.
-
Hot Chocolate: Rich and velvety, hot chocolate adds a cozy touch to your festivities, making each bite of cookie even sweeter.
-
Gingerbread Men: The spicy warmth of gingerbread cookies creates a festive contrast, adding depth to your holiday cookie platter.
-
Festive Fruit Salad: Fresh, vibrant fruits provide a refreshing crunch, balancing the sweetness of the pinwheel cookies for a delightful contrast.
-
Eggnog: This creamy, spiced beverage perfectly captures the essence of the season, making the cookies feel even more festive.
-
Sugar Cookies: Pairing with plain sugar cookies allows you to enjoy different textures without overpowering the flavor profile.
-
Christmas Cake: A rich slice of Christmas cake contrasts the lightness of the pinwheel cookies, adding a beautiful variety to your dessert table.
-
Spiced Apple Cider: Warm spiced cider brings out the best in your cookies with its sweet and tangy flavor notes, immersing your gathering in holiday cheer.
-
Snowman Marshmallows: These fun marshmallow treats add a playful element alongside your cookies, making dessert more enjoyable for the little ones.
-
Candy Canes: This classic holiday treat adds a crunchy, minty zing that harmonizes beautifully with the sweet spirals of the Christmas Pinwheel Cookies.
Expert Tips for Christmas Pinwheel Cookies
-
Soften the Butter: Ensure your unsalted butter is properly softened. This crucial step prevents lumps in the dough and guarantees a smooth mix, leading to delicious cookies.
-
Use Gel Food Coloring: For vibrant colors, stick to gel food coloring instead of liquid. This will give your Christmas Pinwheel Cookies a bright, festive look without altering the dough’s consistency.
-
Chill the Dough Properly: Don’t skip the chilling step! Chilling the dough firm up makes it easier to handle and helps maintain the beautiful swirl pattern during baking.
-
Watch Baking Time: Be vigilant while baking! Every oven differs, so keep an eye on your cookies, and remove them when they’re set but still soft to achieve the perfect texture.
-
Roll Equally Even: When rolling the dough, make sure each square is of even thickness. This uniformity helps the cookies bake evenly and enhances their visual appeal.
How to Store and Freeze Christmas Pinwheel Cookies
Room Temperature: Store in an airtight container at room temperature for up to 1 week. This keeps your festive cookies fresh and ready to enjoy anytime.
Fridge: For longer freshness, keep them in the fridge, where they can last up to 2 weeks in an airtight container. Just make sure they are sealed well to prevent dryness.
Freezer: Freeze the cookie dough logs for up to 3 months. Wrap tightly in plastic wrap and foil before freezing. When ready to bake, slice the dough directly from the freezer; just add a couple of extra minutes to the baking time.
Reheating: If you’re craving a warm cookie, reheat in the microwave for about 10-15 seconds or in the oven at 350°F for 5 minutes. Enjoy your deliciously festive Christmas Pinwheel Cookies!
Christmas Pinwheel Cookies Variations
Feel free to let your creativity shine by personalizing these festive treats in delightful ways!
-
Gluten-Free: Substitute all-purpose flour with a gluten-free blend for a celiac-friendly version. Enjoy all the flavors without the gluten concerns!
-
Different Colors: Swap out the traditional red and green for pastel hues like pink and yellow, perfect for spring celebrations or baby showers. You’ll have rainbow cookies to brighten any occasion!
-
Flavor Infused: Add 1 teaspoon of almond extract or peppermint extract for a different flavor profile. Imagine a minty twist on your classic Christmas delight—simply irresistible!
-
Nutty Addition: Incorporate 1/2 cup of finely chopped nuts like walnuts or pecans into the dough for a crunchy surprise. These add texture and a rich flavor that complements the sweetness beautifully.
-
Holiday Spice: Mix in 1 teaspoon of ground cinnamon or nutmeg to the dough for a warm, cozy depth of flavor. This subtle spice makes your cookies even more inviting during chilly winter evenings.
-
Sanding Sugar Swap: Use colored crystal sugar instead of red sanding sugar to add sparkle and a fun twist. Choose colors that match your theme—your cookie platter will gleam with festive flair!
-
Mini Treats: Roll the dough into smaller logs for bite-sized cookies. These mini pinwheel cookies are perfect for kids or parties, letting everyone enjoy a taste without too much sweetness.
If you’re looking for further exploration into unique cookie delights, don’t miss out on trying these scrumptious slice-and-bake cookies as another fun baking adventure!

Christmas Pinwheel Cookies Recipe FAQs
What type of butter should I use for the dough?
Absolutely, use unsalted butter for this recipe. It provides richness and moisture that enhance the cookie’s texture. Make sure the butter is softened before mixing, as this helps achieve that light and fluffy dough that’s crucial for your Christmas Pinwheel Cookies.
How should I store my Christmas Pinwheel Cookies?
These delightful cookies can be stored in an airtight container at room temperature for up to one week. If you want to keep them even fresher, you can refrigerate them, where they’ll last up to 2 weeks. Just ensure they are well-sealed to keep out any moisture.
Can I freeze the dough for future baking?
Yes, you can certainly freeze the cookie dough! Wrap the logs tightly in plastic wrap and then foil to prevent freezer burn. The dough can be frozen for up to 3 months. When you’re ready to bake, simply slice the dough directly from the freezer, adding an extra minute or two to the baking time.
What if my dough is too sticky to roll out?
If you encounter sticky dough, don’t worry! Simply chill it in the refrigerator for a bit longer, usually about 15-30 minutes. This will help it firm up, making it much easier to handle and roll out into those perfect squares for your Christmas Pinwheel Cookies.
Can I use other flavors or colors for my pinwheel cookies?
Very! This recipe is highly adaptable. Feel free to explore different extracts like almond or peppermint for flavor variations. Additionally, you can use other colors to create beautiful swirls for different occasions, making them suitable for Easter or Halloween festivities!
What are the common mistakes to avoid when making these cookies?
One common mistake is not ensuring your butter is fully softened, which can lead to a lumpy dough. Another tip is to monitor your baking time closely—every oven behaves differently, so keep an eye on your cookies to achieve that perfect balance of soft and slightly crisp.

Delightful Christmas Pinwheel Cookies for a Festive Treat
Ingredients
Equipment
Method
- Cream softened unsalted butter and sugar in a large mixing bowl for 2–3 minutes until light and fluffy.
- Add in egg and vanilla extract, mixing until well combined.
- In a separate bowl, whisk together flour, kosher salt, and baking soda.
- Gradually add the dry mixture to the wet ingredients, stirring until a soft dough forms.
- Divide the dough into three equal portions.
- Color one portion with red gel food coloring and another with green gel food coloring.
- Knead each portion until colors are fully incorporated.
- Wrap colored dough in plastic wrap and refrigerate for 1 hour.
- Roll each colored dough between two sheets of parchment paper into 7-inch squares.
- Refrigerate the squares for another 15 minutes.
- Stack the red square, green square, and plain dough, then roll into a log.
- Wrap tightly in plastic wrap and freeze for 1 hour.
- Preheat the oven to 350°F (175°C).
- Once firm, slice the log into 1/3-inch thick cookies.
- Roll the edges of each slice in red sanding sugar before baking.
- Bake the cookies for 8 to 10 minutes until set and slightly golden.
- Cool on the baking sheet for 5 minutes before transferring to a wire rack.
Leave a Reply