
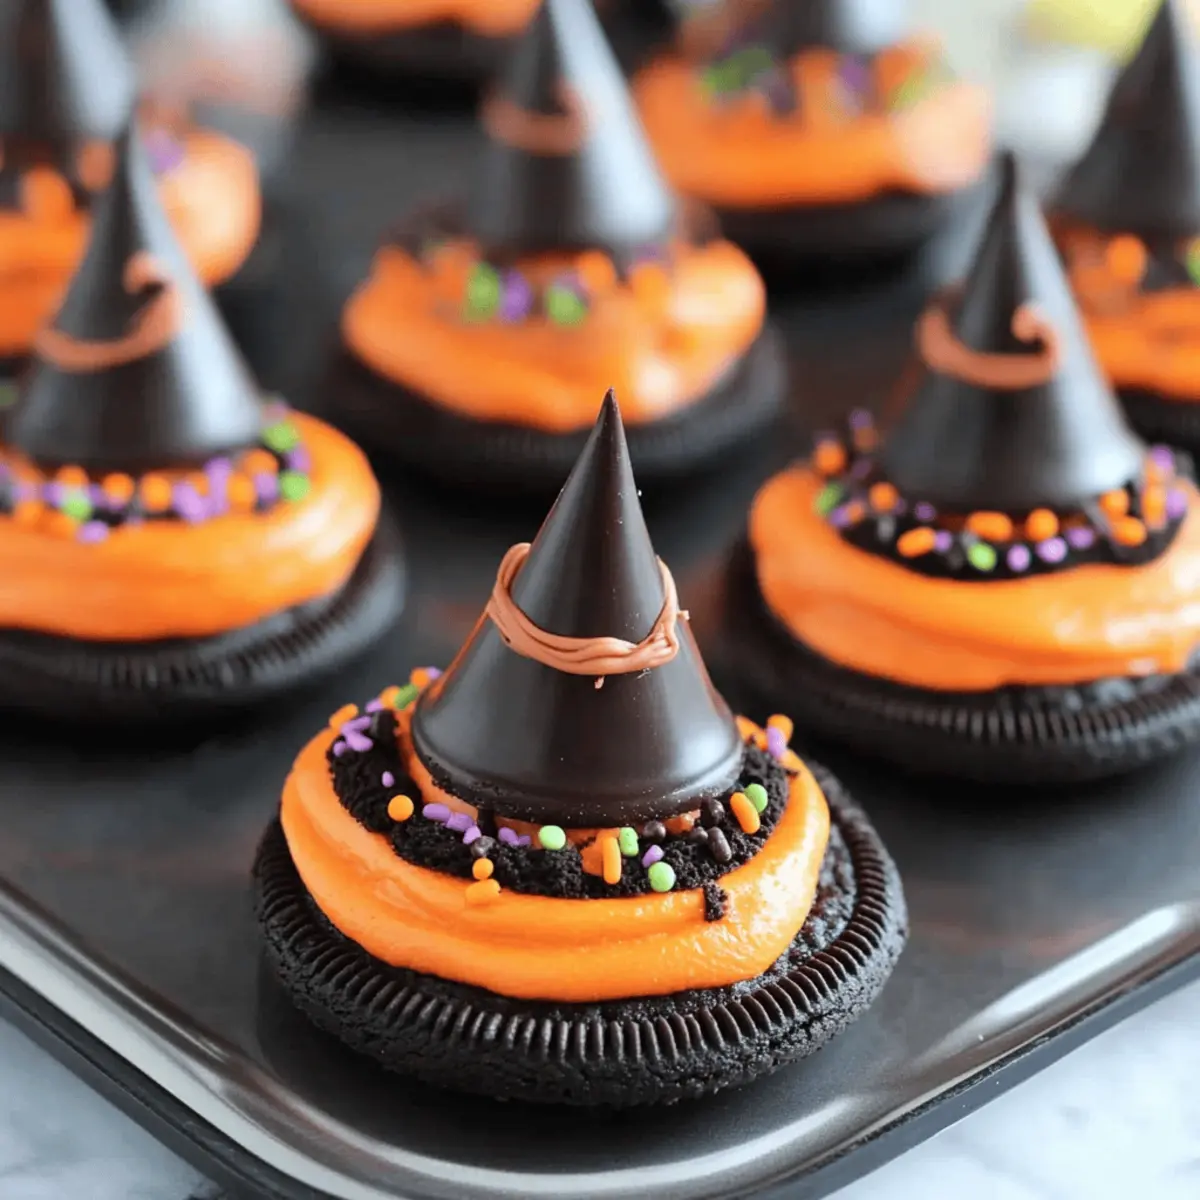
As the cool autumn air settles in, thoughts of Halloween festivities dance in my mind, bringing a rush of ideas for treats that will spark joy at any gathering. Enter these Easy Oreo Witch Hat Cookies—your new go-to for delightful no-bake Halloween fun! In just five minutes, you can create these whimsical cookies that not only look charming but are also highly customizable, allowing everyone to add their personal touch. Whether you prefer classic Oreos, fudgy shapes, or vibrant frosting in shades of orange or purple, these treats are quick to whip up and perfect for those last-minute celebrations. So, are you ready to conjure up some sweet magic in your kitchen? Let’s get started!
Why Make Oreo Witch Hat Cookies?
Incredible versatility: These cookies can be customized with your choice of cookie, from traditional Oreos to fudgy delights!
Quick prep time: Whip them up in just 5 minutes, making them perfect for impromptu gatherings.
Colorful creativity: Let your imagination run wild with frosting colors and fun sprinkles that will appeal to kids and adults alike.
No-bake ease: No ovens required – just assemble and enjoy these delightful treats effortlessly!
Crowd-pleaser: Their charming witch hat shape not only looks festive but also tastes delicious, ensuring they disappear fast at any Halloween party!
If you’re a fan of easy, festive treats, you might also enjoy making Halloween Oreo Cookie Boo Brownies or Cauldron Cookies Spooky for even more fun this season.
Oreo Witch Hat Cookies Ingredients
Get ready to create these delightful Halloween treats with just a few simple ingredients!
For the Cookies
- Oreo Cookies – The star of the show, providing a chocolatey base; feel free to swap them for Fudge Covered Oreos for a richer treat.
- Grasshopper Cookies – For a minty twist; these offer a unique flavor that pairs well with chocolate frosting.
For the Frosting
- Vanilla Frosting – A sweet topping that can be store-bought or homemade; tint with food coloring to match your festive theme!
- Chocolate Frosting – An alternative for chocolate lovers; it adds a rich flavor that complements the Oreos beautifully.
For the Toppings
- Halloween Sprinkles – These add a fun and colorful flair, making your cookies visually appealing; go wild with festive shapes!
- Chocolate Kisses – The perfect finishing touch; these provide a delightful chocolate flavor and give each cookie its whimsical hat shape.
Get ready to enjoy making these Oreo Witch Hat Cookies that not only taste fantastic but also bring a splash of creativity to your Halloween celebrations!
Step‑by‑Step Instructions for Oreo Witch Hat Cookies
Step 1: Prepare the Frosting
In a mixing bowl, combine your vanilla frosting and mix until smooth. If you’d like to add a pop of color for your Oreo Witch Hat Cookies, incorporate a few drops of food coloring until you achieve your desired shade—think vibrant orange or spooky green. This takes about 2 minutes and should look fluffy and easy to spread.
Step 2: Fill the Piping Bag
Fit a piping bag with a large round or star tip to create textured dollops. Carefully fill the bag with the colored frosting, ensuring there are no air bubbles trapped inside. Once filled, twist the top of the bag to prevent the frosting from escaping. This set-up will allow for an easy application onto the cookies in the next step.
Step 3: Pipe the Frosting
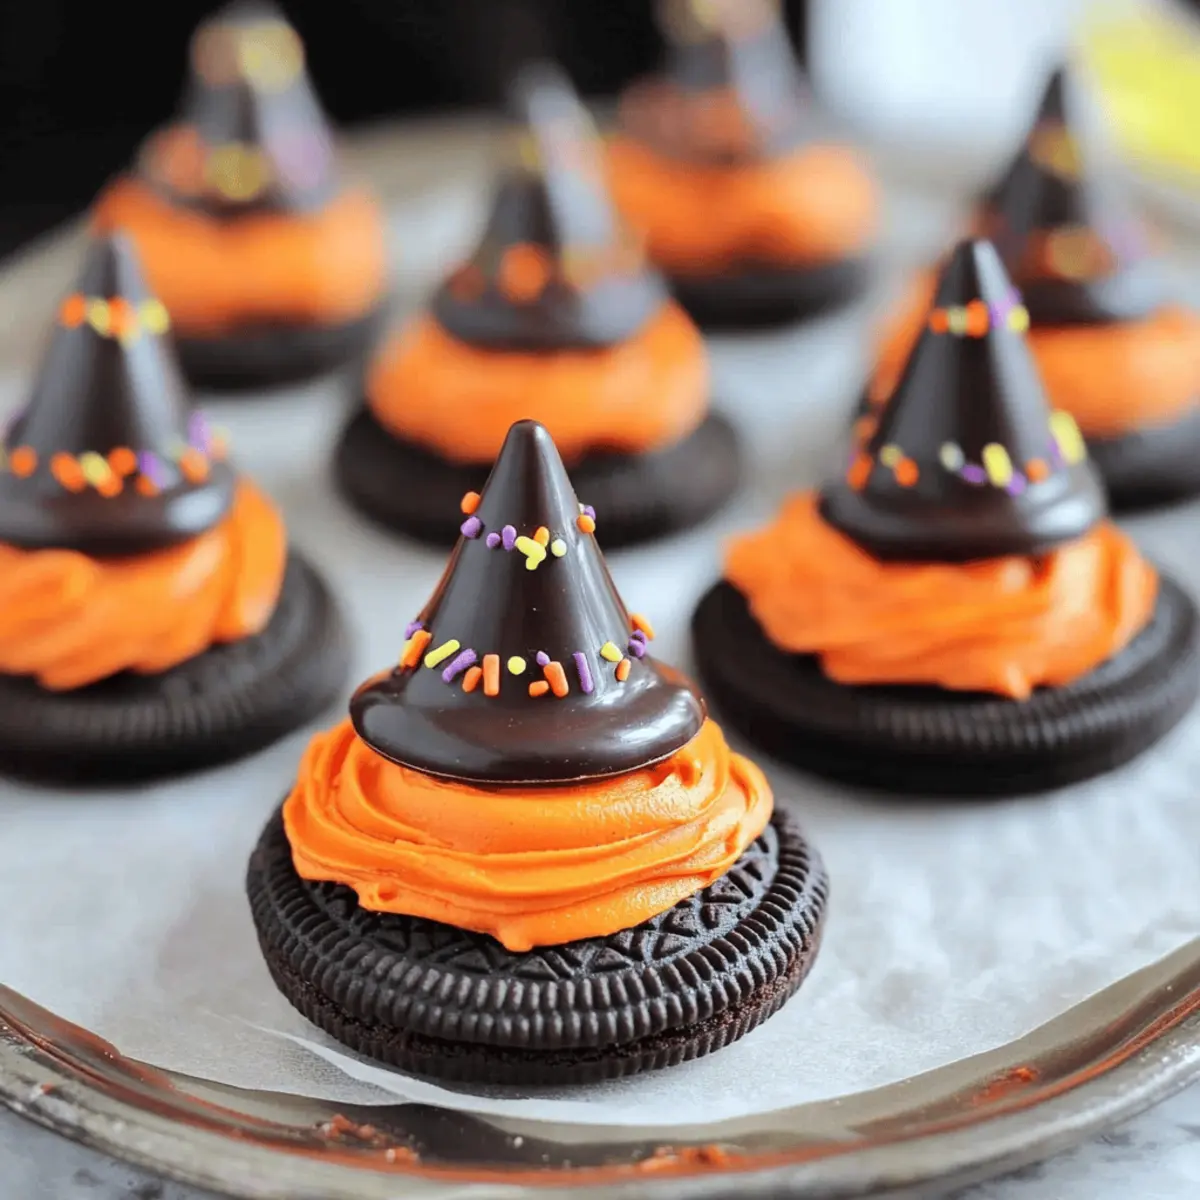
Take an Oreo cookie and hold it in one hand. With your other hand, gently squeeze the piping bag to pipe a generous dollop of frosting onto the center of the cookie. Aim for a mound that’s slightly taller in the middle for a whimsical hat shape. Repeat this process for all Oreo cookies, and it should take about 5 minutes in total.
Step 4: Add the Sprinkles
Once each Oreo has its frosting dollop, it’s time to make them sparkle! Sprinkle your Halloween-themed sprinkles over the frosting while it’s still soft. This will help them adhere nicely. Use a variety of shapes and colors for added fun, transforming each cookie into a festive delight that’ll catch everyone’s eye at your Halloween gathering.
Step 5: Attach the Chocolate Kisses
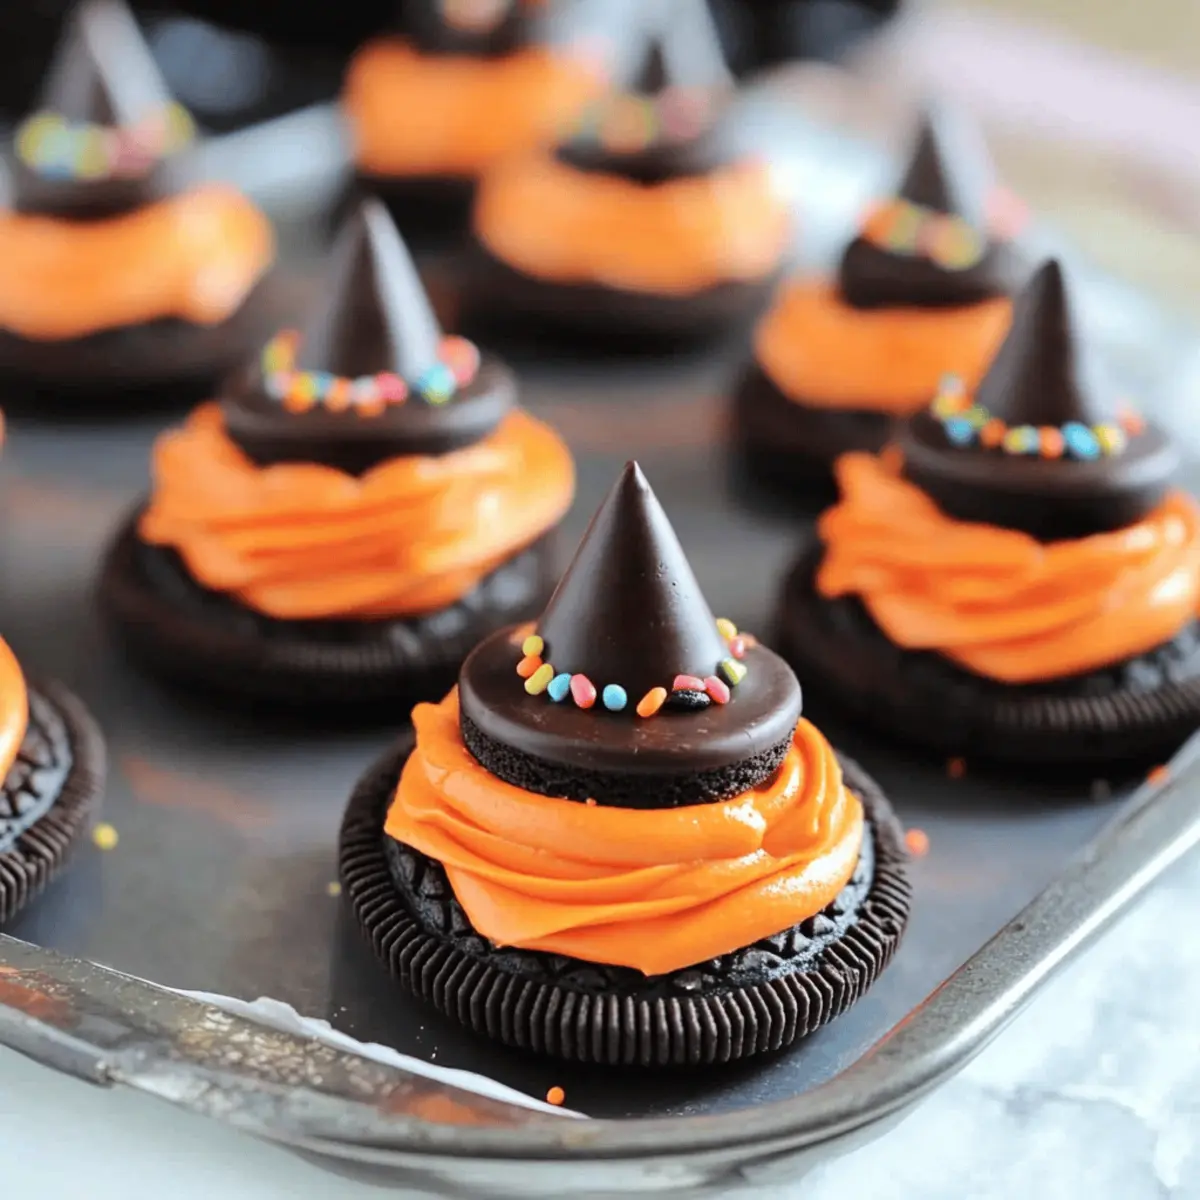
Unwrap your chocolate kisses and gently press one into the center of each frosted Oreo dollop. The kiss should sit snugly on the frosting, resembling the top of a witch’s hat. This step not only adds a delightful chocolatey flavor but also completes the whimsical look of your Oreo Witch Hat Cookies—let these set for a couple of minutes.
Step 6: Store the Cookies
If not serving immediately, place the assembled cookies in an airtight container to keep them fresh. Store them at room temperature and consume within three days for the best texture and taste. Your Oreo Witch Hat Cookies are now ready to enchant everyone at your Halloween festivities!
What to Serve with Oreo Witch Hat Cookies?
As you whip up these charming treats, consider pairing them with delightful accompaniments that elevate your Halloween celebration.
-
Pumpkin Spice Latte: The warm, spiced flavors in this seasonal drink offer a cozy contrast to the sweet, chocolatey cookies.
-
Apple Cider: Serve hot or cold, it brings a crisp fall flavor, perfectly complementing the sweet richness of the cookies.
-
Chocolate Pudding Cups: These creamy cups offer a luscious and silky texture that pairs wonderfully with the crunchy Oreos.
-
Ghost Fruit Cups: Layered yogurt with fruit for a light and fun contrast, these cups are visually festive and refreshing.
-
Mini Cheesecakes: Their rich, creamy texture complements the cookie’s crunchiness and adds a sophisticated touch to your dessert table.
-
Witch’s Brew Punch: A fun, colorful drink that spooks up the party, this punch can be made with fruit juices and soda for a fizzy delight.
For a complete, festive experience, mix and match these treats to create a magical spread that enchants all ages!
Oreo Witch Hat Cookies Variations
Feel free to unleash your creativity and customize these adorable cookies to suit your taste or dietary preferences!
-
Chocolate Frosting: Swap vanilla frosting for rich chocolate frosting for deep, delicious flavor.
-
Minty Delight: Use Grasshopper cookies instead of Oreos for a refreshing minty twist that pairs perfectly with chocolate frosting.
-
Colorful Toppers: Instead of traditional sprinkles, use mini M&Ms as festive hat buckles for a fun, colorful surprise.
-
Dairy-Free Options: Opt for dairy-free chocolate kisses and frosting to make these treats suitable for dairy-sensitive friends or family.
-
Pumpkin Spice Flair: Mix in some pumpkin spice into the frosting for a seasonal twist that’ll warm the hearts of friends and family alike!
-
Hazelnut Spread: Instead of frosting, spread hazelnut or chocolate spread for a nutty, creamy alternative that adds a luscious touch.
-
Spooky Colors: Get playful with your frosting colors! How about eerie greens and purples for Halloween, or even pastel palettes for springtime gatherings?
-
Cookie Choice: Try using fudge-covered Oreos or homemade chocolate cookies for a different texture and even richer flavor.
As you whip up these delicious treats, don’t forget about other spooky favorites like Cider Cheesecake Cookies for a festive variety that everyone will love!
How to Store and Freeze Oreo Witch Hat Cookies
Room Temperature: Store your assembled Oreo Witch Hat Cookies in an airtight container at room temperature for up to 3 days to keep them fresh and flavorful.
Fridge: If you choose to refrigerate the cookies, place them in an airtight container, but note that this may affect their texture. Enjoy them within 4 days for the best taste.
Freezer: For longer storage, individually wrap each cookie and place them in a freezer-safe bag; they can be frozen for up to 2 months. Thaw at room temperature before serving.
Reheating: These cookies are best enjoyed as is and do not require reheating. Just let them sit at room temperature for a few minutes after freezing for optimal enjoyment.
Make Ahead Options
These delightful Oreo Witch Hat Cookies are perfect for meal prep enthusiasts looking to save time during the busy Halloween season! You can prepare the frosting up to 24 hours in advance; simply mix and tint as desired, then store it in an airtight container in the refrigerator. The cookies themselves can be assembled ahead of time and stored in an airtight container at room temperature for up to 3 days, ensuring they remain just as delicious and fresh. When you’re ready to serve, simply take them out, and enjoy these charming treats without any last-minute stress. With this prep, you’ll be able to enjoy more time with your loved ones while still impressing them with your homemade goodies!
Expert Tips for Oreo Witch Hat Cookies
• Choose Wisely: Selecting the right cookie base is essential; while Oreos are classic, experimenting with fudge-covered or Grasshopper cookies can enhance flavors.
• Perfect Consistency: For creamy frosting, mix until smooth, ensuring there are no lumps before piping onto the cookies. Thick frosting can lead to difficult dollops!
• Frosting Fun: Don’t hesitate to mix food colors for a unique frosting shade. Too many colors may clash, so limit to two or three festive hues for a cohesive look.
• Sprinkle Sparingly: When adding sprinkles, be quick! Work while the frosting is soft to help them stick; otherwise, they may just slide right off.
• Storage Smarts: Keep your Oreo Witch Hat Cookies in an airtight container to maintain freshness. Storing them in the fridge may change the texture, so room temperature is best.
Your delicious Oreo Witch Hat Cookies will be the star of any Halloween gathering with these helpful tips!

Oreo Witch Hat Cookies Recipe FAQs
What type of Oreo cookies work best for this recipe?
Absolutely! While traditional Oreo cookies are the star of this recipe, you can also use Fudge Covered Oreos or Grasshopper Cookies for a delightful twist. Fudge Covered Oreos add a rich chocolate flavor, while Grasshopper Cookies provide a refreshing minty taste. Feel free to experiment with your favorites!
How should I store Oreo Witch Hat Cookies?
To keep your Oreo Witch Hat Cookies fresh, store them in an airtight container at room temperature for up to 3 days. If you refrigerate them, they will remain good for about 4 days, although the texture might be slightly affected. Ensure they are well-covered to maintain their taste and softness!
Can I freeze Oreo Witch Hat Cookies?
Yes! For longer storage, wrap each cookie individually in plastic wrap and place them in a freezer-safe bag. They will keep well for up to 2 months. When you’re ready to enjoy them, simply thaw at room temperature. This process typically takes about 30 minutes, so you can enjoy them anytime!
What should I do if the frosting is too thick?
If your frosting is too thick to pipe, don’t worry! Simply add a teaspoon of milk or cream to the frosting and mix until you achieve the desired consistency. This should make it easier to spread and pipe onto your cookies. Remember, a smooth frosting will create beautiful dollops for your witch hats!
Are there any allergy considerations I should be aware of?
Definitely consider that both Oreos and chocolate kisses contain common allergens. If you’re serving these cookies to friends or family, check for allergies to dairy, gluten, or chocolate. You can use gluten-free Oreos and alternative chocolate options to create a safe treat for everyone!
How do I make my cookies even more festive?
The more, the merrier! You can customize your Oreo Witch Hat Cookies with different colored frostings or themed sprinkles. Try using mini M&Ms as hat buckles, or create a mix of sprinkles that matches your Halloween theme. Let your creativity flow, and make these magical cookies stand out!
Delightful Oreo Witch Hat Cookies for a Spooktacular Treat
Ingredients
Equipment
Method
- Prepare the frosting by mixing vanilla frosting until smooth, and add food coloring to achieve desired shade.
- Fill a piping bag with the colored frosting and twist the top to prevent leaking.
- Pipe a generous dollop of frosting onto the center of each Oreo cookie to create a mound.
- Sprinkle Halloween-themed sprinkles over the frosting while it’s still soft.
- Attach a chocolate kiss to the center of the frosted Oreo to complete the witch hat look.
- Store the cookies in an airtight container at room temperature if not serving immediately.
Leave a Reply