
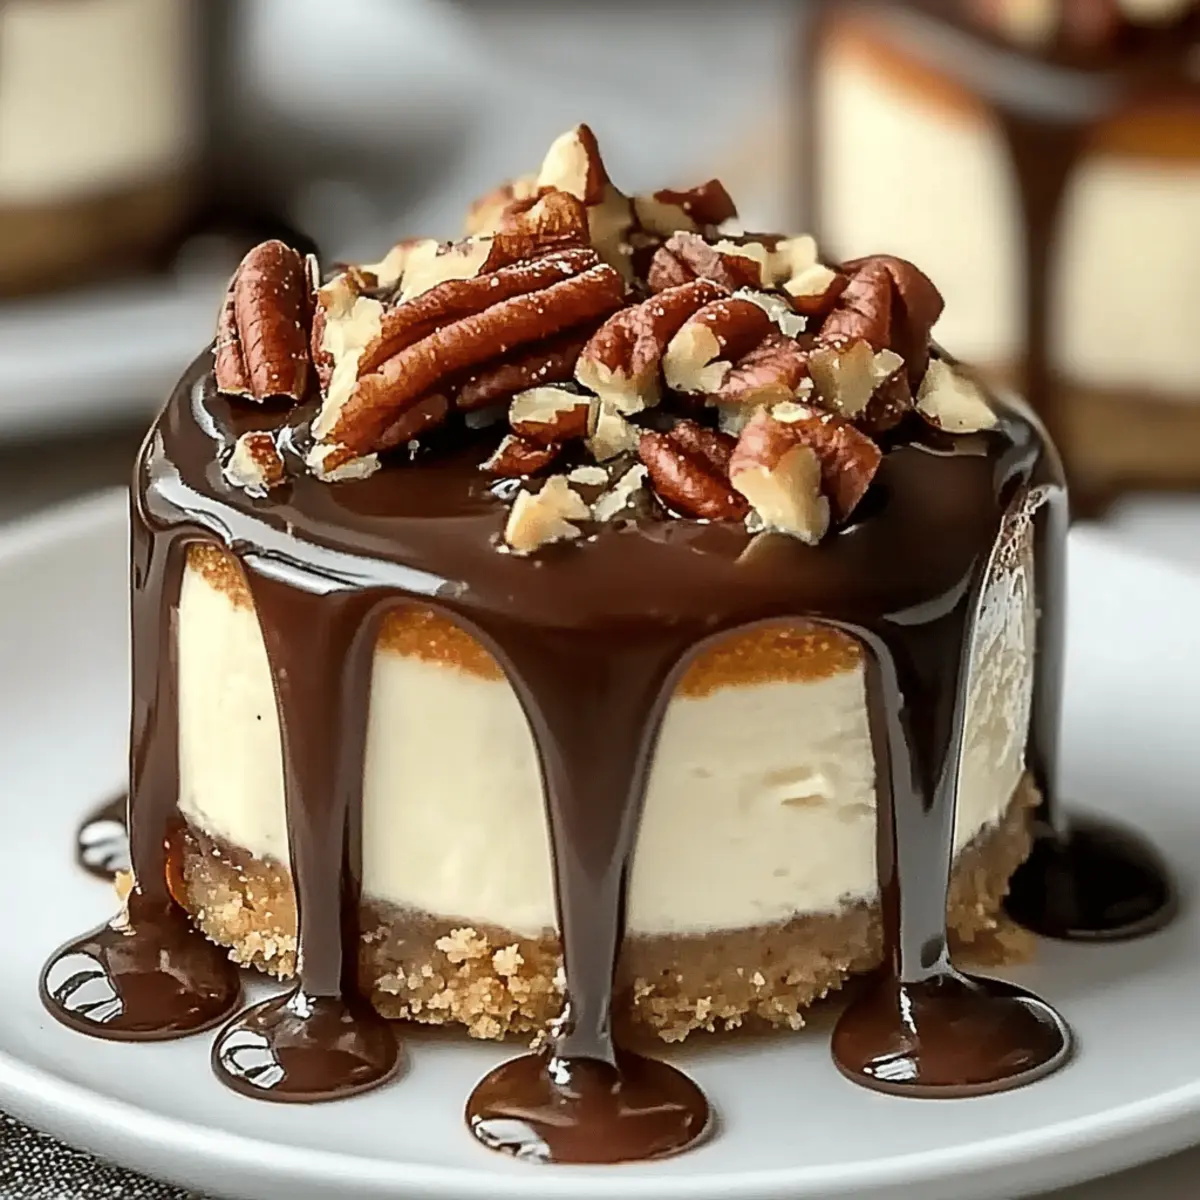
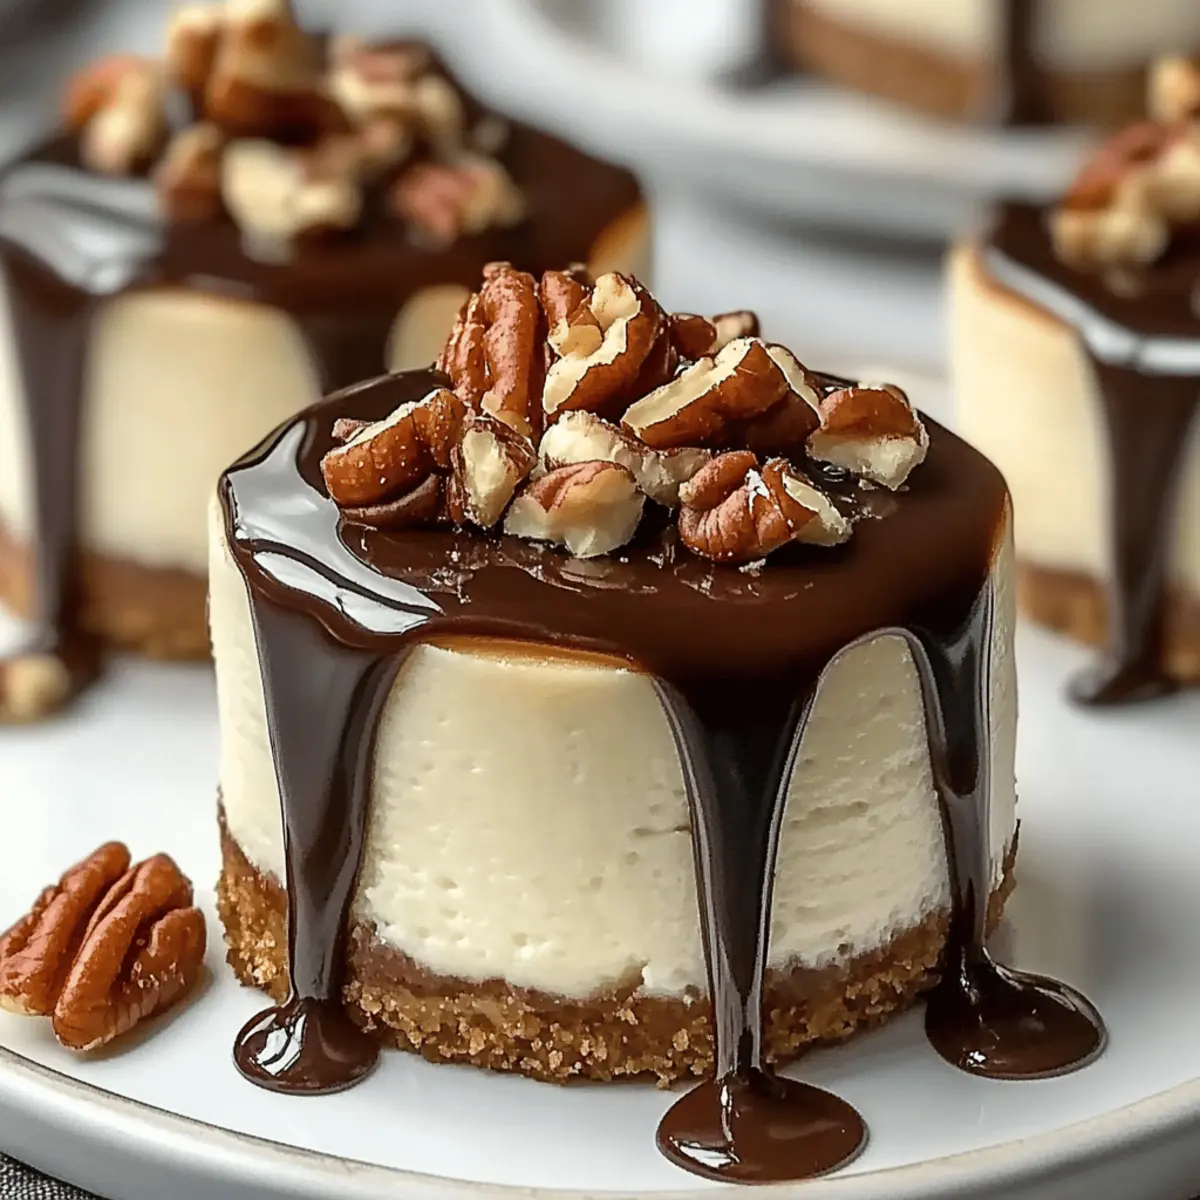
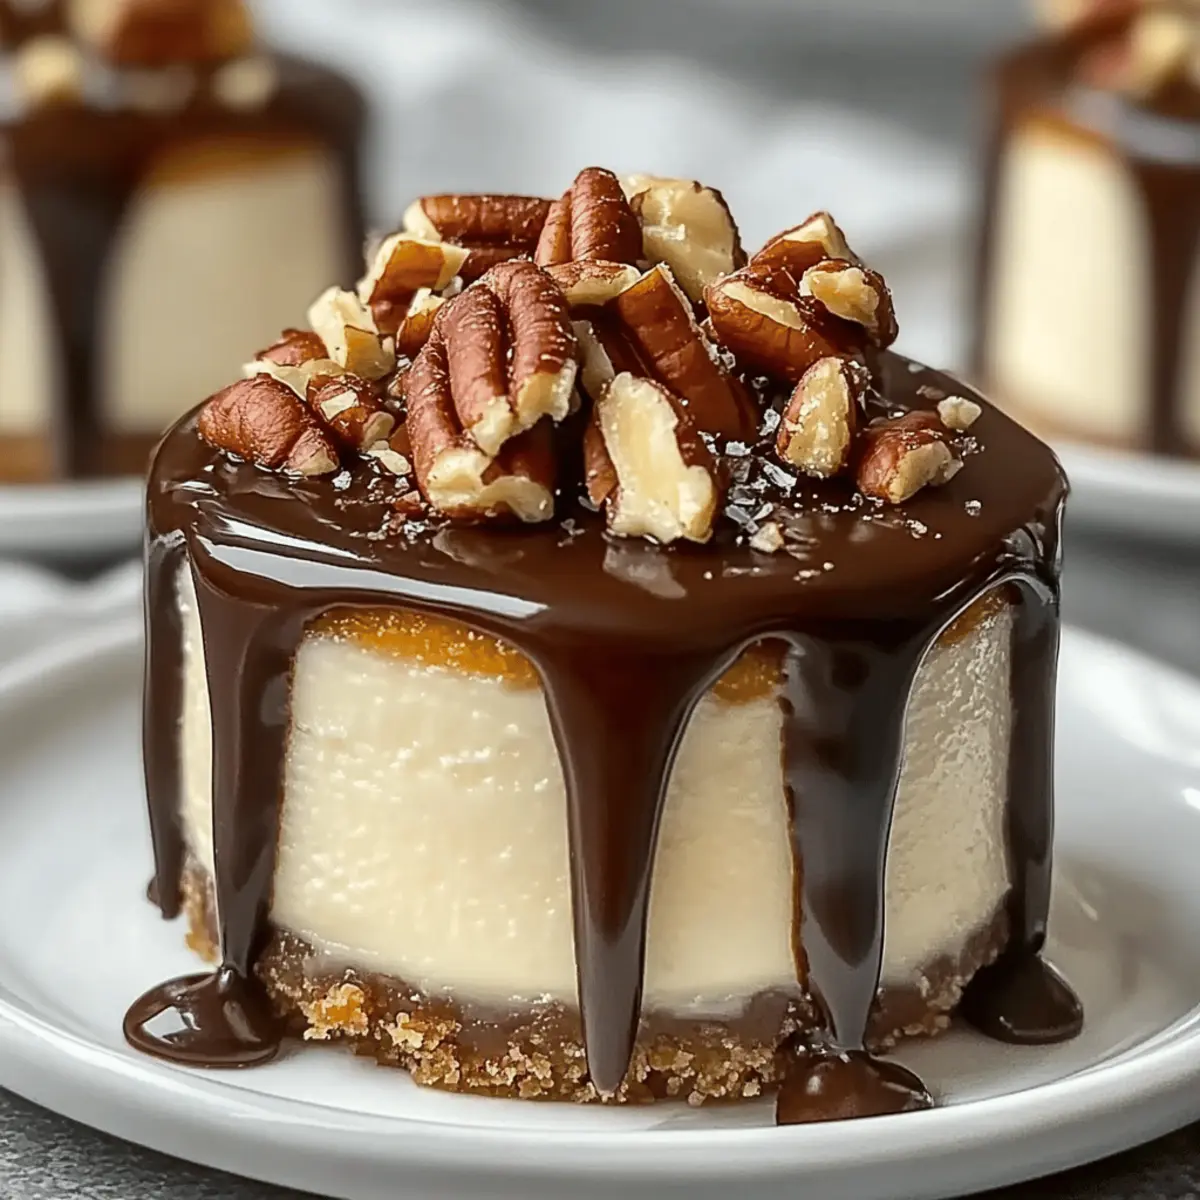
The moment I took my first bite of a Turtle candy, I was hooked—rich chocolate, sweet caramel, and a satisfying crunch in every mouthful. If you have a sweet tooth like mine, get ready to whip up a dessert that captures all those indulgent flavors in a delightful bite-sized treat: the No Bake Turtle Mini Cheesecake. This recipe is a quick and easy solution for anyone who loves to create something spectacular without firing up the oven. With its creamy texture and indulgent layers, this no-bake masterpiece is not only a crowd-pleaser, but it also offers the convenience of being made in advance, leaving your guests to swoon long after the last crumb has disappeared. Curious how to bring this sweet fantasy to life? Let’s dive into the delicious details!
Why Choose No Bake Turtle Mini Cheesecake?
Convenience: This no-bake recipe is a time-saver, requiring minimal effort while delivering impressive results.
Delicious Layers: Each mini cheesecake is a perfect combination of creamy cheesecake, rich chocolate, and sweet caramel, making every bite a taste sensation.
Crowd-Pleasing: Ideal for gatherings, these mini treats will have your friends and family raving, just like my Churro Cheesecake Indulge.
Easy to Customize: Feel free to swap ingredients, from using gluten-free graham crackers to experimenting with toppings like fruit or different nuts, ensuring everyone can enjoy!
Make Ahead: Prepared in advance, these delightful desserts can be chilled for hours, enabling you to enjoy your company, whether you serve them after a lovely dinner or at a casual get-together.
No Bake Turtle Mini Cheesecake Ingredients
-
For the Crust
-
Graham Cracker Crumbs – Sweet and crunchy base. Substitution: Use gluten-free graham crackers for a gluten-free option.
-
Unsalted Butter (melted) – Binds the crust together. Make sure to melt fully before mixing to avoid crumbly texture.
-
Sugar – Adds sweetness to the crust. Brown sugar can be used for a deeper flavor.
-
For the Cheesecake Filling
-
Cream Cheese (softened) – Creamy base for the cheesecake. Ensure it’s at room temperature to avoid lumps in the filling.
-
Powdered Sugar – Sweetens the filling. Can be adjusted according to taste preferences.
-
Vanilla Extract – Enhances flavor. Use pure vanilla for the best results.
-
Whipped Topping – Adds lightness and fluffiness. Whipped cream or a whipped dairy-free alternative can be used.
-
For the Toppings
-
Caramel Sauce – Signature turtle flavor. Store-bought or homemade can be used.
-
Chocolate Sauce – Introduces richness and decadence. Use dark chocolate sauce for a more intense flavor.
-
Chopped Pecans (for garnish) – Provides crunch. Optional: can substitute with other nuts or omit for nut allergies.
Step‑by‑Step Instructions for No Bake Turtle Mini Cheesecake
Step 1: Prepare the Crust
In a mixing bowl, combine graham cracker crumbs, melted unsalted butter, and sugar. Mix until the crumbs are thoroughly coated and have a wet sand-like texture. Press this mixture firmly into the bottom of mini cheesecake cups or a muffin tin, ensuring an even layer. Place the crusts in the refrigerator for about 15 minutes to allow them to set while you prepare the filling.
Step 2: Make the Cheesecake Filling
In a large bowl, beat softened cream cheese with an electric mixer until it’s smooth and creamy, about 2-3 minutes. Gradually add in powdered sugar and vanilla extract, mixing until fully incorporated. Gently fold in the whipped topping until the mixture is light and fluffy, being careful not to overmix. The filling should be rich and creamy, ready to fill your chilled crusts.
Step 3: Assemble the Cheesecakes
Remove the crusts from the refrigerator and carefully spoon the cheesecake filling into each cup, filling them to just below the rim. Use a spatula to smooth the tops as needed. Cover the mini cheesecakes with plastic wrap and refrigerate for at least 2 hours or until fully set. This chilling time is crucial for achieving that firm cheesecake texture.
Step 4: Add Toppings
Once the cheesecakes are set, remove them from the refrigerator. Drizzle each mini cheesecake generously with caramel sauce and chocolate sauce for that classic turtle flavor. Finally, sprinkle chopped pecans on top for a delightful crunch. These visual toppings will make each No Bake Turtle Mini Cheesecake irresistible and ready to impress your guests!
What to Serve with No Bake Turtle Mini Cheesecake
Treat yourself to a memorable meal experience by pairing flavors that elevate this delightful dessert.
- Creamy Mashed Potatoes: Their velvety texture contrasts beautifully with the cheesecake’s richness, balancing sweet and savory perfectly.
- Fresh Berry Salad: A refreshing mix of strawberries, blueberries, and a hint of mint adds a burst of freshness and colors your plate beautifully.
- Nutty Granola Bars: The crunchy texture and wholesome flavors echo the pecans in the cheesecake, making for a satisfying snack alongside.
- Rich Coffee or Espresso: A warm, bold cup of coffee enhances the dessert’s sweetness, creating a delightful end to your meal.
- Chocolate-Covered Strawberries: These decadent treats bring an extra element of indulgence while keeping the chocolate theme alive, perfect for special occasions.
- Vanilla Ice Cream: A scoop of creamy vanilla ice cream alongside your mini cheesecake adds a melty softness that contrasts the firm filling beautifully.
- Spiced Chai Tea: The warm spices in chai tea balance the sweetness of the cheesecake while adding a cozy ambiance to your dessert experience.
- Chewy Caramel Popcorn: This playful addition offers a fun crunch that mirrors the delightful layers of your no-bake confection.
- Lemon Sorbet: A tangy sorbet refreshes the palate after the rich cheesecake, making it an ideal palate cleanser.
- Pecan Tarts: These mini delights echo the cheesecake’s flavors, creating a lovely harmony on the dessert table for family gatherings.
How to Store and Freeze No Bake Turtle Mini Cheesecake
Fridge: Keep the mini cheesecakes in an airtight container for up to 3 days. This ensures they stay fresh and delicious while preventing any absorption of odors from the fridge.
Freezer: For longer storage, freeze the cheesecakes for up to 2 months. Wrap each one tightly in plastic wrap and then place in a freezer-safe container.
Thawing: When ready to enjoy, remove from the freezer and thaw in the fridge overnight. Add the toppings after thawing to maintain freshness and crunch.
Serving: Always serve chilled. After storage, a quick drizzle of caramel and chocolate sauce will elevate your No Bake Turtle Mini Cheesecake and delight your guests!
No Bake Turtle Mini Cheesecake Variations
Feel free to get creative with this recipe and let your taste buds guide you!
- Gluten-Free: Replace graham crackers with gluten-free cookies or crushed nuts for a delicious crust that everyone can enjoy.
- Oreo Crust: For a twist, use crushed Oreos instead of graham crackers. The chocolate flavor pairs beautifully with the creamy filling!
- Dairy-Free: Swap in vegan cream cheese and whipped topping to create a dairy-free version that’s just as decadent!
- Fruit-Infused: Add a layer of fresh fruit, like sliced strawberries or raspberries, between the cheesecake and toppings for a refreshing burst of flavor.
- Nut Alternatives: If you’re allergic to pecans, try using walnuts or almonds for the topping. They bring a different flavor and crunch that’s equally delightful!
- Chocolate Craze: Drizzle a layer of rich chocolate ganache on top before adding the caramel; it will elevate the indulgence for chocolate lovers.
- Festive Flavors: Incorporate seasonal flavors like pumpkin or peppermint extract into the filling for a holiday twist—delicious served with my famous Baked Pumpkin Goat as a meal pairing!
- Spicy Kick: For those who like a bit of heat, a pinch of cayenne pepper in the chocolate sauce can provide a surprising and tantalizing contrast!
Each of these variations allows you to make the No Bake Turtle Mini Cheesecake your own while keeping its essence intact, so dive in and explore!
Expert Tips for No Bake Turtle Mini Cheesecake
-
Cream Cheese Softening: Begin by ensuring your cream cheese is at room temperature. This prevents any pesky lumps in your filling, creating a smooth and creamy texture.
-
Folding Technique: Gently fold in the whipped topping to preserve airiness. Overmixing here can lead to a dense filling instead of that light, fluffy cheesecake we love.
-
Set Time Matters: Never skip the chilling time! Refrigerating the mini cheesecakes for at least 2 hours is essential for achieving a firm and delightful No Bake Turtle Mini Cheesecake.
-
Perfecting the Crust: Be sure to press the crust mixture firmly into your cups or muffin tin. This helps the crust hold its shape when you’re ready to serve, avoiding crumbles and mess.
-
Topping Before Serving: Drizzle the caramel and chocolate sauces just before serving for the best presentation and freshness. This keeps your toppings from soaking into the cheesecake.
Make Ahead Options
These No Bake Turtle Mini Cheesecakes are perfect for meal prep enthusiasts! You can prepare the crust and cheesecake filling up to 24 hours in advance, allowing you to save time on busy days. Simply follow the recipe steps to make the crust and filling, and store the assembled cheesecakes (without toppings) covered in the refrigerator. This chilling allows the flavors to meld beautifully, and they’ll remain just as delicious. When you’re ready to serve, add caramel sauce, chocolate sauce, and pecans for garnish. This way, you’ll have an impressive dessert with minimal effort, ready to delight your family and friends!
No Bake Turtle Mini Cheesecake Recipe FAQs
How do I choose the right ingredients for my No Bake Turtle Mini Cheesecake?
Absolutely! For the best flavor and texture, always opt for fresh and quality ingredients. When selecting cream cheese, make sure it’s softened at room temperature—this helps avoid lumps in your cheesecake filling. As for the graham crackers, look for ones that are sweet and crunchy, and if you’re gluten-sensitive, I recommend using gluten-free graham crackers.
What is the best way to store No Bake Turtle Mini Cheesecakes?
Very good question! These mini cheesecakes should be stored in an airtight container in the refrigerator for up to 3 days. This keeps them fresh and prevents them from absorbing any unwanted fridge odors. If you want to store them for longer, you can freeze them, but remember to wrap each one tightly in plastic wrap and place them in a freezer-safe container.
Can I freeze No Bake Turtle Mini Cheesecake? How should I do it?
Yes, you can! To freeze your No Bake Turtle Mini Cheesecakes, first wrap each individual cheesecake tightly in plastic wrap to prevent freezer burn. Then, place them in a freezer-safe container. They can be stored like this for up to 2 months. When ready to enjoy, simply transfer them to the refrigerator to thaw overnight. This way, you preserve the texture and flavor!
What if my cheesecake filling turns out too thin?
No worries! If your filling is too thin, it likely means the cream cheese wasn’t sufficiently beat or needed more time to mix with the powdered sugar. To salvage it, you can add more whipped topping to thicken it gently. Make sure to fold it in carefully to avoid losing that nice fluffy texture. Alternatively, refrigerate the filling for a bit longer before filling your crusts to allow it to firm up.
Are there any dietary considerations with the No Bake Turtle Mini Cheesecake?
Certainly! If you’re accommodating diet restrictions, you can easily adjust this recipe. Use dairy-free cream cheese and whipped topping alternatives for a vegan option, and swap out any nuts for seeds or omit them entirely to avoid nut allergies. Moreover, substituting regular sugar with a sugar substitute can make it more suitable for those watching their sugar intake.
Can I make these mini cheesecakes in advance?
Absolutely! This is one of the great perks of the No Bake Turtle Mini Cheesecake. You can prepare them a day ahead of time and simply chill them in the fridge. Just wait to add the caramel, chocolate sauce, and nut topping until right before serving for that fresh, delectable touch!

Decadent No Bake Turtle Mini Cheesecake for Easy Indulgence
Ingredients
Equipment
Method
- In a mixing bowl, combine graham cracker crumbs, melted unsalted butter, and sugar. Mix until the crumbs are thoroughly coated and have a wet sand-like texture. Press this mixture firmly into the bottom of mini cheesecake cups or a muffin tin, ensuring an even layer. Place the crusts in the refrigerator for about 15 minutes to allow them to set while you prepare the filling.
- In a large bowl, beat softened cream cheese with an electric mixer until it’s smooth and creamy, about 2-3 minutes. Gradually add in powdered sugar and vanilla extract, mixing until fully incorporated. Gently fold in the whipped topping until the mixture is light and fluffy, being careful not to overmix.
- Remove the crusts from the refrigerator and carefully spoon the cheesecake filling into each cup, filling them to just below the rim. Use a spatula to smooth the tops as needed. Cover the mini cheesecakes with plastic wrap and refrigerate for at least 2 hours or until fully set.
- Once the cheesecakes are set, drizzle each mini cheesecake generously with caramel sauce and chocolate sauce for that classic turtle flavor. Finally, sprinkle chopped pecans on top for a delightful crunch.
Leave a Reply