
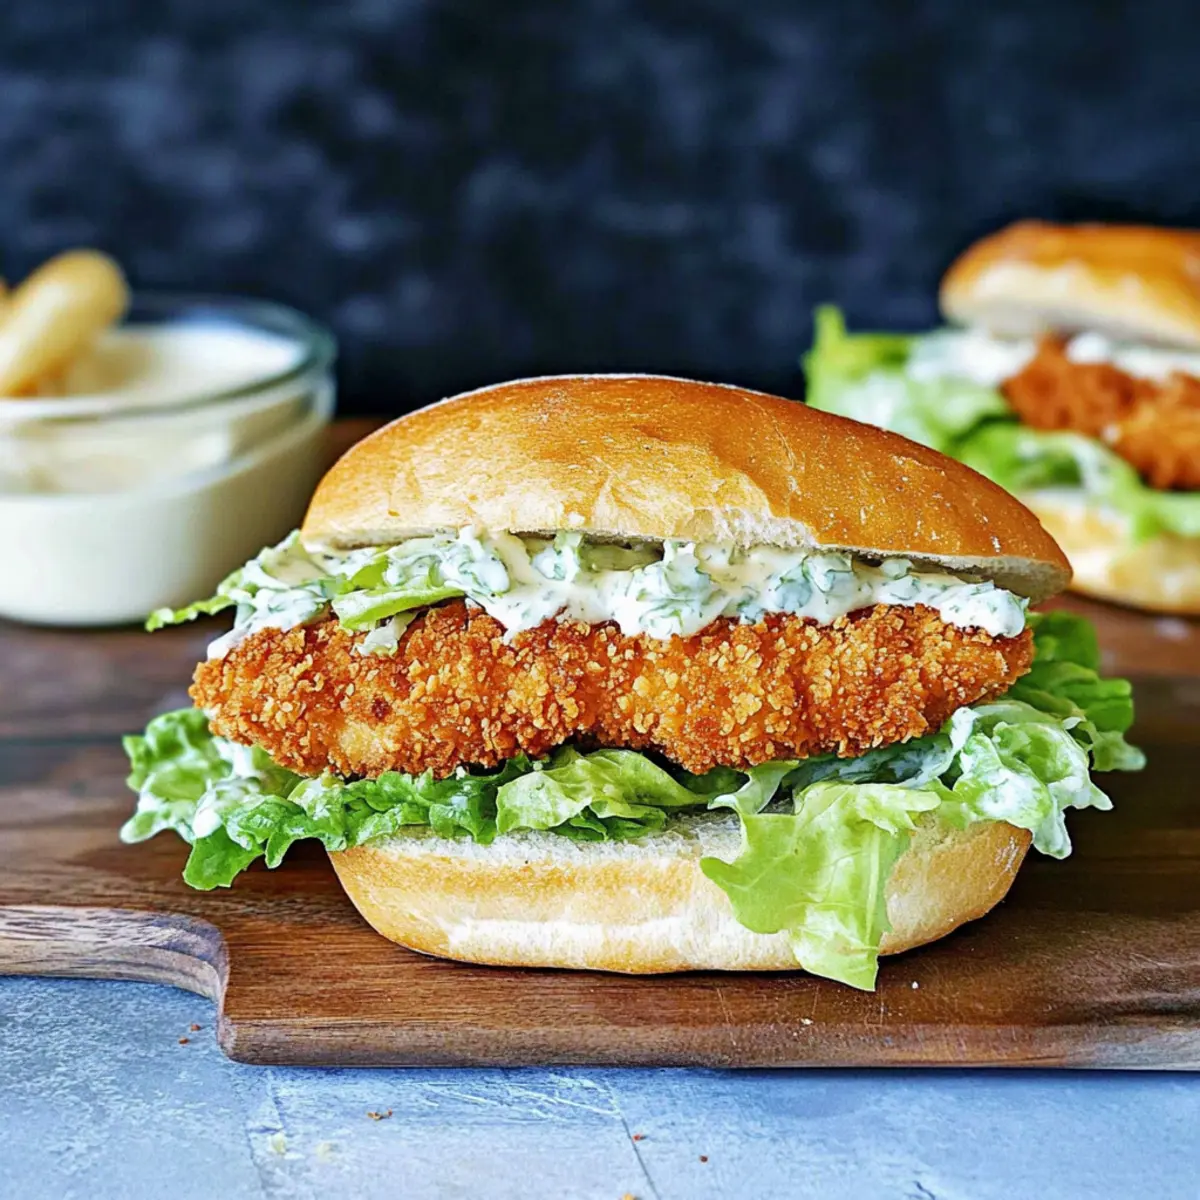
The aroma of frying chicken fills the kitchen, creating an atmosphere of pure culinary magic. Today, I’m excited to share my Crispy Chicken Caesar Sandwich with Homemade Dressing—a delightful fusion of crunchy breaded chicken, crisp romaine, and creamy dressing, all tucked into a crusty baguette. This recipe is a perfect blend of rich flavors and satisfying textures, making it an effortless, quick lunch or a show-stopping dinner that even your family will rave about. Plus, with the option to customize ingredients—like swapping Greek yogurt for sour cream or using gluten-free breadcrumbs—it caters to everyone’s tastes and needs. Want to elevate your sandwich game? Let’s dive into this deliciously simple recipe!
Why You’ll Crave This Sandwich
Savory Indulgence: This Crispy Chicken Caesar Sandwich is like a warm hug, offering a decadent combination of flavors that’ll make you swoon with every bite.
Homemade Goodness: The creamy dressing is easy to whip up, allowing you to indulge in flavors more delicious than any fast food can offer.
Versatile Options: Feeling adventurous? You can even swap chicken for grilled shrimp or top with avocado slices for creaminess, just as you can with my Cheesy Garlic Chicken Wraps.
Quick and Convenient: In just a few simple steps, this sandwich goes from kitchen to table—perfect for those busy weeknights when you crave something exceptional.
Crowd-Pleasing Appeal: Whether you’re serving it at a gathering or just for yourself, this sandwich is sure to earn compliments, making it a must-try for everyone. dig into something homemade and irresistible!
Crispy Chicken Caesar Sandwich Ingredients
Get ready to create the ultimate comfort food!
For the Caesar Dressing
- Full-Fat Mayonnaise – Adds a rich, creamy texture that’s hard to resist.
- Greek Yogurt – A lighter alternative to keep the dressing tangy and thick; replace with sour cream if desired.
- Dijon Mustard – Introduces a slight kick that enhances the overall flavor.
- Worcestershire Sauce – Infuses a savory depth; don’t skip this for a truly authentic taste!
- Fresh Lemon Juice – Brightens the dressing and balances the richness.
- Garlic – Freshly minced for a punch of flavor that elevates the dressing.
- Salt & Pepper – Essential for seasoning to perfection.
For the Chicken Cutlets
- Chicken Breasts or Thighs – Provides heartiness; ensure they’re pounded to even thickness for a uniform cook.
For the Breading
- All-Purpose Flour – Creates a simple, crisp coating; feel free to use gluten-free flour if needed.
- Eggs – Binds the breadcrumbs well; an egg replacement can work for a vegan version.
- Panko Breadcrumbs – Offers superior crunch; combining with regular breadcrumbs is perfect if you want variety.
For the Sandwich Assembly
- Romaine Hearts – Fresh, crunchy contrast in every bite; kale works great for a twist!
- French Baguettes – The ultimate sturdy vessel to hold all your delicious ingredients; swap for ciabatta or sourdough for extra flavor.
- Parmesan Cheese – Nutty richness that enhances both the dressing and breading; consider nutritional yeast for a vegan option.
Enjoy crafting your very own Crispy Chicken Caesar Sandwich, filled with homemade goodness and a world of flavor!
Step‑by‑Step Instructions for Crispy Chicken Caesar Sandwich
Step 1: Prepare Caesar Dressing
In a medium bowl, whisk together full-fat mayonnaise, Greek yogurt, Dijon mustard, Worcestershire sauce, fresh lemon juice, minced garlic, salt, and pepper until smooth. This creamy dressing should be well combined, resulting in a thick texture. Chill the dressing in the refrigerator while you prepare the other ingredients, allowing the flavors to meld beautifully.
Step 2: Prep Chicken
Take your chicken breasts or thighs and place them between two sheets of plastic wrap. Using a meat mallet, pound the chicken to an even thickness of about ½ inch. Season both sides with salt and pepper. This ensures even cooking and enhances the flavor, setting a solid foundation for your crispy chicken in the sandwich.
Step 3: Set Up Breading Station
Gather three shallow dishes to create your breading station. In the first dish, place all-purpose flour seasoned with a touch of salt. In the second, whisk a couple of eggs until homogenous. Finally, combine panko and regular breadcrumbs in the third dish. This organized setup makes breading the chicken cutlets easy and efficient before frying.
Step 4: Bread Chicken
Begin breading the chicken by dredging each cutlet in the flour, tapping off any excess. Next, dip the floured chicken into the egg mixture, ensuring it’s fully coated. Finally, press the chicken into the breadcrumb mixture, covering both sides completely. This process creates a crispy crust that elevates the overall texture of your Crispy Chicken Caesar Sandwich.
Step 5: Cook Chicken
Heat vegetable oil in a large skillet over medium heat until it reaches approximately 350°F (175°C). Carefully add the breaded chicken cutlets into the hot oil without overcrowding the pan. Fry for about 4-5 minutes on each side, or until golden brown and crispy. Once cooked, remove the chicken from the skillet and place it on a wire rack to drain excess oil.
Step 6: Assemble Sandwich
Slice the French baguettes lengthwise and spread a generous amount of the chilled Caesar dressing inside. Place the crispy chicken cutlets on the bottom half of each baguette, then layer in the crisp romaine hearts. For an extra touch, sprinkle more Parmesan cheese over the top before closing the sandwiches. Serve immediately for maximum freshness and crunch!
Crispy Chicken Caesar Sandwich Variations
Feel free to let your creativity shine as you make this recipe your own!
-
Plant-Based Option: Substitute chicken with grilled tofu or tempeh for a delicious vegetarian twist. These alternatives soak up flavors beautifully, and paired with that creamy dressing, they won’t disappoint!
-
Different Greens: Instead of romaine, try using arugula or spinach for a peppery kick! These vibrant greens add delicate textures that complement the sandwich wonderfully.
-
Extra Crunch: Add crispy bacon strips inside the sandwich for an added crunch and smoky flavor. It’s a delightful combination that enhances every bite.
-
Gluten-Free Twist: Use gluten-free bread and breadcrumbs for a satisfying option that everyone can enjoy, without sacrificing taste or texture. You can even check out my Cheesy Garlic Chicken for additional gluten-free ideas.
-
Avocado Creaminess: Slice ripe avocado to layer in the sandwich. The creaminess of the avocado pairs perfectly with the zesty Caesar dressing, making each bite a little more indulgent.
-
Heat It Up: If you enjoy a spicy kick, add sliced jalapeños or a drizzle of Sriracha to your sandwich. This fiery addition elevates the flavors to a whole new level!
-
Seafood Delight: Replace the chicken with grilled shrimp or salmon for a gourmet seafood variant that’s equally delicious. Each bite will hint at the ocean, making it a refreshing choice!
-
Seasonal Touch: For a pop of color and flavor, add roasted red bell peppers or sun-dried tomatoes. These vibrant ingredients offer an amazing contrast and bring summer vibes to your meal.
Whichever variations you choose, I’m sure your Crispy Chicken Caesar Sandwich will become a household favorite!
Storage Tips for Crispy Chicken Caesar Sandwich
-
Room Temperature: Best enjoyed fresh, but if you must store it, keep it at room temperature for no more than 2 hours to maintain safety and quality.
-
Fridge: Store the components separately in airtight containers for up to 2 days to preserve the crispiness of the chicken and freshness of the lettuce. This way, your Crispy Chicken Caesar Sandwich remains delightful when served.
-
Freezer: While it’s not ideal to freeze the assembled sandwich, you can freeze the breaded chicken cutlets. Wrap each cutlet tightly in plastic wrap and then place them in a freezer bag for up to 2 months.
-
Reheating: When ready to enjoy leftover chicken, reheat in a hot skillet for 3-4 minutes per side until crispy again, then assemble your sandwich with fresh ingredients for the best results.
Make Ahead Options
These Crispy Chicken Caesar Sandwiches are perfect for meal prep enthusiasts! You can prepare the Caesar dressing up to 3 days in advance; simply store it in an airtight container in the refrigerator to keep it fresh and flavorful. Additionally, the breaded chicken cutlets can be prepped and refrigerated for up to 24 hours before frying. Just remember to cover them properly to maintain their crunch. When you’re ready to serve, fry the chicken as directed and assemble the sandwiches with the freshly prepared romaine and baguette. By preparing these components ahead of time, you’ll enjoy delicious, homemade sandwiches with minimal effort on busy weeknights!
Expert Tips for the Best Crispy Chicken Caesar Sandwich
-
Timing is Key: Assemble your Crispy Chicken Caesar Sandwich right before serving to keep the bread from getting soggy.
-
Oil Temperature: Keep your frying oil at 175-180°C (350-360°F) for a perfectly crispy chicken. Use a thermometer to avoid under or overcooking.
-
Coating Technique: Ensure each chicken cutlet is evenly coated in the breadcrumb mixture. This not only enhances texture but also contributes to the overall flavor.
-
Fresh Cheese: Grate your Parmesan cheese fresh for the best melting properties and flavor. Pre-grated cheese often lacks the same taste and texture.
-
Flavor Customization: Don’t hesitate to experiment with the Caesar dressing by adding herbs or adjusting the garlic level. It’s the perfect way to customize your Crispy Chicken Caesar Sandwich to your palate!
What to Serve with Crispy Chicken Caesar Sandwich
Elevate your meal experience with delightful pairings that beautifully complement this crispy indulgence.
-
Crispy French Fries: The golden fries offer a satisfying crunch and salty goodness, perfectly balancing the sandwich’s creamy elements.
-
Garlicky Coleslaw: This refreshing side brings a zesty crunch, enhancing the flavors of the sandwich while adding a colorful touch.
-
Roasted Vegetables: A mix of seasonal roasted veggies provides a wholesome, savory contrast that adds depth to your meal.
-
Jalapeno Cucumber Salad: This vibrant salad brings a cool, spicy flavor, invigorating your palate while enhancing the overall meal experience.
-
Creamy Potato Wedges: Crunchy on the outside and soft inside, these wedges are ideal for dipping in extra Caesar dressing.
-
Iced Tea: A refreshing drink option, it balances the sandwich’s richness without overwhelming the palate.
-
Classic Mojito: This minty cocktail adds a refreshing twist, perfect as a light drink to accompany your delicious sandwich.
-
Chocolate Chip Cookies: For dessert, these warm cookies offer a delightful sweet ending, making any meal feel special.
-
Strawberry Mint Lemonade: This sweet and tart beverage pairs wonderfully, providing a refreshing complement to your savory chicken sandwich.

Crispy Chicken Caesar Sandwich Recipe FAQs
What type of chicken should I use for my Crispy Chicken Caesar Sandwich?
Absolutely! You can use either chicken breasts or thighs for this recipe. Both options have their unique benefits: breasts are leaner, while thighs tend to be juicier and more flavorful. Make sure to pound them to an even thickness for optimal cooking!
How should I store leftovers from my Crispy Chicken Caesar Sandwich?
For the best experience, store the components separately in airtight containers. The fried chicken can be stored in the fridge for up to 2 days, while the dressing and romaine lettuce should also be kept separate. This helps maintain the sandwich’s freshness and crispiness when you are ready to enjoy it again.
Can I freeze the cooked chicken for my sandwich?
Very! To freeze your breaded chicken cutlets, wrap each cooked cutlet tightly in plastic wrap, then place them in a heavy-duty freezer bag. They can be stored for up to 3 months. When you’re ready to enjoy, simply reheat them in a hot skillet for about 3-4 minutes per side until they are crispy again.
What should I do if the chicken isn’t getting crispy?
If your chicken cutlets are coming out soggy, check the oil temperature. You want to maintain it at about 175-180°C (350-360°F) during frying. If the oil is not hot enough, the chicken will absorb too much oil and won’t crisp up. Additionally, ensure that each cutlet is well-coated with breadcrumbs before frying.
Are there any dietary restrictions I should consider for this recipe?
Definitely! If you’re looking for gluten-free options, substitute the all-purpose flour with gluten-free flour and the breadcrumbs with gluten-free breadcrumbs. You can also make the recipe vegan by using chicken substitutes, an egg replacement for binding, and nutritional yeast instead of Parmesan cheese. Don’t forget to check for any allergies with ingredients like nuts or dairy based on your or your guests’ needs.
How ripe should my ingredients be?
When making your Crispy Chicken Caesar Sandwich, fresh ingredients make all the difference! Choose romaine hearts that are bright green and crisp, and ensure your garlic is fresh and firm for the dressing. This guarantees that each bite is bursting with flavor!

Crispy Chicken Caesar Sandwich Everyone Will Crave
Ingredients
Equipment
Method
- In a medium bowl, whisk together full-fat mayonnaise, Greek yogurt, Dijon mustard, Worcestershire sauce, fresh lemon juice, minced garlic, salt, and pepper until smooth. Chill the dressing while preparing other ingredients.
- Take chicken breasts or thighs, place between plastic wrap, and pound to even thickness of about ½ inch. Season with salt and pepper.
- Gather three shallow dishes: one with seasoned flour, one with whisked eggs, and one with panko and regular breadcrumbs.
- Dredge each chicken cutlet in flour, dip into egg mixture, and then press into breadcrumb mixture to coat.
- Heat vegetable oil in a skillet over medium heat, add breaded chicken cutlets, and fry for 4-5 minutes per side until golden brown. Drain excess oil on a wire rack.
- Slice baguettes lengthwise, spread chilled Caesar dressing inside, layer with crispy chicken, add romaine hearts, and sprinkle parmesan cheese before closing.
Leave a Reply