
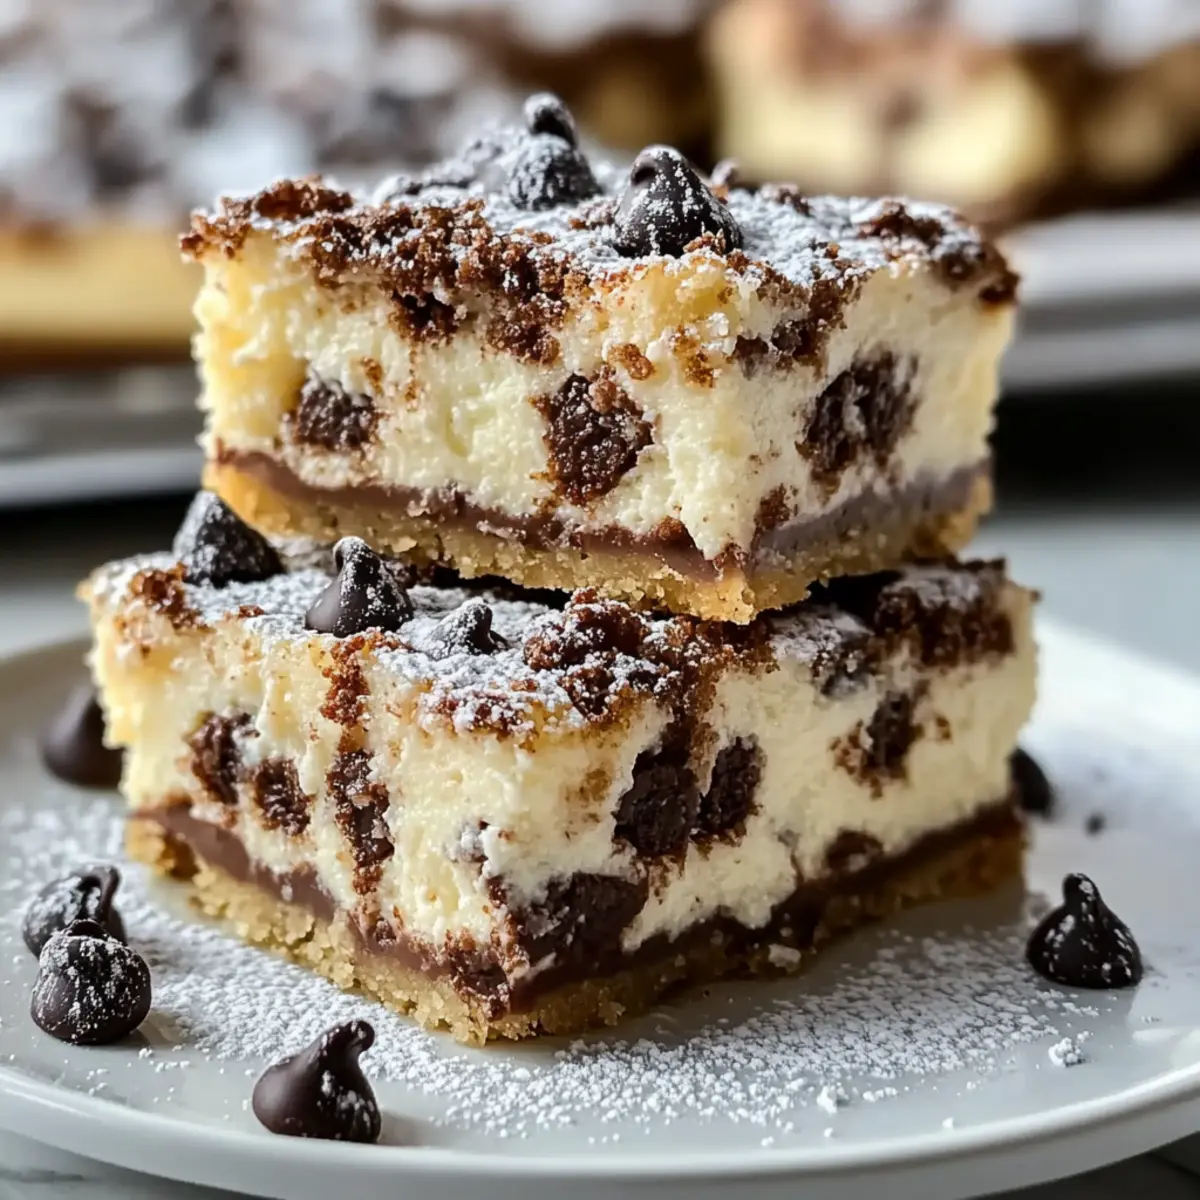
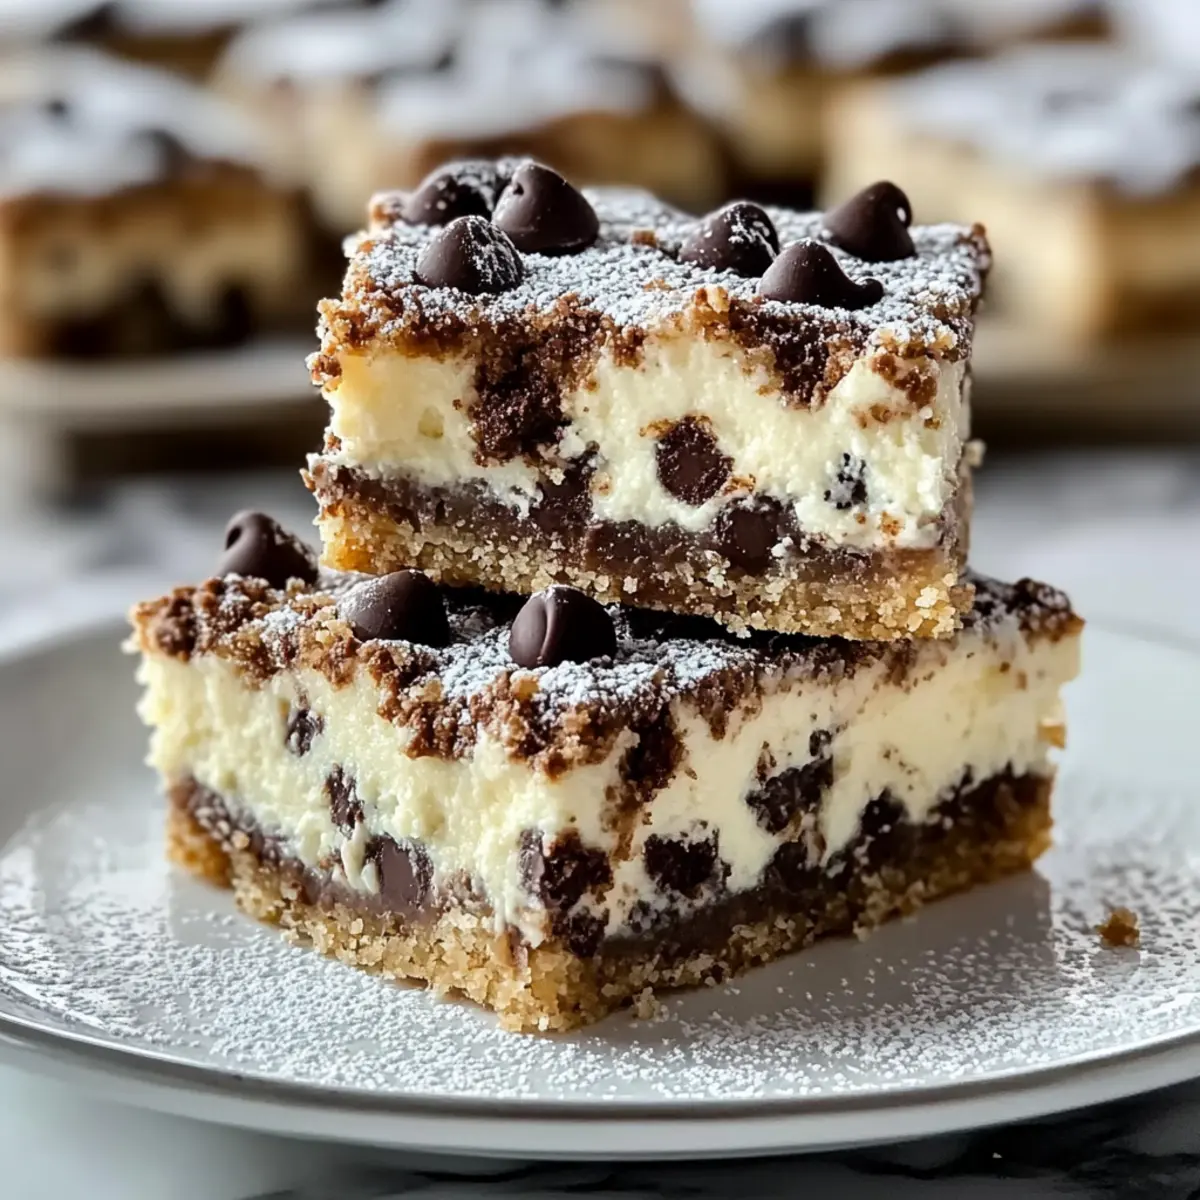
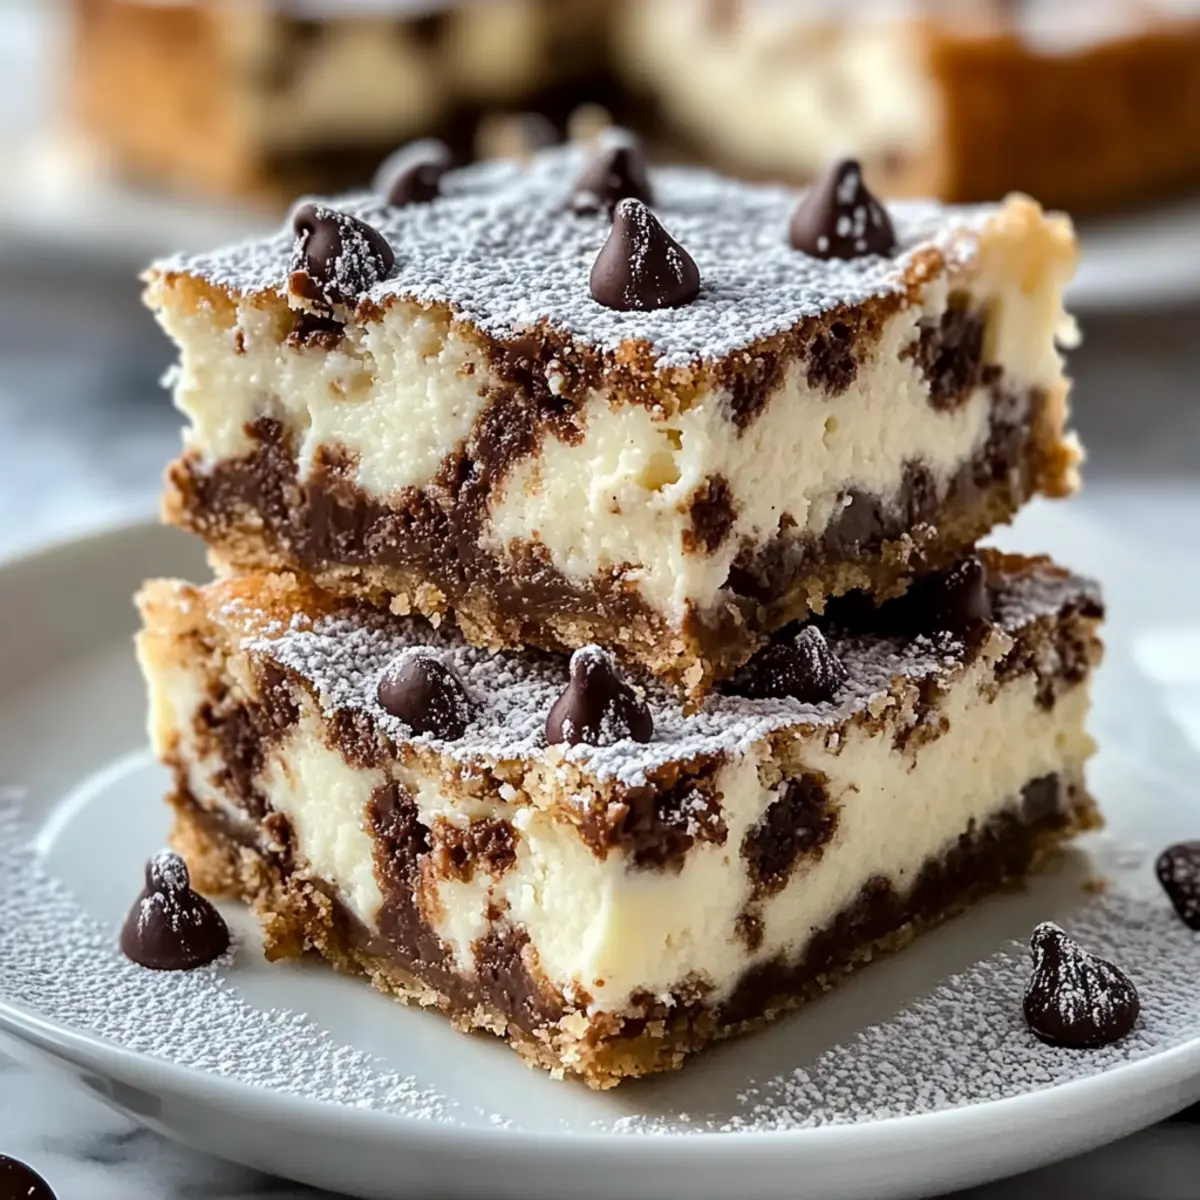
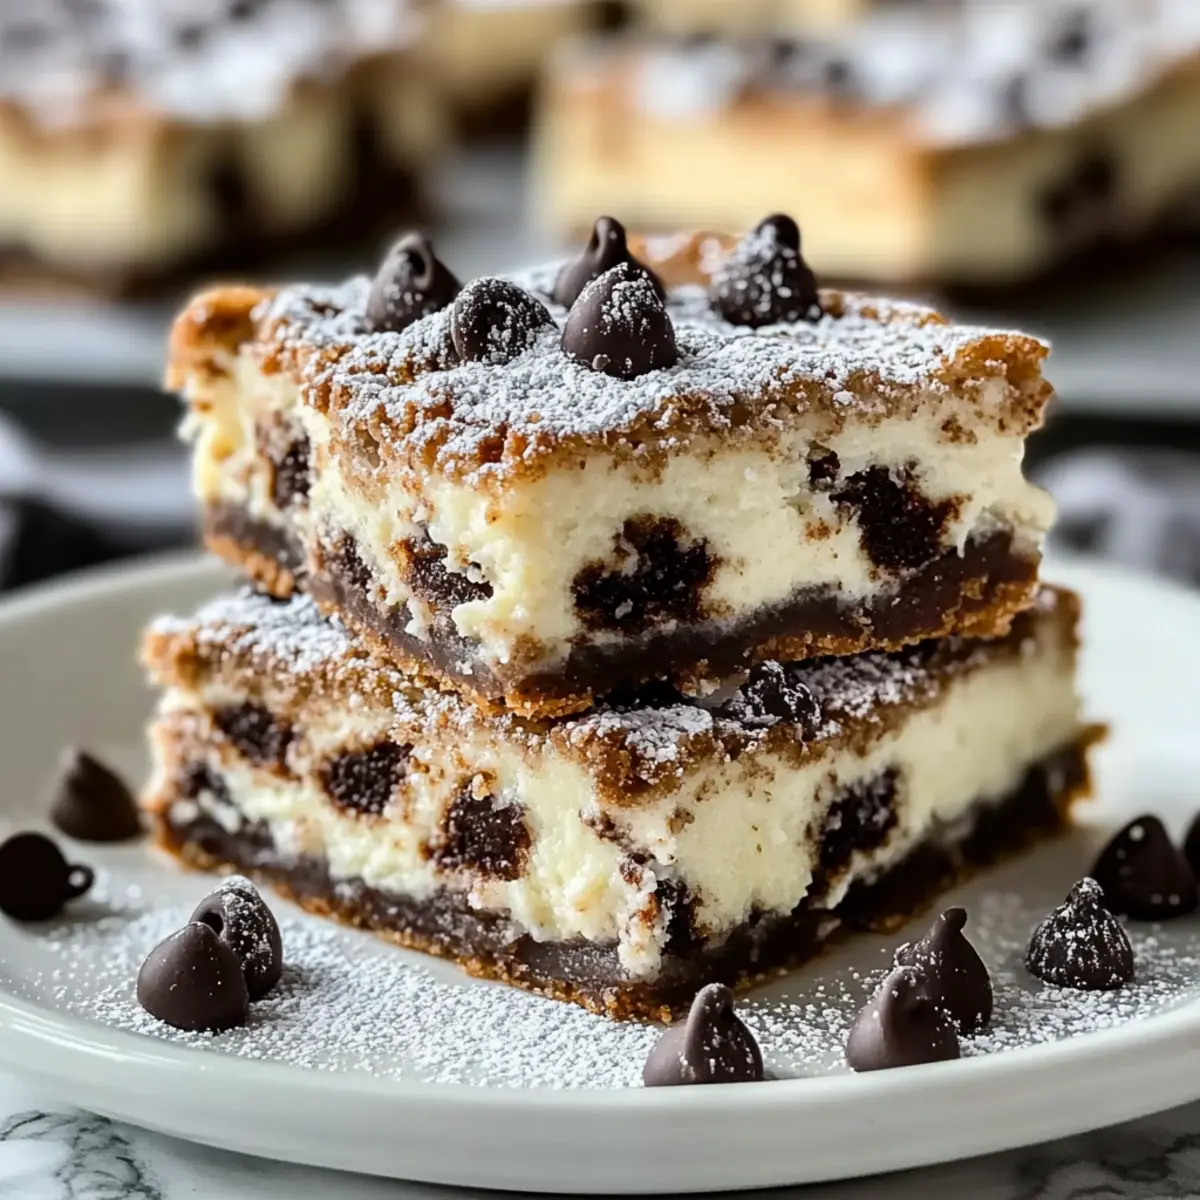
While preparing dinner one evening, I found myself longing for something sweet to round off the meal—something that feels like a warm hug. Enter the delightful Cannoli Cheesecake Bars! Combining the luscious creaminess of cheesecake with the beloved flavors of traditional Italian cannoli, this easy-to-make dessert is perfect for anyone looking to elevate their homemade treats. You’ll not only delight in its no-fry simplicity, but also its portability—ideal for potlucks or cozy nights in! The creamy ricotta, paired with a buttery graham cracker crust and surprise chocolate chips, promises a sweet experience that feels both comforting and sophisticated. Curious about how to whip up this slice of heaven? Keep reading!
Why is this dessert a must-try?
Simplicity: This recipe is incredibly easy to follow, making it perfect even for beginner bakers who want to impress!
Rich, Indulgent Flavor: The creamy blend of ricotta and cream cheese mirrors traditional cannoli, delivering a taste that everyone will love.
No-Fry Necessity: Unlike classic fried cannoli, these bars keep it healthy—no frying required!
Versatile Serving: Enjoy these bars on their own or jazz them up with toppings like crushed pistachios or a dusting of powdered sugar for that wow factor!
Perfect for Gatherings: Serve them as show-stopping treats at parties or cozy family dinners, and watch them disappear!
Make-Ahead Magic: These bars can be prepped in advance, making hosting easier while ensuring a delicious dessert is ready when you are!
Want to explore more delightful treats? Don’t miss out on Sweet Apple Cider Cheesecake or the addictive Churro Cheesecake Indulge!
Cannoli Cheesecake Bars Ingredients
For the Crust
• Graham Cracker Crumbs – Adds sweetness and structure to the crust; substitute with biscotti or vanilla wafers for a unique taste.
• Unsalted Butter (1/2 cup, melted) – Binds the crust ingredients together; use coconut oil for a dairy-free option.
• Granulated Sugar (2 tbsp) – Enhances sweetness of the crust; no substitution necessary for the desired texture.
For the Filling
• Cream Cheese (8 oz, softened) – Adds creaminess and stability to the filling; use dairy-free cream cheese for a vegan version.
• Ricotta Cheese (1 1/2 cups, well-drained) – Provides the traditional cannoli flavor; ensure it’s well-drained to avoid excess moisture.
• Powdered Sugar (1 cup) – Sweetens the filling; replace with coconut sugar for a less processed alternative.
• Large Eggs (2) – Acts as a binder; egg substitutes may not work well for this recipe.
• Vanilla Extract (1 tsp) – Adds depth of flavor; use almond extract for a different profile.
• Orange or Lemon Zest (1 tsp) – Brightens the filling; experiment with citrus zests based on preference.
• Cinnamon (1/2 tsp) – Enhances warmth of flavor; omit if desiring a more traditional cannoli taste.
• Mini Chocolate Chips (1 cup) – Provides bursts of sweetness; dark chocolate chips can be used for a richer taste.
For Garnishing
• Powdered Sugar (optional, for dusting) – Finishing touch for presentation; omit if not desired.
• Crushed Pistachios (optional, for garnish) – Adds visual appeal and flavor contrast; use nuts of choice or omit for a nut-free version.
Step‑by‑Step Instructions for Cannoli Cheesecake Bars
Step 1: Preheat the Oven
Begin by preheating your oven to 350°F (175°C). This step is crucial to ensure that your Cannoli Cheesecake Bars cook evenly, allowing for that delicious creamy texture. While the oven heats up, gather your 9×13-inch baking dish and prepare it by greasing it lightly to prevent sticking.
Step 2: Prepare the Crust Mixture
In a large bowl, combine the graham cracker crumbs, melted butter, and granulated sugar. Mix thoroughly until the mixture resembles wet sand. This buttery combination will form the sturdy base for your Cannoli Cheesecake Bars. Once well combined, press the mixture firmly into the greased baking dish, creating an even layer across the bottom.
Step 3: Bake the Crust
Place the crust in the preheated oven and bake for 8 minutes. You want the edges to be slightly golden and the crust firm to the touch. This brief baking time will help set the crust, ensuring it holds together beautifully when topped with the creamy filling. After baking, remove it from the oven and allow it to cool completely.
Step 4: Mix the Filling
In a mixing bowl, beat the softened cream cheese until smooth and no lumps remain. Next, add the well-drained ricotta, powdered sugar, large eggs, vanilla extract, citrus zest, and cinnamon. Blend these ingredients together until you achieve a creamy and cohesive mixture, ensuring all flavors are well incorporated for a delicious filling.
Step 5: Fold in Chocolate Chips
Gently fold in the mini chocolate chips into the cream mixture using a spatula. This step adds delightful bursts of sweetness throughout your Cannoli Cheesecake Bars. Be careful not to overmix, as you want the chocolate chips to remain intact, providing a delightful surprise in each bite.
Step 6: Bake the Filling
Pour the creamy filling over the cooled crust, spreading it evenly with a spatula. Return the dish to the oven and bake for 35–40 minutes. You’ll know it’s ready when the edges puff slightly, and the center has a slight jiggle—this indicates a perfect creamy texture that will set as it cools.
Step 7: Cool and Chill
Once baked, remove the Cannoli Cheesecake Bars from the oven and allow them to cool completely at room temperature. Cover the dish with plastic wrap and refrigerate for at least 4 hours, or overnight if you can resist. Chilling is essential for developing the flavors and achieving a signature cheesecake texture.
Step 8: Slice and Serve
After chilling, take the Cannoli Cheesecake Bars out of the refrigerator. Using a sharp knife, slice them into squares and dust them with optional powdered sugar for a charming finish. For an extra touch, garnish with crushed pistachios, if desired, before serving. Enjoy your delightful homemade treat!
How to Store and Freeze Cannoli Cheesecake Bars
Fridge: Store the Cannoli Cheesecake Bars in an airtight container in the refrigerator for up to 1 week. This keeps them fresh while enhancing their rich flavors.
Freezer: For longer storage, freeze the bars by wrapping them individually in plastic wrap followed by aluminum foil. They can last for up to 3 months in the freezer.
Thawing: When you’re ready to enjoy your frozen Cannoli Cheesecake Bars, simply thaw them in the refrigerator overnight. This allows for a perfect texture when served.
Reheating: While these bars are delicious cold, if you prefer a warmed treat, gently reheat individually in the microwave for about 15-20 seconds. Enjoy the creamy goodness!
Expert Tips for Cannoli Cheesecake Bars
• Drain the Ricotta: Make sure your ricotta cheese is well-drained to keep your filling from becoming watery. Use cheesecloth for best results.
• Watch the Bake Time: Avoid overbaking; your center should be slightly jiggly. It continues to set as it cools, ensuring a creamy texture.
• Chill Overnight: For the best flavor and texture, refrigerate the Cannoli Cheesecake Bars overnight. This allows the flavors to meld beautifully.
• Customize Flavors: Feel free to experiment with different zests or extracts to personalize your filling. Almond or lemon brings a unique twist!
• Prepare Ahead: These bars can be made up to two days in advance, making them perfect for easy dessert planning for gatherings.
What to Serve with Cannoli Cheesecake Bars
Indulge in a meal that perfectly complements the creamy, dreamy flavors of these Italian-inspired treats!
-
Fresh Berries: The tartness of berries like raspberries or strawberries balances the rich cheesecake flavor, adding a refreshing contrast to every bite.
-
Espresso or Coffee: A cup of strong espresso or rich coffee enhances the dessert experience, allowing the sweet flavors to shine even more amidst the aromatic warmth.
-
Whipped Cream: A dollop of light, airy whipped cream adds cloud-like softness, making every mouthful of Cannoli Cheesecake Bars feel decadent and luxurious.
-
Chocolate Drizzle: Drizzling melted chocolate over each piece elevates the dessert, enhancing its sweetness while adding a touch of sophistication.
-
Pistachio Crumble: A sprinkle of crushed pistachios offers a delightful crunch, bringing texture and a burst of nutty flavor to the creamy bars.
-
Zesty Gelato: Serve alongside a scoop of lemon or orange gelato for a zesty kick that mirrors the citrus notes in the filling—a heavenly match!
-
Chocolate Mint Tea: A warm cup of chocolate mint tea brings a soothing element, harmonizing beautifully with the creamy richness of the cheesecake bars.
-
Nutty Biscotti: For a delightful crunch, serve with nutty biscotti that adds an Italian touch, enhancing the overall cannoli-inspired theme.
-
Mint Garnish: A sprig of fresh mint not only beautifies the plate but contributes a refreshing aroma that elevates the dessert experience.
Make Ahead Options
These Cannoli Cheesecake Bars are perfect for busy weeknights or gatherings, allowing you to prep in advance for a delicious treat without the last-minute rush! You can prepare the crust and filling separately up to 24 hours before serving. Simply bake the crust, let it cool, and refrigerate it covered. For the filling, mix all the ingredients and store it in an airtight container. When you’re ready to assemble, pour the filling over the chilled crust, bake, and then cool. Allowing the bars to chill in the fridge for at least 4 hours (or overnight) not only enhances the flavors but keeps them just as delicious when served!
Cannoli Cheesecake Bars Variations & Substitutions
Unlock a world of flavors and textures with these delightful twists on your Cannoli Cheesecake Bars!
-
Dairy-Free: Substitute cream cheese and ricotta with your favorite dairy-free alternatives for a creamy delight that everyone can enjoy. Coconut-based options work wonderfully, maintaining that lush texture.
-
Chocolate Lovers: For an extra decadent bite, incorporate cocoa powder into the crust and drizzle with melted dark chocolate after baking. This will elevate the bars to sheer chocolate bliss!
-
Nutty Addition: Top your bars with toasted pistachios or chopped almonds to add an irresistible crunch and a nutty flavor that complements the creaminess beautifully.
-
Mini Treats: Bake the filling in greased muffin tins for individual servings, making them perfect for sharing or quick grab-and-go treats. The mini versions maintain the same flavor but offer a fun twist!
-
Holiday Twist: Infuse the filling with a splash of amaretto or rum extract for a festive flair. This will add warmth and depth, making them perfect for holiday gatherings.
-
Citrus Burst: Experiment with different zests—think grapefruit or lime—to brighten the flavor profile. Each citrus brings a unique twist that can refresh the classic cannoli taste.
-
Caramel Drizzle: To add a sweet surprise, drizzle caramel sauce over the top before slicing. The sweet and salty contrast will take your Cannoli Bars to a whole new level!
-
Layered Delight: Create a layered dessert by alternating layers of cannoli cheesecake filling with a berry compote or fresh fruit. This adds vibrant color, texture, and a seasonal twist.
Why stop at Cannoli Cheesecake Bars? Explore more sweet creations like Salted Caramel Apple Crumble Bars or whip up some delectable Pumpkin Oatmeal Bars to add variety to your dessert repertoire!
Cannoli Cheesecake Bars Recipe FAQs
How do I choose the right ricotta cheese?
Absolutely! Select a high-quality ricotta cheese that is well-drained for the best flavor and texture. Look for a brand that has a creamy consistency without excess liquid. You might even consider placing the ricotta in cheesecloth and letting it drain for at least 30 minutes before using it, ensuring your filling remains firm and luscious rather than watery.
How should I store leftover Cannoli Cheesecake Bars?
Very! Store your Cannoli Cheesecake Bars in an airtight container in the refrigerator for up to one week. This will keep them fresh and enhance their rich, creamy flavors. If you’re expecting leftovers, cover the dish tightly with plastic wrap for efficient storage.
Can I freeze Cannoli Cheesecake Bars?
Absolutely! To freeze, wrap the bars individually in plastic wrap, then cover them with aluminum foil. This method prevents freezer burn and keeps them delicious. They can last for up to 3 months in the freezer. When you’re ready for a treat, thaw them in the refrigerator overnight to maintain that delightful texture.
What if my Cannoli Cheesecake Bars are too watery?
No problem! Ensure your ricotta cheese is adequately drained before mixing it with other ingredients. If your filling turns out watery after baking, you might have overmixed. For future bakes, mix just until combined. Also, let the bars chill overnight; this helps firm up the texture beautifully.
Are these Cannoli Cheesecake Bars suitable for people with dietary restrictions?
Certainly! For a dairy-free option, use dairy-free cream cheese and ensure your chocolate chips are vegan. If you have nut allergies, simply omit the optional crushed pistachios or replace them with seeds. Always check ingredient labels for potential allergens relevant to your guests!
How can I enhance the flavor of my Cannoli Cheesecake Bars?
Great question! To elevate the taste, consider adding a splash of almond extract or a hint of amaretto for a unique twist. You can also experiment with different citrus zests to personalize your filling or top them with fresh fruit to create a refreshing contrast.
Delicious Cannoli Cheesecake Bars for Effortless Indulgence
Ingredients
Equipment
Method
- Preheat your oven to 350°F (175°C) and lightly grease your baking dish.
- In a large bowl, combine graham cracker crumbs, melted butter, and granulated sugar until it resembles wet sand. Press into the baking dish.
- Bake the crust for 8 minutes until edges are slightly golden. Allow to cool completely.
- In a mixing bowl, beat cream cheese until smooth. Add ricotta, powdered sugar, eggs, vanilla, citrus zest, and cinnamon. Blend until creamy.
- Gently fold in mini chocolate chips. Be careful not to overmix.
- Pour filling over the cooled crust and bake for 35-40 minutes. The edges puff slightly and center has a slight jiggle when ready.
- Let the bars cool completely at room temperature, then refrigerate for at least 4 hours or overnight.
- Slice into squares and dust with powdered sugar, garnishing with crushed pistachios if desired before serving.
Leave a Reply